Aphids on Vegetable Plants – Control and Prevention

 This article explains why vegetables are so vulnerable to aphids, which species hit crops most, and the damage signs to watch for on edible plants. It covers safe, food-crop treatments, organic controls, preventive planting, growth-stage monitoring, and harvest safety after treatment.
Keep aphids off vegetable crops by checking plants often and acting early, before leaves curl and growth slows. Aphids multiply quickly, so remove them with a strong water spray, pinch off heavily infested tips, and use insecticidal soap or horticultural oil when needed. Encourage ladybugs and lacewings, control ants, and keep plants healthy to prevent repeat outbreaks. For a broader overview, see identify and control aphids on plants.
Quick takeaway: Aphids on vegetables are easiest to control when you catch them on tender new growth, wash colonies off early, and stop ants from protecting them. Once leaves start curling tightly and honeydew spreads across several plants, control usually takes more time and repeated follow-up.
Why vegetables are highly vulnerable
Many edible crops are essentially “soft targets” for sap-sucking insects. They’re bred and grown for fast, tender growth, and that same lush tissue is easy for aphids to pierce and feed on. Add dense planting and regular watering, and you get a steady supply of fresh, nutrient-rich shoots that can support large colonies.
- Rapid, succulent new growth: Leafy greens, beans, squash, and many brassicas push out soft tips quickly. Aphids prefer these young tissues because the plant sap is easier to access and often higher in nitrogen.
- High nitrogen from feeding and soil: Frequent fertilizing (especially with quick-release nitrogen) can make leaves extra tender and “juicy,” which tends to increase aphid reproduction and survival.
- Close spacing and sheltered canopies: Vegetable beds are often packed tightly to maximize yield. That reduces airflow, creates humid pockets, and gives colonies protected places to build up on the undersides of leaves.
- Continuous replanting creates a buffet: Succession sowing means there’s always a mix of seedlings and fresh transplants. Those small plants can be overwhelmed quickly before they have time to toughen up.
- Stressed plants signal opportunity: Heat, inconsistent moisture, or root restriction can change sap composition and plant defenses. A plant that’s struggling is often less able to “outgrow” feeding damage.
- Many vegetables have natural “landing pads”: Curled leaves, tight heads, and folded growing tips (for example, on peppers and brassicas) can hide pests and make them harder to spot early.
- Ant activity protects colonies: In gardens, ants may “farm” aphids for honeydew, chasing off lady beetles, lacewing larvae, and other beneficial predators that would otherwise keep numbers down.
Because these factors often stack up in the same bed, populations can jump from a few insects to a noticeable infestation in a short time. Catching them early—before colonies move from a couple of shoots to multiple plants—usually makes control much simpler. Ant activity can accelerate that escalation, so it also helps to understand aphids and ants on plants.
Practical note: In vegetable beds, aphids usually get out of hand fastest when plants are pushing lush new growth and checks are skipped for even a few days. The earliest colonies are often small enough to remove by hand or with water, but once several neighboring tips are occupied, the cleanup becomes much more repetitive.
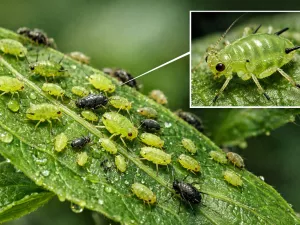
Common species affecting crops
Different aphid types show up on vegetables in predictable ways: some cluster on tender shoot tips, others prefer the undersides of leaves, and a few focus on roots. Knowing which one you’re dealing with helps you decide where to scout, which natural enemies to protect, and how urgent the response is (some are especially good at spreading plant viruses).
| Species (common name) | Typical hosts in the vegetable garden | What to look for | Notes that affect control |
|---|---|---|---|
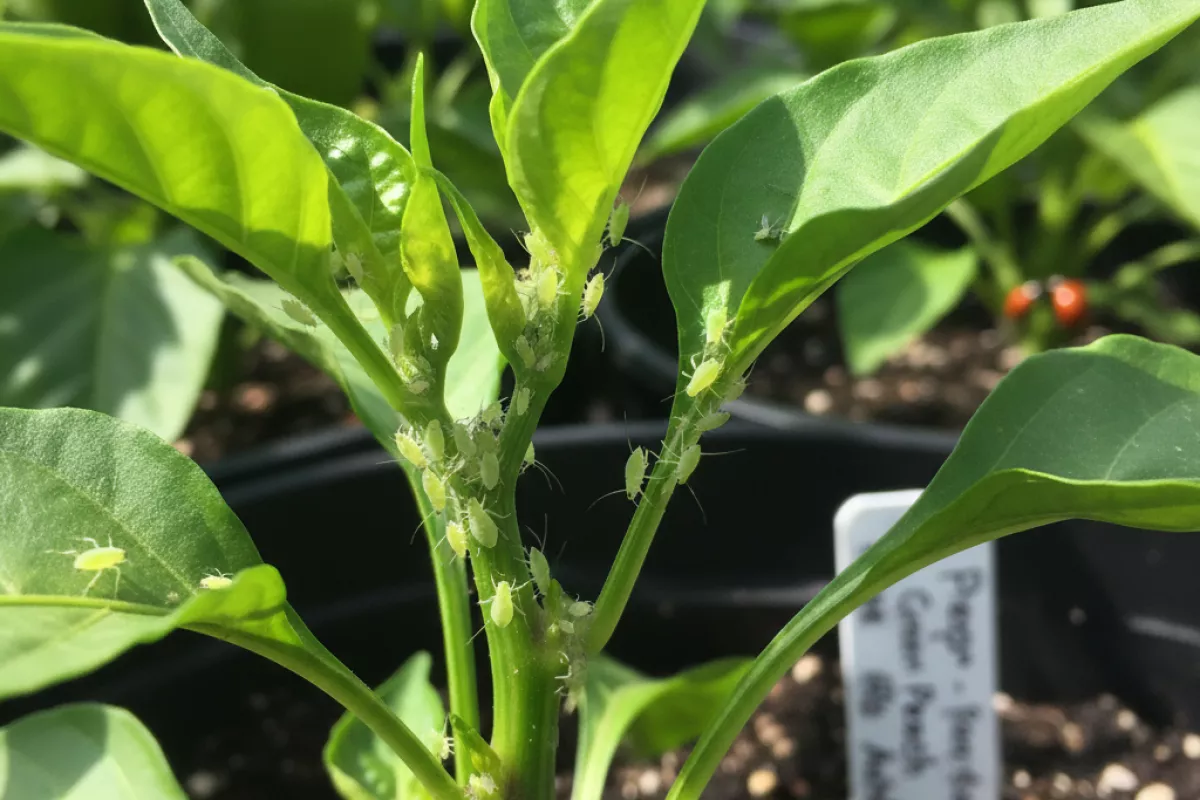
| Green peach aphid (Myzus persicae) | Peppers, tomatoes, eggplant, leafy greens, brassicas | Small green to yellow-green colonies on new growth; sticky honeydew; leaf curl | Notorious virus vector; populations can build fast in mild weather and in protected growing areas |
| Potato aphid (Macrosiphum euphorbiae) | Tomatoes, potatoes, eggplant, peppers | Relatively large aphids (often green or pink) on stems and growing tips; distorted new leaves | Often missed early because individuals are spaced out; check growing points and flower clusters |
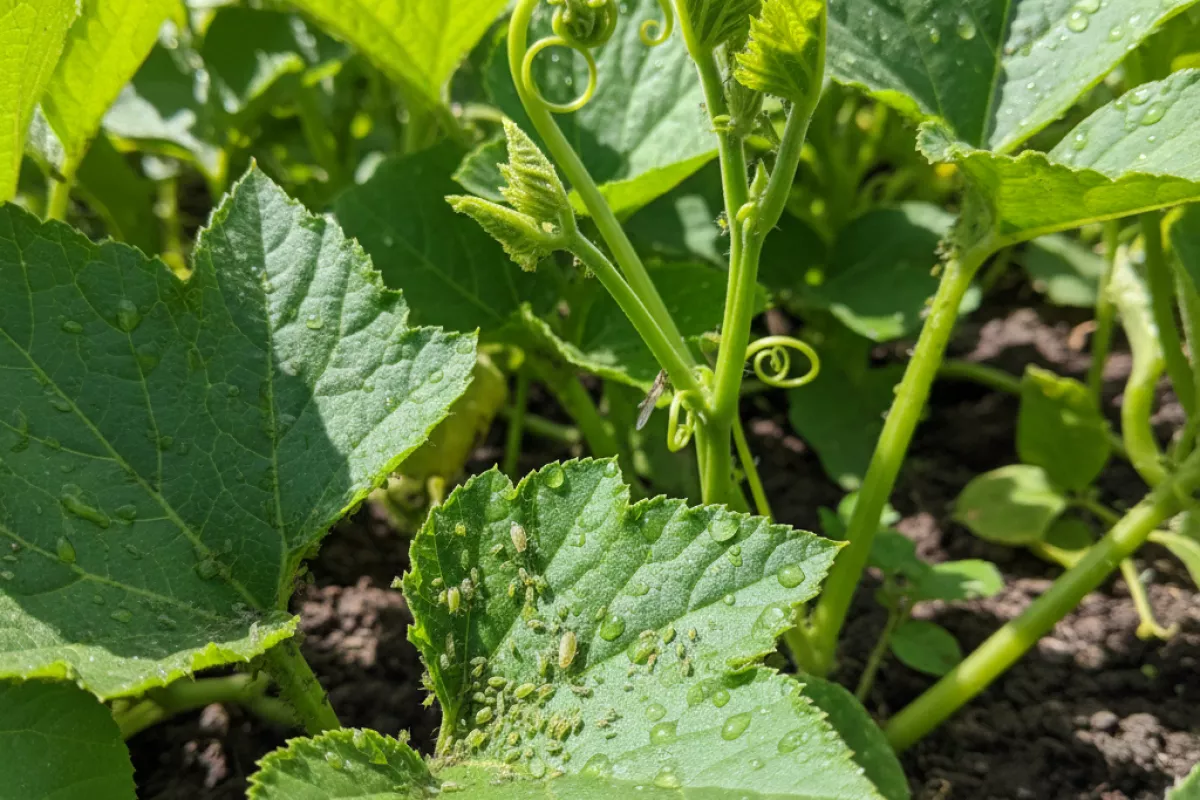
| Melon/cotton aphid (Aphis gossypii) | Cucumbers, squash, melons; also peppers and beans | Dense colonies on leaf undersides; leaves crinkle and cup; sooty mold on honeydew | Can flare during hot spells; tends to resist some sprays, so rely on coverage and repeated scouting |
| Cabbage aphid (Brevicoryne brassicae) | Kale, cabbage, broccoli, cauliflower, Brussels sprouts | Gray-green aphids with a waxy, powdery look; clusters in leaf folds and on heads | The waxy coating can shed water-based sprays; direct contact and thorough coverage matter |
| Bean aphid / black bean aphid (Aphis fabae) | Fava beans, green beans; sometimes beets and chard | Shiny dark colonies on tender tips; curled shoots; ants frequently “tending” them | Ant activity can protect colonies from predators; managing ants can improve biological control |
| Pea aphid (Acyrthosiphon pisum) | Peas and other legumes | Light green aphids along vines and pods; stunting; misshapen pods | Often concentrated in patches; spot-treating can work if you catch it before pods fill |
| Turnip aphid (Lipaphis erysimi) | Mustards and brassicas (including leafy Asian greens) | Green-gray colonies on the undersides; yellowing and puckering leaves | Similar to cabbage aphid but typically less “powdery”; still likes tight leaf folds where sprays miss |
| Lettuce aphid (Nasonovia ribisnigri) | Lettuce (especially heading types) | Aphids hidden deep in the heart; contamination at harvest more than obvious leaf damage | Hard to reach with contact products; early detection and removing infested plants is often the cleanest fix |
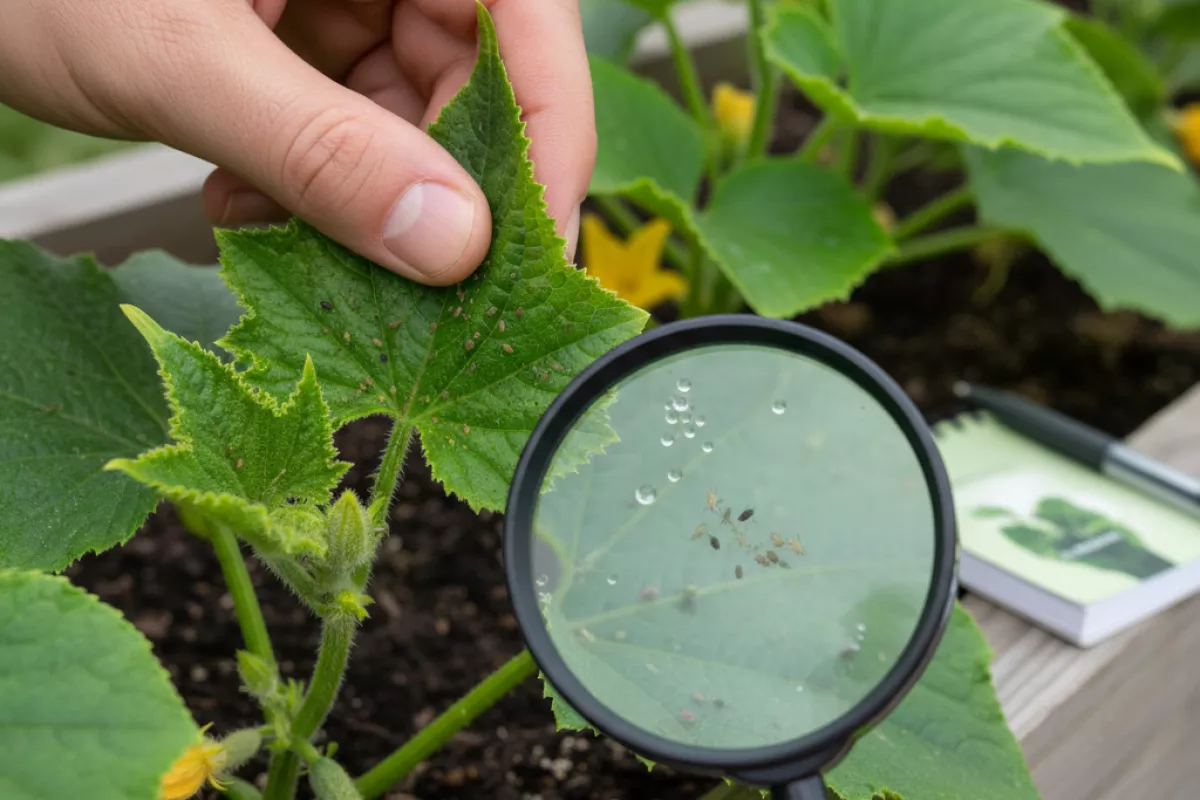
If you’re unsure which one you have, focus on the practical ID cues: host plant, where the colony sits (heart of lettuce vs. leaf underside vs. shoot tip), and whether the insects look waxy or glossy. A hand lens helps, but you can still make good decisions just by scouting those patterns and checking for honeydew, ants, and curled new growth.
Damage symptoms on edible plants
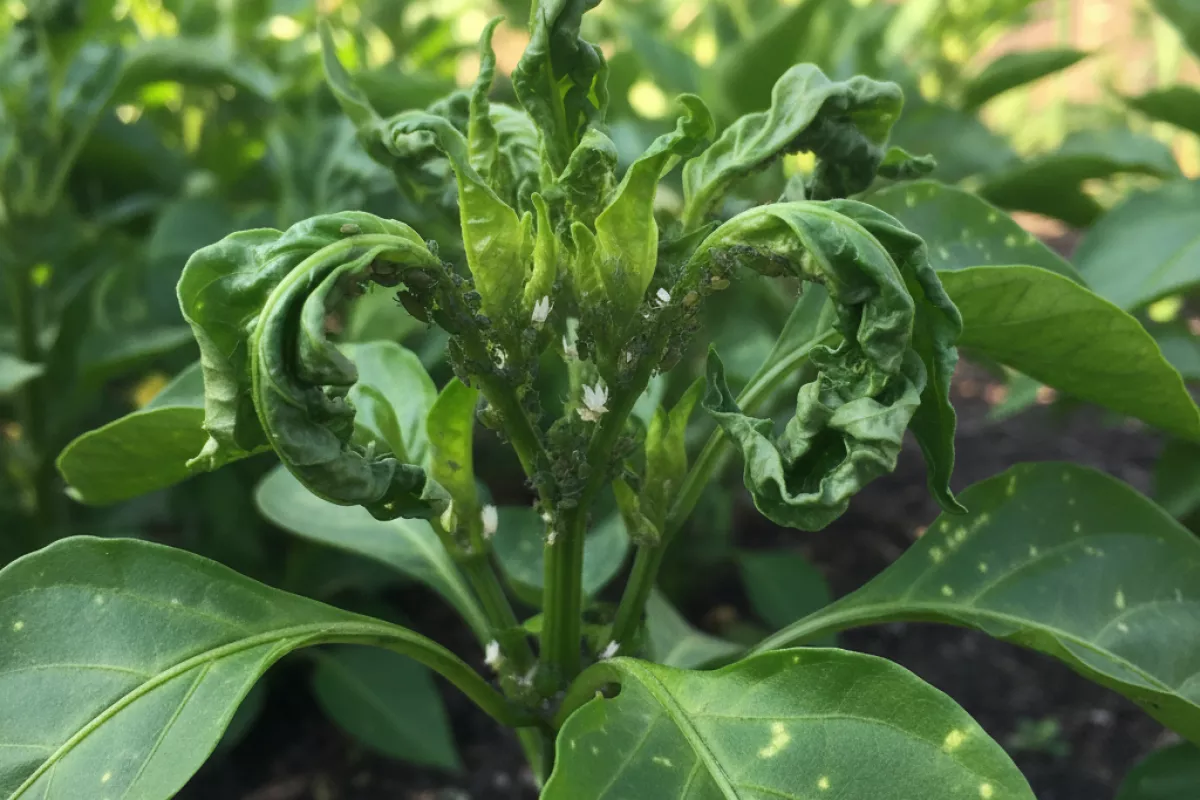
Feeding aphids don’t usually chew holes; they pierce tender tissue and sip sap. That makes the earliest signs easy to miss until growth starts looking “off” or sticky residue shows up on leaves and stems. If that sticky sheen is one of the first clues you notice, see sticky leaves from aphids.
- Leaf curling and puckering: New leaves often twist, cup, or crinkle as insects feed on soft growth points. On brassicas and peppers, the newest leaves may look wrinkled or distorted.
- Yellow stippling or mottling: Small pale spots can appear where sap has been removed, sometimes progressing to broader yellowing if the colony grows.
- Sticky honeydew: A shiny, tacky film on leaves, stems, or nearby surfaces is common. It can attract ants, which may “guard” the pests and make infestations harder to knock back.
- Sooty mold on foliage: Black, dusty-looking fungus can develop on honeydew. It doesn’t infect the plant tissue directly, but it can reduce photosynthesis by shading the leaf surface.
- Stunted growth and poor vigor: Heavy sap loss can slow plant development, leading to smaller leaves, shorter internodes, and reduced yields—especially on young seedlings and transplants.
- Blossom and fruit issues: Flowers may drop, and fruit can be undersized or misshapen when feeding pressure is high during bud and bloom stages.
- Clusters on tender parts: Colonies often gather on the undersides of leaves, along midribs, on flower stalks, and around new shoots. Shed white “skins” (molts) can collect nearby.
- Virus-like symptoms: Some species can spread plant viruses. Watch for unusual mosaic patterns, ring spots, or persistent distortion that doesn’t improve after the insects are removed.
| What you notice | What it often points to | Where to check first |
|---|---|---|
| New leaves tightly curled or cupped | Active feeding on fresh growth | Growing tips, undersides of newest leaves |
| Sticky sheen; ants traveling up stems | Honeydew from a developing colony | Leaf undersides, petioles, stem nodes |
| Black film on leaves | Sooty mold growing on honeydew | Upper leaf surfaces below infested areas |
| Patchy yellowing without obvious chewing | Sap loss and localized stress | Midribs/veins on the underside of leaves |
| Stunted seedlings; slow recovery after watering | High pressure on a small plant | Crowns, inner leaves, protected creases |
| Mosaic patterns or persistent deformation | Possible virus transmission (not always) | Whole plant; compare new vs. old growth |
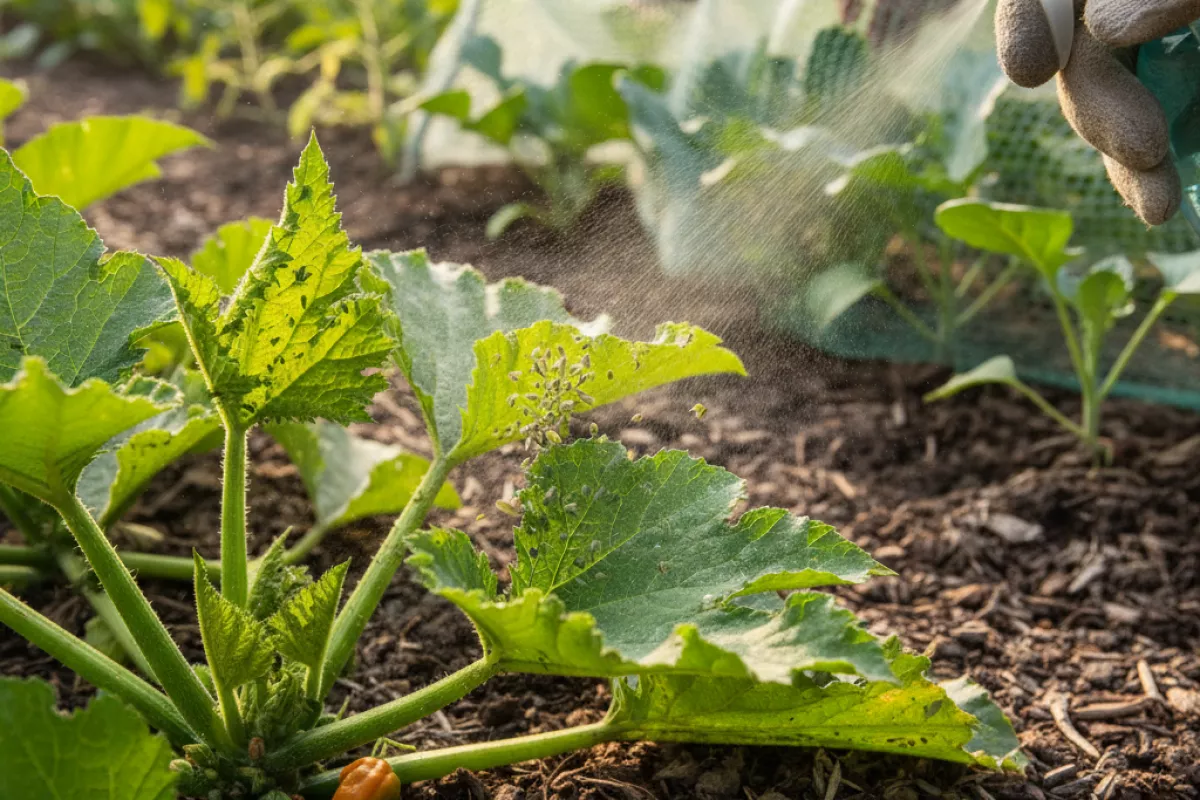
Safe treatment options for food crops
When you’re dealing with aphids on vegetables, the safest approach is to start with low-risk methods that won’t leave problematic residues on edible leaves or fruit. Focus on knocking numbers down, protecting beneficial insects, and timing any sprays so they dry well before harvest.
Practical note: For most home vegetable gardens, the biggest improvement usually comes from combining two steps instead of relying on one: first knock aphids back with a firm water spray, then recheck the same plants within 2–3 days and spot-treat only the colonies that return. That approach is usually easier on edible crops than jumping straight to repeated full-bed spraying.
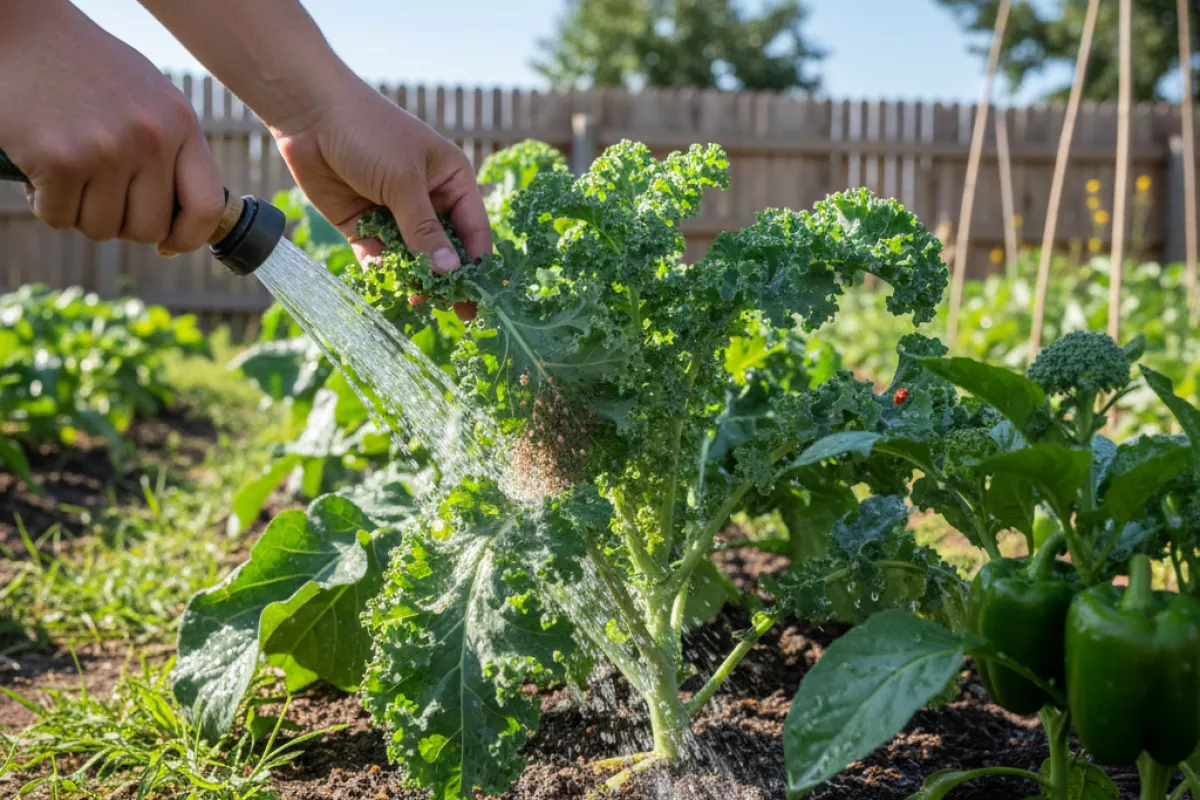
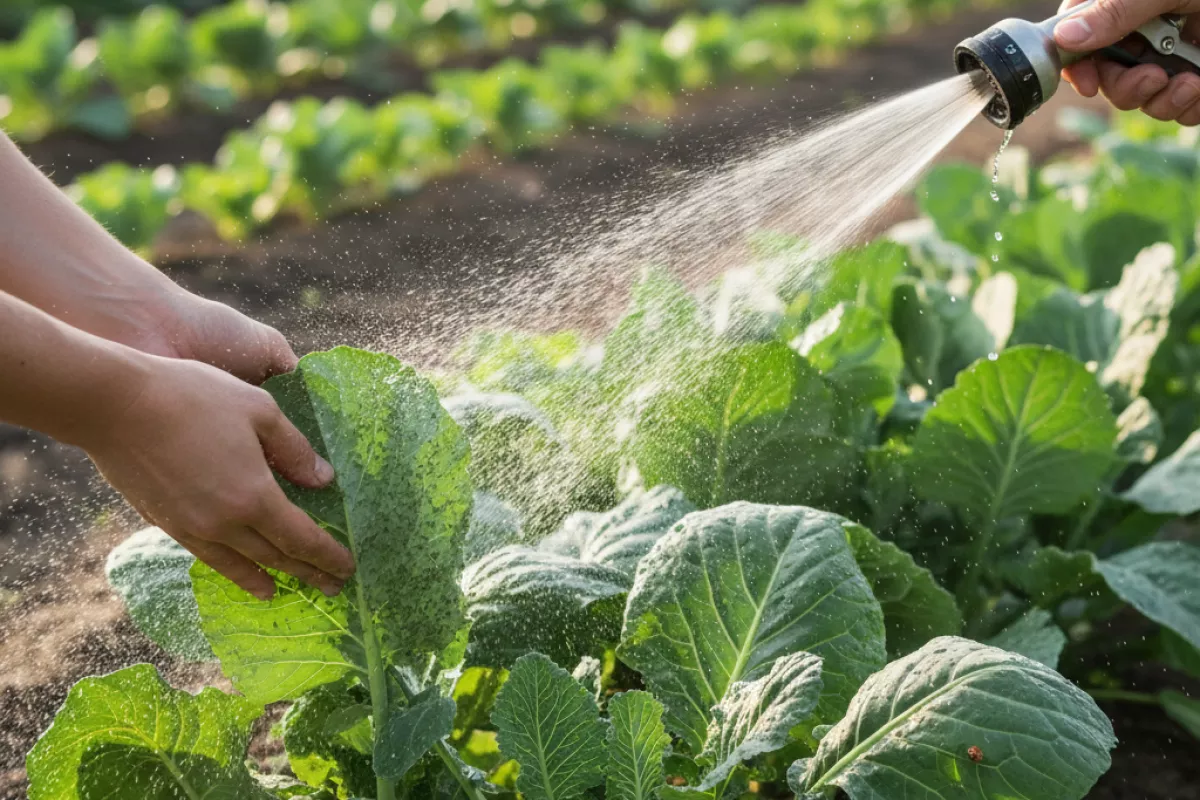
- Blast them off with water. A firm spray from a hose dislodges aphids from stems and leaf undersides. Repeat every 2–3 days until populations drop. Aim early in the day so foliage dries quickly.
- Hand removal for small infestations. Pinch off heavily infested tips or wipe colonies with a damp cloth. Bag and discard prunings rather than composting if they’re crawling with pests.
- Insecticidal soap (ready-to-use or properly diluted). Soap works by direct contact, so coverage matters—especially the underside of leaves. Spray in the evening or early morning to reduce leaf stress, and avoid applying during hot spells above 29°C (85°F). Rinse tender crops with plain water after the spray dries if you’re close to picking.
- Horticultural oil or neem-based products. These can suppress aphids and slow population growth, but they can also affect beneficial insects if sprayed broadly. Use spot treatments and avoid spraying open flowers. Don’t apply when temperatures are expected to exceed 29°C (85°F) that day.
- Encourage natural predators instead of “nuking” everything. Lady beetles, lacewings, hoverfly larvae, and parasitic wasps often catch up if you avoid harsh sprays. Leaving a few small aphid pockets can help predators stay in the area, as long as plants aren’t being distorted or stunted.
- Use physical barriers for prevention. Lightweight row covers can keep aphids from colonizing young plants. Secure edges so insects can’t crawl underneath, and remove covers during flowering for crops that need pollination.
- Control ants that protect aphids. Ants “farm” aphids for honeydew and will chase off predators. Reducing ant traffic (sticky barriers on supports, removing nearby nests, or trimming bridges like weeds) often makes other methods work better.
| Option | Best use | How to apply safely on edibles | Watch-outs |
|---|---|---|---|
| Water spray | Early outbreaks; weekly maintenance | Spray undersides; repeat every 2–3 days | Can spread disease if plants stay wet; avoid late-day soaking |
| Hand removal / pruning | Small gardens; isolated colonies | Remove worst tips; dispose in a sealed bag | Over-pruning can reduce yield on slow-growing crops |
| Insecticidal soap | Moderate infestations; leafy greens | Full coverage; apply below 29°C (85°F); let dry before harvest | Can burn stressed plants; avoid use on drought-stressed foliage |
| Horticultural oil / neem | Persistent problems; repeat pressure | Spot treat; avoid blooms; apply in cool parts of day | May harm beneficials on contact; phytotoxicity risk in heat |
| Row covers | Seedlings and young transplants | Install immediately; seal edges; remove for pollination | Traps pests inside if applied after aphids arrive |
| Ant management | When aphids rebound quickly | Block trails; remove bridges; keep beds weeded | Sticky barriers need reapplication after dust or rain |
If you do choose a spray, treat it like a food-handling step: apply only what you need, target the colonies rather than the whole bed, and follow the label’s harvest timing. As a practical rule, pick first, then treat, and wait until the next harvest window once leaves are dry and the stated interval has passed.
Finally, keep plants resilient—aphids multiply faster on stressed vegetables. Regular watering, avoiding excess nitrogen fertilizer, and spacing plants for airflow won’t “cure” an infestation, but they make control measures more reliable and reduce the chance of a quick comeback.
Organic control methods
Start with the least disruptive steps and escalate only if the colony keeps growing. On vegetable plants, the goal is to knock numbers down quickly, protect new growth, and avoid harming pollinators and beneficial insects that naturally keep aphids in check.
- Blast them off with water. A firm spray from a hose can remove large numbers from stems and leaf undersides. Aim at the clusters, repeat every 2–3 days, and check tender tips where they regroup.
- Hand removal for small outbreaks. Pinch or wipe off groups with gloved fingers, or prune heavily infested tips and discard them. This works well early on, especially on peppers, kale, and beans.
- Use insecticidal soap correctly. Soap works by contact, so coverage matters: spray tops and undersides until evenly wet, then reapply in 5–7 days if you still see live insects. Test on a few leaves first and avoid spraying in heat above 29°C (85°F) to reduce leaf burn.
- Horticultural oil or neem oil for persistent colonies. These can smother soft-bodied pests and may slow reproduction. Apply in the cooler part of the day (early morning or evening), avoid open blossoms, and don’t spray drought-stressed plants. Recheck after 3–5 days and repeat if needed.
- Manage ants, or you’ll keep losing ground. Ants “farm” aphids for honeydew and protect them from predators. Use sticky barriers on stems (where practical), remove bridges like weeds touching plants, and place ant baits away from beds to reduce traffic.
- Encourage natural enemies. Lady beetles, lacewings, hoverfly larvae, and parasitic wasps can collapse an outbreak once they arrive. Keep small-flowered plants nearby (dill, cilantro, alyssum) and avoid broad-spectrum sprays that wipe out helpers along with the pests.
- Physical exclusion for vulnerable crops. Lightweight row covers can prevent winged adults from landing on young seedlings. Secure edges well and remove covers during flowering for crops that need pollinators.
- Reduce “soft growth” that attracts them. Over-fertilizing with nitrogen pushes tender new leaves that aphids prefer. If you fertilize, use moderate rates and water evenly to avoid stress-and-flush growth cycles.
| Method | Best use | Pros | Watch-outs |
|---|---|---|---|
| Water spray | Early to moderate infestations on sturdy plants | Fast, no residue, safe for beneficials | May need repeat treatments; avoid spreading disease by splashing in already-wet foliage |
| Pruning/hand removal | Small colonies on tips and a few leaves | Immediate reduction; very targeted | Can reduce yield if you remove too much new growth |
| Insecticidal soap | Clusters on leaf undersides and stems | Effective on contact; low persistence | Needs thorough coverage; avoid use above 29°C (85°F) |
| Horticultural/neem oil | Stubborn populations and repeated flare-ups | Good knockdown when applied well | Can harm beneficials on contact; avoid spraying blossoms and stressed plants |
| Ant control | When ants are present on plants | Improves success of predators and sprays | Requires persistence; place baits carefully away from harvest areas |
| Beneficial insects | Long-term balance in mixed gardens | Sustainable suppression once established | Slower to act; avoid harsh sprays that disrupt them |
Whatever approach you choose, check plants again after a few days. If you still see active colonies, rotate tactics (for example, water spray followed by soap 24 hours later) rather than repeating a single step indefinitely. That combination usually brings aphids on vegetable plants back to a manageable level without turning the garden into a spray schedule.
Preventive planting strategies
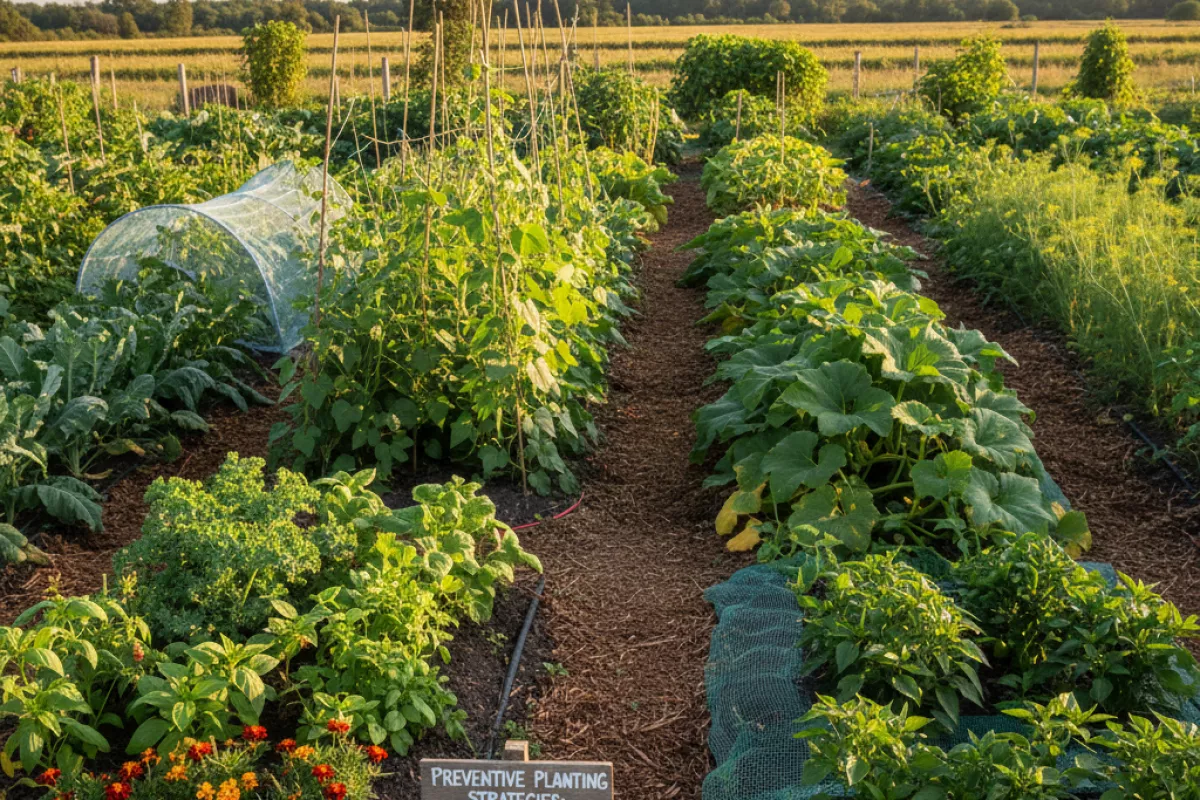
Start by making your beds less inviting to aphids and more supportive of natural predators. The goal is steady, stress-free plant growth and a garden layout that breaks up “easy highways” for sap-suckers to move from plant to plant.
- Rotate plant families each season. Avoid planting the same crop family in the same spot year after year. Rotating brassicas, legumes, cucurbits, and nightshades helps reduce carryover of pests and the tender volunteer growth aphids often colonize early.
- Skip excessive nitrogen and aim for balanced fertility. Fast, soft new growth is aphid-friendly. Use compost and balanced amendments rather than heavy doses of high-nitrogen fertilizer, especially on leafy greens and brassicas.
- Use spacing and airflow as a deterrent. Crowded plants create sheltered pockets where colonies build quickly. Thin seedlings and prune dense foliage so leaves dry faster after rain or irrigation.
- Plant “decoys” to concentrate outbreaks. A small patch of nasturtiums or early-sown mustard greens can act as a trap crop near (not within) your main beds, letting you spot and remove infested growth before aphids spread.
- Interplant with aromatic companions. Mixing in alliums (onions, garlic, chives) and strong-scented herbs can make it harder for aphids to locate host plants. Interplanting also reduces big single-crop blocks that encourage rapid population growth.
- Time plantings to avoid peak pressure. In many gardens, aphids surge in cool-to-mild weather. Stagger sowings so you are not relying on one big flush of young plants at the same time, and consider slightly later starts for crops that routinely get hit early.
- Choose varieties with tolerance when available. Some cultivars handle feeding better (less leaf curl, stronger regrowth). If one variety is repeatedly overwhelmed, switch to a sturdier type next season.
- Protect seedlings during the vulnerable window. Use lightweight row cover over young transplants and direct-sown rows, then remove it at flowering for pollinated crops. Secure edges well so pests can’t crawl underneath.
- Keep weeds and volunteers under control. Many common weeds host aphids and let populations build before they move onto vegetables. Pull or hoe regularly, especially around bed edges and paths.
| Planting choice | Why it helps | How to apply it in a vegetable bed |
|---|---|---|
| Row covers on young plants | Blocks early colonizers during the most tender growth stage | Cover immediately after planting; vent on hot days above 29°C (84°F) and remove for flowering crops |
| Trap crops (nasturtium, mustard) | Draws aphids to a preferred host so you can remove them quickly | Plant a small strip 30–60 cm (12–24 in) from the main crop; prune or remove infested sections promptly |
| Mixed planting (polyculture) | Reduces large target areas and improves predator access | Alternate rows or clusters; avoid planting one crop in a single solid block |
| Balanced fertilization | Prevents overly lush, nitrogen-heavy growth that attracts sap feeders | Use compost and moderate feeding; avoid frequent high-N applications during rapid leaf growth |
These planting choices won’t eliminate aphids entirely, but they usually keep populations smaller and slower to explode. That gives you time to spot the first clusters on new growth and respond before leaves curl and colonies spread across the bed.
Monitoring crops during growth stages
Catch aphids early by checking plants on a schedule that matches how fast the crop is changing. Young growth can go from clean to heavily infested in a few days, especially when weather is mild and plants are pushing tender new leaves. A quick, consistent scouting routine is usually more effective than occasional long inspections. Since the first colonies often build on the softest tissue, it helps to know how to spot aphids on new growth tips.
Practical note: In routine scouting, the most useful shortcut is to inspect the soft newest growth first instead of starting randomly. On peppers, beans, brassicas, cucurbits, and leafy greens, the first meaningful colonies usually show up on tender tips, folded inner leaves, or the undersides of fresh growth before the rest of the plant looks obviously infested.
Focus on the plant parts aphids prefer: soft tips, the undersides of new leaves, flower buds, and the base of developing fruits. Look for indirect clues too—sticky honeydew, a shine on leaves, sooty mold, curled or puckered foliage, and ants moving up and down stems.
- Seedlings and transplants: Inspect before planting and again 2–3 days after setting out. Pay close attention to the growing point and leaf undersides; small colonies often start there.
- Vegetative growth: Walk rows at least weekly; in warm spells, increase to every 3–4 days. Check the newest leaves first, then work downward if you find activity.
- Bud and flowering stage: Examine buds and flower clusters where aphids can hide. This is also when virus risk matters most, so treat “a few aphids” as a signal to tighten monitoring.
- Fruit set to harvest: Look along stems and under leaves near fruiting nodes. Honeydew can contaminate produce and encourage mold, so watch for stickiness and blackening on nearby foliage.
| Crop stage | Where to look first | How often to check | What to record |
|---|---|---|---|
| Seedlings / transplants | Growing tips, underside of first true leaves | Every 2–3 days | Plants with aphids (%), any winged aphids present |
| Active vegetative growth | Newest leaves, tender shoots, inner canopy | Weekly; every 3–4 days in warm weather | Colonies per plant, presence of ants and honeydew |
| Bud / flowering | Buds, flower clusters, nearby leaf folds | Every 3–7 days | Hotspots by row/bed, distorted buds, beneficial insects seen |
| Fruit set to harvest | Nodes near fruit, underside of leaves above fruit | Weekly; twice weekly if sticky honeydew appears | Honeydew/sooty mold, aphids on marketable parts, spread pattern |
Use a simple sampling pattern so you don’t miss hotspots. For small gardens, check every plant in problem-prone areas (near fences, windbreaks, or earlier infestations). For larger plantings, inspect a consistent number of plants per section and include edges and the center; aphids often build up first along borders.
When you find aphids, note whether you’re seeing mostly wingless individuals (colonies building) or winged adults (new arrivals). Also watch for natural enemies—lady beetle larvae, lacewing larvae, hoverfly larvae, and parasitized “mummies.” If beneficials are present and aphid numbers are stable, you may be able to avoid intervention and keep checking every few days.
Harvest safety after treatment
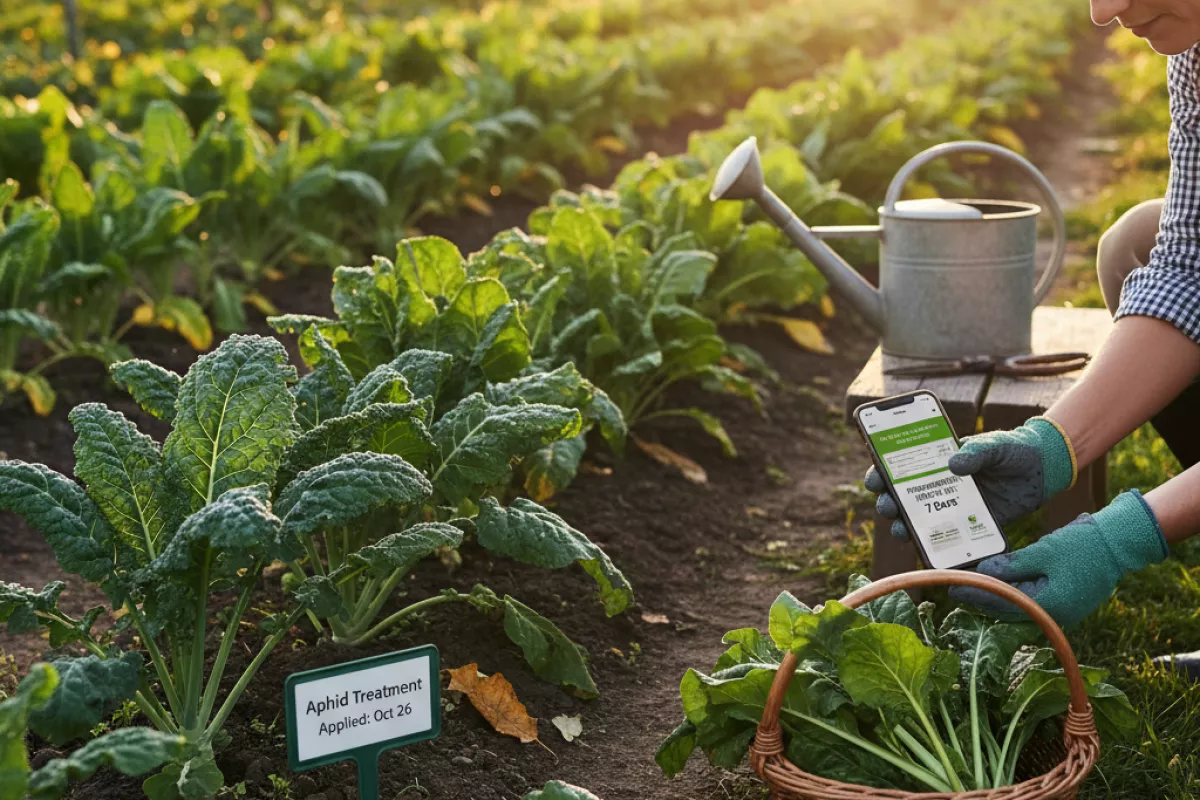
Once you’ve sprayed or dusted to knock back aphids, the next decision is whether your vegetables are ready to pick and eat. The safe approach is to match your harvest timing to the product used, then reduce residues with good washing and handling.
- Check the label for the pre-harvest interval (PHI). This is the minimum waiting time between the last application and picking. It varies by crop and product, so treat it as the rule even if the infestation looks gone.
- Don’t harvest from wet foliage. Wait until leaves and fruit are fully dry to avoid transferring fresh spray to your hands, tools, and produce.
- Wash produce thoroughly. Rinse under running water and rub firm items (tomatoes, peppers, cucumbers). For leafy greens, separate leaves and rinse in multiple changes of clean water, then spin or pat dry. Washing helps remove dust, honeydew, and some residues, but it does not “reset” a PHI.
- Peel or trim when it makes sense. Removing outer leaves of cabbage/lettuce or peeling cucumbers can reduce surface residues, especially after repeated treatments.
- Use clean harvest tools and containers. If you sprayed recently, wipe pruners and knives and avoid setting produce on treated soil or foliage.
- Keep kids and pets out until sprays dry. Drying time is often the practical “re-entry” point for home gardens, but follow any re-entry guidance on the label if provided.
Different control methods come with different waiting periods and cleanup needs. The table below is a practical guide for common aphid treatments, but always defer to the product label when one exists.
| Treatment type | Typical harvest timing guidance | What to do before eating |
|---|---|---|
| Plain water spray (strong jet) | Often same-day harvest is fine once plants are dry | Rinse produce to remove dislodged aphids and honeydew |
| Insecticidal soap | Commonly short wait; follow label PHI if listed | Rinse well, especially leafy greens where soap can cling |
| Horticultural oils (including neem-based oils) | May require a waiting period depending on formulation and crop | Wash thoroughly; trim outer leaves if residue is noticeable |
| Botanical or microbial insecticides (product-dependent) | PHI varies widely by active ingredient and crop | Follow label; wash produce and avoid harvesting early “just because it’s natural” |
| Systemic insecticides | Often longer PHIs and stricter crop restrictions | Do not shortcut the waiting time; consider avoiding systemics on quick-harvest crops |
If you can’t find a label (for example, a homemade mix), treat that as a sign to be conservative: delay picking, wash extra carefully, and avoid using unverified recipes on edible plants. When in doubt, harvest untreated parts first, or focus on non-chemical options until you’re past the main picking window.
FAQ about aphids on vegetable plants
Below are answers to common questions about spotting aphids early, treating infestations safely on edible crops, and reducing the chance of repeat outbreaks in vegetable beds.
What is the first sign of aphids on vegetables?
One of the earliest signs is usually clustered soft-bodied insects on tender new growth or the undersides of young leaves. You may also notice sticky honeydew, ants moving up stems, or slight curling and puckering before the infestation becomes obvious from a distance.
Can I wash aphids off vegetable plants with plain water?
Yes, a firm spray of plain water is often one of the best first steps for small to moderate infestations. It can knock large numbers off stems and leaf undersides without leaving residues, but it usually works best when repeated every 2–3 days and combined with follow-up scouting.
Are aphids dangerous to edible crops?
Aphids do not usually make the crop itself dangerous to eat, but they can weaken plants, reduce yield, contaminate leaves with honeydew, and in some cases spread plant viruses. The biggest risk is often reduced plant health and lower-quality harvest rather than direct toxicity.
What vegetables get aphids most often?
Aphids commonly attack leafy greens, brassicas, beans, peas, peppers, cucumbers, squash, melons, tomatoes, and lettuce. Crops with fast, tender new growth are often the most attractive, especially when they are heavily fertilized or crowded.
Do ants make aphid problems worse?
Yes. Ants often protect aphid colonies because they feed on the honeydew aphids produce. When ants are active on infested plants, predators such as lady beetles and lacewings are less effective, so outbreaks tend to last longer and rebound faster.
Is insecticidal soap safe to use on vegetables?
It can be a useful option on edible crops when applied according to the label and used with good coverage. Because it works by contact, it should be sprayed directly on colonies, especially on leaf undersides, and harvest timing should still follow the product label where required.
Should I remove aphid-covered leaves or treat the whole plant?
For light infestations, it often makes sense to remove the worst tips or leaves and then monitor the rest of the plant closely. If aphids are already spread across several shoots or neighboring plants, a broader but still targeted approach such as water spray or soap on affected areas is usually more practical.
How do I prevent aphids from coming back?
Check plants often, avoid pushing overly soft growth with excess nitrogen, control ants, keep weeds down, and encourage natural predators. In many gardens, prevention is really about early detection and fast response before colonies spread across the whole bed.
Final thoughts
Aphids on vegetable plants are usually most manageable when they are caught on the first few shoots rather than after honeydew, curling leaves, and ant activity spread through the bed. Early scouting, simple knockdown methods, and steady follow-up are often enough to keep edible crops productive without turning routine garden care into constant spraying.
In practice, prevention and control work best together: grow vegetables with balanced fertility and airflow, then respond quickly the moment colonies appear on tender new growth.