Anthurium Care and Growing Guide

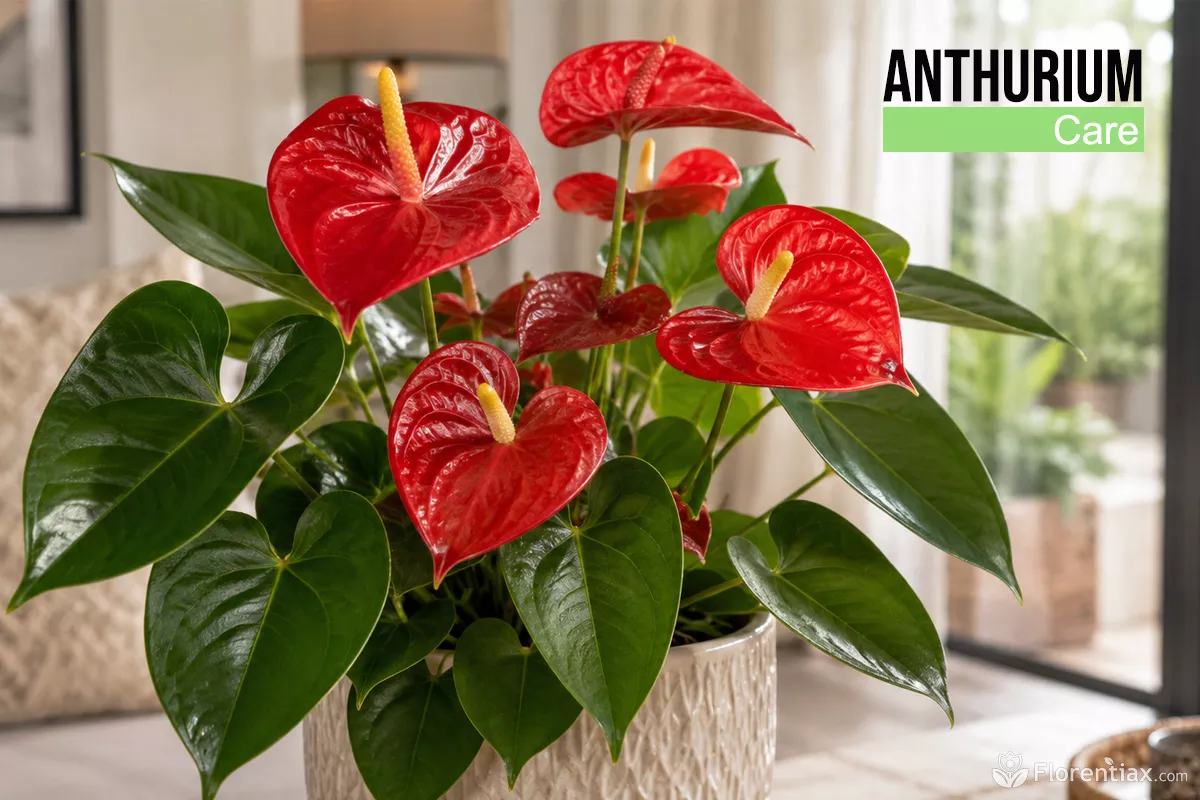 A complete guide to Anthurium as a flowering houseplant, covering its tropical origin, bloom cycle, popular types, light, temperature, humidity, watering, soil, feeding, repotting, propagation, pests and leaf problems.
- Anthurium overview
- Growth and flowering cycle
- Popular Anthurium types
- Light and placement
- Temperature and humidity
- Anthurium watering
- Soil and drainage
- Pot choice and repotting
- Feeding and reblooming
- Routine plant care
- Anthurium propagation
- Problems, pests and diseases
- Anthurium safety
- Popular questions
Quick takeaway: Anthurium is a warm-growing tropical perennial valued for its glossy foliage and long-lasting, heart-shaped floral displays. It is moderately easy to grow indoors when it receives bright indirect light, stable warmth, humid air, an open potting mix and careful watering.
The plant most commonly sold as a flowering Anthurium is usually Anthurium andraeanum or a hybrid from the Andraeanum Group. It can flower several times a year and may produce colour in any season, but the most reliable growth and reblooming generally occur from spring through early autumn.
Anthurium does not respond well to extremes. Strong direct sun can bleach or scorch its leaves, deep shade limits flowering, cold air damages tropical tissues, and constantly wet soil suffocates the roots. The most successful routine is therefore not complicated: provide good light without harsh sun, allow the upper layer of the potting mix to approach dryness, and protect the plant from sudden environmental changes.
The fastest way to improve an Anthurium is usually to correct light, root aeration and watering before adding more fertilizer. A plant with wet, stressed roots cannot use extra nutrients efficiently.
Anthurium overview and ornamental value
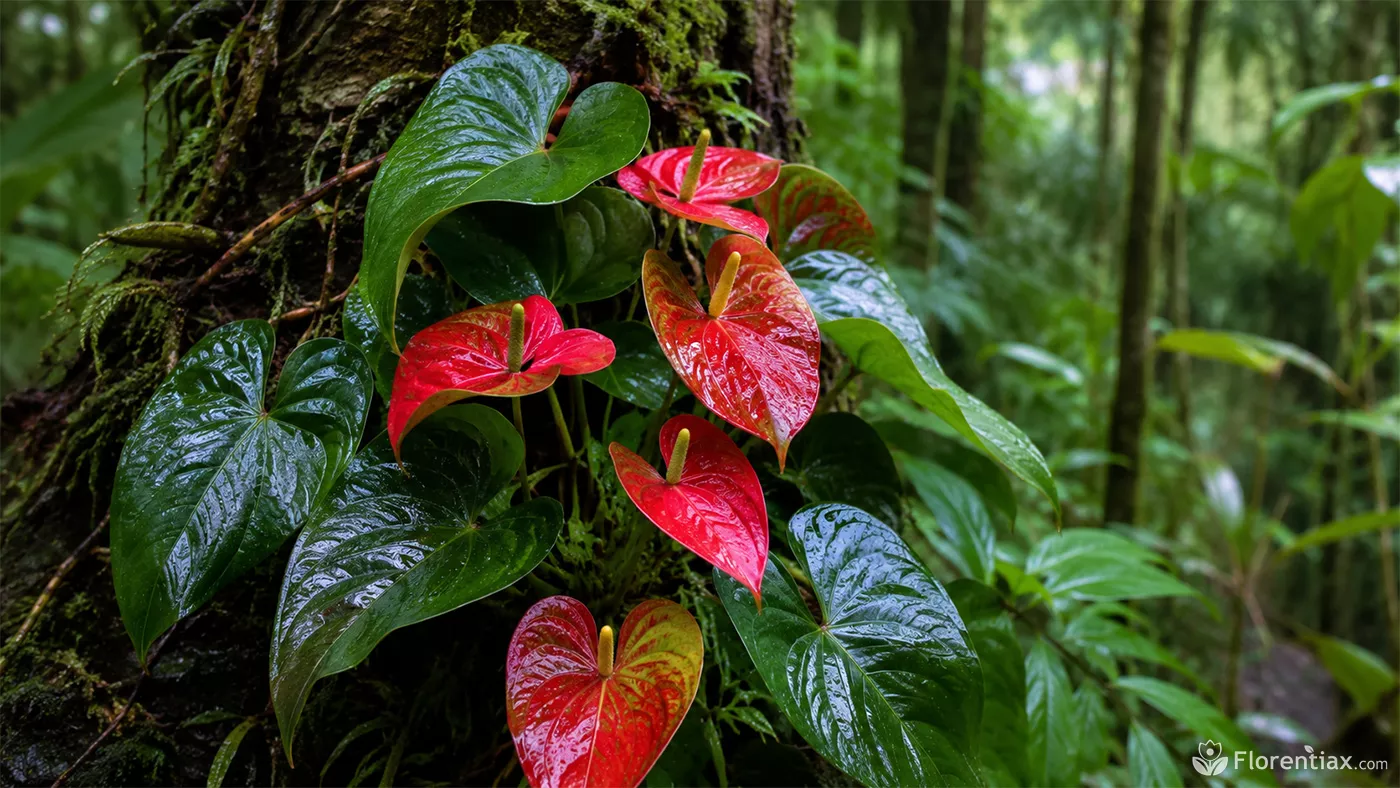
Anthurium is a large genus in the arum family, Araceae. Its species originate in tropical parts of the Americas and the Caribbean, where many grow as epiphytes on trees or rocks rather than in dense ground soil. Their roots are adapted to a combination of moisture, air and loose organic material, which explains why potted Anthuriums perform poorly in compact, muddy substrates.
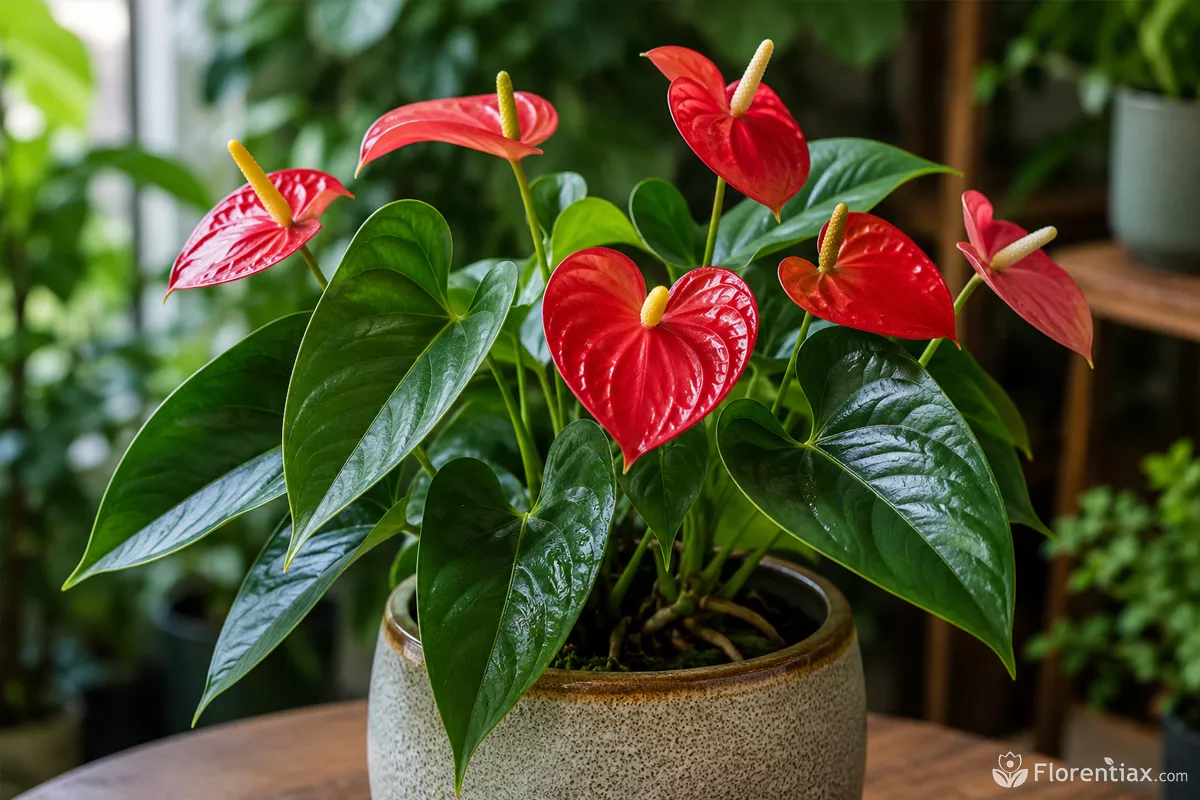
What most people call the Anthurium flower is actually a complete inflorescence made of two visually different parts:
- Spathe: The colourful, waxy structure that may be red, pink, white, orange, burgundy, green or multicoloured. Botanically, it is a modified leaf or bract.
- Spadix: The upright or curled central spike. Hundreds of tiny true flowers are arranged along its surface.
A healthy flowering hybrid forms an upright clump of dark green leaves with new growth emerging from the centre. As the plant matures, a short stem may become visible above the potting mix and aerial roots may develop along it. This is normal growth, not a sign that the plant is climbing out of the pot.
| Plant feature | Typical Anthurium requirement |
|---|---|
| Botanical name | Anthurium spp.; flowering houseplants are commonly Andraeanum Group hybrids |
| Common names | Flamingo flower, tailflower, laceleaf |
| Plant type | Evergreen tropical herbaceous perennial; many species are naturally epiphytic |
| Usual indoor size | About 30–60 cm (12–24 in), depending on the hybrid and growing conditions |
| Light | Bright indirect light; protection from strong direct summer sun |
| Temperature | 18–30°C (65–86°F), with minimal sudden fluctuation |
| Humidity | Preferably above 50%; foliage species usually benefit from still higher humidity |
| Watering | Water thoroughly when the upper 5 cm (2 in) of the mix is approaching dryness |
| Potting mix | Open, moisture-retentive but sharply draining mixture containing bark and mineral aeration material |
| Preferred pH | Slightly acidic, approximately 6.0–6.5 |
| Flowering | Possible throughout the year indoors; usually strongest from spring through early autumn |
| Safety | Harmful if eaten; sap and plant tissues can irritate skin, eyes and the mouth |
Flowering Anthuriums are often described as easy houseplants, but a more accurate description is easy once their basic conditions are stable. They tolerate an occasional missed watering better than permanently wet roots, and they can remain attractive in moderate light, although regular flowering requires a brighter position.
Seasonal growth stages and Anthurium flowering cycle
Anthurium does not have a strict once-a-year flowering season like many garden perennials or spring bulbs. A well-established flowering hybrid can produce new spathes throughout the year. Under favourable conditions, showy Anthurium types may complete four to six flowering cycles annually, and an individual spathe can remain attractive for around six weeks.
The table below shows a typical indoor pattern in the Northern Hemisphere. It is not a fixed biological calendar. A plant under grow lights in a consistently warm room may continue growing and flowering in winter, while a plant in a dim, cool room may pause for several months.
| Month | Jan | Feb | Mar | Apr | May | Jun | Jul | Aug | Sep | Oct | Nov | Dec |
|---|---|---|---|---|---|---|---|---|---|---|---|---|
| Active growth | ✓ | ✓ | ✓ | ✓ | ✓ | ✓ | ✓ | ✓ | ||||
| Flowering possible | ✓ | ✓ | ✓ | ✓ | ✓ | ✓ | ✓ | ✓ | ✓ | ✓ | ✓ | ✓ |
| Strongest flowering | ✓ | ✓ | ✓ | ✓ | ✓ | ✓ | ✓ |
- Flowering potential: Year-round in a bright, warm indoor environment.
- Most reliable flowering period: April–October, when natural light and temperatures support active leaf production.
- Winter performance: Fewer new spathes are normal if days are short and the room is cooler.
- Typical flower longevity: About six weeks, although some cultivars remain colourful for longer.
The number of flowers depends on the plant’s overall growth rate. An Anthurium that is steadily producing firm new leaves is more likely to produce new spathes than one that has remained unchanged for months. This is why extra fertilizer alone rarely solves a flowering problem.
A new spathe normally opens with strong colour and a fresh, smooth surface. As it ages, the colour may fade, darken or turn green. The spadix may also become duller, and the flower stem may gradually yellow. When the entire display has declined, cut the stem close to the base with clean scissors rather than pulling it from the plant.
If an otherwise healthy Anthurium produces leaves but no flowers, investigate these causes in order:
- Insufficient light: The most common reason for healthy foliage without flowers.
- Low temperature: Cool roots and cold nights slow new growth.
- Oversized pot: A large volume of wet substrate can delay root recovery and increase rot risk.
- Depleted or compacted mix: Old substrate may hold too much water and too little air.
- Irregular feeding: A plant in active growth eventually needs nutrients, but feeding should follow rather than replace good light and root health.
Popular Anthurium types and which one to choose
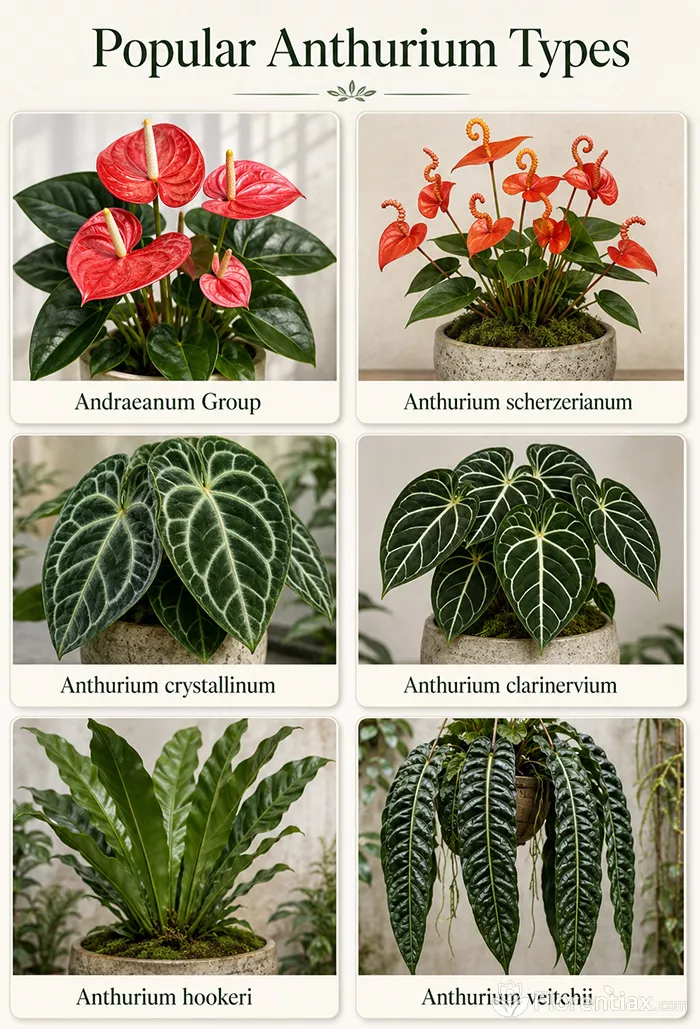
Not every Anthurium is grown primarily for flowers. The genus includes compact flowering hybrids, velvet-leaved collector plants, bird’s-nest forms and species with long, hanging leaves. Choosing the correct type is important because a spectacular foliage species may never produce the large red spathes commonly associated with the name Anthurium.
| Type | Main ornamental feature | Indoor difficulty | Best use |
|---|---|---|---|
| Andraeanum Group | Large waxy spathes in red, pink, white, orange, green or dark shades; usually a straight spadix | Easy to moderate | Best first choice for regular indoor flowering |
| Anthurium scherzerianum | Compact growth, colourful spathe and a distinctive curled or corkscrew-like spadix | Easy to moderate | Smaller rooms and growers who want an unusual flowering form |
| Anthurium crystallinum | Velvety heart-shaped leaves with pale silver-green veins; flowers are less showy | Moderate | Foliage collections and humid display areas |
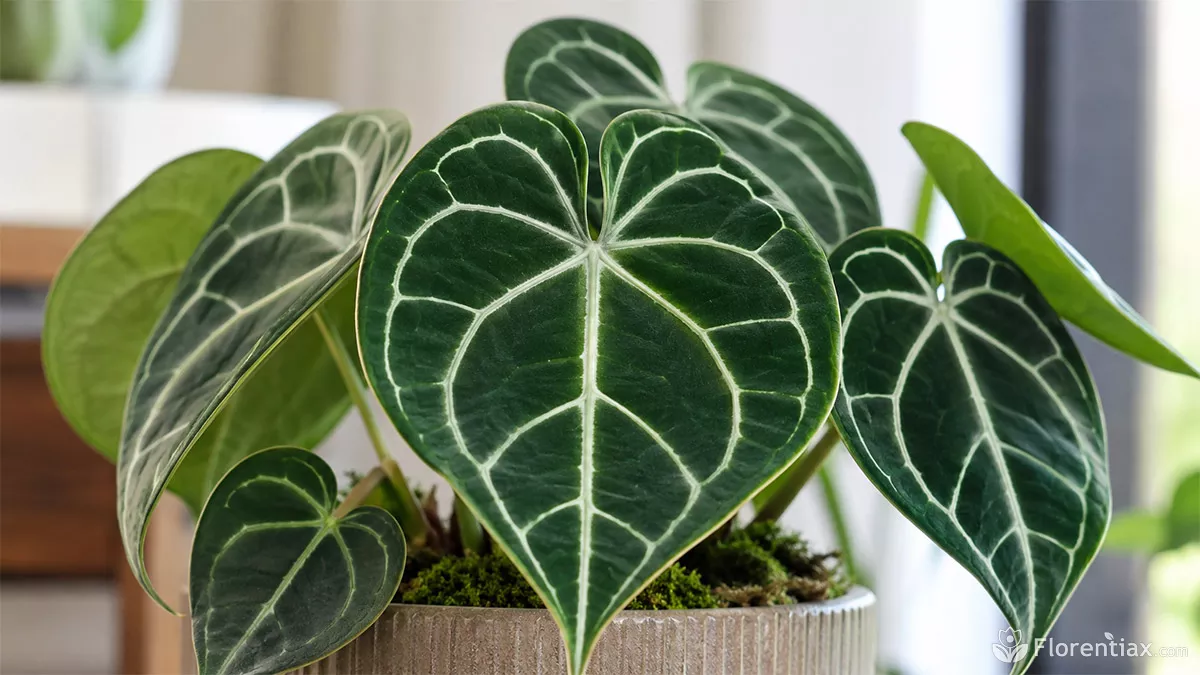
| Anthurium clarinervium | Thick dark leaves with bold white venation and a compact architectural habit | Moderate | Collectors who value foliage more than colourful spathes |
| Anthurium hookeri | Large bird’s-nest rosette of upright leaves; flowers are secondary | Moderate | Floor displays and warm rooms with enough space |
| Anthurium veitchii and other large foliage species | Long, heavily ribbed or dramatically textured leaves | Moderate to difficult | Experienced collectors with controlled humidity and generous space |
For a beginner whose main goal is colourful flowers, an Andraeanum Group hybrid is the safest purchase. These are widely available, relatively compact and bred for repeated flowering. Anthurium scherzerianum is another practical option, especially when a smaller plant is preferred.
Foliage Anthuriums are not inferior plants, but they are a poor choice when the buyer expects repeated red, pink or white displays. Many also react more noticeably to dry air, inconsistent watering and mineral-heavy tap water.
When choosing a plant at a shop, inspect more than the open flowers. Look for:
- Firm, evenly coloured leaves without widespread yellowing or black lesions.
- New growth emerging cleanly from the centre.
- No cottony material, sticky residue, fine webbing or silvery feeding marks.
- A potting mix that is moist but not swampy or sour-smelling.
- Firm roots rather than dark, soft roots visible through drainage holes.
- At least one unopened or newly opening spathe if immediate colour is important.
A plant covered with old flowers but producing no fresh leaf growth may look impressive in the shop yet decline quickly at home. A healthy centre and active new growth are better long-term signs than flower quantity alone.
Best light and placement for Anthurium indoors
Bright indirect light produces the best balance of compact foliage and repeated flowering. Anthurium can survive in moderate light, but survival and strong bloom performance are not the same. In a dim position, the plant may remain green while producing fewer leaves, longer petioles and few or no flowers.
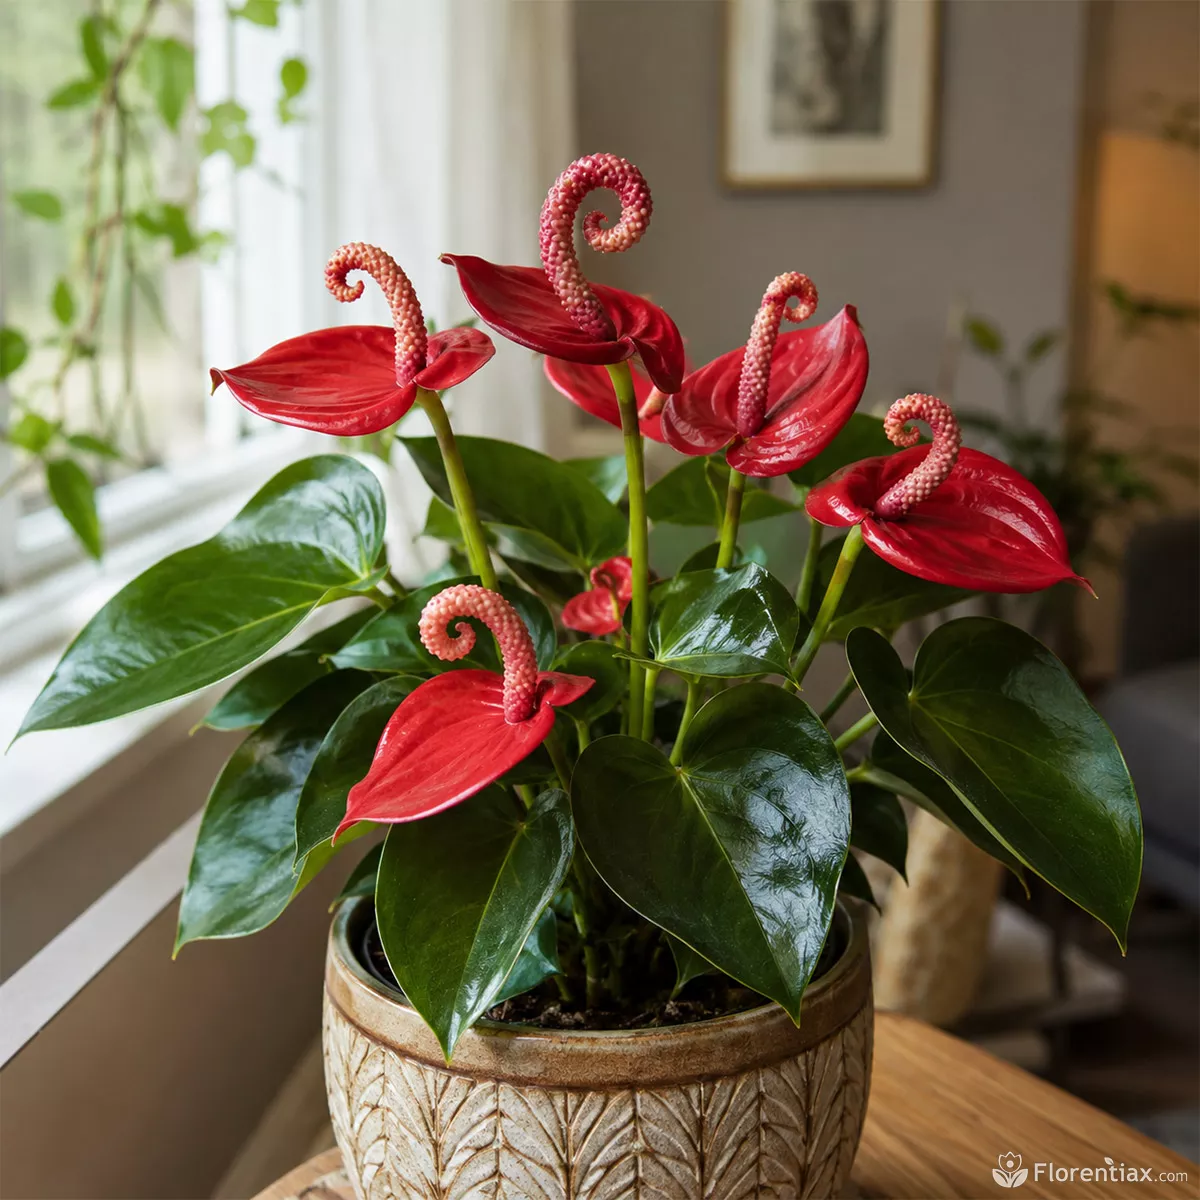
An east- or west-facing window is often suitable. A south-facing window can also work when direct summer sun is filtered through a sheer curtain or the plant is positioned far enough from the glass to avoid hot rays. In a north-facing room, place it in the brightest available location and consider a grow light if flowering stops.
| Location | Likely result | Recommended adjustment |
|---|---|---|
| East-facing window | Gentle morning light and good flowering potential | Keep close to the window; filter the light only if leaves become hot or bleached |
| West-facing window | Strong afternoon brightness with possible summer scorch | Use a sheer curtain or move the plant away from direct rays |
| South-facing window | Excellent brightness but high heat and scorch risk | Filter direct sun, especially from late spring through early autumn |
| North-facing window | Acceptable foliage growth in a bright room; flowering may decline | Use the brightest position or add a grow light during darker months |
| Interior room far from windows | Slow, stretched growth and few flowers | Relocate the plant or provide suitable artificial light |
Direct sunlight damage usually appears as pale, tan or brown patches on the most exposed side of the plant. The damaged tissue does not turn green again. Move the plant to filtered light, but do not immediately place a severely scorched Anthurium in deep shade; it still needs brightness to replace the damaged foliage.
Insufficient light produces a different pattern: long leaf stalks, wide spacing between leaves, smaller or paler new growth and loss of flowering. If only one side receives light, rotate the pot by a quarter turn every one or two weeks to maintain a balanced shape.
A grow light can be useful in winter or in apartments with limited window access. Provide approximately 10–12 hours of light daily and follow the manufacturer’s distance guidance. Leaves should feel normally warm, not hot, and the plant should still experience a dark period at night.
Temperature, humidity and climate acclimation
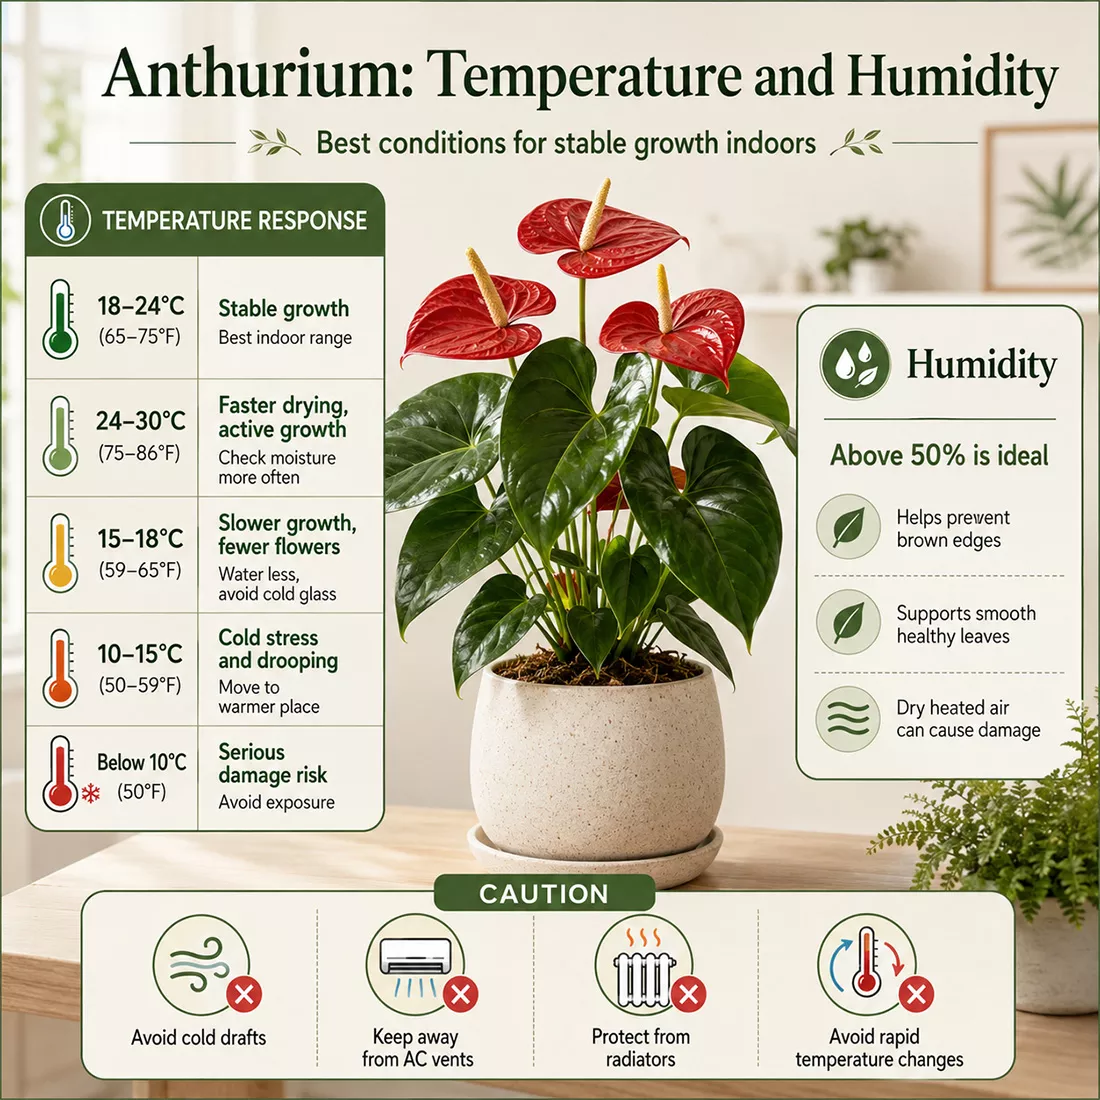
Anthurium is tropical rather than merely frost-tender. It performs best when temperatures remain between 18 and 30°C (65 and 86°F). The easiest indoor range is approximately 18–24°C (65–75°F), where the plant can grow steadily without excessive moisture loss.
| Condition | How Anthurium responds | Care adjustment |
|---|---|---|
| 18–24°C (65–75°F) | Stable growth and manageable watering needs | Maintain bright indirect light and moderate humidity |
| 24–30°C (75–86°F) | Faster drying and potentially strong growth | Increase airflow and check moisture more frequently |
| 15–18°C (59–65°F) | Slower root activity and reduced flowering | Water less often and keep the plant away from cold glass |
| 10–15°C (50–59°F) | Cold stress, drooping, dark patches and root vulnerability | Move immediately to a warmer, stable position |
| Below 10°C (50°F) | Serious tissue damage or plant loss | Avoid exposure entirely |
Keep the pot away from cold draughts, air-conditioning outlets, frequently opened winter doors and direct heat from radiators. Anthurium dislikes rapid changes even when the average room temperature appears acceptable.
Relative humidity above 50% helps maintain smooth leaves and reduces crispy brown margins. Common flowering hybrids usually adapt to normal household conditions better than velvet-leaved collector species, but very dry heated air can still damage them.
Useful ways to improve the immediate environment include:
- Running a room humidifier with enough airflow around the plant.
- Grouping compatible tropical plants without crowding their leaves together.
- Keeping the plant in a naturally bright bathroom or kitchen.
- Using a broad tray of moist pebbles while ensuring the pot itself does not sit in water.
- Keeping leaves clean so their surfaces function efficiently.
Misting provides only a brief humidity increase. It should not leave leaves repeatedly wet in a cool, stagnant room, because bacterial and fungal problems spread more readily across wet foliage. A humidifier is more effective when the home is consistently dry.
Can Anthurium grow outdoors?
Anthurium can remain outdoors year-round only in frost-free tropical or subtropical conditions. Depending on the species and site, outdoor cultivation is generally associated with USDA hardiness zones 10A–11B. In cooler climates, it should be treated as a houseplant that may spend part of summer outside.
Move the plant outdoors only when night temperatures are reliably above approximately 15–16°C (59–61°F). Place it in a sheltered area with bright shade, not in direct garden sun. Outdoor sunlight is far stronger than window light and can scorch indoor-grown leaves surprisingly quickly.
- For the first week, use a protected, bright-shade position.
- Keep the pot raised so rainwater can drain freely.
- Check the substrate after heavy rain rather than watering automatically.
- Inspect for slugs, insects and eggs before bringing the plant indoors.
- Return it indoors before nights begin falling below 15°C (59°F).
Do not place an Anthurium directly into morning or afternoon sun simply because the plant has been described as tropical. In its natural habitat, many species grow beneath a forest canopy rather than in open sunlight.
How to water Anthurium without damaging the roots
Correct watering means fully moistening the root ball and then allowing it to regain air before the next watering. It does not mean keeping the potting mix continuously wet. Anthurium roots need moisture, but they also need oxygen.
Check the substrate approximately 5 cm (2 in) below the surface. When that layer is approaching dryness, water slowly and thoroughly until excess water exits the drainage holes. Allow the pot to drain, then empty the saucer or decorative cachepot. A dependable indoor watering routine should respond to the plant’s actual conditions rather than a fixed weekday. A small pot beside a bright summer window may dry rapidly, while a large plastic pot in winter may remain moist for two weeks or longer.
- Insert a finger or wooden skewer into the upper 5 cm (2 in) of the mix.
- Lift the pot and notice whether it feels significantly lighter than after watering.
- If the upper layer is nearly dry, apply room-temperature water evenly across the surface.
- Continue until water flows from the drainage holes.
- Let the container drain completely and remove standing water.
- Check again only when the surface begins to dry, not automatically the next week.
| Situation | Moisture behaviour | What to do |
|---|---|---|
| Warm room, bright light and active growth | The plant uses water more quickly | Check several times per week, but water only after testing the mix |
| Cooler winter room with short days | The substrate remains wet longer | Extend the interval and avoid leaving water in the cachepot |
| Small terracotta pot | Moisture escapes through the pot walls and surface | Check more frequently and watch for excessive drying |
| Large plastic or glazed pot | Moisture remains around the roots longer | Use a very open mix and wait longer between waterings |
| Recently repotted plant | Fresh mix may hold water differently from the old substrate | Test both the new outer mix and the original root ball |
Best water for Anthurium
Rainwater, filtered water or another low-mineral source is preferable, especially in regions with hard alkaline tap water. Anthurium may gradually develop brown tips, pale new growth or white crust on the substrate when dissolved minerals accumulate.
If tap water is the only practical option, allow it to reach room temperature before use and periodically flush the pot with a generous volume of water so excess salts can drain away. Leaving water overnight may bring it to room temperature, but it does not remove most dissolved minerals.
Underwatering versus overwatering
- Likely underwatering: The pot feels light, the mix is dry through much of its depth, leaves are limp, and edges may become dry or crisp.
- Likely overwatering: The mix remains wet for many days, several leaves yellow, the base may soften, and roots become brown, black or mushy.
- Temporary heat wilt: Leaves droop during a hot afternoon but recover after temperatures fall, even though the root zone still contains moisture.
Drooping does not automatically mean that a plant needs water. Always check the root zone first. Roots damaged by excess moisture cannot supply water efficiently, so an overwatered Anthurium can wilt while its potting mix is still wet.
Best Anthurium soil mix, pH and drainage
Anthurium needs a substrate rather than dense outdoor garden soil. A suitable mix should retain enough moisture for fleshy tropical roots while containing large air spaces that reopen soon after watering.
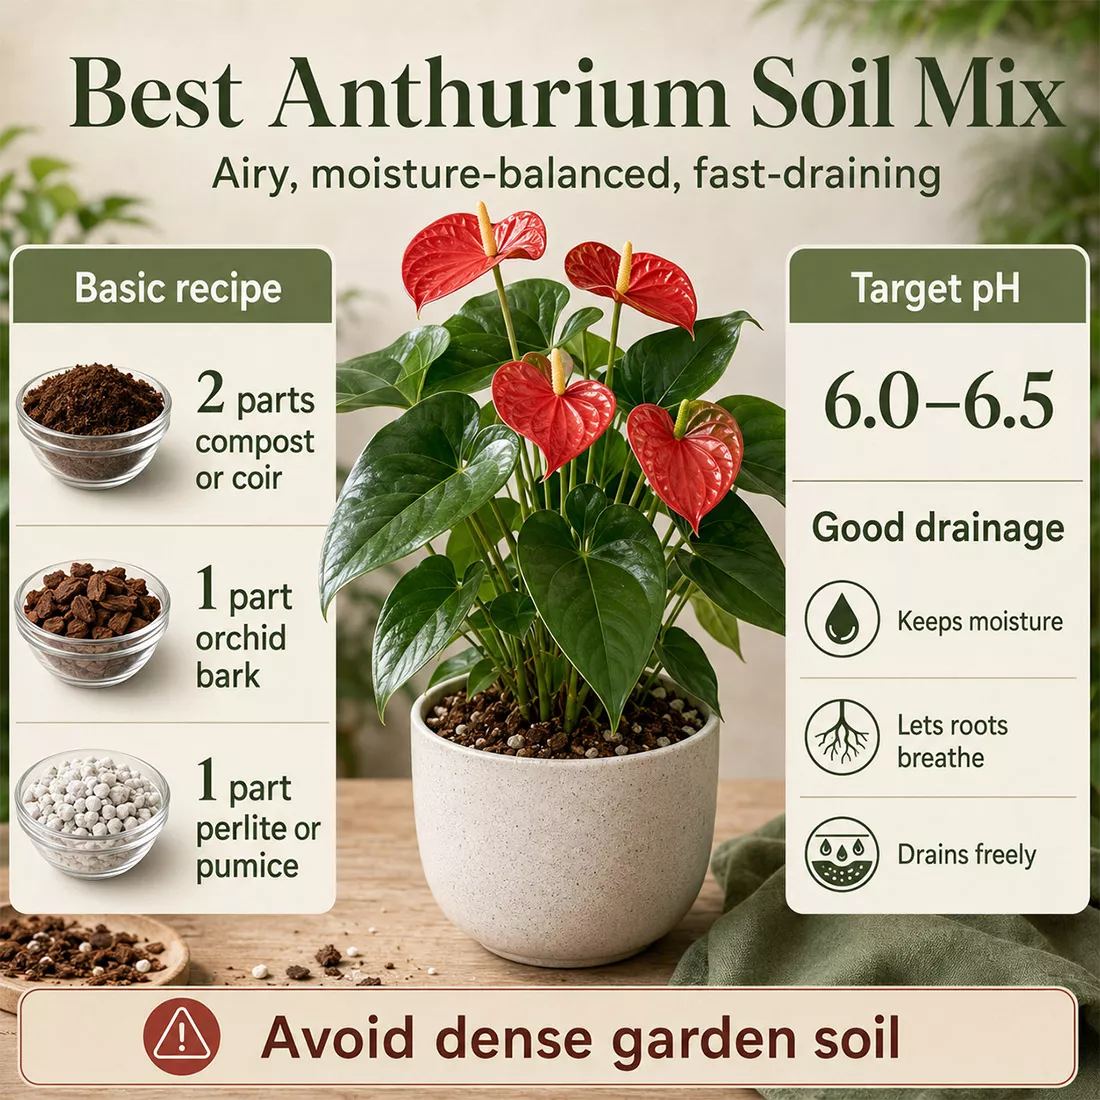
A reliable starting recipe is:
- Two parts acidic peat-free or coir-based potting compost for moisture and nutrient retention.
- One part medium orchid bark for coarse structure and root aeration.
- One part perlite, pumice or coarse horticultural grit for faster drainage and long-lasting pore space.
| Ingredient | Purpose in the mix | Possible substitute |
|---|---|---|
| Acidic peat-free compost or coir mix | Holds moisture and nutrients around fine roots | High-quality indoor plant mix with low initial fertilizer |
| Medium orchid bark | Creates large air channels and imitates loose epiphytic material | Coarse pine bark intended for container plants |
| Perlite or pumice | Improves drainage and prevents collapse | Coarse horticultural grit or another clean mineral aeration material |
| Horticultural charcoal, optional | Adds structure and may help keep the mixture open | Use only a small quantity; it is not a replacement for bark or drainage holes |
A target pH of approximately 6.0–6.5 suits most commonly grown Anthuriums. Strongly alkaline conditions can limit nutrient availability, while a sour, decomposed mix can hold too much water and encourage root disease.
Understanding soil drainage is especially important for this genus. Water should move through the pot freely, but the mixture should not become bone-dry immediately after irrigation. When squeezed gently while moist, it should feel springy and textured rather than forming a sticky, airless lump.
Materials to avoid
- Unamended garden soil, which compacts in containers.
- Fine seed-starting mix used alone, because it may collapse around mature roots.
- Pure bark with no moisture-retentive component in a dry home.
- Heavy compost that remains saturated for a week or longer.
- A thick gravel layer at the bottom of the pot, which does not replace drainage holes and may leave a wetter layer above it.
Organic components gradually decompose. Even when the plant has not outgrown its container, a mix that has become fine, dark and slow-draining should be replaced. This often becomes necessary every two or three years.
Choosing a pot and repotting Anthurium
Anthurium generally performs better in a moderately snug container than in a pot with a large unused volume of wet substrate. Repot only one size upward, usually into a container approximately 2–5 cm (1–2 in) wider than the existing root ball.
Repotting is usually needed every two or three years, but the plant itself should determine the timing. Repot sooner when roots are severely crowded, drainage has slowed, the mix has decomposed or root disease requires emergency treatment.
Signs that repotting is appropriate
- Roots circle densely around the inside of the pot.
- Healthy roots emerge through several drainage holes.
- Water runs around the root ball without moistening it evenly.
- The pot dries excessively fast despite appropriate conditions.
- The plant has become top-heavy and unstable.
- The exposed stem has risen well above the substrate.
- The mix smells sour, remains wet too long or has collapsed into fine material.
What kind of pot is best?
The container must have unobstructed drainage holes. Plastic pots retain moisture longer and work well in warm, bright rooms or for growers who water infrequently. Terracotta dries more rapidly and can help in humid environments, although it may require more attentive watering.
A decorative cachepot is safe only when the inner nursery pot can drain completely. Never leave the inner pot standing in water hidden at the bottom of the outer container.
Step-by-step Anthurium repotting
- Prepare the mix. Lightly moisten the ingredients so they are evenly damp but not dripping.
- Select the new pot. Choose one size larger with good drainage rather than a dramatically oversized container.
- Remove the plant gently. Support the base and slide out the root ball without pulling on the leaves.
- Inspect the roots. Healthy roots are firm and usually cream, tan or pale brown. Remove only roots that are black, hollow, slimy or unmistakably dead.
- Loosen severe circling. Tease apart the outer roots carefully rather than stripping away every piece of old mix.
- Position the crown correctly. Keep the central growing point above the substrate. A short section of exposed stem and aerial roots can be placed against or just within the fresh mix.
- Backfill without compression. Settle the mixture around the roots by tapping the pot. Do not pack it into a solid mass.
- Water and drain. Water evenly to settle the mixture, then let all excess escape.
After repotting, return the Anthurium to warm, bright indirect light and protect it from direct sun for several weeks. The new outer substrate and the older central root ball may dry at different speeds, so check both before watering again. More detailed guidance on how to water after repotting can help prevent a newly potted plant from being kept unnecessarily wet.
Do not fertilize immediately if the new substrate already contains nutrients. Waiting approximately four to six weeks gives disturbed roots time to recover and reduces the chance of salt stress.
A larger pot does not make an Anthurium grow faster. Roots expand only as quickly as light, warmth and leaf growth allow. Extra wet substrate around a small root system mainly increases the risk of rot.
Fertilizing Anthurium and encouraging repeat blooms
Feed while the plant is actively producing leaves, generally from April through October in the Northern Hemisphere. A complete liquid houseplant fertilizer or orchid fertilizer works well because both are formulated for container-grown plants with relatively open root media.
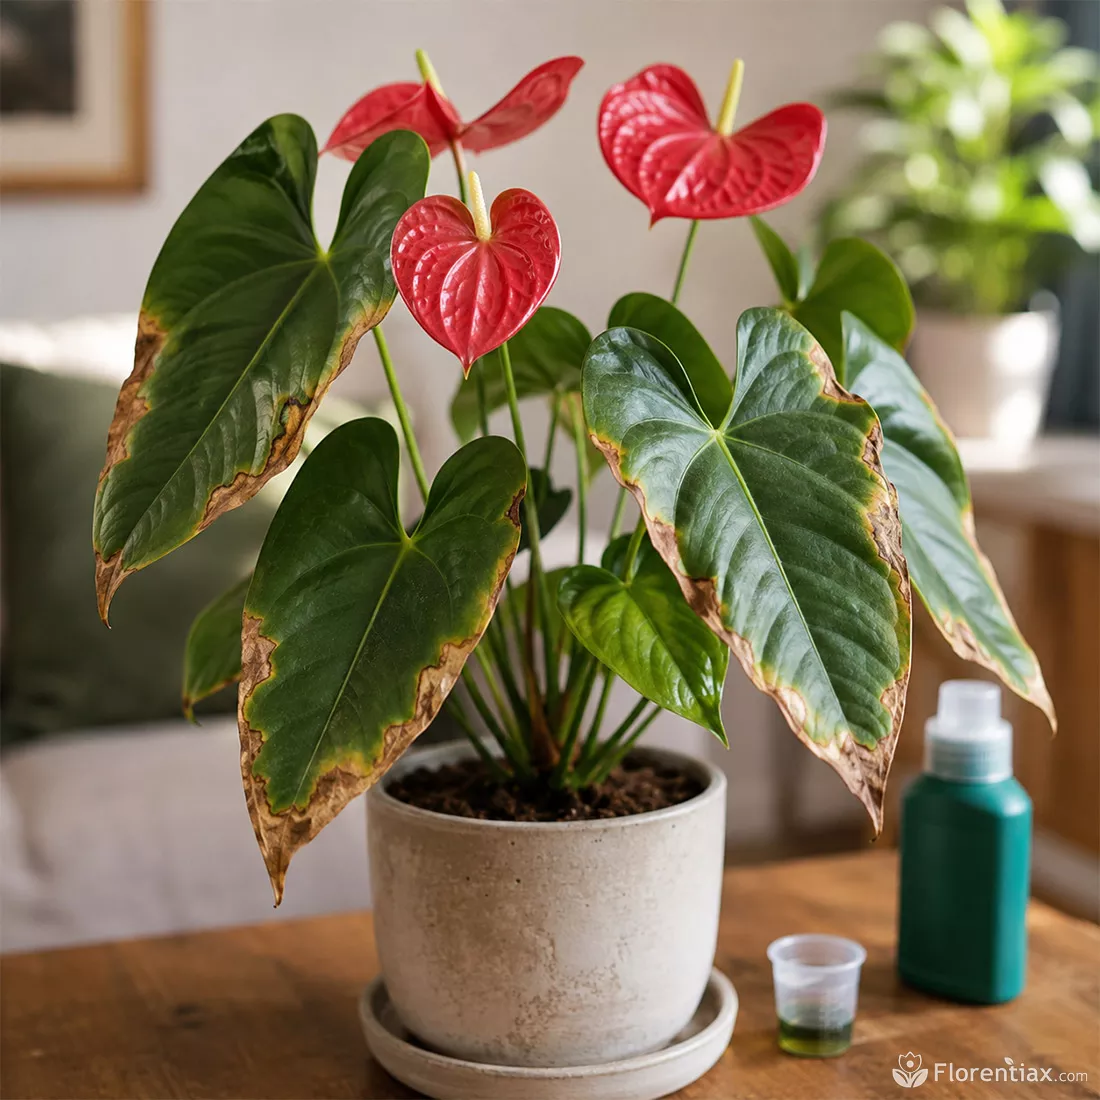
A conservative indoor routine is to apply fertilizer at half the label strength approximately once every four weeks during active growth. Stronger light and rapid growth may justify more frequent feeding according to the product label, while a plant in cool winter conditions may need no fertilizer at all.
- Apply fertilizer to an already moist root zone, not to completely dry roots.
- Measure the product rather than estimating the concentration.
- Reduce or stop feeding when growth pauses in winter.
- Flush the pot periodically with low-mineral water to remove accumulated salts.
- Do not combine several fertilizers, tonics and bloom stimulants at the same time.
More fertilizer does not force an unhealthy plant to bloom. Excess salts may burn root tips and cause brown leaf margins, while excessive nitrogen can encourage soft foliage without solving poor light.
How to help an Anthurium rebloom
- Move it to brighter indirect light without exposing it to hot direct sun.
- Maintain temperatures above 18°C (65°F), especially around the root zone.
- Confirm that the potting mix contains bark and drains freely.
- Water when the upper layer approaches dryness rather than keeping it constantly wet.
- Feed lightly and consistently during active growth.
- Remove completely faded flower stems at the base.
- Allow time for new leaves to develop; flowering is closely connected to steady vegetative growth.
If a plant was purchased in full bloom and then stops flowering, do not assume it needs immediate repotting. Commercial plants may arrive after highly controlled greenhouse production. Give the plant several months to adapt to the home, provided the roots remain healthy.
Routine Anthurium care for clean leaves and compact growth
Anthurium needs little formal pruning. Most routine work involves removing damaged tissue, cleaning the foliage and keeping the plant evenly exposed to light.
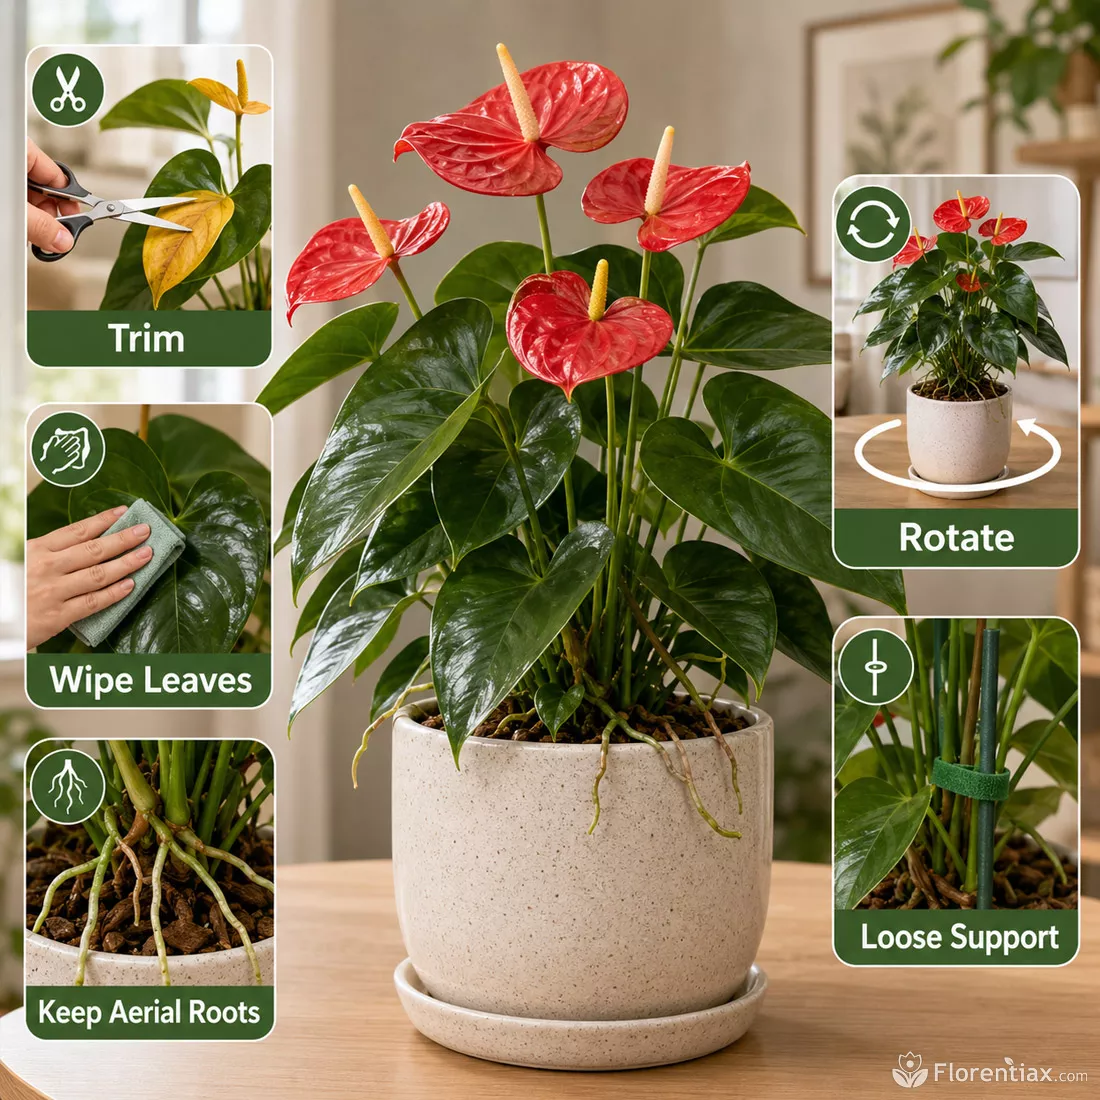
Removing old leaves and flowers
Cut yellow leaves and exhausted flower stems close to the main stem with clean, sharp scissors. Do not tear them away because a ragged wound can damage healthy tissue. Disinfect tools before moving to another plant, particularly when bacterial leaf disease is suspected.
Cleaning the leaves
Broad Anthurium leaves collect dust, reducing their shine and making pests harder to notice. Wipe both sides gently with a soft damp cloth every few weeks. Support the leaf from below so the petiole is not bent.
Avoid oily leaf-shine products. They can leave a sticky surface, attract dust and make it harder to assess natural leaf colour or pest symptoms.
Managing aerial roots
Aerial roots are normal. They may be left exposed, directed onto moist substrate or covered lightly during repotting if they remain flexible. Do not cut healthy aerial roots simply for appearance; they help the plant absorb moisture and support new growth.
Rotating and supporting the plant
Rotate the pot by about a quarter turn every one or two weeks if light enters from one direction. A mature plant with a visible stem can be supported with a slim stake, but ties should remain loose enough to avoid cutting into the tissue.
Use each cleaning session as a plant inspection. The underside of leaves, the joints where petioles meet the stem and the base of the spadix are common places to discover pests before they spread.
How to propagate Anthurium at home
Division is the most reliable home propagation method because each new section begins with its own roots and growing point. Stem or rhizome cuttings are also possible, particularly on older plants with an elongated stem and visible aerial roots.
Propagation by division
- Choose a healthy, actively growing plant with several separate shoots.
- Water normally one or two days before division so the roots are flexible rather than brittle.
- Remove the root ball and identify natural sections with their own roots.
- Separate them gently by hand or use a sterile knife where stems are connected.
- Keep at least a few healthy roots and one active growing point on each division.
- Pot each section into a small container with fresh, open Anthurium mix.
- Place the divisions in warm, bright indirect light with stable humidity.
Do not divide a plant into many tiny pieces merely to produce more pots. Larger divisions establish faster and are less vulnerable to watering errors.
Propagation from a stem section
An older stem section can be cut where it includes a node and preferably an aerial root. Root it in a warm, humid environment using a loose acidic mix, damp sphagnum combined with mineral aeration material, or water as a temporary rooting medium.
If rooted in water, transfer the cutting to substrate after it has formed several healthy roots. Keep the fresh mix evenly moist during the transition, but never saturated.
Growing Anthurium from seed
Seed propagation is slow and less predictable. The plant must first be successfully pollinated and produce ripe berries. Seeds should be cleaned and sown while fresh, and seedlings from hybrid parents may not resemble the original plant. For most home growers, division is faster and preserves the characteristics of a named cultivar.
Never propagate from a plant showing rapidly spreading leaf lesions, bacterial wilt or severe root disease. Infected material and contaminated cutting tools can spread pathogens to the new plants.
Common Anthurium problems, pests and diseases
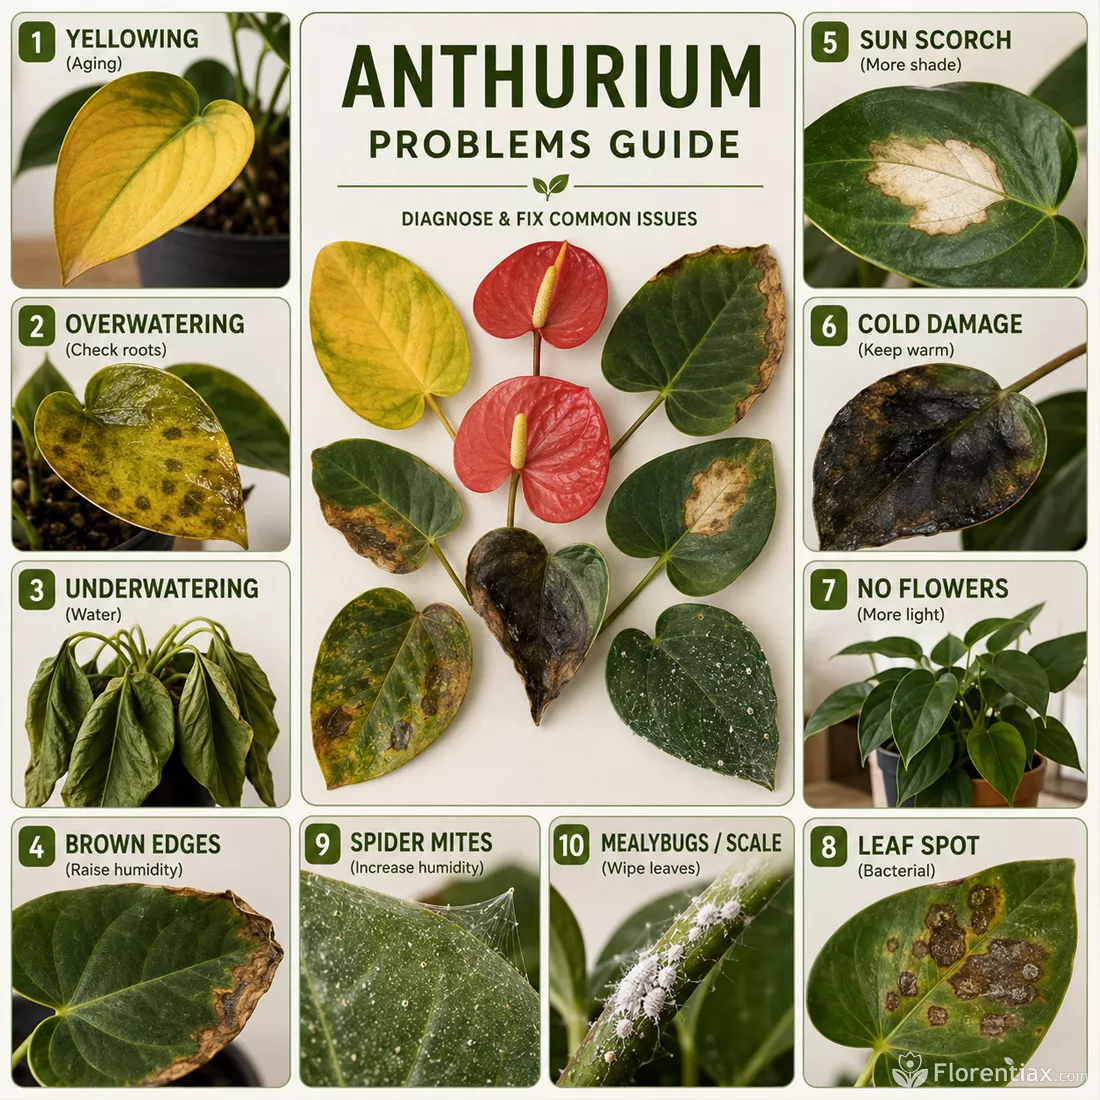
Anthurium symptoms often overlap. Yellow leaves can result from natural ageing, low light, excess moisture, cold damage or root disease. Begin diagnosis by checking four things together: substrate moisture, root condition, recent temperature changes and the pattern of damage across the plant.
| Symptom | Likely cause | What to do |
|---|---|---|
| One old lower leaf gradually turns yellow | Normal leaf ageing | Remove it after most of the leaf has yellowed and continue normal care |
| Several leaves yellow while the mix stays wet | Overwatering, poor drainage or developing root rot | Stop automatic watering, inspect drainage and examine the roots |
| Leaves droop and the pot is very light | Underwatering | Water thoroughly, drain and review how quickly the mix is drying |
| Brown crispy tips or margins | Dry air, irregular watering or mineral accumulation | Improve humidity, stabilize moisture and use lower-mineral water |
| Bleached tan patches on the window side | Direct sun scorch | Filter the light; damaged tissue will not recover |
| Black soft areas after a cold night | Cold injury | Move the plant to stable warmth and remove tissue only after the damage stops spreading |
| Healthy foliage but no flowers | Usually insufficient light, low temperature or inactive roots | Correct the environment before increasing fertilizer |
| Water-soaked brown lesions near leaf margins | Possible bacterial blight or leaf spot | Isolate the plant, keep foliage dry and sterilize tools |
| Fine pale stippling and delicate webbing | Spider mites | Isolate, wash the leaves and begin a labelled mite-control treatment |
| Cottony clusters or sticky residue | Mealybugs or scale insects | Remove visible pests and treat all leaf joints and undersides |
| Silvery streaks and distorted flowers | Thrips | Isolate the plant, remove heavily damaged flowers and use an appropriate labelled treatment |
Root rot
Root rot develops when the root zone remains saturated and oxygen levels fall. Diseased roots become brown or black, soft, hollow or easily detached. The plant may wilt despite wet soil because damaged roots can no longer transport water.
Compare a suspected case with these root rot signs, then act promptly:
- Remove the Anthurium from its pot and discard the wet, decomposed mix.
- Rinse or gently clear enough substrate to see the root system.
- Cut away only clearly dead or mushy roots with disinfected scissors.
- Use a clean pot appropriate to the reduced root system.
- Repot in fresh bark-based, sharply draining mix.
- Keep the plant warm and in bright indirect light.
- Water according to the smaller surviving root system, not according to the previous schedule.
If almost all roots are lost but the stem remains firm, a healthy stem section with a node or aerial root may sometimes be rerooted. A soft, foul-smelling crown indicates a much poorer chance of recovery.
Bacterial leaf problems
Some Anthurium bacterial diseases enter through wounds or wet leaf margins and can spread through splashing water, contaminated tools and contact between plants. Warning signs include water-soaked lesions, yellow halos, bronzed tissue, darkened veins or wilting despite adequate moisture.
Isolate a suspicious plant immediately. Avoid overhead watering and misting, improve air movement, sterilize tools after every cut and discard severely affected material. Do not compost a plant with a rapidly spreading systemic infection.
Spider mites, mealybugs, scale and thrips
Inspect new plants before adding them to a collection. Spider mites cause pale stippling and fine webbing; mealybugs resemble small cottony clusters; scale insects look like fixed brown or pale bumps; and thrips leave silvery scars, dark waste spots and distorted new growth.
A sensible first response is to isolate the plant, wash or wipe the foliage, remove heavily infested flowers, and apply a houseplant product specifically labelled for the pest and plant type. Follow label intervals rather than spraying once and assuming the problem is solved. The eggs or hidden stages of many pests survive the first treatment.
For a persistent mite infestation, use a structured spider mite treatment and inspect nearby plants as well. Avoid using concentrated kitchen detergent or untested homemade mixtures, which may burn Anthurium leaves.
Treat the plant and the growing conditions together. Spider mites favour hot, dry environments, while root diseases favour stagnant, saturated media. Killing the visible pest without correcting the underlying environment often leads to another outbreak.
Is Anthurium toxic to people and pets?
All parts of Anthurium should be treated as non-edible. The plant contains irritating calcium oxalate crystals. Chewing or swallowing plant tissue can irritate the mouth and digestive tract, while sap may irritate sensitive skin and eyes.
- Keep the pot beyond the reach of children, cats, dogs and other pets that chew plants.
- Wear gloves when dividing, pruning or handling damaged roots.
- Wash hands and clean tools after working with the plant.
- Do not place cut leaves or discarded roots where pets can reach them.
- Seek prompt professional medical or veterinary advice if plant material is chewed or swallowed.
A high shelf is suitable only if falling leaves and flower stems cannot land within reach. Anthurium is not a good choice for an accessible floor display in a home with a persistent plant-chewing pet.
Popular questions about Anthurium care
1. How long does one Anthurium flower last?
An individual colourful spathe commonly remains attractive for about six weeks. Longevity depends on cultivar, temperature, watering consistency and light. Excess heat, very dry air and severe drought can shorten the display.
2. Will a store-bought Anthurium flower again?
Yes. Flowering types can rebloom repeatedly after adapting to the home. Provide bright indirect light, temperatures above 18°C (65°F), an airy root zone and light feeding during active growth. Do not expect the next flower immediately after the last store-grown display fades.
3. Why is a red or pink Anthurium flower turning green?
A spathe may turn green naturally as it ages. Green colour can also be part of the cultivar or become more noticeable under lower light. If only old spathes change colour while new growth remains healthy, no treatment is needed.
4. Why are the new flowers smaller than the old ones?
The plant may still be adapting from greenhouse to household conditions. Smaller spathes can also indicate weaker light, reduced winter growth, root crowding or inconsistent nutrition. Evaluate new leaf size as well: progressively smaller leaves usually point to a broader growing-condition problem.
5. Should Anthurium aerial roots be cut off?
Healthy aerial roots should normally remain. They can be directed onto the potting mix or covered lightly during repotting. Remove a root only when it is dead, damaged or interfering with treatment of diseased tissue.
6. Can Anthurium grow permanently in water?
A stem cutting can root in water, and an established plant can be converted to a managed hydroponic system. However, a vase of unchanged water is not a complete long-term growing method. Roots still need oxygen, nutrients, clean water and regular maintenance. An airy bark-based substrate is simpler for most homes.
7. Are coffee grounds good for Anthurium?
Adding used coffee grounds directly to the pot is not recommended. They can compact the surface, encourage mould and provide an unpredictable nutrient concentration. Use a measured houseplant or orchid fertilizer instead.
8. Can Anthurium live in a bathroom without a window?
No. Humidity cannot replace light. A windowless bathroom is suitable only when the plant receives adequate artificial grow lighting. Without it, growth will weaken and flowering will stop.
9. Why are water droplets appearing on the leaf tips?
The plant may be releasing excess moisture through a natural process called guttation, particularly when the root zone is wet and humidity is high. Occasional clear droplets are not usually harmful. Persistent wetness combined with brown lesions, yellow halos or rapidly spreading damage requires closer disease inspection.
10. Can Anthurium be grown in a self-watering pot?
It can, but only when the wick, reservoir and potting mix do not keep the roots permanently saturated. Use a coarse substrate, allow some air to return to the root zone and monitor the mix directly. Conventional top watering is easier to control for growers who are still learning the plant’s moisture needs.
11. Can a cold-damaged Anthurium recover?
Recovery is possible if the crown and most roots remain firm. Move the plant into stable warmth, keep it out of direct sun and avoid overwatering while damaged leaves use little moisture. Wait until the full extent of injury is visible before removing blackened tissue with disinfected scissors.
A well-grown Anthurium is not maintained by one special product or rigid weekly schedule. Its long-term health comes from a stable combination of bright filtered light, warm temperatures, breathable substrate and watering based on actual root-zone moisture. Once those conditions are balanced, repeated flowering becomes a natural result of healthy growth rather than a separate problem to solve.