Drought-Tolerant Plants for Full Sun

 Learn why drought-tolerant plants thrive in full sun, the key adaptations that cut water loss, and the best species for dry, sunny sites. It also covers soil prep, how to water while plants establish, mulching to hold moisture, and long-term care in arid conditions.
Pick sun-loving plants that tolerate dry spells to save time, water, and frustration in hot, exposed beds. This guide highlights dependable choices that stay attractive with minimal irrigation once established, along with practical planting and care tips to encourage deep roots, keep soil cooler, reduce evaporation, and help your garden stay resilient through long stretches of summer heat.
Why drought-tolerant plants handle sun best

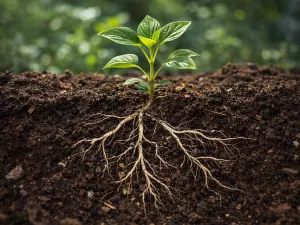
Plants adapted to dry climates don’t just “tolerate” bright exposure—they’re built to keep functioning when heat and intense light would push other plants into stress. Woody species such as Acacia Farnesiana show how structural traits and deep rooting allow plants to thrive where moisture is limited. In full sun, the main challenge isn’t the light itself; it’s the rapid water loss and leaf overheating that come with it. Drought-wise species have structural and physiological tools that slow dehydration, protect tissues, and keep photosynthesis going with less moisture.
Many of these adaptations are easy to spot once you know what to look for. They’re the same traits that help a plant ride out a hot, windy afternoon without wilting, even when the soil surface dries quickly.
- Waxy or reflective leaf surfaces: A thicker cuticle (the “skin” of the leaf) reduces evaporation, while silvery hairs or pale foliage can reflect sunlight and lower leaf temperature.
- Smaller, narrower, or divided leaves: Less leaf area means less surface for water to escape. Fine foliage also sheds heat faster than broad, thin leaves.
- Succulent tissues: Fleshy leaves or stems store water like a reservoir, buffering the plant through dry spells and midday heat spikes.
- Deep or wide-reaching roots: Some send roots down to find moisture; others spread roots near the surface to capture brief rains. Either way, they’re efficient at scavenging water.
- Stomata control: Many species close leaf pores during the hottest part of the day to reduce transpiration, reopening when conditions are cooler.
- CAM photosynthesis in some plants: Certain succulents take in carbon dioxide at night and use it during the day, cutting daytime water loss dramatically.
Heat management is a big part of the story. When leaves overheat, photosynthesis slows and tissues can scorch. Drought-adapted plants often have leaf shapes, coatings, or orientations that reduce direct sun load during peak hours, plus internal chemistry that helps protect cells from sun-driven oxidative stress.
In a garden, these traits translate into practical benefits: fewer midday collapses, less leaf burn, and steadier growth with infrequent irrigation. You’ll still get the best results by matching the plant to your site—full sun with fast-draining soil is ideal for many dry-climate choices, while heavy clay may need amendment or raised planting to prevent roots from staying wet after a storm.
| Adaptation | How it helps in full sun | What you might notice |
|---|---|---|
| Waxy cuticle / glossy leaves | Slows evaporation and reduces heat stress | Leaves feel thick, leathery, or shiny |
| Leaf hairs or silvery foliage | Reflects light and creates a cooler boundary layer | Gray-green color; soft or fuzzy texture |
| Reduced leaf area | Lowers transpiration demand during hot periods | Needle-like, narrow, or finely cut leaves |
| Water storage (succulence) | Provides internal reserves when soil dries quickly | Plump leaves or stems; slow wilting |
| Efficient root systems | Finds moisture deeper down or captures brief rainfall | Strong establishment after the first season |
| Night CO₂ uptake (CAM) in some species | Reduces daytime water loss while maintaining growth | Often seen in many succulents and cacti |
Even drought-tolerant options need some help while establishing. A deep soak every 7–14 days in the first growing season is common in hot climates (adjust for your soil and weather), and a 5–8 cm (2–3 in) layer of mulch can keep roots cooler and reduce evaporation—just leave a small gap around the crown to prevent rot.
Adaptations that reduce water loss

Plants that thrive in hot, exposed sites often succeed by slowing evaporation and limiting how much moisture escapes through their leaves. These traits don’t “create” water, but they help a plant stretch what’s available—especially during heat waves, wind, and long gaps between irrigation.
- Waxy or glossy leaf coatings (cuticles): A thicker cuticle acts like a seal, reducing surface evaporation. You’ll notice this on many sun-tough shrubs and perennials with shiny, leathery foliage.
- Small, narrow, or needle-like leaves: Less leaf area means fewer pores releasing moisture. Fine-textured foliage can look delicate, but it’s often a practical response to intense sun and dry air.
- Leaf hairs (pubescence): A fuzzy surface traps a thin layer of still air, which slows transpiration and can reflect sunlight. Silver-gray leaves often combine hairs with light color to reduce heat load.
- Sun-reflecting color and texture: Pale, bluish, or silvery leaves absorb less radiation than dark green ones, keeping tissues cooler and reducing water demand.
- Stomata that “play defense”: Many drought-adapted plants close stomata during the hottest part of the day, or open them more at night (common in succulents using CAM photosynthesis). This cuts daytime water loss when evaporation is highest.
- Succulent leaves or stems: Water is stored in fleshy tissues, letting the plant ride out dry periods. These plants often pair storage with fewer stomata and thicker skins.
- Leaf rolling, folding, or vertical orientation: Some grasses and perennials curl or angle leaves to reduce sun exposure at midday, lowering heat stress and moisture loss without stopping photosynthesis entirely.
- Dormancy or seasonal dieback: Certain full-sun perennials avoid the worst conditions by slowing growth or going semi-dormant in peak summer drought, then rebounding when moisture returns.
- Deep or wide-reaching roots: Taproots can reach deeper reserves, while fibrous roots spread to capture brief rainfall. Either strategy improves access to water so the plant doesn’t have to “leak” as much through foliage.
When you’re choosing plants for a bright, dry spot, look for visual clues like leathery leaves, a silvery cast, or a fuzzy texture. Pairing those traits with good planting practices—mulch at 5–8 cm (2–3 in) and watering deeply but less often—helps these natural defenses work the way they’re meant to.
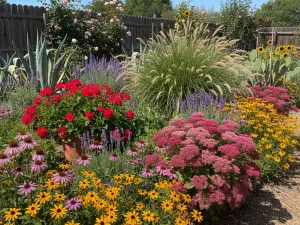
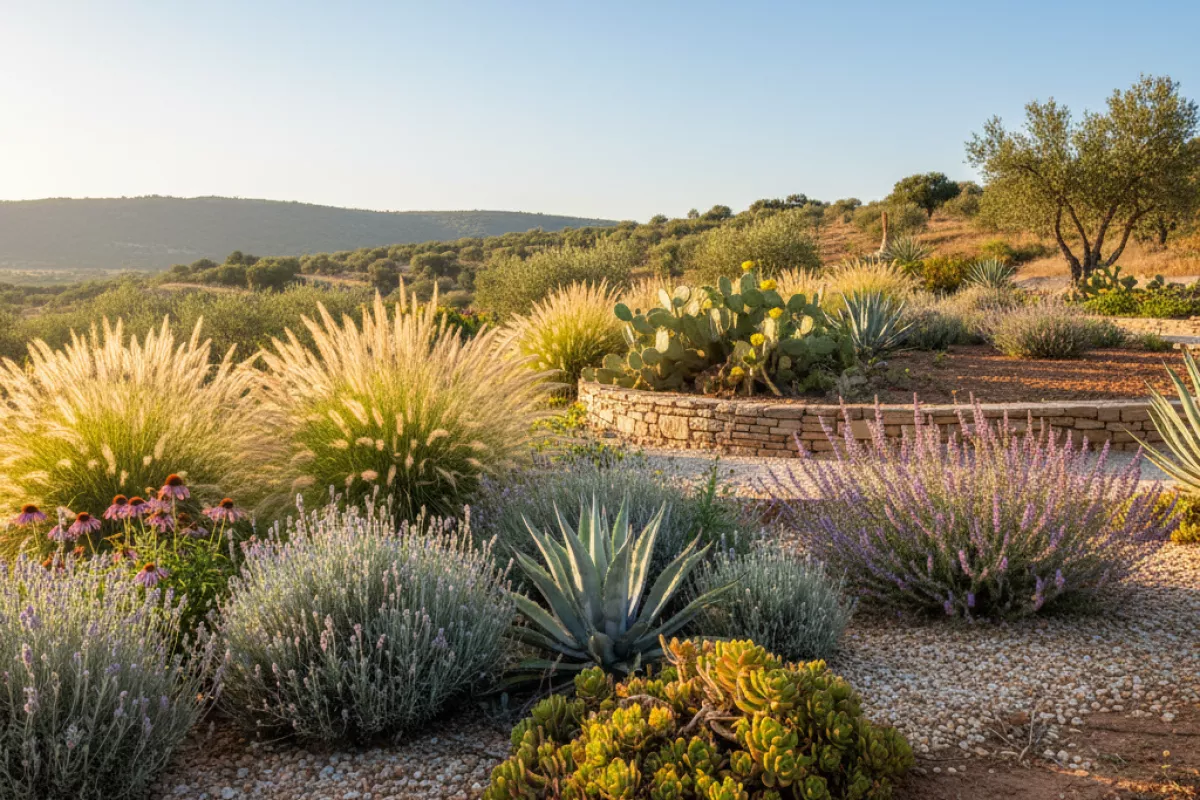
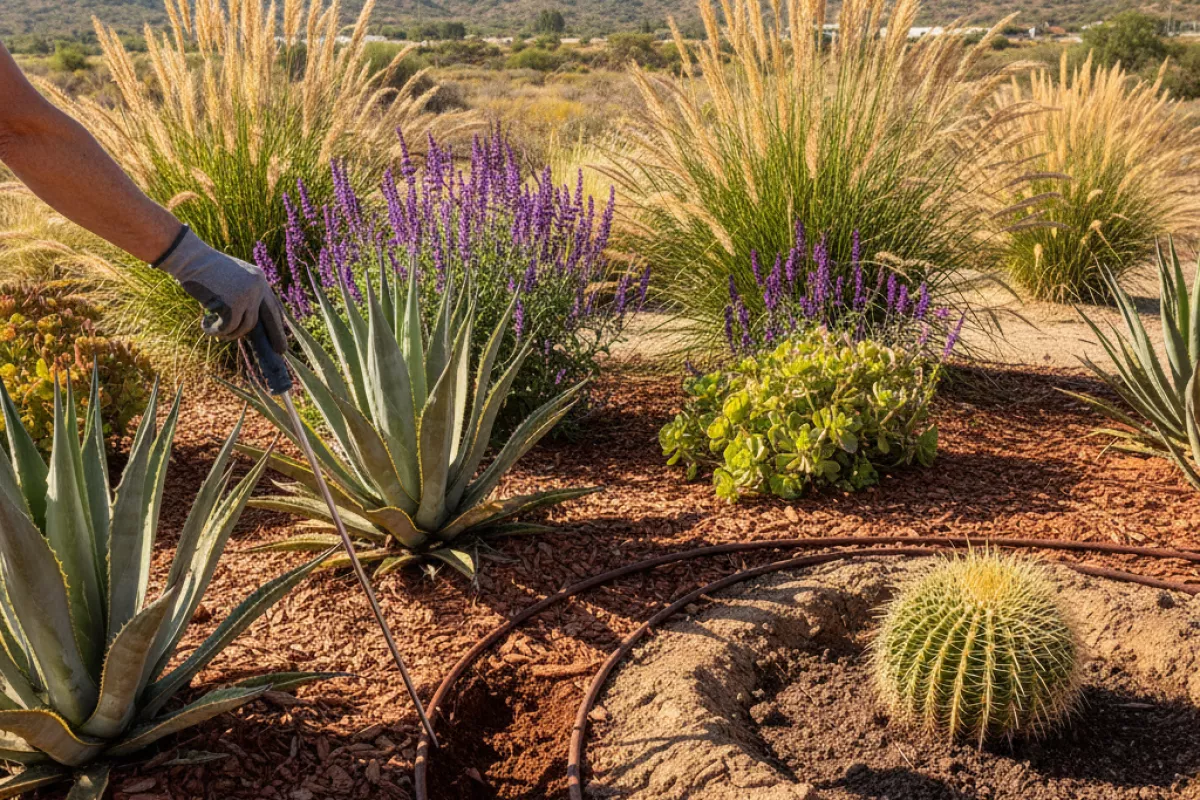
Best species for dry sunny areas
Plants that handle intense light and infrequent watering usually share a few traits: small or silvery leaves that lose less moisture, deep roots, or fleshy stems that store water. The options below are reliable picks for hot exposures like south- or west-facing beds, gravel gardens, and hellstrips where soil dries quickly, especially when you focus on best low-growing sun varieties that stay compact without frequent irrigation.
| Plant | Why it works in full sun with low water | Typical mature size | Notes for success |
|---|---|---|---|
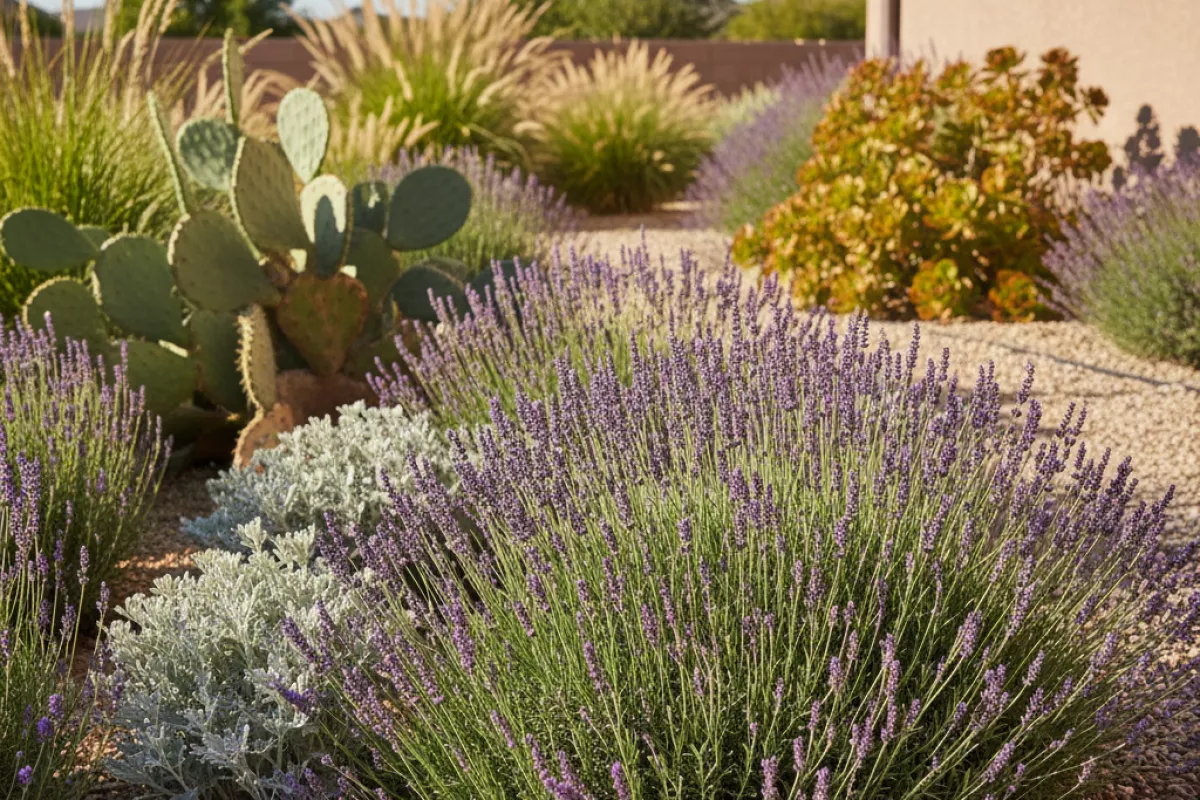
| Lavender (Lavandula spp.) | Aromatic, narrow foliage reduces water loss; thrives in heat | 45–90 cm (18–36 in) tall | Needs sharp drainage; avoid rich, wet soil and heavy mulch against the crown |
| Russian sage (Salvia yangii) | Silvery leaves reflect sun; tough once established | 90–150 cm (36–60 in) tall | Cut back in late winter; give space for airflow to prevent flopping |
| Yarrow (Achillea millefolium) | Feathery foliage and deep roots cope with dry spells | 45–75 cm (18–30 in) tall | Deadhead to extend bloom; can spread—edge or divide every 2–3 years |
| Blanket flower (Gaillardia spp.) | Handles heat and lean soils; keeps flowering with minimal water | 30–60 cm (12–24 in) tall | Best in sandy or gravelly soil; avoid over-fertilizing |
| Stonecrop sedum (Hylotelephium/Sedum spp.) | Succulent leaves store moisture; tolerates reflected heat | 15–60 cm (6–24 in) tall | Don’t overwater; pinch back in late spring for sturdier stems |
| Agave (Agave spp.) | Water-storing rosettes thrive in sun and drought | 30–180 cm (12–72 in) wide | Protect from prolonged freezes below -6°C (21°F); watch for sharp spines |
| Prickly pear cactus (Opuntia spp.) | Pads store water; excellent for hot, exposed sites | 30–150 cm (12–60 in) tall | Use gloves for handling; needs very fast-draining soil |
| California poppy (Eschscholzia californica) | Self-sows and blooms in dry conditions once established | 20–45 cm (8–18 in) tall | Let soil dry between waterings; too much irrigation shortens lifespan |
| Rosemary (Salvia rosmarinus) | Needle-like leaves reduce transpiration; loves heat | 60–150 cm (24–60 in) tall | Winter hardiness varies; in cold areas, choose a sheltered spot or grow in a pot |
| Red yucca (Hesperaloe parviflora) | Arching leaves and deep roots tolerate long dry periods | 60–120 cm (24–48 in) tall | Remove spent flower stalks; performs well in gravel mulch |
In front-yard plantings, success often comes from layering drought-tolerant plants by height and texture rather than spacing everything evenly. Studying best combinations for layered design helps you pair deep-rooted anchors with low, sun-hardy fillers so the bed looks full while staying water-efficient.
If you’re planting into compacted ground, loosen the top 20–30 cm (8–12 in) and mix in mineral material (grit or coarse sand) rather than lots of compost; overly rich soil can make sun-loving, low-water plants grow soft and short-lived. After planting, water deeply for the first 2–4 weeks, then taper to occasional soakings so roots chase moisture downward.
Soil preparation for drought plants
Start by making sure water can move through the root zone quickly. Most sun-loving, low-water plants fail in ground that stays soggy after irrigation or a storm, so the goal is drainage with enough texture to hold a little moisture and nutrients.
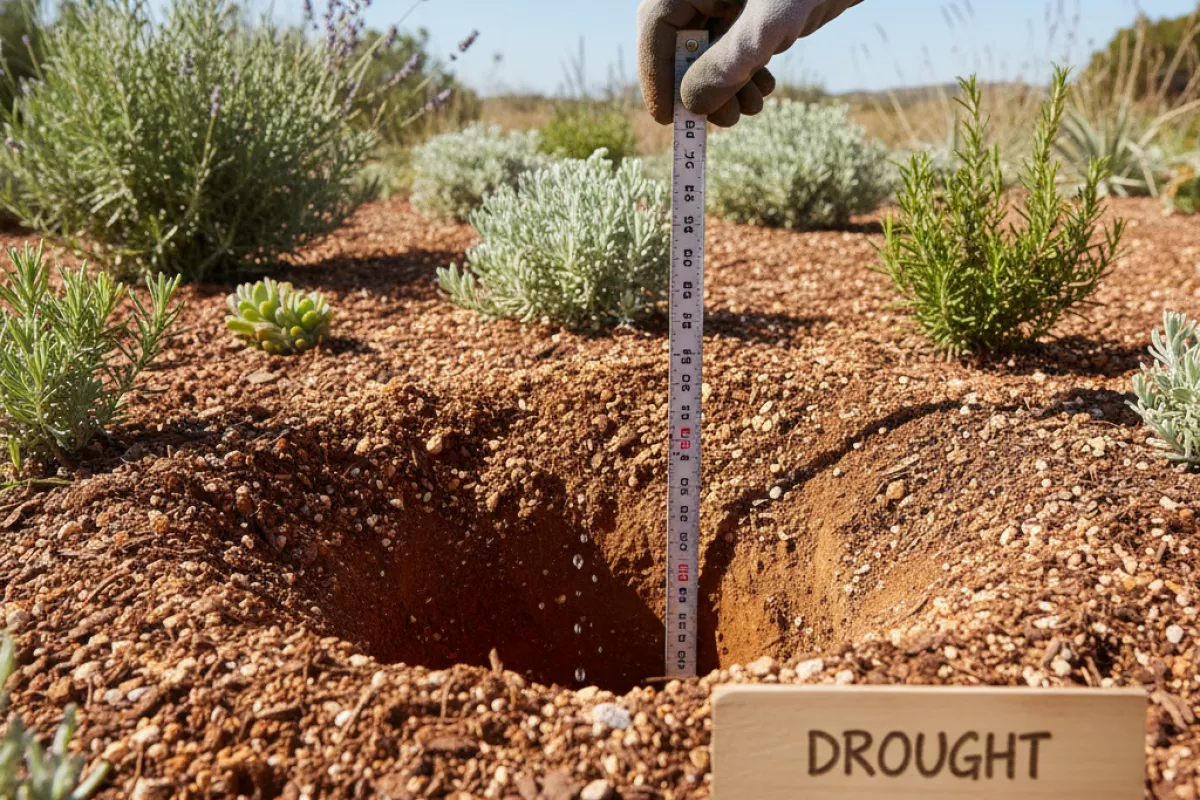
A simple test helps you decide what to fix: dig a hole about 30 cm (12 in) deep, fill it with water, and see how long it takes to drain. If it still has water after 4 hours, your soil is likely too slow-draining for many xeric choices unless you amend or change the planting method.
- Loosen deeply, don’t just scratch the surface. Break up compaction 20–30 cm (8–12 in) down so roots can explore. In tight clay, use a garden fork to crack and lift the soil without turning it into powder.
- Use the right amendment for your soil type. In heavy clay, mix in coarse mineral material (washed grit or small gravel) to open pore space; in very sandy ground, add compost to increase water-holding without making it boggy.
- Avoid “bathtub” planting holes. In clay, a wide, amended hole surrounded by unamended soil can trap water. Either amend a broader area or plant slightly high so excess moisture sheds away from the crown.
- Keep crowns dry. Many drought performers rot when mulch or soil sits against the base. Leave a small gap around the stem and use gravel mulch near the crown if rot has been an issue.
- Match mulch to the plant style. Organic mulch cools soil and reduces evaporation but can hold moisture against stems; gravel mulch reflects heat and drains fast, which suits many Mediterranean and desert species.
- Check pH only if plants struggle. Most tough sun plants tolerate a range, but chlorosis (yellowing) can signal pH-related nutrient lockout. Adjust gradually rather than chasing a perfect number.
| Soil situation | What to do | Why it helps drought-tolerant plants |
|---|---|---|
| Heavy clay that stays wet | Plant 5–10 cm (2–4 in) high on a gentle mound; incorporate coarse grit over a broad area | Reduces root suffocation and crown rot by improving oxygen and shedding excess water |
| Compacted soil (hardpan) | Loosen 20–30 cm (8–12 in) deep; avoid working when saturated | Encourages deeper rooting, which improves heat and dry-spell resilience |
| Very sandy soil that dries instantly | Add 2.5–5 cm (1–2 in) compost and mix into the top 15–20 cm (6–8 in) | Increases moisture and nutrient retention without turning the bed into a sponge |
| Rocky, fast-draining soil | Keep amendments light; add a thin compost layer 1–2.5 cm (0.5–1 in) if needed | Maintains drainage while giving young plants enough nutrition to establish |
| Sloped sites in full sun | Create shallow basins or micro-terraces; mulch to reduce runoff | Captures irrigation and rain where roots can use it instead of losing it downhill |
Once planted, water deeply but less often during establishment so roots chase moisture downward. After the first season, many full-sun drought plants do better with occasional soakings than frequent light watering, especially in well-prepared, free-draining beds.
Watering strategies for establishment
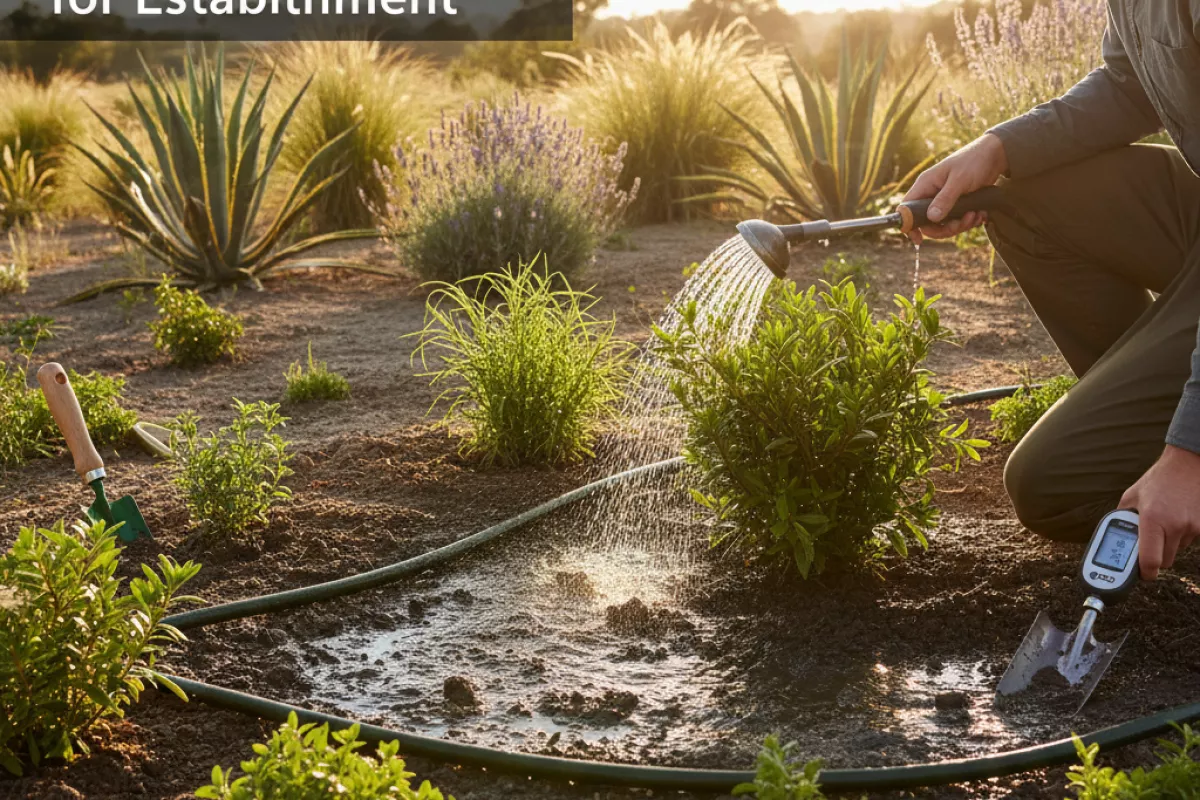
New drought-wise plants still need consistent moisture while roots expand into surrounding soil. The goal is deep, less frequent watering, then tapering down as growth picks up. Frequent light sprinkling encourages shallow roots that dry out fast in full sun.
- Water at planting, then soak the root zone.
Right after planting, irrigate slowly until the soil is wet to roughly 15–20 cm (6–8 in) deep for small perennials and 25–30 cm (10–12 in) for shrubs. This settles soil around roots and removes air pockets.
- Use a simple “soak, then wait” rhythm.
Let the top few centimeters dry between waterings, then soak again. In hot, windy weather, that might mean every 2–4 days; in milder conditions, every 5–10 days. Adjust to your soil: sandy beds need water more often, while clay holds moisture longer.
- Taper irrigation in stages instead of stopping abruptly.
After you see fresh growth, extend the interval between deep waterings over 3–6 weeks. For example, move from twice weekly to weekly, then to every 10–14 days, and finally to “only during prolonged dry spells” once established.
- Check depth, not just surface dryness.
Push a finger or trowel into the soil. If it’s dry at 5 cm (2 in) but still cool and slightly damp deeper down, wait. If it’s dry and dusty down to 10 cm (4 in), it’s time to irrigate.
- Water the soil, not the leaves.
Drip lines, soaker hoses, or a slow trickle at the base put moisture where roots need it and reduce evaporation. Morning watering also limits loss to midday heat.
- Mulch to stretch each watering.
Apply 5–8 cm (2–3 in) of mulch over the root area, keeping it 5 cm (2 in) away from stems or crowns. Mulch moderates soil temperature and slows evaporation, which matters most during the first summer.
- Watch for “new plant stress” signals.
Midday wilting that recovers by evening can be normal in heat; persistent drooping at dawn often means the root zone is too dry. Yellowing with soggy soil suggests overwatering or poor drainage—reduce frequency and make sure water isn’t pooling.
If you’re unsure, err toward fewer, deeper irrigations rather than daily splashes. Once roots are established, many full-sun, low-water plants perform better with occasional thorough soaking than with constant moisture.
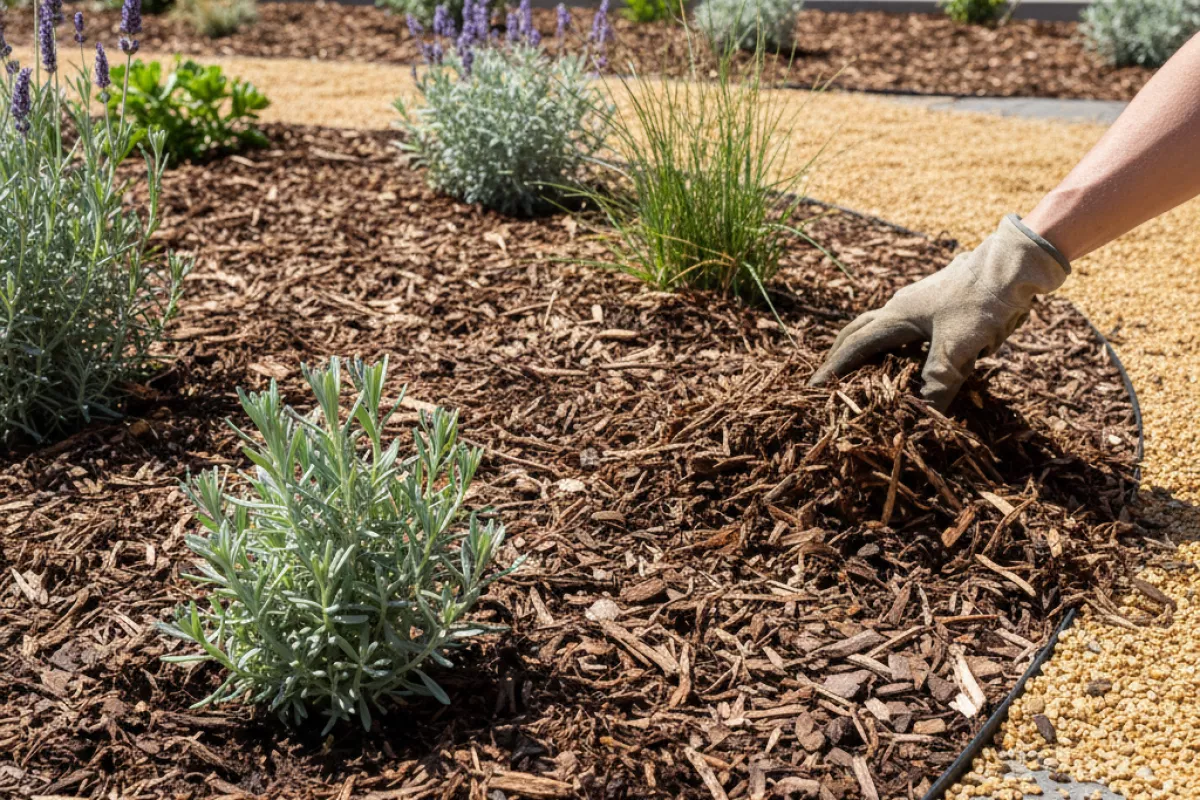
Mulching for moisture retention
A surface layer of organic or mineral material slows evaporation, buffers soil temperature, and helps full-sun plantings ride out longer dry spells. It also reduces crusting on bare soil, so irrigation and light rains soak in instead of running off.
- Apply the right depth: Aim for 5–8 cm (2–3 in) of organic mulch in beds. For gravel or decomposed granite, 3–5 cm (1–2 in) is usually enough to shade the soil without creating a heat trap.
- Keep stems and crowns clear: Leave a gap of 5–8 cm (2–3 in) around the base of shrubs and perennials to prevent rot and discourage pests. For plants with a visible crown (like many succulents), keep mulch off the crown entirely.
- Water first, then cover: Wet the root zone thoroughly before adding a fresh layer. Mulch locks in existing moisture; it can’t fix dry soil underneath.
- Match the material to the plant style: Wood chips and shredded bark work well around shrubs and Mediterranean herbs; gravel pairs nicely with cacti, agaves, and other xeric plants that prefer drier crowns.
- Refresh, don’t pile on: Top up when the layer breaks down to about half its original thickness. Repeatedly adding new material without checking depth can smother shallow roots and reduce oxygen.
- Watch for wind and slope: In exposed sites, use chunkier chips (less likely to blow) or a light tack-down watering. On slopes, a coarser texture helps resist washout and keeps the cover where it’s needed.
| Mulch type | Best use in full sun | Moisture and heat notes | Common cautions |
|---|---|---|---|
| Wood chips | Shrubs, trees, mixed drought-tolerant borders | Excellent at reducing evaporation; moderates temperature swings | Keep off trunks/crowns; can temporarily tie up nitrogen at the surface if mixed into soil |
| Shredded bark | Perennial beds, pathways between plantings | Good moisture conservation; knits together and resists movement | Can form a dense mat if applied too thickly; avoid burying low-growing plants |
| Compost (as a top layer) | Improving sandy or depleted soils under a protective cover | Adds water-holding capacity but dries faster if left exposed | Use as a thin layer 1–2 cm (0.4–0.8 in) and cover with chips to prevent crusting |
| Gravel / crushed stone | Succulents, cacti, rock gardens, very windy sites | Reduces surface evaporation; can increase reflected heat near walls | May warm soil in extreme heat; keep away from tender foliage and consider shade-tolerant groundcovers nearby |
| Pine needles | Acid-loving plants, under open-canopy shrubs | Light, airy layer that slows evaporation without compacting | Can drift in wind; needs occasional replenishing |
If you’re irrigating, a simple check helps: pull back the cover and feel the soil 5–10 cm (2–4 in) down. If it’s still cool and slightly damp, you can wait; if it’s dry at that depth, water deeply and then replace the layer so the moisture stays where roots can use it.
Long-term care in arid conditions
Keep drought-tolerant plants thriving by focusing on root depth, soil moisture retention, and stress signals rather than frequent watering. Understanding how often plants actually need water helps prevent shallow irrigation, overly rich amendments, and crowns staying wet while the surrounding soil stays dry.
- Water deeply, then pause. Aim to moisten the root zone, not just the surface. For new plantings, soak to roughly 20–30 cm (8–12 in) deep; for established shrubs, target 30–45 cm (12–18 in). Let the top 5–8 cm (2–3 in) dry before watering again, adjusting for heat and wind.
- Use a “tapered” schedule for establishment. In the first 2–4 weeks, water more often to eliminate air pockets and encourage roots to push outward. Over the next 6–12 weeks, increase the interval between soakings so plants learn to rely on deeper moisture. After that, irrigate only during extended dry spells or visible stress.
- Mulch for cooler soil and slower evaporation. Apply 5–8 cm (2–3 in) of mulch over the root area, keeping it 5–10 cm (2–4 in) away from stems and crowns to prevent rot. In very windy sites, heavier mulch (like gravel) can stay put better than light bark.
- Mind the soil texture before adding compost. In sandy soil, a modest layer of compost can improve water-holding. In clay, too much organic matter can create a “bathtub” effect that traps water around roots. If drainage is slow, prioritize grading, planting on slight mounds, or choosing species that tolerate heavier soils.
- Fertilize lightly, if at all. High nitrogen pushes soft growth that needs more water and scorches more easily in intense sun. If growth is clearly weak, use a low-nitrogen option once in spring, following label rates, and water it in thoroughly.
- Prune with heat in mind. Avoid heavy pruning right before peak summer heat because it exposes inner stems to sunburn. If shaping is needed, do it in mild weather; in hot climates, leave some canopy to shade the plant’s own structure.
- Watch for stress cues and respond precisely. Midday wilting that recovers by evening can be normal in extreme heat. Persistent morning wilt, dull/gray foliage, leaf curl, or crispy edges usually means the root zone is too dry. Yellowing with soft stems can signal overwatering or poor drainage.
- Protect the “crown” and keep emitters in the right spot. Drip lines placed right at the base can keep crowns wet while roots stay shallow. Position emitters near the dripline (outer edge of the canopy) and expand outward as the plant grows.
| Situation in full sun | Likely cause | What to do next |
|---|---|---|
| Soil surface looks wet, plant still droops | Water isn’t reaching deeper roots | Switch to slower, longer soakings; check moisture at 15–20 cm (6–8 in) depth before stopping |
| Leaves scorch on the sun-facing side | Heat + wind stress; sudden exposure after pruning | Provide temporary shade cloth during heat waves; avoid major pruning until cooler weather |
| Yellow leaves and weak growth | Overwatering or poor drainage (often in clay) | Increase intervals; improve drainage or plant on a 10–15 cm (4–6 in) mound; keep mulch off the crown |
| Lots of new growth that wilts quickly | Too much fertilizer or overly rich soil | Stop feeding; water deeply but less often; consider removing excess compost from the planting zone |
| Cracked soil and shrinking mulch ring | Evaporation and soil contraction in high heat | Rebuild mulch to 5–8 cm (2–3 in) depth; widen the mulched area to match the canopy spread |
As plants mature, the goal is consistency without pampering: fewer, deeper irrigations; cooler soil under mulch; and enough breathing room around stems. When in doubt, check moisture below the surface before adding water—what looks dry on top can be comfortably damp at 15 cm (6 in), and that’s where drought-adapted roots prefer to work.