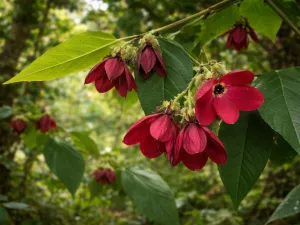
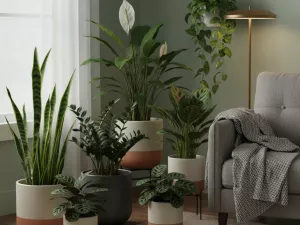
When Yellow Leaves Signal Root Rot Problems

 Learn why yellow leaves can signal root rot, how rot develops in soil, and the early symptoms to catch. It explains leaf color patterns tied to root decay, soil conditions that trigger it, how to confirm rot safely, quick rescue steps, and preventive care.
Yellowing leaves can be an early sign that roots are struggling with rot, often caused by overwatering or poor drainage. Since the damage begins below the soil, it is easy to mistake it for nutrient deficiency or heat stress. A few quick checks, like feeling for soggy soil and inspecting roots, can help you respond quickly, save healthy roots, and prevent losing the plant.
Why yellow leaves can indicate root rot
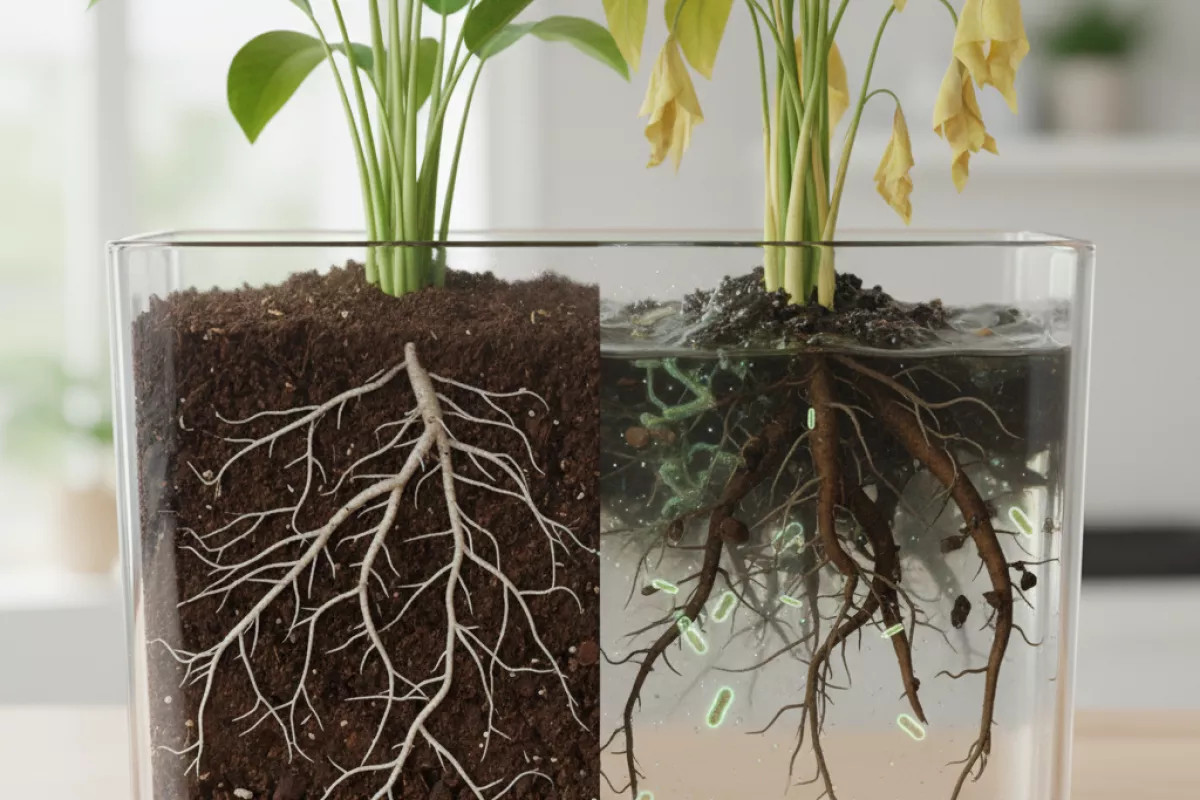
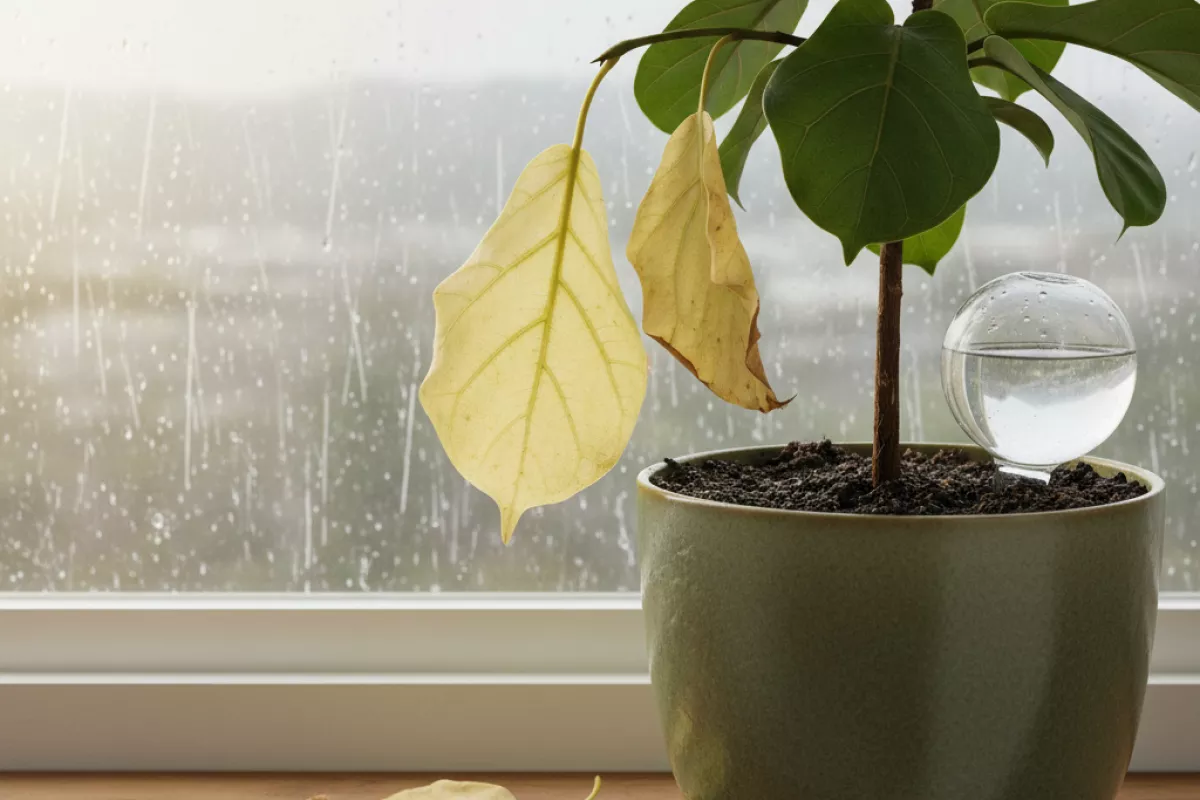
Yellowing often shows up when roots can’t do their job. With rot, fine feeder roots collapse first, so the plant struggles to take up water, oxygen, and nutrients even if the potting mix looks wet. The result is a “thirsty while sitting in water” situation: leaves lose chlorophyll, fade from green to pale yellow, and may drop.
It helps to think of it as a supply-chain problem. Healthy roots move water and minerals upward; damaged roots leak, suffocate, and stop transporting efficiently. That stress triggers older leaves to yellow first as the plant reallocates resources to newer growth, though severe cases can yellow the whole canopy quickly.
- Oxygen deprivation: Overly wet soil pushes out air. Without oxygen, roots can’t respire, so nutrient uptake stalls and leaves turn yellow even before roots look obviously mushy.
- Impaired water uptake: Rotting roots can’t pull water into the plant, so foliage may yellow while also looking limp or slightly curled, especially during the warm part of the day.
- Nutrient lockout and deficiency signals: When roots are compromised, the plant can’t absorb nitrogen, magnesium, and other mobile nutrients well. Yellowing between veins or uniform paling can mimic a fertilizer issue, but adding more feed won’t fix the underlying root damage.
- Toxin and pathogen effects: Fungal and bacterial activity in decaying roots can produce byproducts that further stress the plant, speeding up chlorosis and leaf drop.
Not every yellow leaf means a rotting root system, but the pattern matters. If you want a broader breakdown beyond root rot, why plant leaves turn yellow is a useful reference for separating moisture stress from light, temperature, and nutrient-related causes. If yellowing is paired with consistently soggy mix, a pot that stays heavy for many days, a sour smell, or stems that feel soft near the soil line, it’s more likely a below-the-surface problem than normal aging or a mild nutrient shortfall.
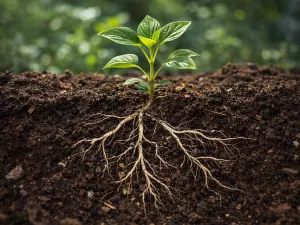
How root rot develops in soil
It usually starts when roots sit in a mix that stays wet for too long. In waterlogged soil, the air pockets that normally hold oxygen fill with water, and roots can’t “breathe” properly. Stressed roots lose their protective outer layers, which makes them easy targets for microbes that are already present in most potting mixes and garden beds.
Once oxygen is limited, a chain reaction kicks in: root cells weaken, fine feeder roots die back first, and the plant’s water and nutrient uptake becomes erratic. That disruption affects how roots absorb nutrients from soil, which is why yellowing can show up even though the soil looks damp—damaged roots can’t move moisture and minerals upward efficiently.
- Excess moisture lingers because of overwatering, compacted soil, or a container with poor drainage holes.
- Oxygen levels drop in the root zone, slowing normal root function and encouraging anaerobic conditions.
- Root tissue breaks down, especially tender tips and root hairs; small injuries also occur during repotting or from fungus gnats and other pests.
- Opportunistic pathogens multiply (commonly water molds like Pythium and Phytophthora, plus some fungi), feeding on weakened tissue.
- Decay spreads upward from fine roots to thicker roots and, in severe cases, into the crown, leading to persistent wilting and leaf drop.
Conditions that make this more likely are surprisingly ordinary: a potting mix that has broken down into fine particles, heavy clay that drains slowly, or a saucer that keeps the base of the pot sitting in runoff. Warm temperatures can speed microbial growth, while cool, dim conditions slow evaporation—either way, the common denominator is roots staying wet without enough airflow.
| Soil condition | What’s happening around the roots | Why it leads to rot |
|---|---|---|
| Compacted or fine-textured mix | Air spaces collapse; water drains slowly | Low oxygen stresses roots and favors pathogens |
| Pot lacks drainage or holes are blocked | Water pools at the bottom of the container | Roots remain saturated and begin to die back |
| Frequent watering “just in case” | Soil never cycles through slight drying | Roots don’t recover; microbes have steady moisture |
| Cold, low-light placement | Evaporation and plant uptake slow down | Moisture persists long enough for decay to spread |
A helpful way to think about it: rot isn’t caused by water alone, but by water plus time plus low oxygen. If the mix can drain and re-aerate within a reasonable window, roots usually stay resilient. When it can’t, even a healthy plant can slide from mild stress into a full root rot problem.
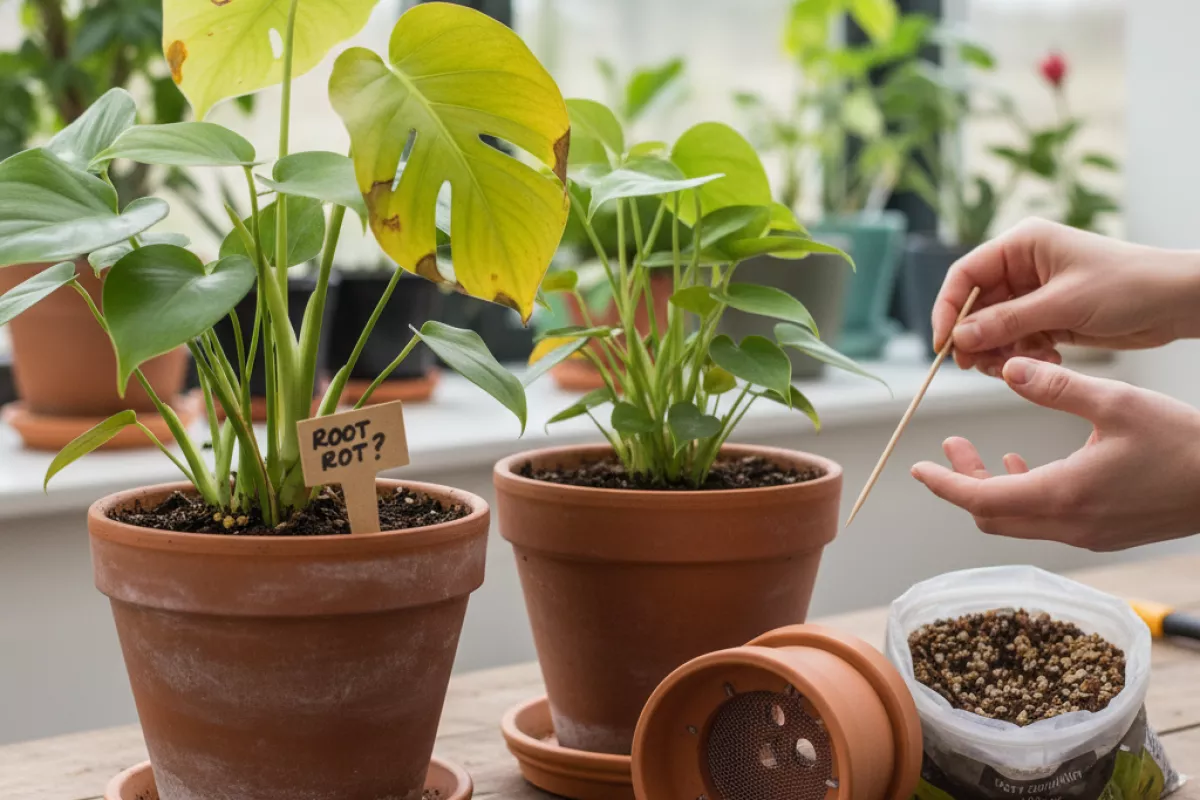
Early symptoms before severe damage
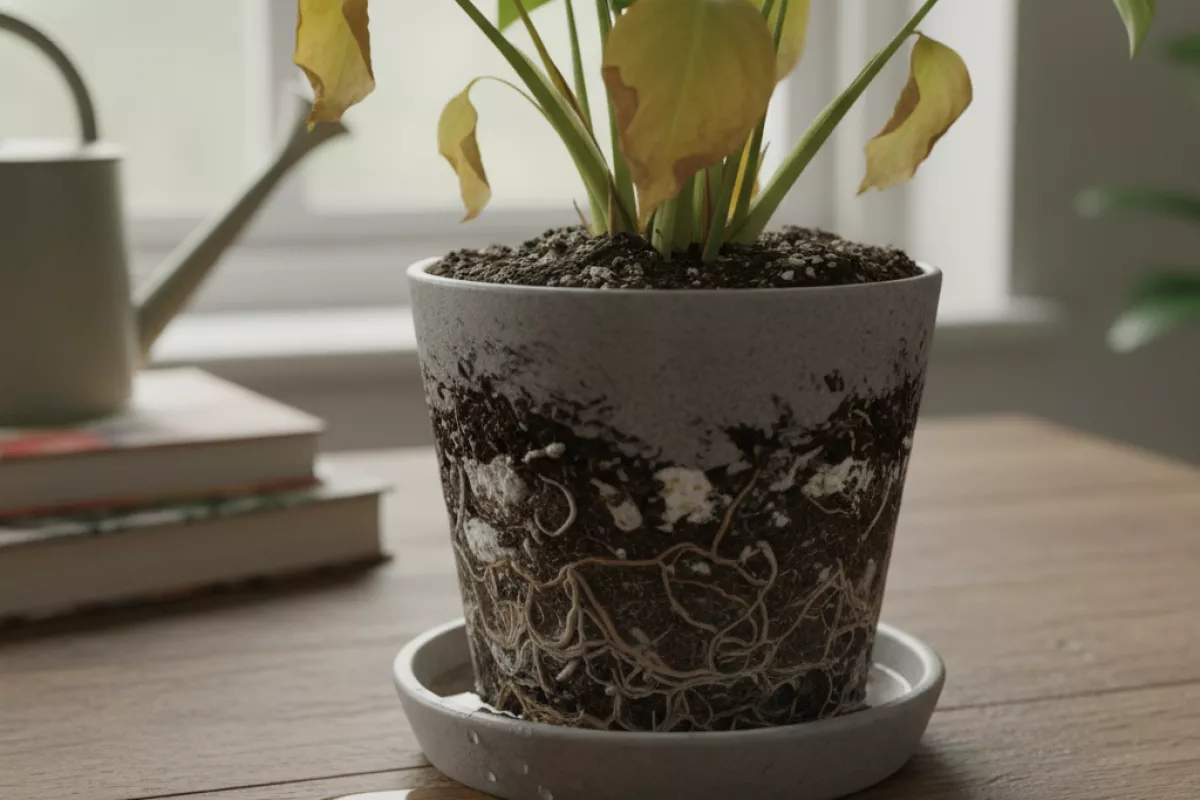
Yellowing can show up long before a plant collapses, especially when the root zone stays wet and oxygen-starved. The tricky part is that the top growth often looks like it needs more water, even though the roots are already struggling. Catching the subtle changes early gives you a chance to dry the potting mix, improve drainage, and stop decay from spreading.
- Lower leaves fade first, then drop. Older leaves often turn pale yellow before newer growth changes. If the plant sheds yellow leaves while the soil is still damp, that’s a red flag.
- Wilting that doesn’t match the soil moisture. A plant can look limp even when the mix feels wet 2–5 cm (1–2 in) down. That mismatch points to roots that can’t take up water.
- Slow growth and smaller new leaves. New shoots may emerge, but they’re undersized, soft, or slow to unfurl because damaged roots can’t supply enough nutrients.
- Leaves feel soft rather than crisp. Yellowing from underwatering often comes with dry, papery edges; early root trouble more often produces a dull, slightly limp texture.
- Soil stays wet for “too long.” If a pot that used to dry in 3–5 days now stays damp for 7–10 days, the mix may be compacted, the pot may be too large, or the root system may already be declining.
- Musty smell near the potting mix. A sour, swampy odor at the soil surface or drainage holes can appear before you see black, mushy roots.
- Fungus gnats and other moisture-loving pests. Seeing repeated gnat activity is often a sign the top layer never dries, which increases the odds of rot starting.
- Stem base looks darker or slightly soft. On some houseplants, the crown or lower stem may look water-soaked. This is an “act fast” clue because the infection can move upward.
| What you notice | More consistent with root rot | More consistent with simple underwatering |
|---|---|---|
| Wilting | Soil feels wet 2–5 cm (1–2 in) down; wilting persists after watering | Soil is dry several cm (a few in) down; perk-up within hours after watering |
| Leaf texture | Soft, dull, sometimes slightly translucent yellowing | Crisp, papery edges; leaves feel thin and dry |
| Pot weight | Pot stays heavy for many days after watering | Pot becomes light quickly |
| Smell and pests | Musty odor; fungus gnats common | Little odor; pests less tied to moisture |
| Progression of yellow leaves | Gradual yellowing plus sudden drops, often starting low | Yellowing often follows repeated dry-down stress; fewer sudden drops if watered |
If you’re unsure, do a quick check before making big changes: feel the mix at 5 cm (2 in) depth, lift the pot to judge weight, and look for odor at the drainage holes. Many cases start with simple watering mistakes, so when several of the signs above line up, it’s worth adjusting timing and aeration right away rather than waiting for the plant to “bounce back” on its own.
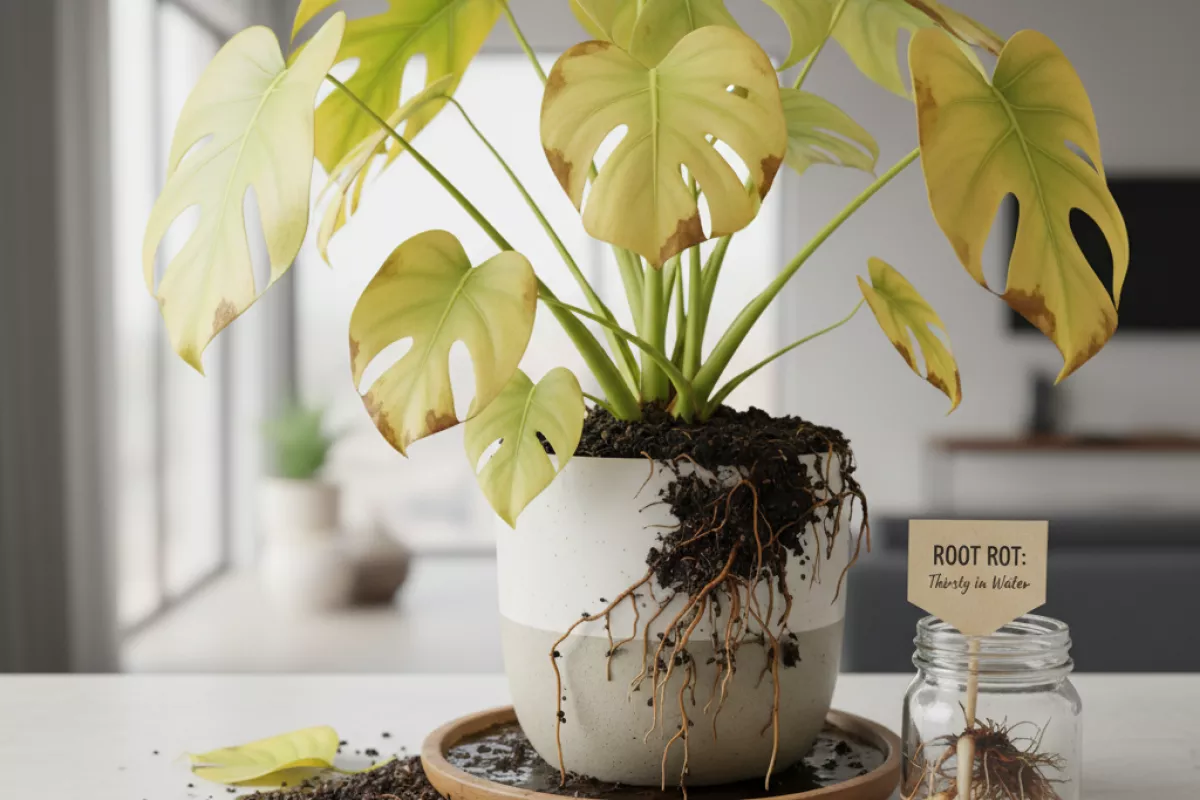
Leaf color patterns linked to root decay
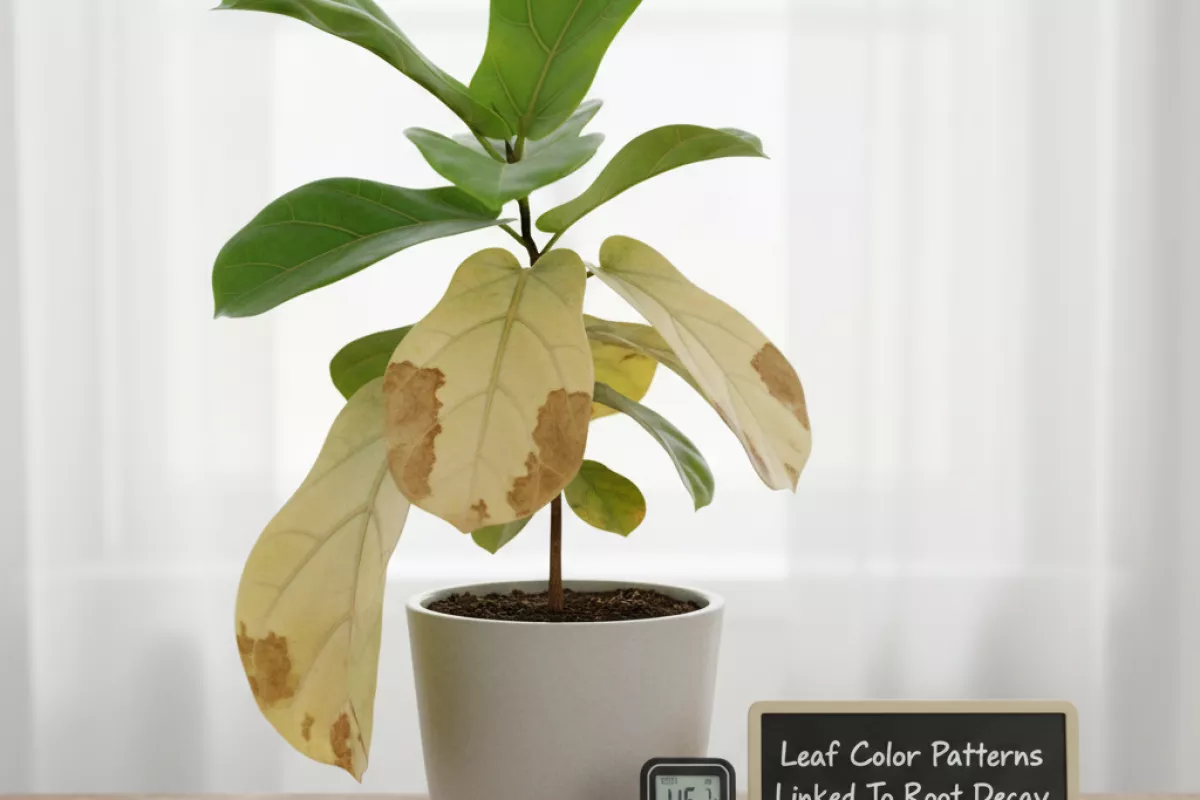
Yellowing from below is often the first visible clue that something is wrong underground. When roots start failing, the plant can’t move water and nutrients reliably, so the oldest leaves usually fade first while new growth may look temporarily “fine.” The exact shade and pattern matters because it can hint at whether you’re seeing early stress, advanced damage, or a secondary issue like nutrient lockout.
| What you see on the leaves | What it often suggests with root rot | Quick check to confirm | What to do next |
|---|---|---|---|
| Lower leaves turn pale yellow first; overall plant looks “tired” | Early root stress: reduced uptake before widespread tissue collapse | Soil stays wet for 3–5 days (72–120 hours) after watering; pot feels heavy | Let the root zone dry more between waterings; improve drainage and airflow around the pot |
| Yellowing plus soft, droopy leaves even when soil is wet | Roots can’t supply water despite moisture present (classic uptake failure) | Gently slide plant out: roots look tan/brown and mushy; sour smell | Trim rotten roots, repot into fresh, airy mix; reduce watering volume until recovery |
| Yellow leaves with brown/black tips or edges that spread inward | Progressing decay and tissue dehydration; salts may accumulate as roots fail | Check for crusty residue on soil surface or pot rim; uneven wet/dry pockets | Flush only if drainage is excellent; otherwise repot and remove salt-laden soil |
| Interveinal yellowing (veins stay greener) starting on older leaves | Nutrient lockout (often magnesium/iron availability issues) triggered by damaged roots | pH drift or chronically soggy mix; slow growth despite feeding | Fix moisture and aeration first; fertilize lightly only after new roots form |
| Patchy yellow mottling with random brown spots | Stress plus opportunistic pathogens; sometimes overlaps with pest damage | Inspect undersides for pests; check crown/base for softness | Address root health and rule out insects; remove badly affected leaves to reduce load |
| New growth emerges smaller, paler, or distorted while older leaves yellow | Advanced root loss: plant is running on reserves and can’t support normal growth | Minimal resistance when tugging the stem; roots break easily | Repot urgently; consider cutting back foliage to match reduced root capacity |
One common trap is assuming yellow leaves automatically mean “needs fertilizer.” With root rot, feeding can backfire because compromised roots can’t absorb nutrients well, and extra salts can stress them further. If you still need to mix a gentle, consistent solution after recovery, a fertilizer blending calculator helps avoid accidental overfeeding while you rebuild root health. If the mix is staying wet longer than about 48–72 hours (2–3 days) in a typical indoor setting, treat moisture and oxygen at the root zone as the priority.
- Pattern matters more than a single yellow leaf: a steady progression from the bottom up is more concerning than one older leaf aging out.
- Texture is a clue: limp, soft leaves paired with wet soil points to uptake failure, not drought.
- Watch for “two-tone” plants: green top growth with yellowing lower leaves can be an early stage before the whole plant declines.
- Don’t ignore odor: a swampy or sour smell from the pot often lines up with root decay and anaerobic conditions.
Soil conditions that promote rot
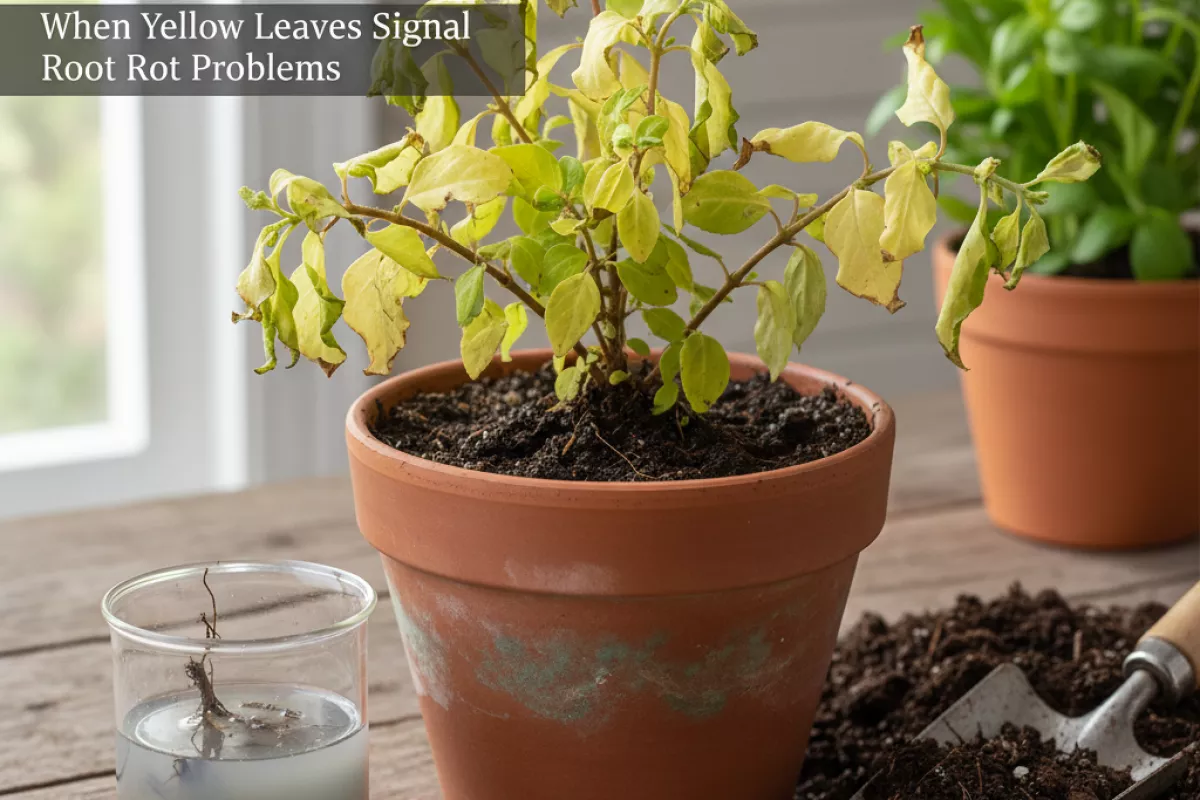
Root disease usually starts when the root zone stays wet and low in oxygen for too long. In that environment, fine feeder roots suffocate, then opportunistic fungi and fungus-like pathogens move in. Yellowing leaves can show up soon after because damaged roots can’t move water and nutrients reliably, even though the pot feels damp.
- Compacted or heavy mixes that hold water like a sponge. Garden soil in containers, very fine peat-heavy blends, or mixes with lots of decomposed material can collapse over time, reducing air pockets.
- Poor drainage in the container, such as too few holes, blocked holes, or a saucer that stays full. Standing water at the bottom keeps the lowest roots constantly saturated.
- Overpotting (a pot much larger than the root ball). Extra soil stays wet longer because there aren’t enough roots to use the moisture, so the center of the pot can remain soggy for days.
- Watering on a schedule instead of by need. If you water again before the upper 2–5 cm (1–2 in) has dried (varies by plant), the mix never re-aerates.
- Low temperatures with wet soil. Cool conditions slow evaporation and root metabolism; a mix that’s fine at 24°C (75°F) may stay dangerously wet at 15°C (59°F).
- Salt buildup and poor structure from repeated fertilizer without flushing. Excess salts can stress roots, and stressed roots are more likely to rot when oxygen is limited.
- Organic debris trapped against the crown (mulch piled high, fallen leaves in the pot). This keeps the stem base damp and can trigger crown rot that mimics root issues.
| Soil or pot condition | What it does in the root zone | Common clue you can notice |
|---|---|---|
| Fine, dense, or broken-down potting mix | Reduces air spaces; water lingers and oxygen drops | Mix feels muddy; water pools on top before soaking in |
| Drainage holes blocked or saucer kept full | Creates a perched water layer at the bottom | Bottom stays wet; pot feels heavy long after watering |
| Pot is oversized for the plant | Large wet volume stays unused; slow dry-down | Top looks dry but deeper soil is still damp days later |
| Frequent watering before partial dry-back | Prevents re-oxygenation between waterings | Musty smell; yellow leaves despite “enough” moisture |
| Cool room + wet mix (e.g., 15°C/59°F) | Slows root function and evaporation; increases saturation time | Soil dries very slowly; growth stalls |
| Hydrophobic or unevenly wet mix | Water channels, leaving some roots soaked and others dry | Water runs down the sides; center stays dry or suddenly floods |
If you’re trying to decide whether yellow leaves are from thirst or rot, focus on how the soil behaves after watering. A healthy setup drains freely, then gradually dries and pulls fresh air back into the mix. When the pot stays heavy, smells sour, or never seems to dry below the surface, the conditions are ripe for root decline.
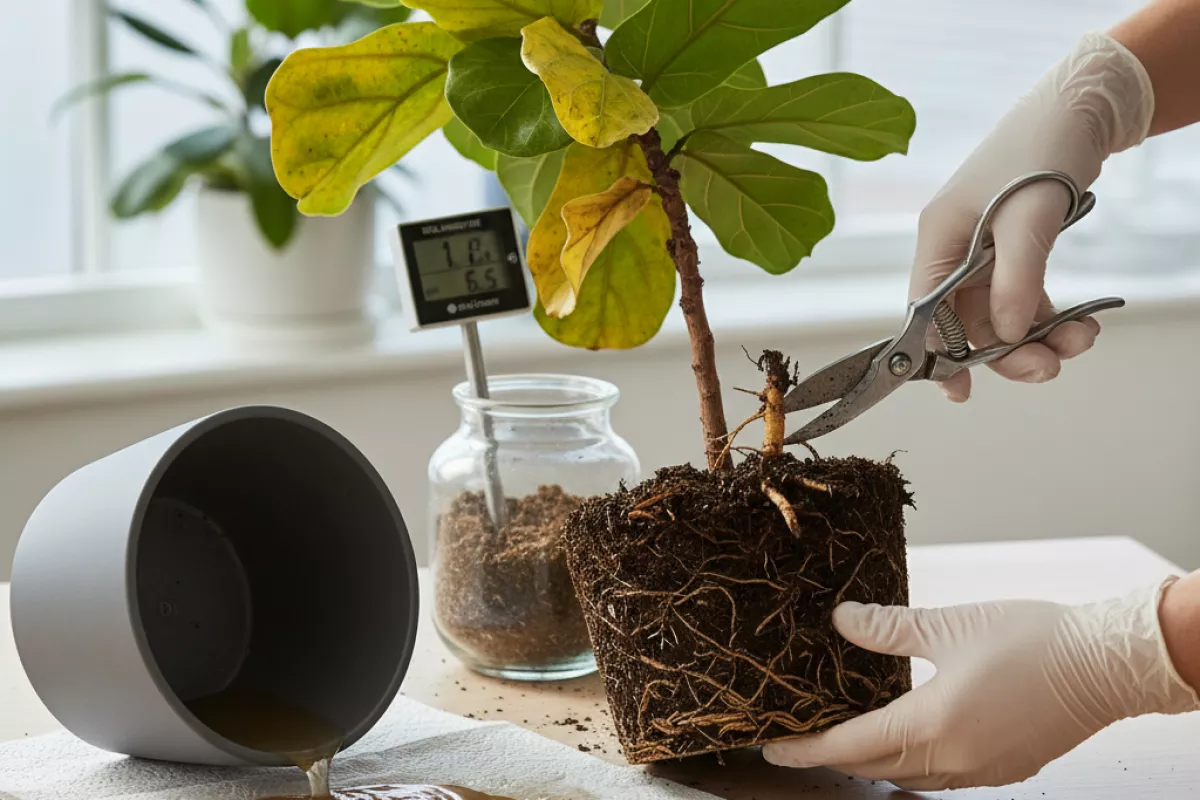
How to confirm root rot safely
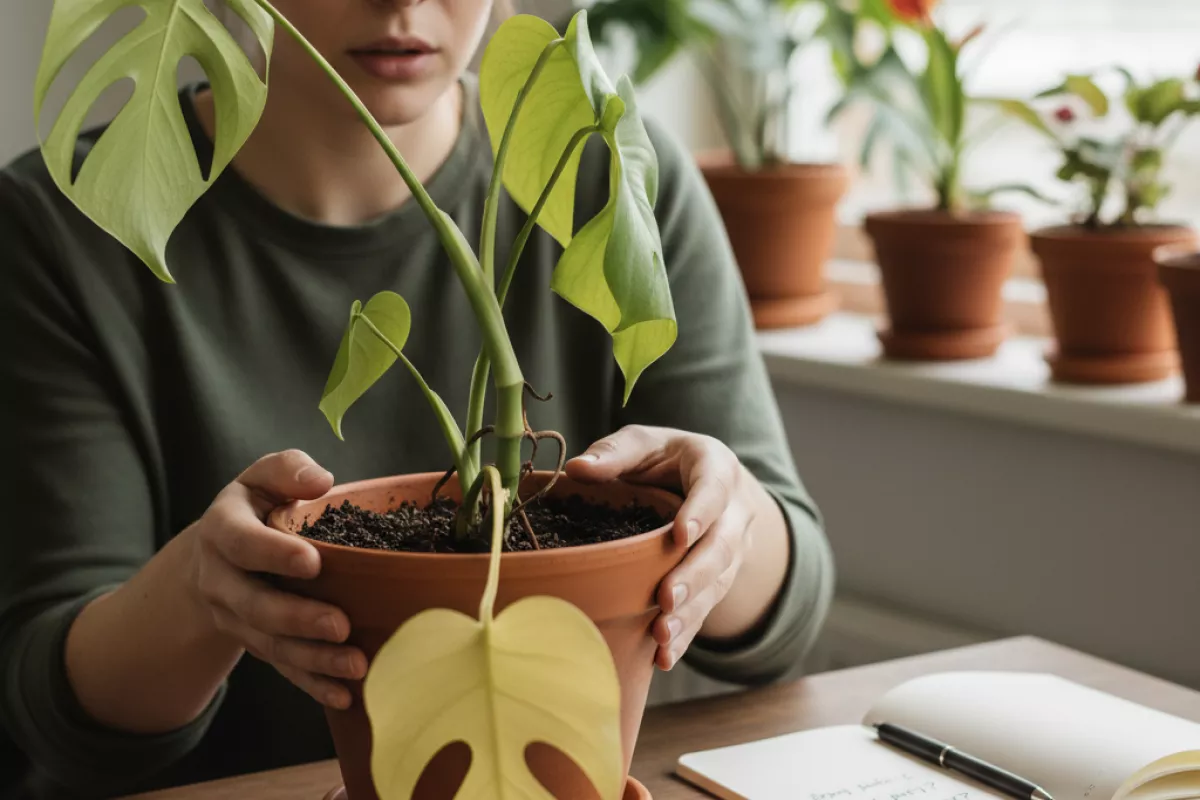
Check the roots only after you’ve ruled out the easy stuff (a dry pot, recent repotting stress, a sudden cold draft). Yellowing from below plus limp growth can point to trouble underground, but you don’t need to rip the plant apart to find out. The goal is to inspect with minimal damage and keep any pathogens from spreading to other pots.
- Start with a “no-unpot” check.
- Smell near the drainage holes. A sour, swampy odor is a common warning sign.
- Lift the pot. If it feels heavy for days after watering, the mix may be staying waterlogged.
- Look for fungus gnats, algae on the soil surface, or a persistently wet top layer—often a clue that the root zone isn’t drying.
- Do a gentle tug test.
- Hold the plant at the base and lightly wiggle. A healthy root system anchors firmly; a plant that rocks easily may have lost fine roots.
- Stop if the stem feels soft at the soil line—this can indicate crown/stem rot, and pulling can make it worse.
- Prepare clean tools and a clean workspace.
- Use a disinfected pruner or scissors, a clean chopstick, and paper towels.
- Wipe blades with 70% isopropyl alcohol and let them air-dry. If you don’t have alcohol, wash with hot soapy water and dry thoroughly.
- Keep the plant away from other houseplants while you inspect.
- Slide the root ball out with support.
- Water lightly 1–2 hours before checking so the root ball holds together, but avoid soaking.
- Tip the pot on its side, support the stem base, and tap the pot to release. Don’t yank the plant upward.
- Inspect roots and potting mix for clear signs.
- Healthy roots are typically firm and pale/white to tan (color varies by plant), and they don’t smear when pinched.
- Rotten roots are often brown/black, mushy, hollow, or slough their outer layer when you gently pull.
- Soil that smells foul, looks muddy, or compacts into a slick mass can indicate poor aeration and ongoing moisture problems.
- Confirm by checking a few different areas.
- Look at the outer edge and the center of the root ball. Sometimes only the core stays saturated.
- If only a small section is affected, you may be catching the issue early.
| What you observe | What it usually suggests | What to do next (low-risk) |
|---|---|---|
| Roots are firm, light-colored; soil smells normal | Yellow leaves likely from watering swings, light change, or nutrient issues | Let the mix dry more between waterings; check light and feeding routine |
| Some roots brown and soft; others still firm | Early-stage root damage from staying wet too long | Trim only mushy roots with disinfected tools; repot into fresh, airy mix and a pot with drainage |
| Most roots dark, mushy, or hollow; strong sour smell | Advanced root rot; plant can’t take up water well | Remove rotten roots, discard old mix, sanitize the pot; consider propagating healthy cuttings as backup |
| Stem base (crown) is soft or discolored at soil line | Crown/stem rot, often more serious than root-only issues | Avoid deep watering; cut above the damaged tissue and propagate if possible; isolate the plant |
Dispose of the old potting mix in the trash rather than composting it, and wash the pot with hot soapy water. If you use a disinfectant soak, follow label directions and rinse well. Once you’re done, wash your hands and disinfect tools again so any lingering microbes don’t hitch a ride to the next plant.
Immediate rescue steps for affected plants
Act quickly once you suspect rot: the goal is to stop oxygen-starvation around the roots, remove decayed tissue, and give the plant a drier, cleaner environment to regrow. If the plant is severely wilted or the potting mix smells sour, treat it as urgent rather than “wait and see.”
- Pause watering and drain excess moisture.
Don’t add more water “to perk it up.” Empty any saucer or cachepot right away, and tilt the container to help free trapped water. If the pot feels heavy and soggy, this step alone can prevent further collapse while you prepare to repot.
- Unpot the plant and inspect the root system.
Slide it out gently and remove as much wet mix as you can with your fingers. Healthy roots are typically firm and pale; rotted roots are brown/black, mushy, and may slough off when rubbed. A foul odor is another strong clue.
- Trim away all soft or dark roots.
Use clean scissors or pruners. Cut back to firm, light-colored tissue. If you’re unsure, err on the side of removing questionable sections—decay spreads. Disinfect tools between plants (or between heavy cuts) to avoid transferring pathogens.
- Rinse and let the root ball air-dry briefly.
Rinse under lukewarm water to expose what’s truly viable, then let the plant sit out of direct sun for about 30–60 minutes. This short rest helps surfaces dry so they’re less likely to re-infect immediately after repotting.
- Repot into fresh, better-draining medium and a pot with drainage holes.
Discard the old mix; don’t “refresh” it. Choose a container only slightly larger than the remaining root mass—oversized pots stay wet longer. If you reuse a pot, wash and sanitize it first.
- Water lightly, then hold off.
After repotting, add just enough water to settle the mix (often a small drink is enough). Then wait until the top 2–5 cm (1–2 in) dries before watering again. The exact depth depends on pot size and plant type, but the principle is the same: keep air moving through the root zone.
- Reduce stress while it recovers.
Place the plant in bright, indirect light and avoid fertilizer for 2–4 weeks. If the top growth is large compared to the remaining roots, consider pruning back a little foliage so the reduced root system can keep up.
| Situation you find | What to do next | What to avoid |
|---|---|---|
| A few mushy roots, most still firm | Trim damaged sections, repot in fresh airy mix, resume careful watering after the top 2–5 cm (1–2 in) dries | Keeping the same wet soil or moving to a much larger pot |
| More than half the roots are soft or black | Hard prune roots to healthy tissue, reduce foliage slightly, keep in bright shade, water sparingly until new growth appears | Fertilizing right away or letting it sit in a cold, damp spot |
| Stem base is soft (crown rot) on rosette plants | Remove affected tissue if possible; if the crown is compromised, take healthy cuttings/offsets and restart | Trying to “dry it out” without removing infected tissue |
| Soil smells sour and stays wet for days | Switch to a chunkier mix, confirm drainage holes are clear, and increase airflow; consider a smaller pot | Adding gravel at the bottom (it can worsen perched water) or watering on a schedule |
If you choose to use a treatment, keep it simple: improving drainage and removing rot usually does more than any additive. Only consider a targeted fungicide if you’ve had repeated losses under good care, and follow label directions closely.
Preventive care to protect roots
Stop rot before it starts by making it hard for roots to sit in stale, oxygen-poor moisture. Most “mystery” yellowing begins with a simple mismatch: the pot holds water longer than the plant uses it, so the root zone stays wet and pathogens take over.
If root rot keeps repeating, the fastest fix is usually reducing overwatering plants by matching watering frequency to real dry-down speed instead of a calendar schedule.
- Water only when the mix has actually dried: Check the top 2–5 cm (1–2 in) with a finger or a skewer. If it feels cool and damp, wait. When you do water, soak thoroughly until excess drains, then empty the saucer.
- Use a pot that drains fast: Choose containers with drainage holes and avoid decorative cachepots that trap runoff. If you use a cover pot, keep the inner pot elevated so it never sits in water.
- Match the soil to the plant and your home: Heavy, peat-dense mixes stay wet longer. For many houseplants, blending in chunky material (bark, perlite, pumice) creates air pockets that discourage root rot. In humid rooms, go even chunkier; in dry rooms, keep a bit more moisture-holding material.
- Right-size the container: Oversized pots dry slowly and invite problems. Move up in small steps, about 2–5 cm (1–2 in) wider than the previous pot, unless the plant is extremely root-bound.
- Give roots oxygen with good light and airflow: Low light slows water use, so the soil stays wet. Place the plant where it can maintain steady growth, and avoid crowding leaves against walls or other pots.
- Be cautious with “helpful” habits: Misting doesn’t fix dry soil and can increase fungal issues; frequent tiny sips of water keep the lower mix constantly wet. Deep, infrequent watering is usually safer than frequent shallow watering.
- Fertilize lightly when growth is active: Overfertilizing can burn roots, making them more vulnerable to infection. If the plant is stressed or yellowing, pause feeding until it’s stable again.
- Keep tools and pots clean: Rinse old pots, remove decaying roots and leaves, and sanitize pruners between plants. Rot organisms spread easily through contaminated soil and debris.
| Risk factor | What it looks like in daily care | Simple prevention move |
|---|---|---|
| Soil stays wet too long | Top looks dry, but pot feels heavy days later; yellow leaves keep appearing | Switch to a faster-draining mix and water only after the top 2–5 cm (1–2 in) dries |
| No drainage or trapped runoff | Water collects in a saucer or decorative pot | Use drainage holes; empty saucers within 10–15 minutes; elevate the inner pot |
| Pot is too large | Plant looks small in the container; soil takes a long time to dry | Repot into a container only 2–5 cm (1–2 in) wider than the root ball |
| Low light slows water use | Watering schedule stays the same year-round, but growth slows | Reduce watering in darker months or move closer to brighter light |
| Cool temperatures | Soil remains damp in rooms below 18°C (65°F) | Water less often and keep plants away from cold windows and drafts |
| Organic debris in the pot | Dead leaves collect on the soil surface; musty smell after watering | Remove fallen material promptly and refresh the top layer of mix if needed |
Build a quick routine: check moisture first, then decide. If yellow leaves show up, treat it as a cue to reassess drying time, drainage, and light rather than automatically adding more water. That one shift prevents most root rot problems before they get established.