Insecticidal Soap for Spider Mites – Proper Use

 Here we how insecticidal soap works on spider mites, when treatment makes sense, and how to apply it safely on different plants. It also explains repeat timing, common mistakes that weaken results, compatibility with other controls, and how to avoid plant damage.
Soap-based sprays can be effective against spider mites, but success depends on proper timing and thorough application. Many gardeners choose them because they are simple and easy to find, yet weak coverage or spraying too often at the wrong time can reduce results. A careful, consistent approach helps protect plants, improves control, and lowers the chance that these fast-spreading pests will continue to damage leaves and stems.
How insecticidal soap works against spider mites

Insecticidal soap controls spider mites through direct contact, not by leaving a long-lasting residue in the plant. The soap disrupts the outer protective layer of soft-bodied pests and damages cell membranes, which causes dehydration and rapid collapse. That is why coverage matters so much: if the spray does not hit the mites, it usually does not kill them.
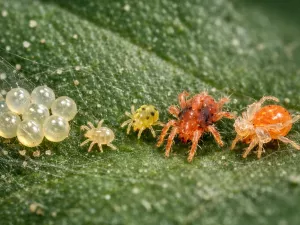
Spider mites are especially likely to gather on leaf undersides, along midribs, and in dense growth where spray can miss them. Eggs are often less affected than active mites, so one application rarely solves the problem. Good results come from understanding that soap is a physical control tool rather than a systemic treatment.
Why contact coverage matters
A light mist over the top of the plant is usually not enough. Mites hide in protected areas, and even a healthy-looking plant can carry a large population below the leaves. Soap works best when it reaches those feeding sites thoroughly without running off excessively.
- Leaf undersides: This is the main target area because most mites feed and reproduce there.
- Young growth: Tender new leaves are often attacked first and should be checked closely.
- Webbed areas: Fine webbing signals a heavier infestation, but webbing can also block spray, so slow, deliberate coverage is needed.
- Stem joints: Mites often shelter where leaves meet stems, especially on compact houseplants.
What soap does not do
It helps to be realistic about the limits of this treatment. Insecticidal soap does not repair damaged foliage, and it does not prevent new mites from arriving later. It also does not move through the sap, so untreated leaves remain vulnerable.
For gardeners used to broad-spectrum pesticides, this can feel less dramatic at first. But when used carefully and repeated on schedule, soap can be very effective while being gentler on many beneficial insects and less disruptive in indoor spaces.
Editor’s note: If leaves still show stippling after treatment, that does not always mean the spray failed. Old feeding damage remains visible even after mites are dead, so judge progress by reduced movement, less fresh speckling, and cleaner new growth.
When to use soap treatment effectively

Timing has a major effect on results. Soap works best when mite numbers are still manageable and before heavy webbing covers the plant. Early intervention is easier, safer for the plant, and usually requires fewer repeat sprays than waiting until leaves are bronzed, curled, or dropping.
Environmental conditions matter too. Apply when the plant is not heat-stressed and when direct sun will not hit wet foliage immediately. Early morning or evening is often best outdoors, while indoor growers should choose a time when the plant can dry gradually in bright but indirect light.
Best stage of infestation for treatment
Soap is most useful for light to moderate outbreaks. If a plant is already heavily webbed, badly weakened, or shedding leaves quickly, you may need to prune the worst growth first and combine soap with other controls rather than relying on one spray alone.
- Inspect the plant with a close look at the undersides of several leaves.
- Check for pale stippling, fine webbing, and moving specks near veins.
- Start treatment as soon as you confirm active mites, even if damage still looks minor.
- Isolate the plant if possible so mites do not spread to nearby foliage.
Conditions that improve performance
Application timing should fit both the pest and the plant. Soap can dry too quickly in hot, windy weather, reducing contact time. On the other hand, cold, dark, damp conditions can slow drying too much and increase the chance of spotting on sensitive leaves.
- Outdoor use: Aim for a calm period below about 29°C (85°F), ideally with no harsh sun for several hours.
- Indoor use: Treat in a bright room out of direct midday sun, with enough airflow to dry leaves without blasting them.
- Water-stressed plants: Water the root zone first if the potting mix is dry, then wait until the plant is no longer wilted before spraying.
- Dusty foliage: Rinse or wipe leaves beforehand because dust can shield mites and reduce even coverage.
Season also plays a role. Spider mites thrive in hot, dry conditions, so outbreaks often accelerate in summer outdoors and during winter indoors when heating dries the air. Regular inspection during those periods makes soap treatment more effective because you catch problems before populations explode.
How to apply it safely on different plants

Different plants respond differently to soap sprays. Thin, soft foliage may tolerate treatment well, while waxy, hairy, blue-gray, or very tender leaves can be more sensitive. The safest approach is to test first, adjust coverage to the plant’s structure, and avoid drenching species that are known to mark easily.
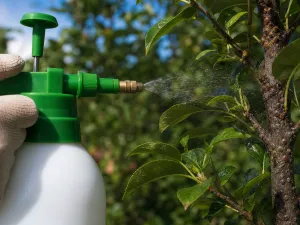
Whether you use a ready-to-use bottle or a concentrate mixed according to the label, the goal is the same: coat the mites thoroughly while minimizing unnecessary stress to the plant. Never guess at dilution rates. Follow the product instructions exactly, especially for edible crops and indoor ornamentals.
General application steps
A careful routine reduces both pest survival and plant injury. Work methodically rather than spraying quickly from above.
- Move the plant out of strong direct sun if needed.
- Check that the soil is lightly moist, not bone dry or waterlogged.
- Shake the spray bottle or tank well so the solution is evenly mixed.
- Test one or two leaves and wait 24 hours before full treatment if the plant is sensitive or unfamiliar.
- Spray upper and lower leaf surfaces until evenly wet, paying special attention to hidden areas.
- Let the plant dry in suitable light and recheck after a day for any spotting or burn.
Adjusting technique by plant type
Leaf texture and growth habit change how you should spray. Broad-leaved houseplants are easier to cover than dense herbs or needle-like foliage, and some plants need a lighter hand.
| Plant type | Application approach | What to watch for |
|---|---|---|
| Broad-leaved houseplants such as pothos, philodendron, or hibiscus | Spray leaf undersides thoroughly and rotate the pot to reach the center of the canopy | Missed inner leaves often allow mites to rebound |
| Fine-textured plants such as ivy, peppers, or small herbs | Use a fine, even spray and separate stems gently with your hand for better access | Dense growth can trap mites and prevent full contact |
| Succulents and waxy-leaved plants | Test first and avoid heavy saturation in leaf axils | Residue, spotting, or trapped moisture may mark the plant |
| Hairy or delicate foliage such as some begonias or African violets | Use extra caution, test a small area, and consider alternative controls if sensitivity appears | Leaf spotting and cosmetic damage are more likely |
Practical tip: On heavily infested indoor plants, take them to a sink, shower, or patio first and rinse with plain water. That knocks down part of the mite population and webbing, making the soap treatment much more effective.
Common mistakes that reduce effectiveness

Most disappointing results come from technique rather than from the product itself. Spider mites are small, fast-breeding, and easy to miss, so even a decent spray can fail if the treatment is rushed or incomplete. Knowing the common errors helps you avoid repeating the cycle of brief improvement followed by another outbreak.
Another issue is expecting soap to act like a residual pesticide. Because it works on contact, missed pockets of mites keep feeding and reproducing. A plant can look better for a few days, then suddenly decline again if those survivors were not reached.
Application errors
These mistakes directly reduce mite kill and are the most common reason treatment seems ineffective.
- Spraying only the top of leaves: The undersides are usually where the main population lives.
- Using too little solution: A faint mist may not wet the pests enough to work.
- Applying in hot sun: Fast drying shortens contact time and can scorch foliage.
- Ignoring webbing: Thick webbing can shield mites, so rinse or prune first when infestations are advanced.
- Skipping nearby plants: Mites spread easily, and untreated neighbors often reinfest the original plant.
Plant care issues that make control harder
Spider mites thrive on stressed plants. Poor watering habits, very dry indoor air, and dusty leaves all make infestations harder to control. Soap can reduce the pest load, but if growing conditions remain unfavorable, the plant may continue to struggle and attract repeat outbreaks.
- Dry root zone: Plants kept too dry are more vulnerable and recover more slowly after feeding damage.
- Low humidity indoors: Very dry air does not cause mites by itself, but it helps them multiply quickly on many houseplants.
- Overfeeding with nitrogen: Lush, soft growth can be especially attractive to sap-feeding pests.
- Crowded placement: Tight spacing reduces inspection and allows mites to move from leaf to leaf.
Good sanitation matters as well. Fallen leaves, old webbing, and neglected pruning can leave hiding spots around the plant. Cleaning benches, windowsills, trays, and nearby pots supports the treatment instead of letting the infestation linger around the edges.
How often to repeat treatment

Repeat treatment is usually necessary because eggs may survive and hatch after the first application. A single spray may kill active mites well, but it rarely catches every life stage at once. The correct interval depends on the product label, the severity of the infestation, and how quickly the plant dries in its growing environment.
For many labeled insecticidal soaps, repeating every 4 to 7 days is a common pattern until no active mites remain. Always check the specific directions on your product, because concentrations and plant safety guidance vary. The aim is to interrupt the mite life cycle without overdoing treatment on sensitive foliage.
Practical repeat schedule
A simple monitoring routine helps you decide whether to continue, pause, or switch tactics.
- Make the first application with thorough coverage.
- Inspect after 2 to 3 days for live mites, fresh stippling, or new webbing.
- Repeat according to the label, often around day 4 to day 7.
- Continue for at least 2 to 3 rounds if mites were clearly active at the start.
- Stop only after inspections show no moving mites and no fresh damage on new growth.
Signs that the interval needs adjustment
Plants and conditions do not all behave the same way. If mite numbers stay high, the issue may be poor coverage rather than the interval itself. If leaves begin to show spotting after repeated sprays, the product may be too strong for that plant or the treatment conditions may be wrong.
| What you observe | Likely meaning | Best response |
|---|---|---|
| Fewer mites after each spray, but some still present | The treatment is working, but eggs are hatching between applications | Continue on-label repeat treatments until activity stops |
| No real change after two rounds | Coverage is incomplete or reinfestation is occurring | Improve underside coverage and inspect nearby plants |
| Leaf spotting or edge burn appears | The plant may be sensitive or conditions were too hot or bright | Pause, reassess timing, and test a smaller area before repeating |
| New growth looks clean while old leaves remain speckled | Control is improving and old damage is simply still visible | Monitor closely rather than retreating too aggressively |
Editor’s note: Mark treatment dates on a tag or phone reminder. Spider mite control often fails because the second and third sprays happen too late, not because the first one was useless.
Compatibility with other control methods
Insecticidal soap works best as part of a broader management plan rather than as a stand-alone cure in every situation. It pairs well with physical rinsing, pruning of badly infested growth, cleaner growing conditions, and careful monitoring. On edible crops, houseplants, and ornamentals, this integrated approach often gives steadier control than repeated spraying alone.
Compatibility does not mean mixing products together unless the label specifically allows it. Tank-mixing soap with oils, fungicides, fertilizers, or homemade additives can increase the risk of leaf injury and may reduce effectiveness. It is usually safer to separate treatments and observe how the plant responds.
Methods that work well alongside soap
These measures support treatment without duplicating it.
- Water rinsing: A firm rinse removes dust, webbing, and many active mites before spraying.
- Pruning: Removing heavily infested leaves or stems lowers the pest load quickly.
- Isolation: Keeping affected plants away from healthy ones reduces spread.
- Humidity support: For indoor plants that tolerate it, avoiding very dry air can slow mite buildup.
- Regular inspection: Weekly checks of leaf undersides catch rebounds early.
Using soap with beneficial insects and other sprays
Because soap can also harm soft-bodied beneficials on contact, timing matters if you are using predatory mites or other natural enemies. It is generally better not to spray directly where beneficials have been released. In greenhouses or indoor grow rooms, many growers choose one strategy at a time or allow a gap between treatments so they do not wipe out their helpers.
Horticultural oils can also suppress spider mites, but combining oil and soap too closely can stress foliage, especially in warm weather. Sulfur products, some fungicides, and foliar feeds may also interact poorly depending on the crop. When in doubt, leave several days between applications and test first on a small section of the plant.
- With predatory mites: Avoid direct contact and follow supplier guidance on timing.
- With horticultural oil: Do not assume they can be mixed or used back-to-back safely.
- With fertilizers: Foliar feeding and soap treatment should generally be separate events.
- With homemade remedies: Avoid adding vinegar, alcohol, essential oils, or dish soap unless a trusted label specifically supports that use.
How to avoid plant damage during application
Preventing leaf injury is just as important as killing the mites. Even properly labeled insecticidal soap can mark certain plants if it is applied under stressful conditions. Heat, drought, recent repotting, transplant shock, and intense light all increase the chance of spotting, scorch, or leaf drop after spraying.
The safest habit is to treat the plant when it is stable, hydrated, and out of harsh sun. A small patch test is worth the extra day, especially on uncommon houseplants, seedlings, cuttings, succulents, ferns, and fuzzy-leaved ornamentals. If the test area remains clean after 24 hours, proceed with full coverage.
Conditions to avoid
These situations raise the risk of damage and should usually delay treatment.
- Hot foliage: Do not spray leaves that are warm from direct sun or temperatures above about 29°C (85°F).
- Dry, wilted plants: Rehydrate first if the potting mix is dry several centimeters deep, about 2.5 to 5 cm (1 to 2 in).
- Recently repotted plants: Wait until the plant has resumed normal growth and is no longer stressed.
- Very tender new leaves: Young growth can be more sensitive than mature foliage.
- Dirty spray equipment: Residues from other chemicals can cause unexpected reactions.
Safe handling and aftercare
Good aftercare helps the plant recover from both the pest and the treatment. Once sprayed, let the foliage dry in bright indirect light or gentle outdoor shade. Avoid moving the plant immediately into strong midday sun. If the label permits rinsing after a certain period, that can help on sensitive species, but follow the product directions rather than improvising.
Continue normal plant care instead of trying to “boost” recovery with heavy feeding. Overfertilizing a stressed plant often creates soft new growth while the root system is still under pressure. Keep watering even and appropriate for the species, maintain clean leaves, and remove badly damaged foliage only after the plant begins to stabilize.
Practical recommendation: If you are unsure about a plant’s sensitivity, test one lower leaf and one upper leaf. Light exposure and leaf age can affect how the same plant reacts, so a two-point test gives a more reliable preview.
Finally, remember that some cosmetic damage may come from the original infestation, not the spray. Compare new growth over the next 1 to 2 weeks with older leaves before deciding the treatment harmed the plant. Healthy new foliage, reduced webbing, and fewer active mites are the clearest signs that your approach is working.