Soil pH Issues Causing Yellow Leaves

 This article explains how wrong soil pH blocks nutrient uptake, causing yellow leaves even in fertile soil. It covers acidic vs. alkaline effects, signs of pH imbalance, quick testing methods, safe ways to correct pH, and how stable pH helps prevent repeat problems.
- How incorrect soil pH blocks nutrient absorption in plants
- Why even fertile soil can cause yellow leaves due to pH imbalance
- Difference between acidic and alkaline soil effects on plants
- Common signs your soil pH is outside optimal range
- How to test soil pH quickly and accurately
- Ways to safely adjust soil pH for better nutrient uptake
- How stable pH levels prevent recurring yellow leaf problems
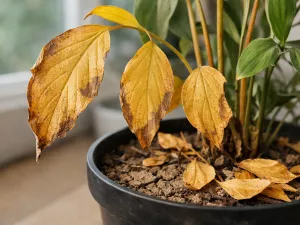
When leaves begin to turn yellow, the issue is not always too much or too little water. In many cases, soil that is too acidic or too alkaline prevents roots from absorbing key nutrients. This pH imbalance can block iron, magnesium, and other essentials, causing plants to look pale even when conditions seem fine. By understanding how soil chemistry affects leaf color, gardeners can address the true cause and restore healthier growth.
How incorrect soil pH blocks nutrient absorption in plants

Yellow leaves are often blamed on lack of fertilizer, but the real problem can be that nutrients are present in the soil and the plant still cannot use them. Soil pH controls how available key elements remain around the roots. When the pH drifts too far in either direction, some nutrients become chemically tied up, while others become overly available and start interfering with normal growth.
Most garden and houseplants absorb nutrients best in a slightly acidic to neutral range, usually around 6.0 to 7.0. Outside that window, roots may sit in soil that looks rich and dark yet still struggle to take in iron, manganese, magnesium, phosphorus, or calcium. The result is chlorosis, weak growth, and leaves that fade from healthy green to pale yellow.
What happens in the root zone
The root zone is a chemical environment, not just a physical one. Roots release compounds that help dissolve nutrients, but pH affects whether those nutrients stay in a form the plant can absorb. If the soil is too alkaline, iron often becomes unavailable. If it is too acidic, phosphorus can become less accessible and some metals may reach levels that stress roots.
This is why adding more feed does not always fix yellowing. If pH is wrong, fertilizer can remain unused, build up in the pot or bed, and make root stress worse.
- Iron: often becomes harder to absorb in alkaline soil, leading to yellowing between green veins on young leaves.
- Magnesium: may be less available in strongly acidic or highly leached soils, often affecting older leaves first.
- Phosphorus: can be locked up in very acidic or very alkaline conditions, slowing root growth and overall vigor.
- Calcium: uptake can suffer in very acidic soils, contributing to distorted new growth and weak tissues.
- Manganese: may become too limited in alkaline soil, but too available in very acidic soil, which can also damage plants.
Why yellowing patterns matter
The part of the plant that turns yellow first gives useful clues. New leaves commonly show iron-related chlorosis because iron does not move easily within the plant. Older leaves often reveal magnesium or nitrogen issues first because those nutrients can be relocated to support fresh growth. Looking at leaf age, vein color, and how quickly symptoms spread helps separate a pH problem from simple underfeeding.
Editor’s note: If a plant yellows soon after feeding, do not automatically fertilize again. Check the pH first, especially in containers where salts and water quality can shift the root environment fast.
Why even fertile soil can cause yellow leaves due to pH imbalance

Rich soil is not always usable soil. A bed full of compost, organic matter, and nutrients can still produce pale foliage if the pH keeps those nutrients out of reach. Gardeners sometimes see this in raised beds, old borders, and potting mixes that were once productive but gradually changed through watering, fertilizer use, or the breakdown of organic materials.
Fertility and availability are different things. Fertility means nutrients are present. Availability means roots can actually absorb them. A soil test may show adequate iron, phosphorus, and trace minerals, yet the plant behaves as if it is starving because pH has shifted the chemistry around the roots.
How fertile soil becomes misleading
Several common practices create this mismatch. Repeated use of high-phosphorus bloom boosters can suppress uptake of other elements. Hard tap water may slowly raise pH in containers. Fresh composts and manures vary in reaction and can nudge the soil over time. Even a naturally fertile clay loam can become a problem for acid-loving plants if its pH sits too high.
- Container culture: pots change faster than garden beds because there is less soil volume buffering pH swings.
- Water source: alkaline water gradually pushes many mixes upward in pH, especially indoors.
- Fertilizer choice: repeated feeding with the wrong formulation can alter root-zone chemistry.
- Plant mismatch: blueberries, camellias, and gardenias may yellow in soil that suits vegetables or lawn grasses.
When “more compost” is not the answer
Organic matter improves structure and moisture balance, but it is not a guaranteed cure for chlorosis. If the soil pH is off, adding more compost may improve texture while doing little to restore nutrient uptake. In some cases, repeated top-dressing without testing can make diagnosis harder because the soil appears healthier on the surface while the root chemistry remains unsuitable.
A better approach is to combine observation with testing. If leaves keep yellowing despite regular watering, decent light, and measured feeding, the issue is often not soil poverty but nutrient lockout.
Difference between acidic and alkaline soil effects on plants

Acidic and alkaline soils can both cause yellow leaves, but they do not usually do it in the same way. Understanding the difference helps you choose the right fix instead of treating every chlorosis problem as identical. The visible symptoms, plant types affected, and nutrient interactions often point in different directions.
Acidic soil generally has a pH below 7.0, while alkaline soil is above 7.0. Many ornamentals, vegetables, and houseplants tolerate a modest range, but they start showing stress when the soil moves too far from their preferred level.
Typical effects of acidic soil
In acidic conditions, some nutrients become more soluble, sometimes to the point of excess. That may sound helpful, but too much availability can be as harmful as too little. Very low pH can also limit calcium, magnesium, and phosphorus uptake, weaken roots, and reduce microbial activity that supports nutrient cycling.
Plants in overly acidic soil may show slower growth, yellowing on older leaves, weak stems, and poor response to feeding. Sensitive species may also struggle with root stress long before the gardener notices a clear leaf pattern.
Typical effects of alkaline soil
Alkaline soil is a frequent cause of interveinal chlorosis, especially on younger leaves. Iron, manganese, zinc, and sometimes phosphorus become less available as pH rises. This is common in chalky soils, lime-rich beds, and containers watered for months with hard water.
Acid-loving plants usually react first. Gardenias, citrus, hydrangeas, blueberries, and azaleas often develop pale new growth even when they are being fed regularly.
| Soil reaction | Common nutrient issue | Typical leaf pattern | Plants often affected |
|---|---|---|---|
| Too acidic | Low calcium, magnesium, or phosphorus availability; possible metal excess | Older leaves yellowing, weak growth, reduced vigor | Many vegetables, herbs, and general garden plants outside their preferred range |
| Slightly acidic to neutral | Best overall nutrient balance for many species | Healthy green growth when watering and feeding are also correct | Most common houseplants, vegetables, and ornamentals |
| Too alkaline | Iron, manganese, and zinc lockout | Young leaves yellow between green veins | Gardenias, citrus, hydrangeas, blueberries, camellias |
| Strongly alkaline | Multiple micronutrient deficiencies | Persistent chlorosis, stunting, poor flowering | Acid-loving plants and nutrient-sensitive container plants |
Practical tip: Hydrangea color can hint at soil reaction, but it is not a reliable pH test for every garden. Use it as a clue, not proof.
Common signs your soil pH is outside optimal range

Plants rarely tell you “the pH is wrong” in a direct way. Instead, they show a pattern of stress that keeps returning even after normal care has been corrected. The key is to notice combinations of symptoms rather than a single yellow leaf.
When pH is outside the useful range, symptoms often appear unevenly. One species may struggle while another nearby looks fine. New growth may emerge pale, or lower leaves may yellow despite regular feeding. A plant can also stop growing well without obvious wilting, which separates pH problems from simple drought stress.
Leaf and growth clues to watch for
Yellowing caused by pH imbalance often follows nutrient-specific patterns. Looking closely at the veins, the age of the affected leaves, and whether the problem spreads upward or downward gives better clues than leaf color alone.
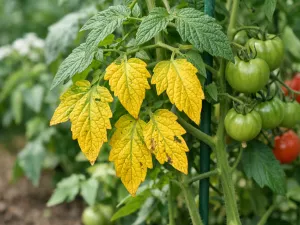
- Interveinal chlorosis: leaf tissue turns yellow while veins stay green, often linked with iron or manganese lockout in alkaline soil.
- Older leaves fading first: can suggest magnesium or other mobile nutrient issues, sometimes tied to acidic conditions or leaching.
- Stunted new growth: the plant stays small even during the active season.
- Poor flowering or fruiting: buds form weakly or drop early because nutrient uptake is inconsistent.
- Leaf scorch after feeding: fertilizer salts accumulate because the plant cannot use nutrients efficiently.
- Repeated chlorosis in one plant type: especially common when acid-loving plants are grown in neutral to alkaline ground.
Site-level warning signs
The growing environment often gives away the cause. Soil near concrete foundations may become more alkaline over time. Containers with white mineral crusts around the rim often receive hard water that raises pH gradually. Beds that have been limed repeatedly can overshoot the target, while heavily leached sandy soils may become too acidic after long periods of rain.
If yellowing keeps returning in the same spot season after season, pH should move high on the troubleshooting list.
How to test soil pH quickly and accurately

Testing is the fastest way to stop guessing. A visual diagnosis can point you in the right direction, but only a pH test confirms whether the root environment is actually too acidic or too alkaline. The best method depends on whether you need a quick check for one container or a more reliable reading for a whole garden bed.
For houseplants and small containers, a simple pH meter or test kit can be useful if used carefully. For outdoor beds, a laboratory soil test gives the most dependable result because it also reports nutrient levels and buffering capacity, which matters when deciding how much amendment to apply.
Fast testing options
Quick methods are helpful when a plant is actively declining and you need a direction before making changes. They are not all equally accurate, so technique matters.
- Use a home soil pH kit: collect soil from the root zone, remove debris, and follow the kit instructions exactly. Test several spots and compare the results.
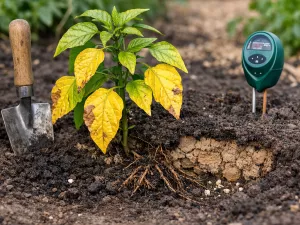
- Try a calibrated digital meter: suitable for repeated checks, especially in containers. Clean the probe between samples and calibrate it as recommended by the manufacturer.
- Check irrigation water: if you grow in pots, test the water too. Water with high alkalinity can slowly push a mix upward in pH even if the starting soil was ideal.
- Send a sample to a lab: best for persistent yellowing in beds, lawns, or productive borders where long-term correction matters.
How to collect a useful sample
A poor sample gives a poor result. Do not scrape only the dry top layer. Take soil from the active root area, usually 10 to 15 cm (4 to 6 in) deep for many bedding plants and vegetables, and a little deeper for shrubs if possible. Mix several small samples from the same planting area before testing.
For containers, sample from below the surface where roots are actually growing, not just from the crusty top. If the pot is very dry, water lightly and wait before testing so the reading reflects normal growing conditions.
Editor’s note: Homemade vinegar-and-baking-soda tests are entertaining but unreliable. They can suggest extremes, yet they are not precise enough for correcting yellow leaf problems.
Ways to safely adjust soil pH for better nutrient uptake

Once you know the pH is off, the safest correction is a gradual one. Sudden swings can shock roots, disrupt soil life, and create a new set of deficiencies. The right amendment depends on whether you need to raise pH, lower it, or simply make nutrients more available while the soil is being corrected over time.
Container plants usually respond faster than garden beds because the soil volume is smaller. Outdoor soil changes more slowly, especially clay or heavily buffered ground. That is why measured applications and follow-up testing matter more than one large treatment.
How to raise pH in overly acidic soil
If the soil is too acidic for the plant you are growing, lime is the standard amendment. Garden lime adds calcium and raises pH gradually. Dolomitic lime also adds magnesium, which can help where magnesium is low. Apply according to test results rather than guesswork, because too much can push the soil into a new problem.
- Use finely ground lime: it reacts more evenly than coarse material.
- Work it into the top layer: where possible, mix into the top 10 to 15 cm (4 to 6 in) of soil before planting.
- Water after application: moisture helps the amendment begin reacting.
- Retest later: check again after several weeks in containers or after a season in outdoor beds.
How to lower pH in alkaline soil
To make alkaline soil more suitable for acid-loving plants, elemental sulfur is commonly used. Soil microbes convert it over time, so results are gradual rather than immediate. In containers, switching to a fresh mix formulated for acid-loving plants is often quicker and more reliable than trying to force a major pH shift in old media.
Acid-forming fertilizers can also help maintain a lower pH once you are close to the target, but they should support the correction, not replace proper testing.
- Elemental sulfur: effective for lowering pH gradually in beds and some containers.
- Acidic potting mix: useful for gardenias, azaleas, blueberries, and camellias in pots.
- Chelated iron: can temporarily improve chlorosis in alkaline conditions while the soil is being corrected.
- Rainwater use: helpful for sensitive container plants when tap water is very hard.
What not to do
Some common fixes create more instability than improvement. Avoid repeated doses of random kitchen acids, wood ash without a test, or heavy feeding to “green up” a chlorotic plant. These may change the chemistry briefly or unevenly and can burn roots or worsen nutrient imbalance.
If a plant has severe yellowing and the soil is far from its preferred range, transplanting into a suitable mix may be the cleanest solution, especially for potted specimens.
How stable pH levels prevent recurring yellow leaf problems
The long-term goal is not just to correct one episode of chlorosis but to keep the root environment steady enough that nutrient uptake stays reliable. Plants handle small fluctuations well. Trouble starts when pH drifts repeatedly because of inconsistent watering, unsuitable fertilizer, poor-quality water, or a mismatch between plant and soil type.
Stable pH supports more than leaf color. It improves root growth, helps beneficial microbes function properly, and makes feeding programs more predictable. When the soil reaction remains in the right range, plants use water and nutrients more efficiently and recover better from heat, pruning, and transplant stress.
Habits that keep pH from drifting
Prevention is usually easier than repeated correction. Choosing plants that suit your native soil reduces maintenance from the start. For containers, using a quality mix and monitoring water source makes a major difference over time.
- Match plant to soil: grow acid-loving species only where the soil or potting mix can support them.
- Use fertilizer with purpose: avoid constant high-dose feeding and choose formulas suited to the plant and water conditions.
- Watch your water: hard water can gradually raise pH in pots; collected rainwater can be gentler for sensitive plants.
- Refresh old potting mix: repot container plants before the medium becomes compacted, salty, and chemically unstable.
- Test periodically: once or twice a year is often enough for problem areas, or sooner if yellowing returns.
Why recurring yellow leaves often trace back to the same cause
Many gardeners treat the symptom each time it appears with iron tonic, extra feed, or more watering. That may improve the plant briefly, but the yellowing returns because the root-zone chemistry never changed. Stable pH breaks that cycle. Once the soil reaction is right, nutrient problems become easier to diagnose because you are no longer dealing with hidden lockout.
When a plant greens up after correction and stays healthy through new growth, that is a stronger sign of success than the color of the oldest damaged leaves. Those older leaves may never recover fully. What matters is that the fresh growth emerges evenly colored, strong, and proportionate to the plant.
Practical recommendation: Keep a simple garden note with pH readings, fertilizer type, and water source. A few lines of record-keeping often reveal patterns that are easy to miss from memory alone.