Yellow Leaves After Transplanting Plants

 This article explains why plants get yellow leaves after being moved, especially from root disturbance and watering issues. It covers normal stress signs versus lasting damage, how to help plants recover faster, how to prevent future transplant shock, and when recovery usually starts.
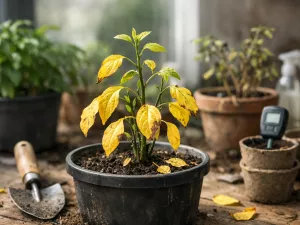
Yellowing leaves after moving a plant to a new pot or garden bed often worry gardeners, but this usually reflects transplant stress rather than a serious problem. Disturbed roots, changes in moisture, light, or temperature, and the effort of adjusting to a new environment can all cause this response. Knowing which symptoms are normal, which suggest trouble, and how to support recovery helps reduce shock and prevent lasting damage.
Why transplant shock causes yellow leaves

Yellowing foliage soon after moving a plant is usually a response to transplant shock, not an instant sign that the plant is dying. When a plant is lifted, divided, repotted, or relocated in the garden, it loses part of its ability to take up water and nutrients at the very moment it must adjust to a new environment. Leaves often react first because they are where water loss and energy use are easiest to see.
Plants maintain leaf color through chlorophyll production and steady movement of water, oxygen, and minerals. After transplanting, that balance is disrupted. Even if the soil is good and the plant was handled carefully, the roots may temporarily absorb less moisture than the leaves are losing. The result can be pale foliage, drooping stems, leaf scorch, or yellow leaves that appear within a few days.
Why the leaves change color first
Leaves are the most exposed part of the plant. Sun, wind, and dry air increase transpiration, which is the process of water evaporating from leaf surfaces. If the roots cannot keep up, the plant starts conserving resources. Older leaves may yellow first because the plant redirects nutrients and moisture toward new roots and younger growth.
- Reduced water uptake: Damaged or disturbed roots cannot supply enough moisture to support the full canopy.
- Nutrient interruption: Nitrogen, magnesium, and iron uptake may slow temporarily, causing chlorosis-like yellowing.
- Environmental mismatch: A plant moved from shade to stronger light, or from a sheltered spot to wind, can yellow faster.
- Energy reallocation: The plant may shed some leaves to reduce demand while rebuilding its root system.
Why this is common after both potting and garden moves
Container plants and in-ground plants both experience stress, but for slightly different reasons. A potted plant may struggle with changed potting mix moisture levels, while a garden transplant may face compacted soil, temperature swings, or root breakage during digging. In either case, yellow leaves are often part of a short adjustment period rather than a permanent decline.
Editor’s note: A few yellow leaves after transplanting are normal. Panic watering or immediate fertilizing often creates a second problem on top of the first.
Root disturbance and its immediate effects

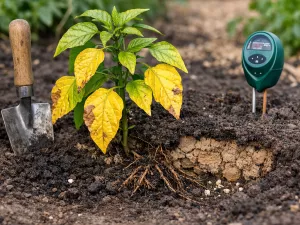
The root system is where transplant stress begins. Fine feeder roots are especially important because they handle most of the water and nutrient absorption. These tiny roots are delicate and easily broken when a plant is lifted from a pot, teased apart, or dug from the ground. Even a healthy-looking root ball can lose enough active root tips to affect the top growth almost immediately.
Once those feeder roots are damaged, the plant faces a temporary supply problem. The leaves continue losing moisture, but the roots are no longer collecting it efficiently. This imbalance can trigger yellowing, wilting, curling, or leaf drop. The larger the top growth compared with the surviving root mass, the more obvious the symptoms tend to be.
What happens below the soil line
Root disturbance is not only about breakage. It also includes compression, exposure to air, and poor contact with the new soil. If roots dry out for even a short time during planting, their performance drops. If they are bent into a tight hole or left circling in a pot shape, they may take longer to spread into surrounding soil.
- Broken feeder roots: Immediate reduction in water and mineral uptake.
- Air gaps around roots: Soil does not make full contact, so roots cannot draw moisture evenly.
- Compacted planting hole: Roots meet resistance and expand more slowly.
- Buried too deeply: Oxygen levels around the crown and upper roots decrease.
- Root-bound patterns: Circling roots may continue wrapping instead of growing outward.
How different plants respond
Some species tolerate root handling better than others. Annual bedding plants often recover quickly, while woody shrubs, conifers, and plants with fleshy or brittle roots may react more strongly. Vegetable seedlings can yellow fast if roots are exposed to sun and wind for only a few minutes, while houseplants may show delayed symptoms over one to two weeks.
If a plant was already stressed before moving, root disturbance has a bigger effect. A dry root ball, a plant that was pot-bound for months, or one moved during hot weather above 29°C (85°F) is more likely to show yellow leaves than a well-watered plant transplanted in cool conditions around 16–24°C (61–75°F).
How watering impacts newly transplanted plants

Watering is one of the biggest factors in whether a transplanted plant settles in or declines. The challenge is that newly moved plants need consistent moisture, but they are also vulnerable to overwatering because their damaged roots cannot use water as efficiently as before. Yellow leaves can come from both extremes, which is why watering by habit instead of checking the soil often leads to confusion.
Right after planting, the goal is to moisten the root zone thoroughly so the soil settles around the roots and eliminates air pockets. After that, the aim shifts to keeping the soil evenly damp, not constantly saturated. Wet soil excludes oxygen, and roots need oxygen as much as they need water. If the planting area stays soggy, roots stop functioning well and leaves may turn yellow from the bottom up.
Underwatering versus overwatering
The symptoms can overlap, but the pattern usually gives clues. Dry stress often causes limp leaves, crisp edges, and rapid drooping in heat. Excess water tends to produce softer yellowing, slower decline, and a heavy, cool soil feel. Looking only at the leaf color is not enough; the root zone must be checked.
| Condition | Typical leaf symptoms | Soil clues | Best response |
|---|---|---|---|
| Too little water | Wilting, dry tips, yellowing followed by browning | Dry 5 cm (2 in) or more below the surface | Water deeply and evenly, then monitor more often |
| Too much water | Soft yellow leaves, droop without crispness, slow growth | Wet, dense, or sour-smelling soil | Let the top layer dry slightly and improve drainage |
| Inconsistent watering | Mixed yellowing, leaf drop, stalled recovery | Alternates between bone-dry and saturated | Set a check routine based on soil moisture, not the calendar |
| Hydrophobic root ball | Plant wilts even after watering | Water runs down the sides instead of soaking in | Water slowly in stages until the root ball is fully rehydrated |
How to water more accurately
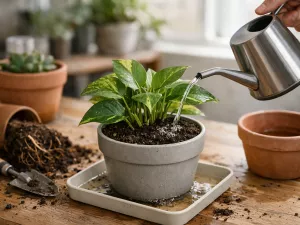
New transplants benefit from slower, deeper watering rather than frequent light splashes. A small shrub or perennial often does better with a thorough soak than with daily surface wetting. For containers, water until excess drains out, then wait until the upper layer begins to dry before watering again.
- Check the soil 5-8 cm (2-3 in) below the surface with a finger or trowel.
- Water slowly so moisture reaches the full root ball, not just the surrounding soil.
- Pause and repeat if the root ball was very dry and repels water at first.
- Adjust frequency for weather, wind, pot size, and soil type.
- Reduce watering only after you see stable new growth.
Practical tip: If the plant was root-bound, water can bypass the old root ball and soak only the new soil around it. A second slow pass 5-10 minutes later often solves that problem.
Signs of stress vs long-term damage

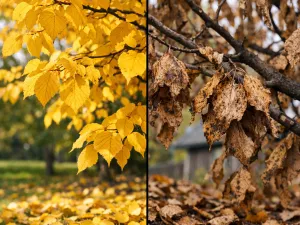
Not every yellow leaf means serious trouble. Many plants shed a portion of their older foliage after transplanting and still recover well. The key is to tell the difference between a short-lived adjustment phase and damage that is progressing. Timing, pattern, and the condition of new growth matter more than a single yellow leaf.
Short-term stress usually appears within days of transplanting and then stabilizes. Long-term damage tends to spread, deepen, or involve stems and roots. If the plant holds firm in the soil, the stems remain flexible, and new buds stay green, recovery is still likely even if some leaves are lost.
Signs that point to temporary transplant stress
These symptoms are common and often reversible when care is corrected quickly.
- Yellowing on older, lower leaves: The plant is sacrificing less productive foliage first.
- Mild daytime wilt with evening recovery: Roots are catching up, though not fully established yet.
- Limited leaf drop: A small amount of shedding can reduce water demand.
- Stable stems and crown: The plant remains structurally sound and not mushy or brittle.
- New growth still present: Buds, tips, or central leaves remain green.
Signs that suggest more serious damage
When symptoms worsen instead of leveling off, the issue may be deeper than normal transplant shock. Root rot, severe dehydration, stem injury, or planting depth problems can all lead to lasting decline.
- Yellowing spreads rapidly to most of the plant: Especially concerning if it reaches young leaves quickly.
- Blackened stems or crown tissue: Often linked to rot or cold damage.
- Persistent wilt in cool weather: A sign roots are failing, not just struggling in heat.
- No new growth after several weeks: Recovery is slower than expected for the plant type and season.
- Foul smell or mushy roots: Strong indicator of overwatering or poor drainage.
Quick checks that give better answers
A closer inspection is more useful than guessing from leaf color alone. Gently scrape a stem with a fingernail; green tissue underneath suggests the stem is still alive. Check whether the root flare or crown is buried. Look at the newest leaves, not only the oldest ones. If possible, inspect drainage holes in containers for healthy white or tan roots rather than dark, collapsing ones.
One caution: avoid repeatedly pulling the plant up to inspect it. That creates fresh root disturbance and resets recovery.
Best practices to help plants adapt faster

Helping a plant recover is mostly about reducing demand while encouraging new root growth. The plant does not need a complicated rescue plan. It needs steady moisture, suitable light, good soil contact, and time. Sudden changes in fertilizer, pruning, or placement often slow recovery instead of speeding it up.
The most effective approach is to support the root system first. Once roots begin expanding into the new soil, leaf color and growth usually improve on their own. This is why calm, consistent aftercare works better than aggressive intervention.
Immediate care after transplanting
The first few days are the most sensitive period. Gentle handling and stable conditions can prevent stress from becoming long-term damage.
- Water deeply right after planting to settle the soil around the roots.
- Provide temporary shade for sun-sensitive plants for 2-5 days if they were moved in bright weather.
- Keep mulch 5-8 cm (2-3 in) away from the stem or crown to avoid excess moisture against the base.
- Shield tender plants from strong wind, which increases moisture loss.
- Delay feeding until the plant shows signs of renewed growth, unless it was planted in clearly depleted soil.
Light, feeding, and pruning decisions
Light levels matter more than many gardeners expect. A plant moved from a greenhouse, windowsill, or shaded nursery bench into direct afternoon sun can yellow even if watering is correct. Gradual exposure is safer. For houseplants, bright indirect light is often ideal during recovery.
Fertilizer should be used carefully. Strong liquid feed or high-nitrogen products can stress damaged roots, especially in dry soil. If feeding is needed, use a diluted solution at half strength once active growth resumes. For example, if the label suggests 10 ml per 1 L (2 tsp per 1 qt), start with 5 ml per 1 L (1 tsp per 1 qt).
Pruning depends on the plant. Removing dead, fully yellow leaves is reasonable, but heavy pruning right away is not always helpful. The remaining healthy leaves still make energy for root repair. Only reduce top growth if the plant is severely wilted, badly root-reduced, or if broken stems need cleaning up.
Editor’s note: Resist the urge to “fix” every yellow leaf immediately. If the newest growth looks healthy, the plant is often already doing the work of recovery.
How to reduce transplant shock in the future

Prevention starts before the plant ever goes into the ground or a new pot. Most yellowing after transplanting can be reduced by timing the move well, preparing the root ball properly, and matching the plant to the new conditions. A plant that is moved during mild weather and planted at the correct depth usually rebounds much faster than one transplanted in heat, wind, or poor soil.
Good preparation also means understanding the species. Some plants, such as cucumbers, magnolias, and many tap-rooted specimens, dislike root disturbance more than others. With these, minimizing handling is especially important.
Timing and site preparation
Cooler parts of the day and milder seasons give roots time to establish before the top growth is stressed. Early morning or late afternoon is usually better than midday. In many climates, spring and early autumn are the safest transplant windows for shrubs and perennials, while summer moves are riskier unless irrigation is reliable.
- Choose moderate weather: Avoid transplanting during heat waves, frost, or drying winds.
- Prepare the hole first: Make it wide enough for roots to spread naturally, but not so deep that the plant sinks.
- Moisten dry soil in advance: Slightly damp planting soil settles better around roots.
- Match light conditions: Harden plants off before moving them into stronger sun.
- Water the plant beforehand: A hydrated root ball handles the move better than a dry one.
Handling roots the right way
How you treat the root ball has a direct effect on yellowing later. Plants removed from pots should be checked for circling roots. If roots are tightly wrapped, loosen or score them lightly so they grow outward. Bare-root plants should never be left exposed to sun or wind; keep roots covered and damp until planting.
For container moves, choose a pot only slightly larger than the old one. Jumping from a small pot to a very large one can keep excess soil wet for too long. As a guide, increase the pot diameter by about 2.5-5 cm (1-2 in) for small to medium houseplants rather than doubling the size all at once.
Aftercare that prevents future yellowing
Consistent monitoring matters more than strict schedules. Weather, soil type, and plant size all change how quickly the root zone dries. Sandy soil needs more frequent checks than clay, and containers dry faster than garden beds.
- Use mulch wisely: A layer of 5-7 cm (2-3 in) helps moderate temperature and moisture swings.
- Stake only when needed: Excessive staking can reduce natural trunk strengthening in young trees.
- Avoid heavy fertilizer at planting: Let roots establish first.
- Watch the first two weeks closely: Early correction prevents a small setback from becoming severe stress.
When plants will recover after relocation
Recovery time depends on the plant type, season, root loss, and growing conditions. Small annuals and vegetable seedlings may perk up in a few days, while shrubs and trees can take weeks or even months to fully re-establish. Yellow leaves already damaged by stress usually do not turn green again, but the plant can still recover by producing healthy new growth.
A useful way to judge progress is to look for stability first and growth second. If the yellowing stops spreading, wilting becomes less frequent, and the stems remain firm, the plant is moving in the right direction. New leaves, fresh buds, or root growth from drainage holes are stronger signs of recovery than old leaves improving.
Typical recovery windows
These timelines are general, but they help set realistic expectations.
| Plant type | Common recovery range | What improvement looks like |
|---|---|---|
| Annual flowers and vegetable seedlings | 3-10 days | Leaves lift, color stabilizes, new tip growth resumes |
| Houseplants after repotting | 1-3 weeks | Less drooping, steady new leaves, normal water use returns |
| Perennials and small shrubs | 2-6 weeks | Fresh shoots appear and leaf drop slows or stops |
| Trees and large woody plants | Several weeks to one full season | Bud break, extension growth, and stable canopy color |
When to intervene more seriously
If there is no sign of stabilization after a reasonable period, reassess the basics. Check planting depth, drainage, root ball moisture, and light exposure. A plant that continues yellowing for more than 2-3 weeks without any healthy new growth may need a change in care or, in severe cases, replanting into better conditions.
Still, patience is part of good plant care. A recently moved plant is rebuilding below the surface before it can look better above it. As long as stems remain alive and the root zone is not staying waterlogged or bone dry, many plants recover more slowly than gardeners expect but still recover well.