Scale Insects on Indoor Plants – Signs and Treatment

 This article explains why indoor plants get scale, the early signs to watch for, and where the insects hide. It also covers sticky residue and black mold, quick isolation, safe indoor treatment, cleanup of plants and surfaces, common mistakes, and how to stop spread.
- Why indoor plants are vulnerable to scale infestations
- Early warning signs of scale on houseplants
- Where scale insects hide on indoor plants
- How sticky residue and black mold develop indoors
- Best ways to isolate infected houseplants quickly
- Safe treatment methods for indoor use
- How to clean leaves, pots, and nearby surfaces after infestation
- Mistakes that make scale problems worse indoors
- How to protect other indoor plants from spread
Scale pests on houseplants are easy to overlook at first, but early detection makes treatment much easier and helps prevent serious damage. These tiny sap-sucking insects often resemble small bumps on stems or leaves, which can delay identification until the problem spreads. Knowing the warning signs is key. This guide covers how to spot scale insects early and the most effective indoor methods to remove them and keep them under control.
Why indoor plants are vulnerable to scale infestations

Houseplants often seem protected from outdoor pests, but indoor conditions can actually make scale insects easier to establish. These sap-feeding pests thrive when plants are under mild, ongoing stress rather than dramatic outdoor swings in weather. Inside a home, temperatures are usually steady, predators are almost absent, and plants may stay in the same spot for months, giving scale plenty of time to multiply unnoticed.
Indoor plants are also more likely to experience subtle care imbalances. Low light, irregular watering, dry air from heating, and accumulated dust on leaves can all weaken growth. A stressed plant produces softer tissue and has less energy to replace damaged leaves and stems, so a small infestation can become a persistent one.
Why the indoor environment helps scale survive
Scale insects do not need much movement to spread on a single plant. Once the young crawler stage settles and begins feeding, the insect becomes protected under a waxy or shell-like covering. Indoors, there is no heavy rain, strong wind, or beneficial insect activity to knock populations back.
- Stable warmth: Rooms kept around 18–24°C (65–75°F) support ongoing feeding and reproduction.
- Limited airflow: Still air around crowded plants makes it easier for pests to remain undisturbed.
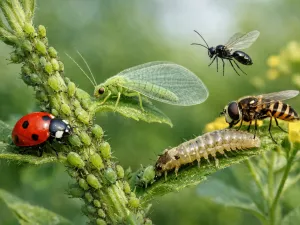
- No natural enemies: Ladybirds, parasitic wasps, and other outdoor predators are usually absent indoors.
- Long-term host access: A plant kept in one pot year-round gives scale a continuous food source.
Plants most likely to struggle
Scale can attack many indoor species, but infestations are especially common on broad-leaved tropical plants, woody houseplants, citrus grown indoors, ficus, schefflera, ivy, orchids, and succulents with tight leaf joints. Plants that have been recently moved, repotted, or brought home from a shop are particularly vulnerable because they are already adjusting to new light and moisture levels.
Overfeeding can also play a part. Heavy fertilizer use may push soft, lush growth that is attractive to sap-feeding pests. By contrast, a plant growing steadily in suitable light, with balanced watering and occasional pruning, is usually better able to tolerate and recover from minor damage.
New plants are one of the most common ways scale enters a home. A quick inspection at purchase is helpful, but a separate holding area for 2 weeks is even better because tiny crawlers are easy to miss at first glance.
Early warning signs of scale on houseplants

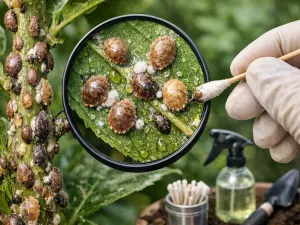
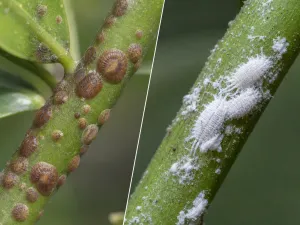
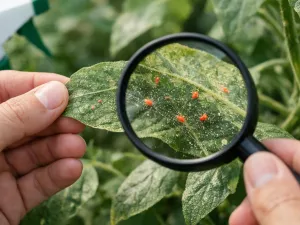
Scale infestations are often missed in the early stage because the insects do not look like typical bugs. They may resemble tiny brown bumps, pale waxy discs, or immobile scabs attached to stems and leaves. The first clues are often changes in the plant itself rather than obvious pest movement.
Early detection matters because treatment is much easier before the insects spread to multiple stems or neighboring pots. A plant checked every week during watering is far less likely to develop a heavy infestation than one that is only noticed when leaves begin dropping.
Changes in plant appearance
The earliest visible symptoms usually reflect sap loss. The plant may look dull, tired, or uneven long before severe damage appears. New growth can emerge smaller than normal, and leaves may lose their healthy sheen.
- Yellowing leaves: Often starts gradually, especially on older foliage.
- Leaf drop: Common when feeding has continued for some time.
- Stunted growth: New shoots stay short or distorted.
- Sticky leaves: Honeydew may appear before you spot the insects themselves.
- Patchy decline: One branch or side of the plant may weaken first.
What the insects look like
Different species vary in color and texture. Some look like flat tan scales, while others are rounded and dark brown. Soft scale often produces more sticky residue, while armored scale can appear drier and more shell-like. They are usually found attached firmly enough that a light shake will not dislodge them.
If you gently scrape one with a fingernail or a cotton swab, it may lift off as a small bump. That simple test often distinguishes scale from natural stem texture or harmless corking on older growth.
Signs that are easy to confuse with other problems
Because houseplants can yellow from poor drainage, low light, or nutrient issues, scale is often misdiagnosed. The difference is that pest damage usually comes with visible bumps, sticky residue, or concentrated decline around stems and leaf veins.
- Not just watering stress: Watering problems affect the whole plant more evenly, while scale often clusters in specific feeding sites.
- Not ordinary dust: Dust wipes away cleanly; scale remains attached.
- Not edema or scarring: Plant tissue damage is part of the leaf or stem, while scale sits on top of the surface.
Where scale insects hide on indoor plants

One reason scale becomes established indoors is that it hides in places many growers do not inspect closely. The insects favor sheltered areas where they can feed without being rubbed off during normal plant care. A quick look at the top of the leaves is rarely enough.
Most infestations begin in tight, protected spots and then spread outward. If you only treat the obvious insects on exposed leaves, hidden survivors can restart the problem within a few weeks.
Common hiding spots to inspect first
Use bright natural light or a small torch and check slowly. Turning the pot a quarter turn at a time helps you inspect the whole plant instead of only the front-facing side.
- Along midribs and veins: Especially on the undersides of leaves where sap flow is easy to access.
- At leaf axils: The angle where leaf meets stem is a classic hiding place.
- On stems and petioles: Woody or semi-woody growth often hosts dense clusters.
- Near pruning cuts: Tender regrowth around trimmed areas can attract crawlers.
- Under dried leaf sheaths: Common on orchids, palms, and some dracaenas.
- Around the crown: Rosette plants and compact succulents can hide pests deep in the center.
Plants with structures that conceal infestations
Certain houseplants make inspection harder simply because of how they grow. Dense canopies, overlapping leaves, and branching stems create sheltered feeding zones. Citrus, ficus, hoya, ivy, and indoor shrubs with many twigs deserve especially careful checks.
Trailing plants are another challenge. The top growth may look fine while scale gathers on the stems hanging behind the pot or pressed against a wall. Hanging baskets should be lifted down and inspected from below rather than viewed only at eye level.
When checking a suspicious plant, inspect the stem first, not the leaf blade. Scale often establishes on stems before the foliage shows obvious stress, especially on woody indoor plants.
How sticky residue and black mold develop indoors

Sticky residue on leaves, shelves, or nearby windowsills is one of the strongest clues that soft scale is feeding on a plant. As these insects consume sap, they excrete excess sugars in the form of honeydew. Indoors, that sugary film can build up quickly because there is no rain to wash it away.
Once honeydew coats leaves and surrounding surfaces, sooty mold may begin to grow. This black fungal coating does not invade the plant tissue itself, but it blocks light, makes the plant look dirty, and further reduces photosynthesis. In a room with limited airflow, the problem can become very noticeable.
How the process develops
The chain of events usually follows a predictable pattern. First, scale feeds and weakens the plant. Then sticky droplets appear on lower leaves, pots, furniture, or the floor beneath the plant. Finally, black mold colonizes the sugary surface if the residue remains in place.
- The insect pierces plant tissue and feeds on sap.
- Excess sugar is expelled as honeydew.
- Leaves and nearby objects become tacky.
- Sooty mold grows on the residue, creating a dull black film.
Why this is worse indoors than outside
Inside a home, honeydew can spread beyond the plant itself. It may drip onto saucers, shelves, radiators, and curtains near a bright window. Dust sticks to the residue, making cleanup harder and giving mold more material to cling to. Plants grouped tightly together can also transfer the sticky coating from leaf to leaf.
Although sooty mold is secondary, it should not be ignored. A leaf covered in black film receives less usable light, which is a real setback for indoor plants already growing in lower light than they would outdoors.
| Symptom | Likely cause | What it means for the plant |
|---|---|---|
| Clear sticky droplets | Fresh honeydew from feeding insects | Active infestation is present, often soft scale |
| Tacky leaf surfaces | Accumulated residue mixed with dust | Photosynthesis is reduced and cleanup is needed |
| Black soot-like coating | Sooty mold growing on honeydew | Plant is under prolonged pest pressure |
| Sticky area below the pot | Honeydew dripping from upper foliage | Infestation may be above eye level or hidden in stems |
Best ways to isolate infected houseplants quickly

Fast isolation is one of the most effective ways to stop scale from moving through a collection. While adult insects do not travel much, the crawler stage can spread on hands, tools, nearby leaves, or by simple contact between crowded plants. Separating an affected plant right away buys time and prevents a minor problem from becoming a room-wide one.
The goal is not just to move the plant, but to create a temporary care routine that avoids carrying pests back to healthy specimens. Isolation works best when it is practical and immediate, even if the ideal treatment space is not available.
Where to place the plant
Choose a spot with decent light and easy-to-clean surfaces. A bathroom with a bright window, a utility room, or a separate windowsill away from the main plant group can work well. Avoid putting the plant in a dark corner just because it is out of the way, since poor light adds stress and slows recovery.
- Keep distance: Aim for at least 1-2 m (3-6.5 ft) from other plants if a separate room is not possible.
- Use a washable surface: Place the pot on a tray or saucer that can be cleaned often.
- Maintain suitable light: Match the plant’s normal needs as closely as possible.
- Reduce handling: Move it once, then leave it in place except for treatment and inspection.
How to avoid spreading crawlers during handling
Scale often spreads during well-meant care. If you inspect a heavily infested plant and then prune or water healthy ones without washing your hands or tools, you may transfer young insects. Treat the affected plant last in your routine, not first.
- Move the infected plant away from the collection.
- Remove fallen leaves from the original area.
- Wash hands with soap and water after handling it.
- Disinfect pruners, stakes, and clips before reuse.
- Check neighboring plants over the next 2-3 weeks.
If the infestation is severe, consider bagging prunings and heavily infested fallen material immediately rather than leaving debris in an indoor compost caddy. That simple step reduces the chance of crawlers lingering nearby.
Safe treatment methods for indoor use
Indoor treatment should focus on methods that are effective but manageable in living spaces. Scale is difficult to control with one quick spray because the protective covering shields many life stages. The best approach combines physical removal, repeat inspection, and carefully chosen products that are suitable for indoor use.
Before treating, test any product on a small section of the plant and wait 24-48 hours. Some species, especially ferns, thin-leaved tropicals, and certain succulents, can react badly to oils, soaps, or alcohol if overapplied.
Manual removal for light infestations
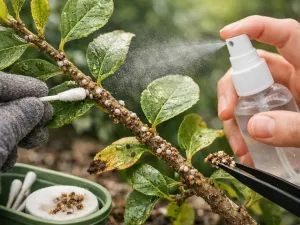
If the problem is caught early, physically removing the insects can be very effective. This works best on sturdy plants with accessible stems and leaves. A cotton swab lightly moistened with isopropyl alcohol, or a soft cloth with diluted insecticidal soap, can loosen individual scale insects so they can be wiped away.
- Use gentle pressure: Rub just enough to detach the insect without tearing the leaf surface.
- Work stem by stem: Random wiping often misses hidden clusters.
- Dispose of wipes immediately: Do not leave them near other plants.
- Recheck weekly: Crawlers may hatch after the first cleanup.
Soap, oil, and ready-to-use products
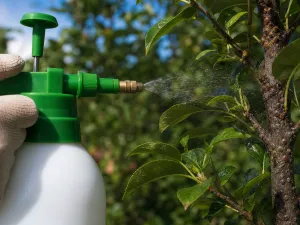
Insecticidal soap and horticultural oil can help smother exposed scale, especially the crawler stage. Indoors, ready-to-use formulations are often easier and safer than mixing stronger concentrates. Apply in good ventilation and avoid direct hot sun immediately after treatment, as wet leaves can scorch in a bright south-facing window.
Coverage matters more than volume. A light mist over the top of the plant is rarely enough. The product must reach stems, undersides of leaves, leaf joints, and the crown where pests hide.
| Treatment type | Best use indoors | Main caution |
|---|---|---|
| Isopropyl alcohol on a swab | Small, visible clusters on tough leaves and stems | Can mark delicate foliage if overused |
| Insecticidal soap | Broad coverage on active crawlers and light infestations | Needs repeat applications and full contact |
| Horticultural oil | Smothering exposed pests on sturdy plants | May cause leaf burn in heat or strong sun |
| Pruning infested parts | Heavy colonies on a few stems or leaves | Do not remove too much growth at once |
When pruning is the better option
Sometimes a few badly infested stems are not worth saving. Pruning them off can reduce the pest load dramatically and make follow-up treatment much easier. Use clean pruners and avoid removing more than about one-third of the plant at one time unless the plant is already in severe decline and you are trying to salvage what remains.
After pruning, adjust watering slightly. A plant with less foliage usually needs less moisture, and overwatering a recently treated specimen can create a second stress problem.
If a plant has repeated heavy infestations despite treatment, replacement may be more sensible than rescue. This is especially true for inexpensive plants with dense growth that makes complete coverage nearly impossible indoors.
How to clean leaves, pots, and nearby surfaces after infestation
Cleaning after treatment is not just cosmetic. Honeydew, dead insects, and sooty mold can remain on the plant and around it, attracting dust and making it harder to tell whether the infestation is truly gone. A clean plant is also easier to monitor because fresh pests stand out clearly against healthy foliage.
Work methodically from the plant outward. Start with the leaves and stems, then wash the pot, saucer, shelf, and any nearby surfaces that may have caught residue. This prevents you from recontaminating the plant by setting it back onto a sticky tray.
Cleaning the plant itself
Use lukewarm water rather than cold water, which can shock tropical plants. A soft cloth or sponge is usually enough for broad leaves. For narrow foliage or plants with many crevices, a gentle shower can help, provided the potting mix does not stay waterlogged afterward.
- Wipe each leaf, including the underside, to remove residue and mold.
- Clean stems and petioles where insects were attached.
- Rinse the cloth often so you are not spreading sticky buildup around.
- Let the plant dry in bright, indirect light with good airflow.
Cleaning pots, saucers, and the surrounding area
Pots and nearby surfaces often collect more honeydew than growers expect. Decorative cachepots, windowsills, plant stands, and even the wall behind a plant can become tacky over time. Mild soapy water is usually enough for hard surfaces, followed by a clean wipe to remove residue.
- Plastic and glazed pots: Wash thoroughly and rinse well.
- Terracotta: Scrub gently so sticky residue does not remain in the porous surface.
- Saucers and trays: Clean both top and underside before reuse.
- Shelves and glass: Wipe until no tacky film remains.
If the top layer of potting mix is littered with dead scale, honeydew, or moldy debris, remove the top 1-2 cm (0.5-0.8 in) and replace it with fresh mix. This is not always essential, but it can make the plant area cleaner and easier to monitor during recovery.
Mistakes that make scale problems worse indoors
Many indoor scale problems become severe not because the pest is unbeatable, but because treatment is delayed or inconsistent. A few common mistakes allow surviving insects to rebound quickly. Since scale is protected by its covering and often hidden in stem joints, casual treatment rarely solves the issue.
Recognizing these errors can save a lot of time and frustration. It is usually better to do a careful, moderate treatment plan several times than one aggressive cleanup followed by neglect.
Common treatment errors
One of the biggest mistakes is assuming the infestation is gone after the visible adults are removed. Eggs and crawlers may still be present. Another is spraying only the upper leaf surface, which leaves the main feeding sites untouched.
- Skipping follow-up checks: Reinspection after 7-10 days is essential.
- Treating only what is obvious: Hidden clusters remain in leaf axils and on stems.
- Using too much product: Overapplication can damage foliage without improving control.
- Ignoring plant stress: Low light, poor drainage, or drought make recovery slower.
- Returning the plant too soon: Moving it back beside healthy plants before repeated clean checks risks spread.
Care mistakes that weaken the plant further
After an infestation is discovered, some growers react by changing everything at once: repotting, fertilizing heavily, pruning hard, and moving the plant to a much brighter spot. That stack of stress can be harder on the plant than the pest itself. Recovery is usually better when care is stabilized rather than dramatically altered.
Keep watering appropriate to the reduced leaf mass and current light level. If a plant has lost many leaves, it will use water more slowly. Fertilizer should also be modest until active new growth resumes.
A final mistake is keeping leaves dusty. Dusty foliage hides early reinfestation and reduces the plant’s ability to use light efficiently. Clean leaves make both plant health and pest monitoring easier indoors.
How to protect other indoor plants from spread
Once one plant has scale, the rest of the collection should be treated as potentially exposed. That does not mean every plant needs pesticide, but it does mean inspection and preventive hygiene become important. The crawler stage is small enough to escape notice, especially when plants are grouped tightly on a shelf or windowsill.
Protection works best as a routine rather than a one-time reaction. A few simple habits can prevent recurring outbreaks and make future infestations easier to catch while they are still minor.
Monitoring nearby plants
Start with the plants closest to the infected one, then expand outward. Check stems, undersides of leaves, and leaf joints once a week for at least 3-4 weeks. Pay special attention to plants with woody stems or dense foliage, since they tend to hide scale well.
- Inspect nearest neighbors first: Contact spread is most likely among touching plants.
- Space plants apart: Even a small gap improves airflow and reduces leaf-to-leaf contact.
- Clean tools between plants: Pruners, stakes, and clips can move crawlers.
- Wipe dusty leaves: Cleaner foliage makes early pests easier to spot.
Preventive care that lowers risk
Healthy plants are not immune, but they are less likely to suffer severe decline. Good light, correct watering, and moderate feeding support stronger growth that can better tolerate minor pest pressure. Avoid crowding plants into dark corners where leaves stay dusty and inspection is awkward.
Quarantine remains one of the best long-term defenses. Any new plant, gift plant, or specimen returning from time outdoors should be kept separate before joining the main collection. During that period, inspect it closely and wipe down the pot and leaves.
It helps to keep a simple inspection habit linked to watering day. Looking at stems, leaf undersides, and saucers for 30 seconds per plant often catches scale early enough that treatment stays small and manageable.
If you have a large indoor collection, consider grouping plants by care needs rather than packing every available surface. Better spacing improves light distribution, airflow, and access for inspection, all of which make pest spread less likely and treatment easier if problems do appear.