Best Treatment for Severe Spider Mite Problems

 Covers what counts as a severe spider mite infestation, the signs mites are out of control, and why mild treatments fail. Explains isolating affected plants, stronger options to eliminate mites, safe treatment for leaves, stems, and soil, a follow-up schedule, and how to prevent reinfestation.
- What counts as a severe spider mite infestation
- Signs that mites are out of control
- Why mild treatments stop working
- Immediate isolation of affected plants
- Strong treatment options that eliminate mites
- How to treat leaves, stems, and soil safely
- Follow-up treatment schedule for full eradication
- Preventing reinfestation after recovery
Spider mites can spread fast, leaving plants stippled, dusty, and shedding leaves. This guide lays out a practical, reliable plan for handling heavy infestations, based on what works in real gardens and indoor plant collections. You will learn quick knockdown steps, how to treat the whole plant safely, and the follow-up care needed to stop mites from bouncing back.
What counts as a severe spider mite infestation

A problem is “severe” when mites are no longer confined to a few leaves and the plant is actively losing function: photosynthesis drops, new growth stalls, and damage keeps spreading even after you rinse or wipe leaves. At that stage, you’re dealing with a population that’s reproducing faster than casual control methods can knock it back.
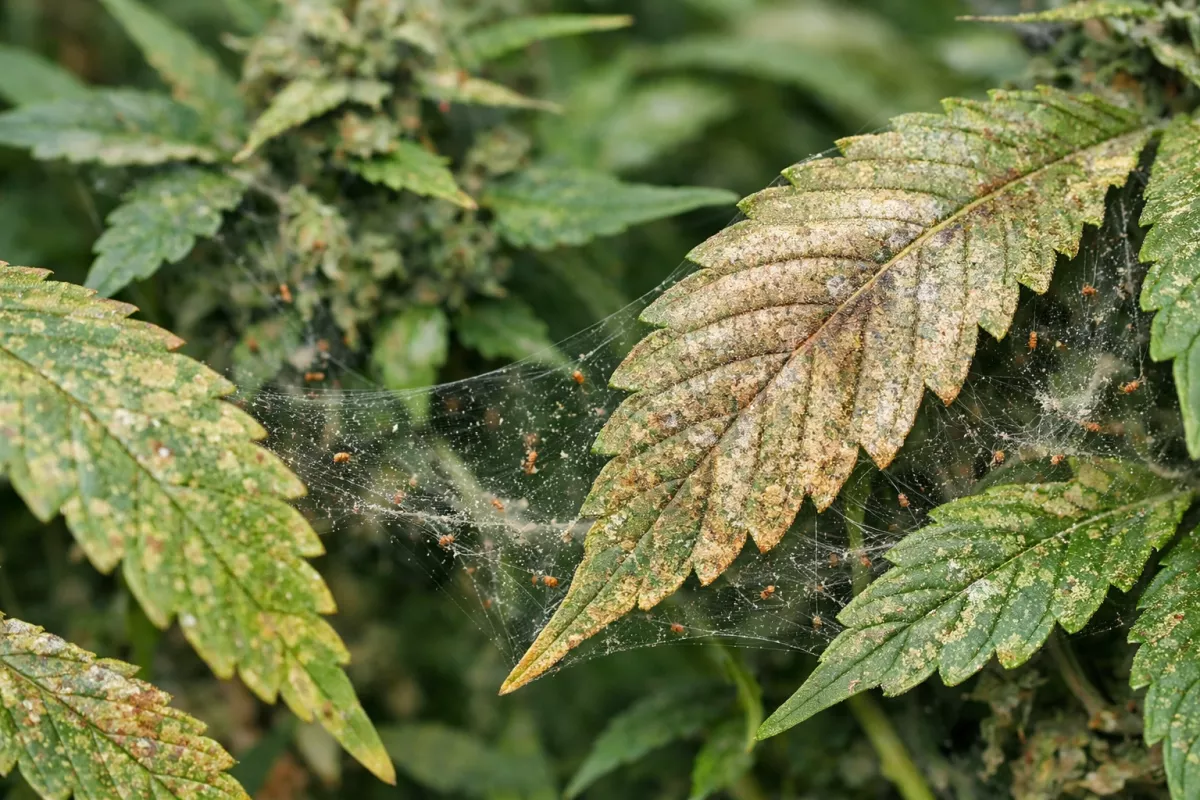
- Webbing is obvious, not just occasional strands. You can see fine silk across leaf joints, stems, or between leaves, and it collects dust or looks like a thin veil. Heavy webbing usually means a large, established colony.
- Damage is widespread across the plant. Stippling (tiny pale dots) has progressed to bronzing, yellowing, or a dull, “sandblasted” look on many leaves, not just one branch or one side.
- Leaves are dropping or crisping. You’re seeing premature leaf drop, curled edges, brittle foliage, or sections that dry out even when watering is normal.
- New growth is distorted or stunted. Fresh leaves emerge small, puckered, or weak, and the plant stops putting on normal size and color.
- Mites are easy to find without hunting. When you tap a leaf over white paper, you quickly see multiple moving specks; with a hand lens, you can spot clusters along veins and undersides.
- It’s spreading to nearby plants. Adjacent pots or branches begin showing stippling and webbing, especially in warm, dry spots.
- Quick fixes don’t hold. After rinsing or a single spray, symptoms keep advancing within 3–7 days, which fits their fast life cycle in warm conditions.
| Severity level | What you typically see | Why it matters for treatment |
|---|---|---|
| Early / localized | Light stippling on a few leaves; little to no webbing; mites mostly on undersides | Spot treatment and isolation can work if you repeat it on schedule |
| Moderate | Stippling on multiple branches; some webbing in leaf joints; plant looks dull | You’ll usually need whole-plant coverage and multiple follow-ups |
| Severe | Visible webbing across stems/leaves; bronzing/yellowing; leaf drop; mites easy to spot | Assume a large population: aggressive knockdown plus repeated applications are required |
| Critical / failing plant | Large sections defoliated; crispy foliage; growth stopped; infestation spreading to other plants | Consider pruning hard or discarding the plant to protect the rest of your collection |
If you’re unsure, check two places: the undersides of the newest fully expanded leaves and the warmest, driest area of the plant. When webbing and damage are present in both spots, it’s usually beyond “minor” and should be treated like a serious outbreak.
Signs that mites are out of control
You can usually tell an infestation has moved past “minor annoyance” when damage spreads faster than the plant can replace new growth. At that point, quick spot-treatments and occasional rinsing stop working, and you’ll see consistent symptoms across multiple leaves or even multiple plants.
Because spider mite damage can resemble nutrient or exposure stress, it helps to understand how lighting problems lead to leaf yellowing before assuming pests are the only cause.
- Stippling that turns into bronzing: Tiny pale dots start on the upper leaf surface, then merge into a dull, bronzed or silvery look as feeding ramps up.
- Fine webbing in protected areas: Threads show up along leaf veins, between petioles and stems, on leaf undersides, and around new growth. If you can see webbing without a magnifier, populations are usually high.
- Leaf drop or “crispy” edges: Leaves yellow, curl, dry out, and fall earlier than normal, especially older foliage. New leaves may emerge smaller or distorted.
- Damage spreads plant-to-plant: Symptoms appear on neighboring plants even if they looked fine a week earlier, which often means mites are dispersing on air currents, clothing, tools, or by touching plants.
- Visible mites with a quick tap test: Tap a suspect leaf over white paper; if you see multiple moving specks within a few seconds, the colony is well established.
- Hot, dry conditions keep triggering flare-ups: If the area regularly sits around 27–32°C (81–90°F) with very low humidity, outbreaks tend to rebound quickly after light treatment.
- “Reinfestation” within days of treatment: When you treat and the plant looks better briefly, then fresh stippling appears again in 3–7 days, it often means eggs survived or coverage missed leaf undersides and crevices.
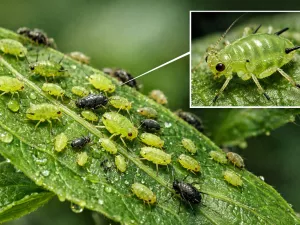
- Multiple life stages at once: Finding eggs (tiny, translucent spheres), pale juveniles, and darker adults together is a sign the population has been reproducing unchecked for a while.
- Overall vigor drops: Growth slows, flowering/fruiting declines, and the plant looks tired even with adequate watering and nutrients—because sap loss and stress are compounding.
If you’re seeing several of these at the same time, treat it like a severe spider mite problem: isolate affected plants, assume there are missed pockets on undersides and tight nodes, and plan on repeated, thorough applications rather than a one-and-done spray.
Why mild treatments stop working
Light sprays and “gentle” fixes often fail once an infestation has momentum. At that stage, you’re not dealing with a few mites on the surface—you’re dealing with fast reproduction, hidden colonies, and plant stress that makes the whole system easier for pests to exploit.
- Population growth outruns your spray schedule. Spider mites multiply quickly in warm, dry conditions, so treatments that only knock down adults can look like they worked for a day or two—then the next wave hatches and the damage resumes.
- Eggs are protected and many products don’t touch them. A lot of mild options (like diluted soaps or low-strength oils) mainly affect exposed, mobile mites. Eggs tucked along leaf veins or in webbing can survive, which is why the problem “mysteriously” returns after a short break.
- Webbing acts like a shield. In severe cases, mites produce dense webbing that reduces contact between the spray and the pest. If the liquid can’t wet the underside of leaves and penetrate the webbing, coverage becomes inconsistent and survivors repopulate.
- Undersides and tight spaces get missed. Spider mites feed mostly under leaves and in crowded growth tips. A quick mist from above is rarely enough. Even a good product underperforms if it doesn’t reach the exact feeding sites.
- Resistance builds when the same approach is repeated. Using the same active ingredient (or the same type of “soft” control) over and over can select for mites that tolerate it. Over time, the treatment seems weaker even if you apply it correctly.
- Environmental conditions keep favoring the mites. Low humidity, heat, and dusty leaves all tilt the odds toward spider mites. If the plant stays in a dry room around 25–30°C (77–86°F), mild controls have to work much harder to keep up.
- Plant stress lowers the margin for error. Drought stress, root issues, or nutrient imbalance can make leaves more vulnerable and slow recovery. When the plant is already struggling, “almost effective” control isn’t enough to stop visible decline.
- Application mistakes are more costly at high numbers. Too-weak dilution, skipping repeat applications, spraying at the wrong time of day, or not fully coating leaves can all be survivable errors with a small outbreak—but they’re deal-breakers when mites are everywhere.
Stress often starts with water mismanagement, so understanding factors that influence how often plants need water can make spider mite treatments far more effective.
If you’ve been spraying and the mites keep coming back, it usually means one of two things: the treatment isn’t reaching the mites (coverage and webbing), or it isn’t breaking the life cycle (eggs and repeat timing). Severe infestations typically need a tighter rotation, more thorough leaf coverage (especially undersides), and environmental adjustments so the plant isn’t fighting the same battle every day.
Immediate isolation of affected plants
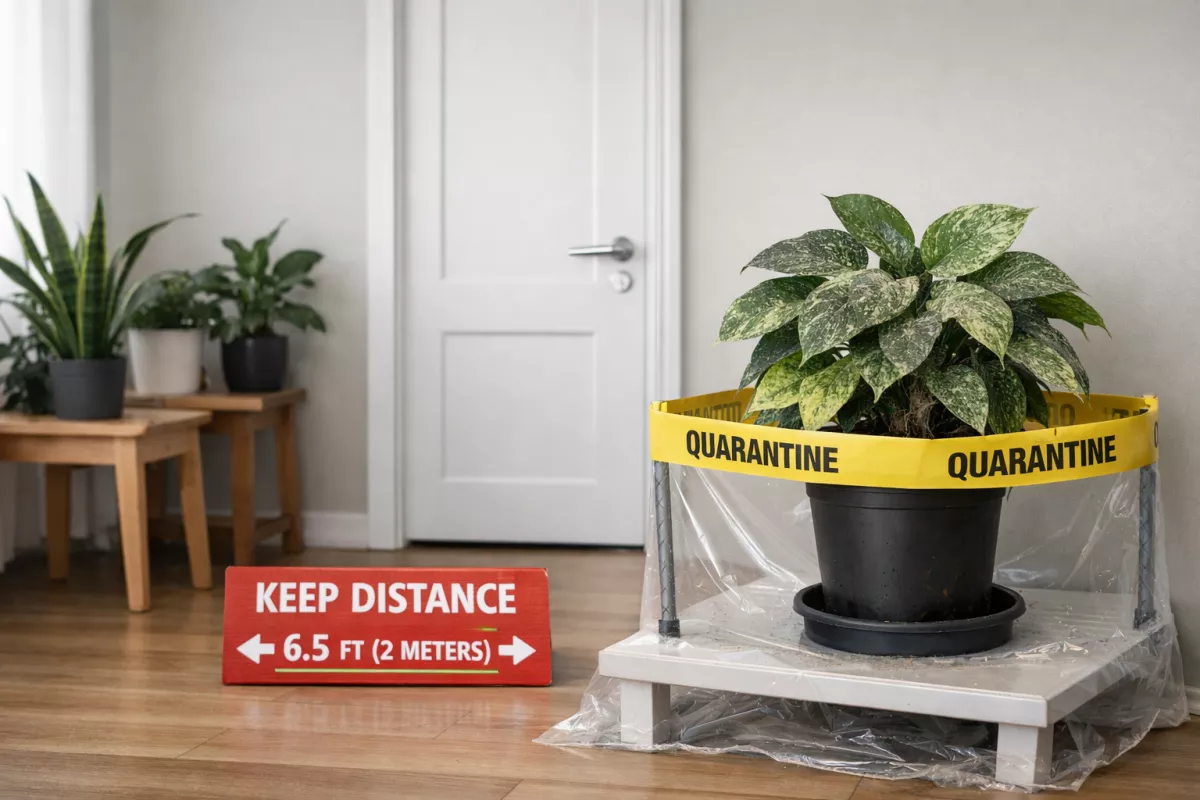
Separate any plant showing stippling, fine webbing, or “dusty” leaves right away, because mites spread easily on air currents, sleeves, and shared tools. Moving the problem plant buys you time to treat thoroughly without reinfesting everything nearby.
Place the plant in a different room if you can. If space is tight, create distance and a barrier: at least 2 m (6.5 ft) away from other plants, ideally with a door between them. Avoid setting it near vents or fans, which can help hitchhikers travel.
- Pick the quarantine spot first. Choose a bright area that matches the plant’s needs, but with minimal traffic so you’re not brushing past leaves.
- Bag it for transport. Slip a clear plastic bag over the canopy before carrying it, then remove the bag in the quarantine area to keep mites from dropping onto floors and furniture.
- Stop sharing equipment. Don’t reuse stakes, trays, saucers, or pruners between the isolated plant and healthy ones unless cleaned. Wash tools with hot, soapy water and dry; wipe hard surfaces with 70% isopropyl alcohol.
- Handle healthy plants first. Water, prune, and inspect unaffected plants before touching the infested one. Afterward, change clothes or at least wash hands and forearms.
- Remove the worst foliage. If a few leaves are heavily bronzed or webbed, prune them and seal in a bag before disposal. This reduces the population quickly and makes sprays more effective.
- Inspect neighbors immediately. Check plants within 1–2 m (3–6.5 ft), especially undersides of leaves and new growth. If you see speckling or moving dots, isolate those too rather than “waiting to see.”
During quarantine, keep conditions stable so the plant can tolerate treatment. Skip heavy fertilizing and avoid heat stress; a plant struggling from drought or high temperatures (above about 27°C (81°F)) tends to suffer more damage and can be harder to bring back.
Maintain separation until you’ve had at least 2 full weeks with no new stippling, webbing, or live mites found during close inspection. If you’re using a multi-application approach (like rinsing plus a miticide or horticultural oil), restart the clock if you spot active mites again.
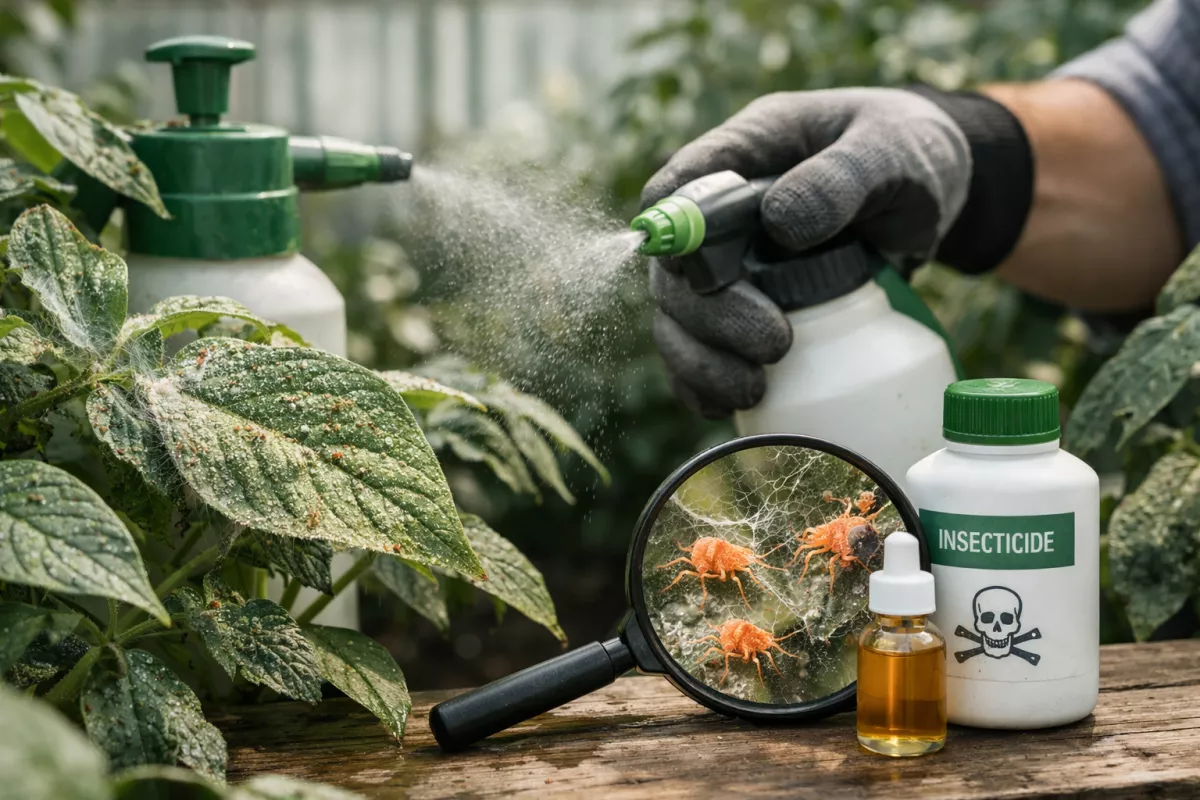
Strong treatment options that eliminate mites

When an infestation is heavy, mild sprays often just slow it down. The goal is to hit adults and newly hatched mites repeatedly, while improving coverage on the undersides of leaves where they feed and lay eggs. Rotate products with different modes of action when possible, and treat on a schedule that matches their fast life cycle.
| Option | What it does best | How to use it effectively | Key cautions |
|---|---|---|---|
| Horticultural oil (mineral, neem, or plant-based oils) | Smothers mites and eggs by coating them; good knockdown with thorough coverage | Spray to wet both sides of leaves until just before runoff. Repeat every 5–7 days (about 1–2 weeks) for 2–3 rounds. | Can burn foliage if applied in heat or strong sun; avoid treating above 29°C (85°F). Don’t combine with sulfur products within 14 days (2 weeks). |
| Insecticidal soap (potassium salts of fatty acids) | Breaks down mite bodies on contact; useful for quick suppression | Direct-contact coverage is everything. Reapply every 3–5 days (about 0.5–0.7 weeks) until activity drops, then weekly. | Can spot or dehydrate tender leaves; test a small area first and avoid drought-stressed plants. |
| Sulfur (wettable sulfur / sulfur dust labeled for mites) | Strong suppression; can help when mites rebound after soaps/oils | Apply according to label, aiming at leaf undersides. Repeat at label intervals, commonly 7–10 days (1–1.5 weeks). | Phytotoxicity risk on some plants; do not apply within 14 days (2 weeks) of oils. Avoid in high heat, typically above 29°C (85°F). |
| Miticides/acaricides (targeted products labeled for spider mites) | Most reliable for severe outbreaks; some target eggs/immatures as well as adults | Follow label rates and rotate active ingredients between treatments. Many programs use 2 applications spaced 5–7 days (about 1–2 weeks) apart, depending on the product. | Resistance can develop quickly if you repeat the same active ingredient. Observe re-entry and pre-harvest intervals; some are not suitable for edible crops. |
| Biological control (predatory mites such as Phytoseiulus or Neoseiulus) | Longer-term control in greenhouses/indoors; excellent for preventing rebounds | Release early and in sufficient numbers; keep humidity moderate and avoid broad-spectrum pesticides that kill predators. Re-release as needed. | Works poorly if plants are dusty, very dry, or if a harsh spray program continues. Not an instant “clean-out” by itself. |
- Improve coverage first. Use a sprayer that can reach the underside of leaves; mites often survive when only the top surface is treated.
- Time treatments to the hatch cycle. Eggs can survive many contact products, so repeating in 3–7 days (about 0.5–1 week) is usually what turns the corner.
- Remove the worst leaves. Prune heavily webbed tips and bag them before they drop mites elsewhere. This reduces the population so sprays or predators can keep up.
- Reduce plant stress. Drought-stressed plants are more vulnerable. Water consistently and, if indoors, consider raising humidity to around 50–60% (typical comfort range) if the plant tolerates it.
- Don’t mix “strong” products casually. Oils plus sulfur within 14 days (2 weeks) is a common burn scenario; also avoid stacking multiple harsh treatments on the same day unless the label allows it.
If you’re unsure which route fits your plant, start with a thorough wash-down and a contact option (soap or oil), then step up to a labeled miticide if the population is still active after two properly timed rounds. The biggest difference between “it helped” and “they’re gone” is usually coverage plus repeat timing, not sheer concentration.
How to treat leaves, stems, and soil safely

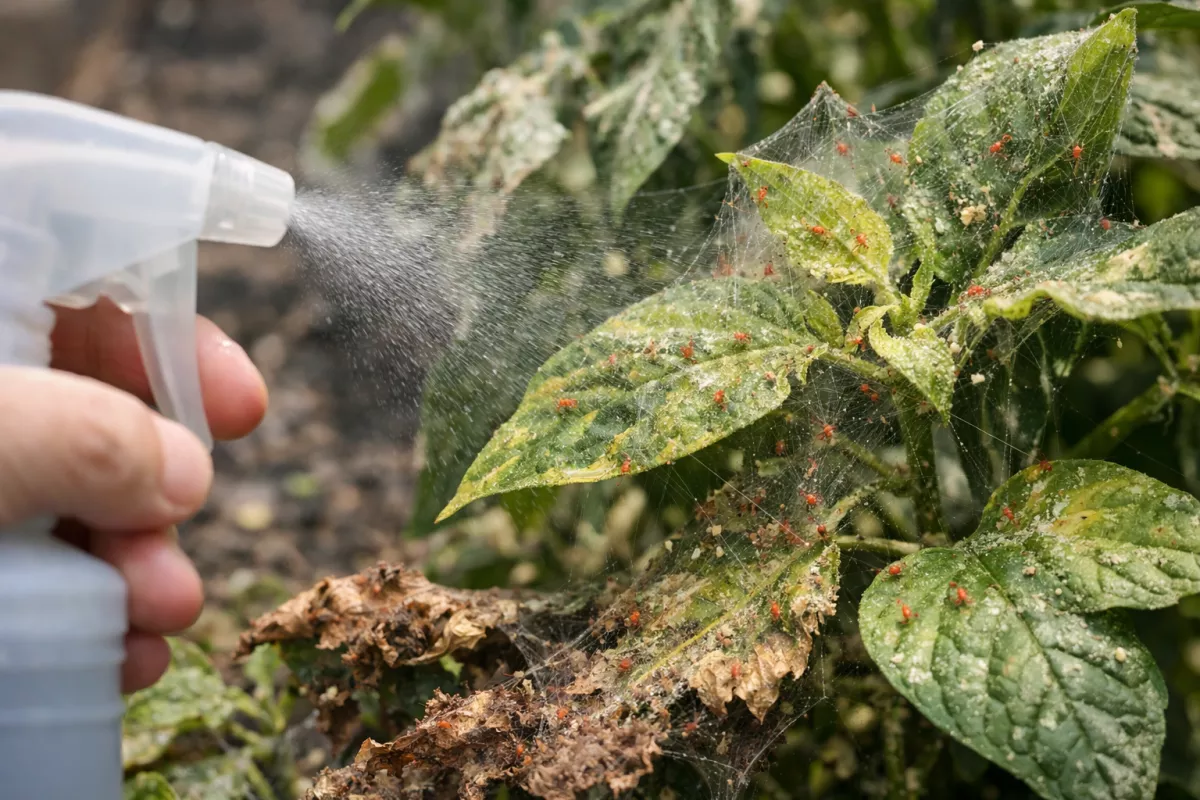
Start by targeting the places mites actually live and feed: the undersides of leaves, tight stem joints, and the top layer of potting mix where dust and webbing can collect. Work in bright light so you can see stippling, fine webbing, and clusters along veins, then treat in a way that wets surfaces thoroughly without stressing the plant.
- Leaves (especially undersides): Rinse first to knock populations down. Use a steady spray for 30–60 seconds per plant, focusing under each leaf. Let foliage dry out of direct sun to prevent scorch.
- Stems, petioles, and nodes: Wipe or spray these “junction zones” where mites hide. A soft cloth or cotton swab helps you reach crevices without tearing tissue.
- Soil surface and pot rim: Remove fallen leaves and debris, then lightly rinse the top 1–2 cm (0.4–0.8 in) of mix. Avoid saturating the entire pot unless the plant tolerates it; waterlogged roots make recovery harder.
When you apply a miticide or soap/oil-based spray, coverage matters more than strength. Mist until the leaf surface is evenly wet and just starting to drip, then pause. If you’re using a ready-to-use product, follow the label interval; for severe infestations, repeating every 3–7 days (72–168 hours) is common because eggs can hatch after the first round.
| Plant area | What to do | Safety notes |
|---|---|---|
| Leaf undersides | Rinse, then spray/wipe until evenly coated; separate crowded leaves so spray reaches hidden surfaces. | Test on 1–2 leaves and wait 24 hours; avoid treating in heat above 29°C (85°F) or in direct sun. |
| Leaf tops | Lightly treat if you see stippling or webbing; otherwise focus below where mites congregate. | Too much product on tops can clog pores; stop once wet, not glossy. |
| Stems and nodes | Spray and gently wipe joints, petiole bases, and branch forks. | Don’t scrub; damaged epidermis invites rot and secondary pests. |
| Soil surface + pot rim | Remove debris, rinse the top layer, and clean the rim where dust collects. | Keep runoff out of saucers; empty after 10–15 minutes (0.17–0.25 hours) to prevent root issues. |
| Surrounding area | Wipe shelves, window sills, and nearby pots; isolate the plant during treatment. | Use separate tools per plant if possible; wash hands and tools after each session. |
To reduce plant stress while you’re fighting mites, keep conditions steady: moderate light, good airflow, and consistent watering. If you raise humidity, do it in a controlled way (for example, aiming for 50–60% rather than a constant fog) so leaves dry between treatments and fungal problems don’t replace the mite problem.
If you’re unsure about sensitivity, treat one small section first and reassess the next day. Leaf curl, greasy spotting, or sudden yellowing after spraying usually means the product concentration, timing, or temperature was too harsh, and you should switch to a gentler approach with better rinsing and more frequent, lighter applications.
Follow-up treatment schedule for full eradication
Beating a heavy infestation usually comes down to timing: you’re trying to hit newly hatched mites before they mature and lay more eggs. Since most products don’t reliably kill eggs, plan on multiple passes, consistent coverage (especially leaf undersides), and regular checks so you can tighten or relax the interval based on what you see.
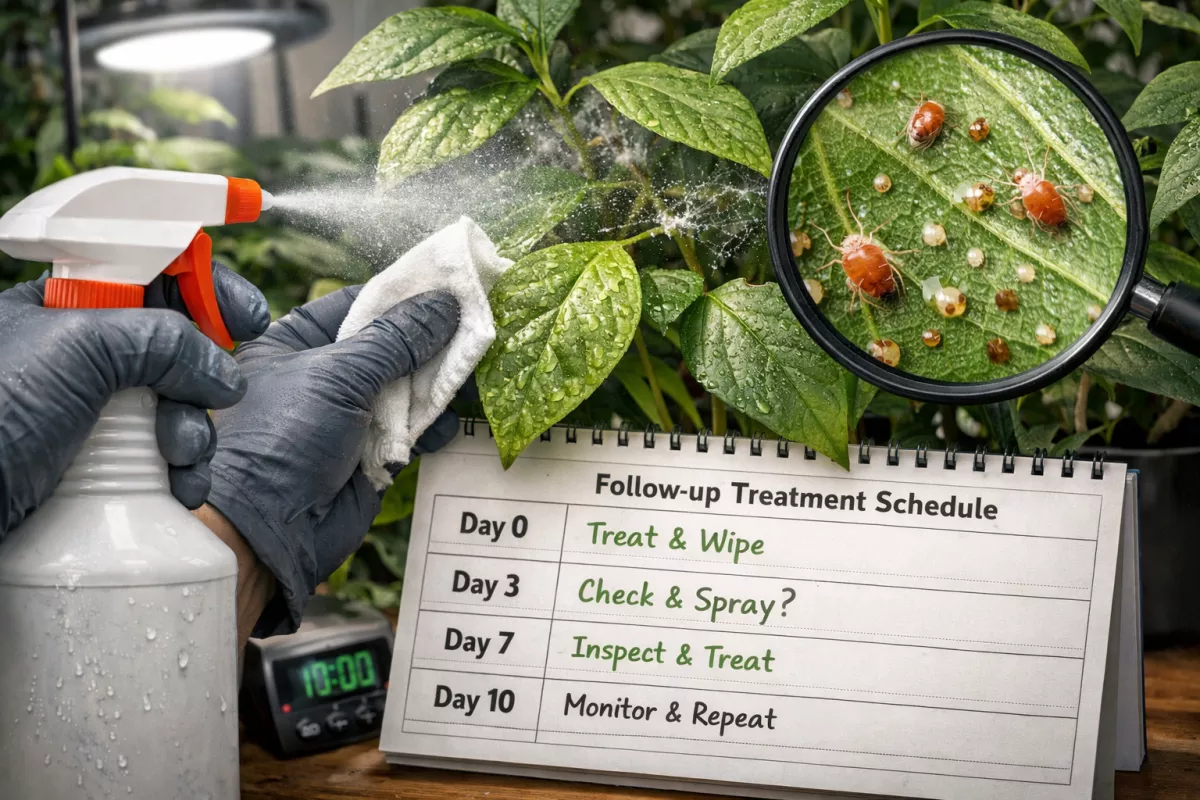
| Day | What to do | Notes (what you’re targeting) |
|---|---|---|
| Day 0 | Knockdown treatment + rinse/wipe leaves | Start with the most effective option you can use safely; remove webbing and heavily damaged leaves so sprays can reach mites. |
| Day 3–4 | Repeat treatment | Catches many hatchlings before they mature; shorten to 3 days if the area is warm (around 27°C (81°F)) or the outbreak is severe. |
| Day 7 | Third treatment + detailed inspection | Check undersides with a hand lens; look for moving specks and fresh stippling. If you still see active mites, keep the tighter rhythm. |
| Day 10–14 | Fourth treatment (or targeted spot treatment) | If activity is dropping, you can stretch the interval; if not, stay at 3–4 day cycles until numbers clearly fall. |
| Day 21 | Confirm-cleanup inspection | No visible mites, no new damage, and no webbing for 7–10 days is a good sign you’re past the worst of it. |
| Weeks 4–6 | Preventive check every 7 days | Early detection matters more than routine spraying; treat only if you find live mites or new stippling. |
If you’re rotating products to avoid resistance, rotate by mode of action rather than brand name. For example, don’t use the same type of miticide or oil-based spray every time; alternate with a different approach that’s labeled for spider mites and safe for your plant.
- Keep intervals consistent: Missing a follow-up by even 3–4 days can let survivors reproduce and reset the problem.
- Spray to the point of coverage, not runoff: Focus on leaf undersides, petioles, and tight nodes where colonies hide.
- Re-check after drying: Once leaves are dry (often 2–4 hours, depending on airflow), inspect a few “hot spot” leaves again to confirm mites are no longer moving.
- Quarantine and spacing: Keep treated plants separated for at least 14 days; increase spacing so leaves don’t touch and mites can’t bridge over.
Adjust the plan for conditions: warm, dry rooms speed up mite development, so tighter spacing between applications is usually necessary. Cooler conditions slow them down, but don’t rely on temperature alone—keep the schedule until inspections show the population has collapsed.
Preventing reinfestation after recovery

Once plants look clean, the next goal is to stop a small leftover population from bouncing back. Spider mites reproduce quickly, so the “aftercare” matters as much as the initial knockdown: keep monitoring, reduce stress on plants, and make the growing area less welcoming to mites.
Long-term success depends on how to prevent pests from returning after treatment, especially when multiple sap-feeding insects share similar spread patterns.
- Keep scouting on a schedule. Check the underside of leaves and along midribs 2–3 times per week for the first 2 weeks, then weekly for the next 4–6 weeks. Look for stippling, fine webbing, and moving specks; a white paper “tap test” makes them easier to spot.
- Repeat a light follow-up cycle. If you used sprays or soaps during treatment, do one or two preventive applications 5–7 days apart (to catch newly hatched mites). Rotate modes of action when possible so survivors aren’t selected for tolerance.
- Isolate and quarantine new plants. Keep incoming plants separate for 14 days, ideally in a different room. During quarantine, inspect twice weekly and wash foliage with a gentle rinse if the plant tolerates it.
- Clean the environment, not just the plant. Remove fallen leaves and plant debris, then wash pots, trays, stakes, and tools. For hard surfaces, a thorough wipe-down and vacuuming of cracks and edges helps remove eggs and hitchhikers.
- Lower plant stress. Drought-stressed plants are easier targets. Water consistently (without waterlogging), and avoid big swings in temperature. Many mites thrive in hot, dry conditions; keeping the space closer to 18–24°C (65–75°F) and avoiding prolonged heat spikes can slow outbreaks.
- Use humidity strategically. If your plants tolerate it, raising relative humidity can make conditions less favorable for mites. Aim for a stable, plant-appropriate range rather than sudden jumps; poor airflow plus high humidity can invite fungal issues.
- Prune and thin dense growth. Better airflow and light penetration make it harder for mites to hide and easier for sprays (or beneficials) to reach leaf undersides. Bag and discard heavily damaged leaves instead of composting indoors.
- Be careful with nitrogen-heavy feeding. Overfertilizing can push tender new growth that mites prefer. Keep nutrition balanced and avoid “catch-up” feeding right after recovery.
- Consider beneficial predators for ongoing suppression. In indoor grows or greenhouses, predatory mites can help keep low-level populations from resurging. They work best when introduced early, before you see webbing again, and when broad-spectrum pesticides are avoided.
- Prevent cross-contamination. Treat infested and clean plants as separate zones. Wash hands, change gloves, and handle healthy plants first. If you use a sprayer, label it and rinse it after use so residues don’t harm beneficial insects later.
If you see fresh stippling or a few mites during monitoring, respond immediately with a targeted rinse or spot treatment rather than waiting for visible webbing. Early action is what keeps a severe spider mite problem from turning into a repeat event.