Early Chlorosis Signs in Plant Leaves

 This article explains how to spot early chlorosis on leaves by checking pale areas, darker veins, yellowing patterns, and whether old or new leaves are affected. It also covers how symptoms progress, how to tell chlorosis from damage, and when signs point to urgent plant stress.
- What chlorosis looks like in early stages on plant leaves
- How to recognize vein patterns and color changes in leaves
- Differences between uniform yellowing and interveinal chlorosis
- How leaf position (old vs new) helps identify the issue
- Visual progression of chlorosis over time
- How to distinguish chlorosis from physical or environmental damage
- When visual symptoms indicate urgent plant stress
Spotting the first signs of leaf yellowing early can help save a plant from more serious trouble later. Pale areas between the veins, a fading green tone, or an overall washed-out appearance often suggest chlorosis before growth begins to slow or leaves start to fall. Recognizing these warning signs gives gardeners time to inspect light, watering habits, root health, and nutrient levels before the problem causes lasting damage.
What chlorosis looks like in early stages on plant leaves

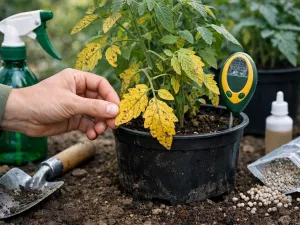
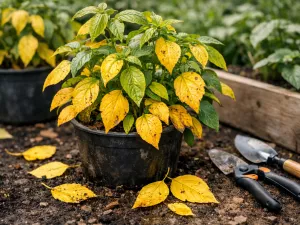
Early chlorosis usually begins subtly. A leaf that once looked evenly green starts to appear slightly washed out, pale, or dull, often before it turns clearly yellow. The change may affect only a small area at first, and many growers miss it because the leaf still looks firm and intact.
In the earliest stage, the texture of the leaf often remains normal. That matters because chlorosis is primarily a color symptom at first, not a collapse of tissue. Leaves may stay smooth, flexible, and full-sized while the green pigment fades. This is one reason chlorosis can be confused with normal aging unless you compare the plant to healthier leaves nearby.
Typical first visual clues
The first signs are often easier to spot in bright indirect light or daylight near a window. Under dim indoor lighting, pale green leaves can look normal until the problem advances.
- Faded green tone: the leaf looks lighter than the rest of the plant, but not yet bright yellow.
- Uneven paling: some sections lose color before others, especially between veins or near the tip.
- Reduced contrast: healthy leaves often have a rich, even green; chlorotic leaves look flatter and less vibrant.
- Normal leaf shape: early chlorosis rarely causes curling or crisp edges immediately.
Where the change often starts
The pattern depends on the underlying cause. Nutrient-related chlorosis may start on either older or newer leaves, while root stress from waterlogging can create a broader pale look across several leaves at once. If the plant has recently been repotted, overwatered, or exposed to cold drafts below 10°C (50°F), early yellowing may appear within days.
It helps to inspect both the upper and lower canopy. On houseplants, the first pale leaf is often hidden underneath or toward the back of the pot. In garden plants, chlorosis may show first on leaves exposed to reflected heat, compacted soil, or uneven irrigation.
If you suspect chlorosis, take a photo every 3 to 4 days under the same lighting. Small color shifts are much easier to judge in side-by-side images than by memory alone.
At this stage, avoid rushing to add fertilizer without checking moisture and drainage. A plant sitting in soggy soil can show chlorosis even when nutrients are technically present, because stressed roots cannot absorb them properly.
How to recognize vein patterns and color changes in leaves

Vein patterns are one of the most useful clues when diagnosing chlorosis. The way green color remains or disappears around the veins can point toward specific nutrient or root problems. Looking closely at the leaf structure helps separate a true deficiency pattern from general stress or sun fading.
To check this properly, hold a leaf at eye level in natural light. You are looking for contrast between the veins and the tissue around them, not just the overall shade of yellow. On many plants, the main vein and side veins stay greener longer than the surrounding surface.
What healthy versus chlorotic venation looks like
Healthy leaves usually show veins that blend naturally into the surrounding tissue. With chlorosis, the pattern becomes more obvious because the leaf blade loses pigment first. This can make the veins appear outlined or netted.
- Green veins with pale tissue: often seen in interveinal chlorosis, especially on younger leaves when iron is involved.
- Evenly pale veins and tissue: more consistent with general yellowing, root stress, or nitrogen shortage.
- Dark green veins against yellow leaf tissue: a stronger, more advanced form of chlorotic patterning.
- Patchy vein retention: may suggest mixed stress, such as poor drainage plus feeding imbalance.
Color shifts that matter
Not all yellowing is the same. Early chlorosis may move through several shades before the leaf turns fully yellow. A pale lime tone can indicate the start of pigment loss, while a creamy yellow often suggests more developed chlorosis. In some species, especially citrus, hydrangea, and many tropical houseplants, the first change may be a yellow-green cast rather than obvious yellow.
Watch for whether the color change starts near the leaf tip, between side veins, or across the whole blade. A tip-first fade can overlap with watering stress, while a center-out or vein-defined pattern often points more strongly to nutrient uptake issues.
Practical inspection method
A quick routine makes pattern recognition more reliable and prevents overcorrecting the wrong problem.
- Choose one older leaf and one newer leaf from the same plant.
- Check them in daylight, not under warm indoor bulbs.
- Compare the veins to the surrounding tissue on both leaves.
- Look at the underside as well, since some patterns show more clearly there.
- Note whether the leaf is only pale or also soft, wilted, spotted, or scorched.
If the veins stay green while the rest of the leaf fades, nutrient availability is often part of the picture. But if the entire leaf, veins included, loses color evenly, broader root or feeding issues are more likely than a single micronutrient problem.
Differences between uniform yellowing and interveinal chlorosis

Uniform yellowing and interveinal chlorosis may look similar at a glance, but they tell very different stories. The key difference is whether the whole leaf loses color evenly or the tissue between veins fades while the veins remain greener. Learning this distinction helps you avoid treating every yellow leaf as the same problem.
Uniform yellowing often suggests a more general issue affecting the entire leaf, such as nitrogen deficiency, chronic overwatering, root decline, or natural aging. Interveinal chlorosis is more pattern-based and often points toward iron, magnesium, manganese, or pH-related nutrient lockout.
How the two patterns differ visually
When yellowing is uniform, the leaf tends to look consistently pale from edge to edge. There is little contrast, and the veins do not stand out much. With interveinal chlorosis, the leaf develops a more defined map-like appearance because the veins resist fading longer than the tissue around them.
| Feature | Uniform yellowing | Interveinal chlorosis |
|---|---|---|
| Color pattern | Even loss of green across most of the leaf | Pale or yellow areas between veins, veins stay greener |
| Common association | Nitrogen shortage, overwatering, root stress, aging | Iron, magnesium, manganese issues, high pH, poor uptake |
| Vein visibility | Low contrast | High contrast, often netted appearance |
| Diagnostic value | Suggests broad stress affecting the whole leaf | Suggests a more specific nutrient or uptake pattern |
Why the distinction matters for plant care
Plants with uniform yellowing are often suffering from conditions that limit overall function, such as compacted soil, poor drainage, or a feeding routine that is too weak over time. In contrast, interveinal chlorosis may happen even when fertilizer is present, especially if the soil pH is too high or roots are too cold and wet to absorb key elements.
For container plants, check whether water drains freely from the pot after watering with about 500 ml (17 fl oz) to 1 L (34 fl oz), depending on pot size. If water sits in the saucer, root stress can mimic deficiency symptoms. In garden beds, alkaline soil can trigger iron-related chlorosis even in well-fed plants.
A common mistake is adding more fertilizer to a plant with interveinal chlorosis caused by poor pH or waterlogged roots. If uptake is blocked, extra feeding can increase stress rather than solve the yellowing.
When comparing leaves, use several examples rather than one. A single yellow leaf can mislead, but a repeated pattern across the plant is much more diagnostic.
How leaf position (old vs new) helps identify the issue

The position of affected leaves is one of the fastest ways to narrow down the cause of chlorosis. Whether the oldest leaves yellow first or the newest growth shows symptoms first can tell you a great deal about nutrient mobility and root function. This is especially useful when the color pattern is still mild.
Older leaves are usually lower on the plant or deeper in the canopy. New leaves are at the tips, top growth, or fresh side shoots. Because some nutrients move easily inside the plant and others do not, the location of chlorosis often points toward what the plant is trying to redistribute.
When older leaves yellow first
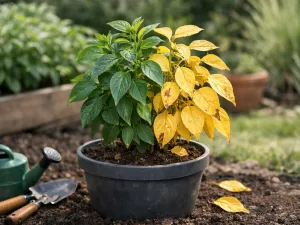
If the oldest leaves lose color before the newer ones, the plant may be moving mobile nutrients out of older tissue to support fresh growth. Nitrogen and magnesium issues often show this way. It can also happen when a fast-growing plant has been underfed for several weeks during active growth.
- Older leaf chlorosis: often linked with nitrogen or magnesium shortage.
- Lower leaf drop after yellowing: common when the plant is conserving resources.
- Whole lower canopy fading: may also suggest low light combined with watering stress.
When new leaves show chlorosis first
Chlorosis in fresh growth often points toward nutrients that are less mobile within the plant, especially iron. New leaves may emerge smaller, paler, or with green veins and yellow tissue between them. This pattern is common in high-pH soil, cold wet media, or roots damaged by overwatering.
Pay close attention to the newest 2 to 5 cm (1 to 2 in) of growth on stems. If the tips are pale while older leaves remain fairly green, the problem is unlikely to be simple age-related leaf loss.
Using leaf position with other clues
Leaf position is not a complete diagnosis on its own, but it becomes powerful when combined with vein pattern, watering history, and recent weather or indoor conditions.
- Old leaves + uniform yellowing: often broad nutrient shortage or normal senescence if limited to a few leaves.
- Old leaves + interveinal pattern: often magnesium-related or a root uptake issue affecting mobile nutrients.
- New leaves + interveinal pattern: often iron-related chlorosis or pH lockout.
- New leaves + distorted growth: suggests a more urgent root, micronutrient, or environmental problem.
For practical troubleshooting, always compare at least three leaves from different positions on the same plant. One yellow bottom leaf on a mature plant may be normal. A repeated top-growth pattern is much more significant and usually deserves prompt correction.
Visual progression of chlorosis over time

Chlorosis rarely appears all at once. It usually follows a visible progression, and understanding that sequence helps you judge whether the problem is mild, stable, or worsening. In many plants, the first stage is a slight loss of green, followed by clearer yellowing, then tissue weakening, browning, or leaf drop if the cause is not corrected.
The speed of progression depends on the plant type and the trigger. A nutrient imbalance may develop over 1 to 3 weeks, while root damage from overwatering can push leaves from pale to yellow surprisingly fast, especially in warm indoor conditions around 24°C (75°F) or higher.
Common stages you may observe
Watching the sequence is often more useful than reacting to one snapshot. A slowly fading leaf suggests a different problem from one that yellows and collapses in a few days.
- Subtle paling: the leaf looks less saturated green but still healthy in shape.
- Clear chlorotic pattern: yellowing becomes obvious, either evenly or between veins.
- Expansion of affected area: more leaves show the same symptom, or the pale area spreads across the leaf.
- Secondary damage: tips brown, margins dry, or weak spots develop as the leaf struggles.
- Leaf decline: the leaf may crisp, wilt, or drop if the underlying issue continues.
What progression suggests about the cause
A slow, orderly progression on older leaves often points to nutrient redistribution or age-related decline. A rapid spread across many leaves suggests a root-zone problem, severe watering imbalance, or environmental stress such as cold shock, heat, or sudden transplant stress. If new leaves emerge already pale, the plant is dealing with an active uptake problem rather than just losing older foliage.
| Time pattern | What you may see | Likely direction of concern |
|---|---|---|
| Several weeks | Gradual fading on older leaves first | Feeding imbalance, mild deficiency, natural aging |
| 1 to 2 weeks | Patterned yellowing spreading to similar leaves | Nutrient uptake issue, pH problem, root stress |
| Few days | Fast yellowing after soil stays wet or after weather shock | Overwatering, drainage failure, temperature stress |
| New growth emerges pale | Fresh leaves are chlorotic from the start | Ongoing micronutrient lockout or damaged roots |
Do not judge recovery by the color of already yellow leaves alone. The best sign of improvement is that new growth returns to a healthier green and the spread stops.
Once tissue has turned fully yellow, it may not regain its original color completely. That is why early observation matters so much in preventing more extensive decline.
How to distinguish chlorosis from physical or environmental damage

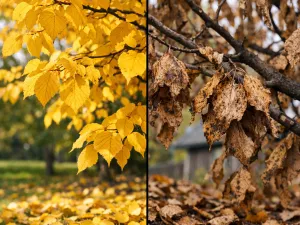
Not every yellow or pale leaf is chlorosis. Physical injury, sun scorch, cold exposure, pest feeding, and chemical burn can all create discoloration that resembles nutrient-related yellowing. The difference is that chlorosis usually follows a physiological pattern, while damage from external stress often appears irregular, localized, or sharply edged.
Start by asking whether the color loss follows the leaf's natural structure. True chlorosis often respects veins or affects leaves by age and position. Physical damage tends to look random, one-sided, or linked to where the leaf was exposed.
Signs that point away from chlorosis
Environmental and mechanical problems often leave clues beyond simple fading. The tissue may be torn, scorched, spotted, or collapsed rather than just pale.
- Sun scorch: bleached tan, white, or brown patches on the side facing strong light, especially after moving a plant suddenly.
- Cold injury: translucent, water-soaked, or darkened areas after exposure below a plant's comfort range, often near windows or drafts.
- Wind or rubbing damage: torn edges, creases, or abrasion marks rather than a vein-based pattern.
- Salt or fertilizer burn: brown tips and margins, often with a dry crust on the soil surface.
- Pest feeding: stippling, speckling, silvery scars, or distorted leaves rather than smooth yellowing.
Questions that help separate the causes
A short review of recent care often reveals whether the problem is internal chlorosis or external damage.
- Was the plant recently moved into stronger sun?
- Did temperatures drop below 12°C (54°F) or rise sharply above 32°C (90°F)?
- Has the plant been fertilized heavily or flushed poorly?
- Are only the exposed leaves affected while shaded leaves remain normal?
- Do you see insects, webbing, sticky residue, or tiny feeding marks?
When both problems happen together
Plants often face more than one stress at once. For example, a root-bound plant in bright afternoon sun may show both chlorosis and scorch. A waterlogged plant may become chlorotic first and then develop brown edges because weakened leaves cannot handle dry air or direct light. In these mixed cases, the pattern on the newest and oldest leaves still helps identify the underlying issue.
If you are unsure, inspect unaffected leaves too. Damage usually creates a more random distribution, while chlorosis tends to repeat a recognizable pattern across similar leaves or growth stages.
When visual symptoms indicate urgent plant stress
Some chlorosis develops slowly and can be corrected with measured changes to watering, feeding, drainage, or soil pH. Other cases signal that the plant is under immediate stress and needs prompt attention. The warning signs are not just yellow leaves themselves, but how fast the symptoms spread and what other changes appear alongside them.
Urgency increases when chlorosis affects new growth, progresses within days, or comes with wilting, stem softness, leaf drop, or browning. These combinations often point to root failure, severe nutrient lockout, or environmental conditions the plant cannot tolerate for long.
Visual signs that deserve quick action
If you see several of the following together, do not wait for a routine feeding schedule or assume the plant will recover on its own.
- Rapid spread: multiple leaves turn pale or yellow within 3 to 7 days.
- New growth affected: fresh leaves emerge chlorotic, small, or weak.
- Wilting with yellowing: often a sign of root trouble rather than simple deficiency.
- Brown edges after yellowing: indicates tissue is moving from pigment loss into actual damage.
- Stem or crown softness: suggests rot and requires immediate correction of moisture conditions.
- Leaf drop accelerating: the plant is shedding tissue to survive.
What to check first
When symptoms look urgent, focus on the root zone and environment before adding products. Check whether the soil is saturated, compacted, bone dry, or sour-smelling. Make sure the pot drains freely and is not standing in water. For outdoor plants, inspect whether recent heavy rain, irrigation problems, or alkaline soil conditions may be blocking uptake.
Also review light and temperature. A chlorotic plant in a dark corner may not use water efficiently, while one exposed to harsh midday sun after stress may decline faster. If pruning is needed, remove only leaves that are mostly dead; keep partially functional leaves if they still support recovery.
When a plant shows yellowing plus wilt, always check roots before feeding. Correcting oxygen and moisture around the roots is often more urgent than supplying extra nutrients.
When observation should lead to intervention
Visual symptoms become a call for action when they stop being isolated and start affecting the plant's ability to grow. If chlorosis is limited to one or two aging leaves, monitor it. If the pattern reaches the canopy, fresh growth, or stems, treat it as active stress. In practical terms, that means adjusting watering immediately, improving drainage, checking pH if relevant, and reviewing the feeding program rather than waiting another week.
The earlier you respond to the visual pattern, the better the chance that new leaves will return healthy and the plant will avoid long-term setback.