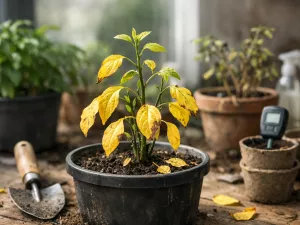
Healthy Plants Suddenly Turning Yellow

 This article explains why healthy-looking plants can suddenly turn yellow, covering environmental shocks, hidden root issues, unnoticed watering or feeding mistakes, and pests or diseases without early signs. It also shows how to diagnose the cause fast and stabilize the plant before it gets worse.
- Why sudden yellowing happens in healthy plants
- Environmental shocks that trigger rapid changes
- Hidden root problems that appear unexpectedly
- Watering or feeding mistakes that go unnoticed
- Pest or disease factors without early signs
- How to quickly diagnose sudden plant decline
- Steps to stabilize plant health before worsening
When a plant that looked healthy begins to develop yellow leaves, the reason is often a simple issue that is easy to overlook, such as inconsistent watering, poor drainage, low light, or a lack of nutrients. Taking a few minutes to review recent changes in care and growing conditions can help you identify the cause early, correct it before the plant becomes more stressed, and prevent the problem from affecting the rest of the foliage.
Why sudden yellowing happens in healthy plants

A plant that looked vigorous a few days ago can suddenly develop yellow leaves without any obvious warning. This often feels mysterious, but yellowing is usually a stress response rather than a random event. Leaves lose green color when chlorophyll production slows, when roots stop supplying water and nutrients efficiently, or when the plant begins shedding foliage it can no longer support.
The key point is that the visible change may happen fast even when the underlying problem started earlier. A root zone that stayed too wet for a week, a cold draft that hit overnight, or a fertilizer buildup that reached damaging levels can all trigger a quick shift from green to pale yellow. The plant may still look structurally sound, which is why the decline seems sudden.
Why symptoms show up all at once
Plants often compensate for stress quietly until they reach a threshold. Once that threshold is crossed, several leaves may yellow together. This is especially common in container plants, where soil volume is limited and conditions change faster than they do in the ground.
- Stored reserves run low: The plant has been coping, but it no longer has enough energy to maintain older leaves.
- Root function drops quickly: Damaged or oxygen-starved roots can stop supporting top growth in a short period.
- Environmental change is abrupt: A move from shade to direct sun, or from warm indoor air to a chilly windowsill, can trigger a rapid response.
- Natural leaf prioritizing begins: The plant redirects resources to newer growth, buds, or survival rather than keeping every leaf green.
What yellowing pattern can tell you
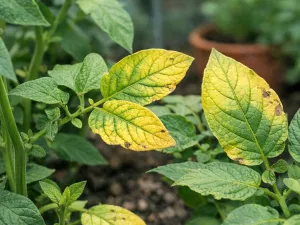
The pattern matters more than many gardeners realize. Uniform yellowing across older leaves often points to root stress, watering imbalance, or a mobile nutrient issue. Yellowing between veins may suggest a feeding or pH problem. Leaves that yellow and then crisp at the edges often indicate water stress, salt buildup, or heat exposure rather than a simple lack of fertilizer.
Look at where the yellowing started, how fast it spread, and whether leaves are soft, limp, spotted, or dry. Those details narrow the cause much faster than guessing based on color alone.
Editor’s note: Take photos on day 1 and again 48 hours later. A side-by-side comparison often reveals whether the issue is spreading from the bottom up, affecting only one side, or tied to a recent change in location.
Environmental shocks that trigger rapid changes

Even well-cared-for plants can react badly to abrupt shifts in their surroundings. Sudden yellowing often follows a change in temperature, light intensity, humidity, or airflow. These shocks may not kill a plant immediately, but they can interrupt normal water movement and leaf function enough to cause visible discoloration within days.
Indoor plants are especially vulnerable because home conditions can swing more than expected. A heater vent, an air-conditioning blast, a cold night near glass, or a newly opened sunny window can all create stress that was not present before.
Temperature and draft stress
Most common houseplants and many tender garden plants dislike sharp temperature swings. A drop below 10°C (50°F) for warmth-loving species, or a rise above 32°C (90°F) in a bright, dry spot, can impair root uptake and leaf metabolism. Cold drafts from doors and windows are just as problematic as heat from radiators.
- Cold shock: Leaves may yellow, turn translucent, or drop after one chilly night.
- Heat stress: Yellowing may begin with limp foliage and dry edges, especially if the pot dries rapidly.
- Repeated fluctuations: Daily swings between warm afternoons and cold nights can be more damaging than one brief event.
Light changes that overwhelm foliage
A plant moved from low light to direct sun may bleach or yellow before it scorches. The reverse can also happen: a plant shifted into much dimmer light may yellow because it cannot support the same amount of foliage. This often affects leaves that developed under previous conditions and are poorly adapted to the new setting.
Outdoor plants can react after nearby trees are pruned, reflective surfaces increase heat, or a run of cloudy days is followed by intense sun. Indoors, a south-facing window in summer can be dramatically brighter than the same spot in winter.
Humidity and airflow problems
Low humidity increases water loss from leaves, while stagnant air can encourage stress and disease. A plant near a fan, vent, or dehumidifier may dry out faster than the potting mix suggests. Meanwhile, crowded plants with poor airflow can stay damp too long, creating stress that first appears as yellow foliage.
| Environmental change | Typical yellowing clue | Useful check |
|---|---|---|
| Moved into stronger sun | Paler upper leaves, possible scorch later | Check whether affected leaves face the window or sunniest side |
| Cold draft or cold glass contact | Sudden yellowing on exposed side | Measure nighttime temperature near the plant, not just room temperature |
| Heat vent or radiator nearby | Yellowing with dry tips and rapid wilting | Feel for hot airflow and monitor how quickly the top 2.5 cm (1 in) dries |
| Very low humidity | Dull yellowing with edge crisping | Check whether newer leaves are smaller or distorted |
When yellowing follows a recent move or weather shift, stabilize the environment before changing fertilizer or repotting. Correcting the wrong thing too quickly can add more stress.
Hidden root problems that appear unexpectedly

Roots can be in trouble long before leaves show it. Because they are out of sight, root issues are one of the most common reasons a healthy-looking plant suddenly turns yellow. By the time foliage changes color, the root system may already be struggling with rot, compaction, crowding, or physical damage.
Container plants are particularly prone to hidden root problems because water, oxygen, and temperature all fluctuate within a small volume of soil. A decorative cachepot, a blocked drainage hole, or a dense old mix can quietly create poor root conditions.
Root rot and oxygen starvation
Roots need both moisture and air. When potting mix stays saturated, oxygen levels fall and fine feeder roots begin to die. The leaves then yellow because the plant cannot absorb water properly, even though the soil is wet. This is why overwatered plants can look thirsty.
Root rot is more likely when temperatures are cool, light is low, or the pot is too large for the root ball. In those conditions, the mix dries slowly and stays airless for too long.
- Warning signs: Persistent damp soil, a sour smell, soft stems near the base, and leaves yellowing while still pliable.
- High-risk setups: Pots without drainage, saucers left full, heavy garden soil used indoors, or compacted old mix.
- What to inspect: Gently slide the plant out and look for brown, mushy roots instead of firm white or tan ones.
Root binding and compacted media
A crowded root ball can also trigger yellowing, especially if water runs straight through the pot or the center becomes hard and dry. In very root-bound plants, the mix may no longer hold moisture evenly. Some roots stay soggy while others dry out, producing mixed stress signals above the soil line.
Compacted potting mix behaves similarly. Over time, fine particles settle, reducing air pockets and making it harder for roots to function. A plant may have enough nutrients in the pot, but poor root access prevents proper uptake.
Practical tip: If water beads on the surface or races down the pot edge, do not assume the root ball is evenly moist. Probe several points or lift the plant from the pot to see whether the center is still dry.
Mechanical damage and transplant shock
Roots can be damaged during repotting, rough handling, or even by repeated movement of a heavy container. Outdoor plants may suffer from digging nearby, mower injury, or soil disturbance. Once roots are broken, leaves may yellow a few days later as the plant adjusts to reduced uptake capacity.
Recent repotting does not always mean the new pot is the problem, but it should be part of the diagnosis. A jump from a 15 cm (6 in) pot to a 25 cm (10 in) pot can leave too much wet soil around a modest root system, while a cramped upgrade may not solve crowding at all.
Watering or feeding mistakes that go unnoticed

Many yellowing problems come from care routines that seem reasonable on the surface. Watering every Saturday, adding fertilizer monthly, or giving “a little extra” during growth can all backfire if they do not match the plant’s actual needs. The issue is often not one dramatic mistake, but a pattern that slowly creates stress until leaves respond.
Plants do not use water and nutrients at a constant rate. Season, light level, pot size, root density, and room temperature all change how quickly the soil dries and how efficiently nutrients are absorbed. A routine that worked in spring can become harmful in winter.
Subtle overwatering and underwatering
Overwatering is not simply about volume; it is about frequency relative to drying time. Small sips given often can be worse than a thorough watering followed by an appropriate dry-down period. On the other hand, repeated underwatering can cause older leaves to yellow and drop as the plant sheds what it cannot support.
- Too frequent watering: Soil stays damp, roots lose oxygen, and leaves fade yellow without becoming crisp at first.
- Too little water at each session: Only the top layer gets wet while the root ball remains dry inside.
- Long dry spells: Lower leaves yellow, then dry and fall, especially on fast-growing plants.
- Uneven watering: Alternating drought and saturation stresses roots and can mimic nutrient problems.
Fertilizer excess, deficiency, and pH lockout
Yellow leaves do not always mean the plant needs more feed. Excess fertilizer can burn roots and cause yellowing just as easily as deficiency can. Salt buildup is common in pots watered with hard water or fertilized heavily without occasional flushing.
Deficiencies also depend on pH. If the root zone is too acidic or too alkaline, nutrients may be present but unavailable. Iron-related yellowing, for example, often appears on newer leaves when pH is out of range rather than because the soil contains no iron.
| Care issue | How it often appears | Better response |
|---|---|---|
| Heavy fertilizer use | Yellowing with browning tips or margins | Flush the pot with clean water and pause feeding for 2 to 3 weeks |
| No feeding during active growth | General paling, slower growth, smaller new leaves | Resume a balanced fertilizer at reduced strength |
| Hard water buildup | Yellowing despite regular feeding, crust on soil surface | Leach salts and consider rainwater or filtered water if suitable |
| Incorrect pH | Interveinal yellowing, especially on new growth | Test pH before adding more fertilizer |
As a practical guide, flushing means running enough water through the pot to equal roughly two to three times the container volume, such as 2 L to 3 L (68 fl oz to 101 fl oz) through a 1 L (34 fl oz) pot, provided drainage is good. Let excess water drain fully afterward.
Pest or disease factors without early signs

Not every infestation announces itself with obvious holes, webs, or black spots. Some pests feed discreetly on leaf sap or roots, and some diseases begin inside stems or in the root zone where they are easy to miss. By the time yellowing appears, the population or infection may already be established.
This is why a quick glance at the top of the plant is rarely enough. Sudden yellowing with no clear watering or light issue should prompt a closer inspection of leaf undersides, stem joints, soil surface, and drainage holes.
Common pests that cause yellowing quietly
Spider mites, thrips, scale, aphids, and fungus gnat larvae can all contribute to yellow foliage. Spider mites are notorious for causing a dull, faded look before webbing becomes obvious. Thrips may leave silvery patches and distorted new growth. Fungus gnat larvae damage fine roots in overly wet soil, reducing uptake and leading to generalized yellowing.
- Spider mites: Fine stippling, dusty-looking leaves, and decline in warm dry rooms.
- Thrips: Streaking, silvery scars, and malformed emerging leaves.
- Scale or mealybugs: Sticky residue, slow yellowing, and weak growth.
- Fungus gnat larvae: More common in constantly damp media, especially seedlings and soft-rooted plants.
Disease issues that start below the surface
Fungal and bacterial problems may first interrupt vascular flow rather than mark the leaves. Root and crown diseases often produce yellowing, wilting, or leaf drop before spots appear. In outdoor beds, poorly drained soil after heavy rain can set this process in motion surprisingly quickly.
Some leaf diseases also begin subtly, with faint pale patches that are mistaken for nutrient deficiency. If yellowing is accompanied by soft tissue, dark lesions, or a spreading pattern that follows veins, disease should move higher on the suspect list.
Editor’s note: Isolate a newly yellowing houseplant from the rest for at least 7 to 10 days. Many pest problems spread faster than people realize, especially when plants are grouped closely on shelves or windowsills.
When to suspect a broader outbreak
If several plants in the same area begin yellowing at once, think beyond individual care mistakes. Shared water sources, contaminated tools, infested new purchases, or a common environmental issue may be involved. Outdoor plantings may also respond together after prolonged rain, irrigation changes, or a pest hatch.
In these cases, inspect the healthiest nearby plants too. Early signs often show there before severe symptoms develop.
How to quickly diagnose sudden plant decline

Fast diagnosis depends on narrowing the possibilities in the right order. Instead of guessing, start with what changed recently, then confirm the root condition, then inspect for pests and feeding issues. This approach saves time and reduces the chance of applying the wrong fix.
The most useful clues are usually physical: soil moisture at depth, root appearance, leaf pattern, and the plant’s location over the last week. A methodical check often reveals more than any single symptom chart.
A practical troubleshooting sequence
Begin with recent changes because sudden yellowing often follows a move, weather shift, repotting, or altered watering schedule. Then assess the root zone before adding fertilizer or pesticides. If roots are compromised, extra feeding will not solve the problem.
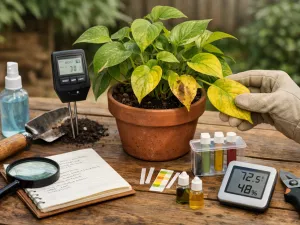
- Review the last 7 to 14 days for changes in light, temperature, watering, feeding, or location.
- Check soil moisture 5 cm to 7.5 cm (2 in to 3 in) deep, not just at the surface.
- Lift the pot to judge weight compared with its usual watered and dry states.
- Inspect drainage holes and, if possible, slide the root ball out partly to assess root color and smell.
- Examine leaf undersides, stems, and growing tips for pests or residue.
- Note whether yellowing affects old leaves, new leaves, one side, or the whole plant.
- Only after these checks, consider nutrient or pH testing if no obvious cause appears.
How symptom patterns help separate causes
Different causes leave different signatures. While overlap exists, pattern recognition speeds up decisions and helps avoid overcorrecting.
| Symptom pattern | Likely direction to investigate | What to confirm |
|---|---|---|
| Older leaves yellow first, soil often wet | Root stress or overwatering | Root firmness, drainage, smell of mix |
| New leaves yellow between green veins | Micronutrient lockout or pH issue | Water source, recent feeding, pH range |
| One-sided yellowing | Draft, sun exposure, or localized root damage | Plant position, nearby vents, pot orientation |
| Yellowing with stippling or distortion | Pests | Leaf undersides, sticky residue, fine webbing |
| Yellowing after repotting or moving | Transplant or environmental shock | Root disturbance, pot size jump, change in light |
When in doubt, make one correction at a time and observe for 3 to 5 days. Multiple changes at once can hide the original cause and make recovery harder to judge.
Steps to stabilize plant health before worsening
Once a plant starts yellowing quickly, the first goal is stability, not aggressive treatment. Many plants recover if stress is reduced early, but they decline faster when they are repotted unnecessarily, overfed, or moved repeatedly. A calm, corrective response gives the roots and leaves a chance to rebalance.
Think in terms of removing pressure from the plant. Improve the environment, correct obvious watering problems, and monitor closely. Dead or fully yellow leaves can be removed later, but immediate root-zone and placement decisions matter more.
Immediate actions that help most plants
These steps are safe in many situations and buy time while you confirm the cause. They are especially useful when the issue is recent and the plant still has firm stems and some healthy green growth.
- Move to stable conditions: Bright indirect light, away from vents, heaters, and cold glass.
- Adjust watering based on actual moisture: Do not water on schedule alone; check the root zone first.
- Stop fertilizing temporarily: Pause feeding until active stress is under control and roots are functioning normally.
- Empty saucers and outer pots: Never leave roots standing in trapped water.
- Inspect and isolate if needed: Separate suspect plants to prevent pest spread.
- Remove only badly damaged tissue: Keep partially green leaves if they still contribute energy.
When repotting is the right move
Repot only when inspection shows a clear root problem such as rot, severe compaction, or extreme root binding. Use a container just one size larger, often about 2.5 cm to 5 cm (1 in to 2 in) wider than the current root ball, with free drainage. Replace sour, dense, or exhausted mix with fresh potting media suited to the plant type.
If rot is present, trim mushy roots with clean tools and avoid saturating the new mix. Water lightly enough to settle the soil, then allow appropriate drying before watering again. A stressed plant in a much larger pot often worsens rather than improves.
Short-term monitoring after intervention
Recovery is rarely instant. Existing yellow leaves may not turn green again, so judge progress by whether yellowing stops spreading, new growth emerges normally, and the plant regains firmness. Monitor for at least 1 to 2 weeks before deciding the first correction failed.
Practical recommendation: Mark the date of your last watering and any changes you made on a label or phone note. This simple record helps you avoid the common mistake of responding too often and creating a second problem while trying to fix the first.
If the plant continues to yellow despite stable conditions, inspect the roots again and consider testing water quality or pH. Persistent decline usually means the original issue was deeper than surface symptoms suggested, but a measured response still gives the best chance of recovery.