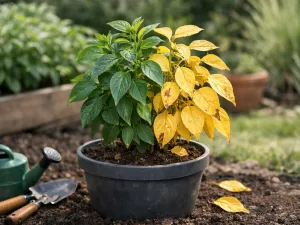
Persistent Yellow Leaves That Keep Spreading

 This article explains why yellowing that spreads through a plant usually signals a systemic problem. It covers root disease, worsening nutrient imbalance, how to stop the spread, when to prune yellow leaves, and which serious cases need fast action.
When yellowing leaves keep appearing and spreading through a plant, it usually points to an ongoing problem rather than normal aging. Instead of just removing damaged leaves and hoping it stops, check watering, light, root health, and feeding habits together. A steady pattern of yellowing often signals stress from conditions that are off balance, and the issue can often be corrected once the cause is identified.
Why yellowing spreads across the plant

When yellow leaves keep appearing beyond one branch or one older leaf, the problem is usually larger than simple aging. A single leaf can yellow naturally as a plant redirects energy, but spreading discoloration often points to a condition affecting water movement, nutrient uptake, or the plant’s ability to produce energy through photosynthesis.
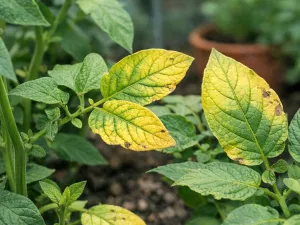
The pattern matters. Yellowing that starts on lower leaves and climbs upward suggests one set of issues, while pale new growth at the top suggests another. A plant that turns yellow in scattered patches may be reacting to inconsistent care, but a plant that fades more evenly is often under broader stress.
How stress moves beyond one leaf
Leaves are connected to the same root system and vascular network, so a problem in one part of the plant can quickly influence the rest. If roots are staying too wet, for example, oxygen levels drop throughout the pot or planting area. Once roots cannot function properly, multiple leaves begin to lose color because they are no longer receiving enough water and minerals in a usable form.
Environmental stress can also spread in stages. A plant placed in poor light may first sacrifice older leaves, then show weaker growth, then develop more widespread yellowing as stored energy runs low. The same gradual decline can happen with cold drafts, compacted soil, or repeated overfeeding.
Common spread patterns to watch
Looking closely at where the yellowing begins helps narrow the cause before the whole plant declines further. Instead of focusing only on leaf color, check which leaves are affected first, how quickly the change is happening, and whether wilting, spots, or soft stems appear at the same time.
- Older lower leaves first: often linked to nitrogen shortage, overwatering, or normal shedding if only a few leaves are involved.
- New leaves first: more often associated with iron deficiency, severe root damage, or pH-related nutrient lockout.
- One side of the plant: may indicate uneven light, root damage on one side, or localized stem injury.
- Entire plant fading: usually points to systemic stress such as root trouble, chronic watering problems, or prolonged nutrient imbalance.
- Yellowing with brown edges: can suggest salt buildup, underwatering, or root stress from inconsistent moisture.
If yellowing is spreading fast, take photos every 3 to 4 days. A simple visual record often reveals whether the problem is moving from old leaves to new ones, which is one of the quickest ways to separate nutrient issues from root decline.
Plants rarely turn yellow everywhere without a reason. The spread itself is a clue: it tells you the issue is active, ongoing, and affecting more than one leaf’s normal life cycle.
Systemic issues affecting overall plant health

Some yellowing problems begin with the environment rather than a disease or a missing fertilizer. These are systemic because they influence the whole plant at once. Light, temperature, watering rhythm, and air movement all affect how efficiently roots and leaves work together. When one of these basics stays out of balance, yellow leaves can continue appearing even if the plant is otherwise pest-free.
Indoor and outdoor plants show this in slightly different ways. Houseplants often struggle with low light, cold windows, and overwatering in decorative pots. Garden plants may face poor drainage, compacted beds, or sudden weather swings. In both cases, the plant is reacting to conditions that reduce normal metabolism over time.
Light, temperature, and water balance
Insufficient light is one of the most underestimated causes of progressive yellowing. A plant may survive in dim conditions for weeks or months, but eventually it cannot support all of its leaves. The result is gradual fading, slower growth, and a tendency to drop older foliage. At the other extreme, harsh direct sun can bleach leaves and create a yellowed look that later turns tan or crispy.
Temperature stress works in a similar way. Warm-growing plants exposed to repeated nights below 10°C (50°F) often show yellowing because root activity slows sharply in cool soil. Likewise, roots in containers standing in hot sun can overheat, especially when dark pots reach well above 30°C (86°F).
Container and soil-related stress
A plant can also yellow steadily when the root zone is physically limiting growth. Pot-bound roots, dense soil, and containers without proper drainage all interfere with water and oxygen balance. This creates a cycle where the grower waters more often to help the plant, but the roots become even less efficient.
- Compacted soil: holds water unevenly and leaves little air space for roots.
- No drainage hole: allows excess water to collect at the bottom, encouraging root decline.
- Root-bound growth: causes water to run through quickly or circle the pot without proper uptake.
- Cold, wet compost or potting mix: slows nutrient absorption and keeps leaves pale.
Systemic stress often produces mixed symptoms. You may see yellow leaves, weak stems, smaller new growth, and delayed recovery after watering. That combination usually means the plant’s basic growing conditions need correcting before any fertilizer or pruning will help.
Before adding plant food, check the simplest factors first: light duration, drainage, and how long the soil stays wet after watering. Correcting those often solves the problem faster than any supplement.
Root diseases and their impact on leaves

Root diseases are among the most serious reasons yellowing keeps spreading. Leaves may be the visible symptom, but the real damage happens below the surface. When roots are attacked by fungi or fungus-like organisms, they lose the ability to absorb water and nutrients efficiently. The plant then shows yellowing, wilting, and eventual decline even when the soil appears moist.
This is why a plant can look thirsty and overwatered at the same time. Diseased roots cannot move moisture upward properly, so leaves droop and yellow while the pot or bed remains wet. Gardeners often respond by watering again, which worsens the root environment and speeds the spread.
Signs that point to root rot or root infection
You do not always need to remove the entire plant to suspect root disease. The combination of symptoms usually gives it away. If yellowing is paired with a sour smell, blackened roots, stem softening near the soil line, or a potting mix that stays wet for many days, root trouble should move high on your list of likely causes.
- Persistent wet soil: the mix remains damp for more than 7 to 10 days in a typical indoor pot.
- Wilting despite moisture: leaves droop even though the root zone is not dry.
- Brown or black roots: healthy roots are usually pale and firm, not mushy.
- Yellowing with leaf drop: older and middle leaves may fall quickly once roots fail.
- Soft stem base: often signals advanced rot moving upward from the roots.
How root problems translate into leaf symptoms
As roots decay, the plant first loses fine feeder roots. These are the parts most responsible for taking up water and dissolved nutrients. Without them, leaves may turn light green, then yellow, then develop brown patches. New growth often emerges smaller than normal because the plant is operating on reduced reserves.
Some root diseases progress slowly in cool conditions and rapidly in warmth. In heavy garden soil after repeated rain, roots may suffocate and become vulnerable to pathogens. In containers, the most common trigger is frequent watering combined with a dense or old potting mix.
If you inspect roots, trim away only clearly dead tissue using clean tools. Replant into a fresh, airy mix and a container with drainage. In the garden, improving drainage with organic matter and avoiding repeated saturation is more useful than simply watering less for a few days.
Nutrient imbalances that worsen over time

Not every yellow leaf means the plant is hungry, but nutrient imbalances can absolutely cause yellowing that spreads if left uncorrected. The key word is imbalance. Too little fertilizer is one issue, but too much, the wrong ratio, or a soil pH that blocks uptake can create the same pale, tired appearance.
Plants use nutrients differently depending on growth stage, temperature, and light levels. A fast-growing container plant in spring may exhaust available nitrogen quickly, while the same plant in winter may yellow because the soil is too wet and cold for normal uptake. This is why feeding on a fixed schedule without checking conditions often leads to trouble.
Deficiency versus lockout
A true deficiency means the nutrient is not present in adequate amounts. Lockout means the nutrient may be in the soil, but the plant cannot absorb it properly. High pH often limits iron uptake, while salt buildup from repeated fertilizer use can interfere with several nutrients at once.
The age of the affected leaves offers a useful clue. Mobile nutrients such as nitrogen and magnesium are often pulled from older leaves first, so lower foliage yellows before new growth. Iron, by contrast, tends to affect newer leaves first, often leaving veins greener than the tissue between them.
| Pattern on the plant | Possible imbalance | What to check |
|---|---|---|
| Older leaves yellow evenly | Nitrogen shortage | Feeding history, weak growth, exhausted potting mix |
| Older leaves yellow between veins | Magnesium deficiency | High potassium feeding, long-term container growth |
| New leaves pale with greener veins | Iron lockout | Soil pH, cold wet roots, poor drainage |
| Leaf edges yellow then brown | Salt buildup or potassium imbalance | Fertilizer strength, crust on soil surface, hard water use |
When feeding makes the problem worse
Overfertilizing can mimic deficiency because damaged roots stop taking up nutrients normally. If the soil surface has a white crust, or if leaves yellow soon after feeding, excess salts may be involved. In that case, adding more fertilizer usually intensifies the decline.
For potted plants, flushing the soil with clean water can help remove accumulated salts. Use enough water for it to run freely from the drainage holes, then allow the mix to drain fully. As a rough guide, flushing with water equal to about two to three times the pot volume is often effective, provided the container drains well.
Yellow leaves after feeding do not always mean the fertilizer was “too strong” in one application. More often, the mix had been building salts quietly for months, and the latest feed simply pushed the roots past their limit.
How to stop yellowing from progressing

Stopping the spread depends on correcting the cause rather than chasing the color change itself. A yellow leaf rarely turns fully green again, so the goal is to protect healthy foliage and improve new growth. That means assessing moisture, roots, light, and feeding in a practical order instead of making several random changes at once.
Start with the root zone because many ongoing yellowing problems begin there. If the soil is constantly wet, compacted, or sour-smelling, address that before adjusting fertilizer. If the soil is drying too quickly and the plant wilts repeatedly, improve watering consistency and consider whether the plant is root-bound.
A practical recovery sequence
Using a simple sequence prevents overcorrection. Plants often decline further when they are repotted, heavily pruned, fertilized, and moved to a new location all in the same week. One thoughtful adjustment at a time gives clearer results.
- Check soil moisture properly: feel 5 cm (2 in) below the surface in pots, or dig a small test hole in garden soil to assess dampness below the top layer.
- Inspect drainage: make sure excess water can escape and that saucers or cachepots are not holding water around the roots.
- Review light levels: move indoor plants closer to bright indirect light if they are in a dim corner, or protect shade-lovers from harsh midday sun.
- Examine roots if decline continues: look for firm, pale roots rather than dark, mushy ones.
- Pause fertilizer until growth stabilizes: feed only after the plant resumes active, healthy growth.
- Adjust watering rhythm: water thoroughly, then allow the appropriate drying interval for that species instead of giving small daily amounts.
Supporting recovery without causing more stress
Once conditions improve, give the plant time. Recovery is usually seen first in stronger new leaves, not in the old yellow ones. Keep temperatures stable, avoid drafts, and do not repot unless the root zone truly needs intervention. For outdoor plants, a mulch layer can help moderate soil moisture, but keep it a few centimeters away from the stem base to prevent rot.
If you are using liquid feed, apply it at reduced strength during recovery rather than full label rate, especially after root stress. For example, if the product suggests 10 ml per 1 L (0.34 fl oz per 34 fl oz), begin with half that amount once the plant is actively growing again.
When pruning affected leaves is necessary

Pruning yellow leaves is sometimes helpful, but it should not be the first response to spreading discoloration. Leaves still provide some energy if they retain green tissue, so removing too many at once can weaken an already stressed plant. The decision should be based on the leaf’s condition, the plant’s overall vigor, and whether the damaged foliage may harbor disease.
In many cases, lightly yellowed leaves can stay in place while you correct the underlying issue. Fully yellow, collapsed, or rotting leaves are different. They no longer contribute much and may attract fungal growth, especially in dense indoor foliage or humid greenhouse conditions.
Leaves that should be removed
Selective pruning improves airflow and tidiness, but it also helps you monitor whether the problem is still progressing. Once the worst foliage is gone, it becomes easier to spot fresh symptoms on newer leaves.
- Fully yellow leaves: these are unlikely to recover and can be removed cleanly.
- Soft or decaying leaves: remove promptly to reduce disease pressure.
- Leaves with spreading fungal spotting: prune and discard away from healthy plants.
- Lower leaves resting on wet soil: remove if they are staying damp and becoming infected.
How much to prune at one time
Avoid stripping the plant bare. As a general rule, do not remove more than about one-quarter to one-third of the foliage in a single session unless the plant is dealing with an active disease outbreak and sanitation is essential. Heavy pruning on a weak plant can slow recovery because it reduces the plant’s remaining photosynthetic surface.
Use clean scissors or pruners and wipe blades between cuts if disease is suspected. Make cuts close to the base of the leaf stalk without tearing the stem. For large leaves, support the leaf as you cut so you do not split surrounding tissue.
After pruning, resist the urge to compensate with extra water or fertilizer. The plant still needs stable care, not a sudden change in routine.
Identifying serious problems that need intervention
Some yellowing can be corrected with better watering and improved growing conditions, but certain signs suggest a more urgent problem. If the color change is spreading rapidly, new growth is also affected, or the stem and roots show obvious damage, the plant may need immediate action rather than simple observation.
Intervention might mean repotting, isolating the plant, improving drainage in a bed, or treating a confirmed pest or disease issue. The important thing is recognizing when normal care adjustments are no longer enough.
Warning signs that go beyond routine stress
Look for combinations of symptoms rather than one detail alone. A few yellow leaves are manageable; yellow leaves plus stem collapse, black roots, or distorted new growth point to a more serious issue.
- Rapid yellowing over 1 to 2 weeks: often indicates active root failure, severe watering imbalance, or disease.
- Yellowing with mushy stems: suggests rot and requires immediate sanitation and root inspection.
- Pale new growth across the whole plant: may indicate severe root dysfunction or major nutrient lockout.
- Leaf drop plus foul-smelling soil: strongly points to anaerobic conditions and root decay.
- Yellowing with visible pests: sap-feeding insects can weaken the plant enough to cause widespread chlorosis.
When to isolate, repot, or seek expert help
If a houseplant may have disease or pests, isolate it from nearby plants while you investigate. Repot only when the current mix is clearly contributing to the problem, such as in cases of root rot, severe compaction, or salt accumulation. For outdoor plants, intervention may involve improving drainage channels, lifting and replanting in a raised area, or sending a soil sample for testing.
It is worth seeking local expert advice when yellowing affects many plants in the same bed, when a valuable specimen declines despite corrected care, or when symptoms include cankers, unusual spotting, or dieback in addition to leaf discoloration. Those patterns can indicate problems that are not solved by routine feeding or watering changes.
The main lesson is simple: persistent yellow leaves that keep spreading are a signal, not a cosmetic flaw. Once you read the pattern correctly and act on the root cause, you give the plant its best chance to return to steady, healthy growth.