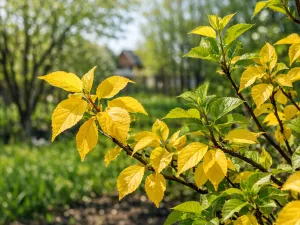
Yellow Leaves in Low Light Conditions

 This article explains how low light slows plant metabolism, causes leaves to lose color, and leads to yellowing. It covers signs of light stress, how to tell them from watering issues, better placement for more light, artificial lighting, and prevention in shaded spots.
- How insufficient light affects plant metabolism
- Why leaves lose color without enough energy
- Common signs of low light stress in plants
- How to differentiate light issues from watering problems
- Best placement strategies to improve light exposure
- Using artificial lighting for plant support
- Preventing yellow leaves in shaded environments
When foliage turns yellow in dim conditions, the problem is often more complex than simple shade. Low light slows photosynthesis, so plants use water and nutrients less efficiently, which can leave roots sitting in overly wet soil and weaken overall growth. As a result, leaves may lose color, older foliage may decline first, and stress can build gradually. Understanding how limited light disrupts normal plant function helps you identify the real cause and adjust care before damage spreads.
How insufficient light affects plant metabolism

Plants do far more with light than simply stay green. Light powers photosynthesis, the process that turns water and carbon dioxide into sugars used for growth, repair, and basic survival. When a plant sits in a dim corner for too long, its energy production drops, and that shortage affects nearly every internal function.
Low light slows metabolism in a way that is often gradual rather than dramatic. A plant may still look acceptable for weeks, but behind the scenes it is producing less fuel, moving nutrients more slowly, and using stored reserves to stay alive. That is why yellowing leaves can appear even when watering and temperature seem reasonable.
Reduced photosynthesis means reduced energy
Leaves are the plant’s energy factories. In bright enough conditions, they make sugars that support root growth, new shoots, flowering, and tissue maintenance. In poor light, sugar production falls below what the plant needs, so it begins to ration resources.
This energy shortage often leads to a few predictable responses:
- Slower growth: New leaves emerge smaller, farther apart, or not at all.
- Weaker stems: Shoots stretch toward available light and become thin or floppy.
- Lower nutrient use: The plant takes up and processes fertilizer less efficiently.
- Leaf sacrifice: Older leaves may be abandoned first because they cost energy to maintain.
Stored reserves are used up over time
Many houseplants can tolerate dim conditions for a while because they rely on energy stored in stems, roots, or thicker leaves. That reserve creates a delay between the start of the problem and visible yellowing. Once those reserves run low, the plant starts reallocating what little energy remains to its most useful growth points.
Older, shaded, or lower leaves are usually the first to decline because they contribute the least. This is why yellow leaves in low light often appear from the bottom upward rather than randomly across the plant.
A plant that “survives” in a dark room is not necessarily thriving there. If growth has stalled for a full season and older leaves are fading, the plant is likely living off stored energy rather than benefiting from the space.
Metabolic slowdown changes care needs
Because metabolism slows in dim conditions, the plant also uses water more slowly and needs less feeding. This is where many care problems overlap. A grower may continue watering on the same schedule used in brighter months, but the plant now dries out much more slowly, which can add root stress on top of the light problem.
In practical terms, lower light often means:
- Longer drying time in the potting mix
- Reduced demand for fertilizer
- Less frequent need for pruning due to slower growth
- Greater sensitivity to cold drafts because growth is already sluggish
Understanding this metabolic slowdown is the key to solving yellow leaves correctly. The issue is not only that the plant wants more brightness; it is also that every other part of care must match the reduced pace of growth.
Why leaves lose color without enough energy

Yellowing in low light is closely tied to chlorophyll, the green pigment that captures light for photosynthesis. When a plant cannot make enough energy, it stops investing in some leaves and begins breaking down chlorophyll. As the green pigment fades, yellow tones that were always present in the leaf become more visible.
This process is not always a sign of sudden damage. Often it is a controlled response. The plant is deciding that certain leaves no longer return enough energy to justify their upkeep, especially if they are old, shaded by other foliage, or positioned far from the strongest light source.
Chlorophyll is expensive for the plant to maintain
Healthy green leaves require nutrients, water movement, and a steady energy supply. In dim conditions, the plant may not be able to support all of its foliage equally. It then pulls mobile nutrients away from older leaves and redirects them toward newer growth or the crown of the plant.
That is why low-light yellowing often has a pattern:
- Older leaves fade before younger ones
- Leaves on the interior of a dense plant yellow first
- The side facing away from the window declines faster
Color loss can look different by plant type
Not every species responds in exactly the same way. Thin-leaved tropicals may turn pale quickly, while thicker plants may hold color longer but grow weakly. Variegated plants can become dull and washed out, while deep green foliage plants may simply lose richness before turning fully yellow.
A few common patterns include:
- Pothos and philodendron: Longer gaps between leaves, smaller new growth, and yellowing older leaves.
- Peace lily: General paling, reduced flowering, and soft yellow lower leaves.
- Ficus: Leaf drop after a period of dim exposure, often following a move indoors.
- Succulents: Less yellowing at first, but stretched growth and weak, pale tissue are common.
When yellowing becomes leaf drop
If the energy deficit continues, yellow leaves eventually brown, dry, or detach. This is not always reversible for the affected leaf. Once a leaf has lost much of its chlorophyll, it rarely returns to full function. The goal is to correct conditions early enough that new growth emerges healthy and the remaining leaves stabilize.
It helps to think of yellowing as a warning stage. The plant is signaling that it can no longer support its current amount of foliage under the available light. Improving exposure, adjusting watering, and reducing unnecessary stress can stop the decline before it spreads further.
Common signs of low light stress in plants

Yellow leaves are only one clue. Plants that are not getting enough light usually show a combination of changes in shape, growth rate, and moisture use. Looking at the whole plant gives a much clearer diagnosis than focusing on leaf color alone.
Low light stress often develops slowly, so the signs can be easy to miss if you see the plant every day. Comparing current growth to older photos or checking the spacing between leaves can reveal a pattern that is otherwise hard to notice.
Visible growth changes
One of the clearest signs is stretching, also called legginess. Stems grow longer with wider gaps between leaves as the plant tries to reach a brighter source. This growth is usually weaker and less compact than normal.
- Small new leaves: Fresh growth appears undersized compared with older foliage.
- Leaning: The whole plant angles toward a nearby window or lamp.
- Sparse shape: Interior leaves are lost, leaving bare stems.
- Slow recovery after pruning: The plant takes much longer to branch or refill.
Changes in leaf appearance
Color shifts can range from pale green to fully yellow, depending on species and severity. In low light, leaves may also become thinner and softer because the plant is building weaker tissue. Glossy foliage can look dull, and variegation may become less distinct.
Watch for these leaf-related clues:
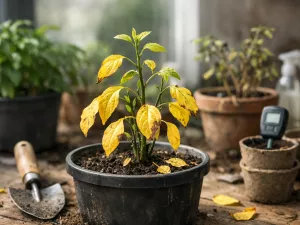
- Yellowing that begins on older or lower leaves
- Pale, washed-out foliage without crisp burn marks
- Leaves that stay small and fail to deepen in color
- Increased leaf drop after several weeks in a dim room
If a plant is yellowing but the pot stays damp for 10 to 14 days after watering, low light is likely involved. Slow drying is often one of the earliest practical signs that the plant is not using resources at a healthy rate.
Behavioral signs in day-to-day care
Some symptoms show up in maintenance rather than appearance. A plant in insufficient light often needs water less often, stops producing flowers, and seems to “pause” despite warm temperatures. Growers sometimes mistake this for a seasonal rest period when the real issue is placement.
The following checklist can help identify a low-light pattern:
- The potting mix remains wet much longer than expected
- Growth slows even during spring and summer
- New stems are thin and unable to support themselves
- The plant performs better immediately after being moved closer to a window
When several of these signs appear together, poor light is usually a stronger explanation than a single isolated care mistake.
How to differentiate light issues from watering problems

Yellow leaves caused by low light can look similar to those caused by overwatering or underwatering, which is why many plants are misdiagnosed. The difference usually becomes clearer when you compare leaf pattern, soil moisture, and the speed of decline. Light problems tend to be gradual and tied to placement, while watering problems often show up through root stress and more sudden leaf collapse.
The most reliable approach is to examine the plant as a system: where it sits, how fast the soil dries, which leaves are affected first, and whether the roots still look healthy.
Key differences in symptoms
Low light and watering issues can overlap, especially because dim conditions often lead to accidental overwatering. Still, there are patterns that help separate the primary cause.
| Clue | Low light stress | Watering problem |
|---|---|---|
| Leaf pattern | Older or shaded leaves yellow first, often gradually | Yellowing may be widespread, patchy, or paired with wilt |
| Growth habit | Leggy, leaning, small new leaves | Growth may stall, but stretching is less typical |
| Soil behavior | Mix stays wet longer because the plant uses less water | Mix may be constantly soggy or bone dry due to care routine |
| Leaf texture | Often pale and thin before dropping | Can become limp, mushy, crispy, or curled depending on the issue |
| Root condition | Usually intact at first | May be rotting, shriveled, or stressed |
Simple checks you can do at home
You do not need special equipment to narrow down the cause. A few practical observations usually reveal whether the plant is mainly lacking light, suffering from poor watering habits, or dealing with both at once.
- Check how far the plant is from the window. Even moving from 30 cm (12 in) to 2 m (6.5 ft) away can reduce usable light sharply.
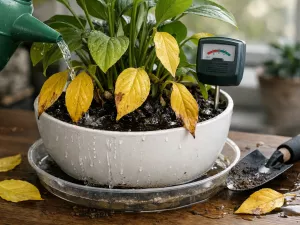
- Insert a finger or moisture probe into the mix. If it stays wet for many days in a dim spot, the watering schedule may be too frequent for the available light.
- Inspect the roots if the plant slides easily from the pot. Healthy roots are usually firm and light-colored; rotting roots are dark, soft, or sour-smelling.
- Look at new growth. If it is stretched and weak, poor light is strongly suggested.
When both issues are happening together
This is common indoors. A plant in a dark area uses less water, but if it is still watered as though it were in bright light, the root zone remains too wet. The result is a mixed symptom set: yellow leaves from low energy and additional yellowing or droop from root stress.
In that situation, correcting only the watering schedule may help temporarily, but the plant often continues to decline until light exposure improves. Likewise, moving the plant to a brighter place without addressing soggy soil may not solve the problem if roots have already been damaged. Good troubleshooting means treating both the cause and the consequence.
Best placement strategies to improve light exposure

Placement changes are often the fastest and cheapest way to stop yellowing caused by dim conditions. Many plants do not need direct sun, but they do need enough usable brightness for several hours each day. A small move can make a major difference, especially indoors where walls, curtains, and window direction dramatically affect light levels.
The goal is not to place every plant in the sunniest possible spot. It is to match the species to the brightest location it can comfortably use without scorching or heat stress.
Use distance from the window wisely
Indoor light drops off much faster than many people expect. A plant right beside a bright window may receive several times more light than one placed deeper in the same room. If yellow leaves are appearing, reducing that distance is usually the first adjustment to try.
- Very close placement: 15 to 60 cm (6 to 24 in) from a bright window suits many tropical foliage plants, depending on sun intensity.
- Moderate placement: 60 to 120 cm (24 to 48 in) may work for tolerant species in bright rooms.
- Deep-room placement: Beyond 1.5 to 2 m (5 to 6.5 ft), many common houseplants receive too little light unless supplemented.
Match plant type to window direction
Window orientation matters because it changes both intensity and duration of light. North-facing windows in the northern hemisphere are usually the dimmest, while south-facing windows are often the brightest. East and west windows offer useful middle ground, though west light can be hotter in the afternoon.
As a practical guide:
- Use east windows for gentle morning light and steady brightness.
- Place tougher light-loving plants near south windows, with sheer filtering if midday sun is harsh.
- Try west windows for species that can handle warmer afternoon exposure.
- Reserve north windows for genuinely shade-tolerant plants, not sun-loving ones.
Rotate plants a quarter turn every 1 to 2 weeks if they lean strongly toward the window. This will not fix inadequate light, but it helps maintain a fuller shape while you improve positioning.
Reduce barriers that block useful light
Sometimes the problem is not the window itself but what stands between the plant and the light. Heavy curtains, insect screens, tinted glass, nearby furniture, and even dense neighboring plants can cut brightness enough to trigger yellowing over time.
Useful placement improvements include:
- Moving the plant in front of, rather than beside, the brightest part of the window
- Pulling back thick curtains during the day
- Raising small plants on a stable stand so leaves clear the window ledge shadow
- Spacing crowded plants so lower leaves are not permanently shaded
After moving a plant, give it 2 to 4 weeks to respond. Existing yellow leaves may not recover, but new growth should appear stronger, greener, and more compact if the placement is better.
Using artificial lighting for plant support

When natural light is limited, artificial lighting can keep plants healthy and prevent the slow decline that leads to yellow leaves. This is especially useful in winter, in rooms with small windows, or in offices where daylight is weak for much of the day. A proper grow light does not need to be complicated, but it does need to be close enough, bright enough, and used consistently.
Artificial support works best when it supplements a realistic care routine rather than replacing all observation. If a plant remains in poor soil or is watered too heavily, a lamp alone will not solve every problem.
Choosing a practical setup
For most home growers, full-spectrum LED grow lights are the easiest option. They run cooler than older bulb types, use less electricity, and can be placed fairly close to foliage. The exact strength needed depends on the plant, but distance matters almost as much as bulb quality.
- Low to medium light houseplants: Often do well with a lamp positioned 20 to 45 cm (8 to 18 in) above the foliage.
- Higher light plants: Usually need stronger fixtures or closer placement, depending on manufacturer guidance.
- Small collections: A clamp lamp or compact bar light may be enough.
- Shelves and plant stands: LED bars provide more even coverage than a single spotlight bulb.
How long to run grow lights
Duration matters because plants need enough total light each day, not just brightness for a short period. Many foliage plants respond well to 10 to 14 hours of artificial light daily. Using a timer is helpful because irregular schedules reduce the benefit.
A few practical timing tips:
- Start with 12 hours per day for most common houseplants.
- Reduce slightly if the plant also receives good natural daylight.
- Avoid running lights all night; plants still benefit from a dark period.
- Keep the schedule steady from day to day.
Signs the light setup needs adjustment
Even with a grow light, plants can still yellow if the fixture is too weak or too far away. On the other hand, leaves can bleach or dry if a strong lamp is placed too close. Monitoring new growth is the best way to judge success.
Look for these responses over the next few weeks:
- New leaves emerge greener and more normally sized
- Stem stretching slows down
- The potting mix begins drying at a more predictable rate
- Leaf drop decreases
If nothing changes after 3 to 4 weeks, increase intensity, reduce the distance slightly, or extend the daily lighting period within a reasonable range. Always make changes gradually so the plant can adapt without added stress.
Preventing yellow leaves in shaded environments
Prevention is easier than recovery, especially in homes and gardens where shade is unavoidable. The best long-term strategy is to combine realistic plant selection with care habits that fit slower growth. A plant kept in a dim area can remain attractive for years if its light needs are modest and the rest of its care is adjusted accordingly.
Shaded conditions do not automatically mean failure. Problems usually start when a plant that wants bright exposure is treated as though any dark corner will do, or when watering and feeding are not reduced to match slower metabolism.
Choose plants that tolerate lower light
The first layer of prevention is matching the species to the site. Some plants naturally handle filtered or reduced light better than others. While even shade-tolerant plants need some usable brightness, they are less likely to yellow quickly in rooms that are not sun-filled.
- Better choices for dimmer spots: ZZ plant, snake plant, cast iron plant, heartleaf philodendron, and some pothos varieties.
- Poor choices for dim corners: Many succulents, citrus, herbs, and flowering plants that need strong sun to stay healthy.
Adjust watering, feeding, and pruning to slower growth
Plants in shade use water and nutrients more slowly. That means the usual schedule may be too much. Instead of watering by the calendar, check the potting mix and the weight of the container. Fertilizer should also be lighter, especially if the plant is not actively producing new leaves.
- Water only when the upper layer of mix has dried to the depth appropriate for the species.
- Empty saucers or cachepots so roots do not sit in standing water.
- Feed lightly during active growth rather than applying strong fertilizer in low-energy conditions.
- Remove fully yellow leaves so the plant can focus on healthy tissue.
Build a routine for shaded rooms
Plants in lower light benefit from regular observation more than frequent intervention. A simple routine helps catch problems before yellowing spreads too far.
- Check leaf color and stem shape every week
- Rotate containers for balanced growth
- Clean dust from leaves so they can capture available light more efficiently
- Refresh potting mix if it has become compacted and stays wet too long
- Use a grow light in winter or in rooms with consistently poor daylight
Dusty leaves can reduce already limited light capture. Wiping foliage gently with a damp cloth every few weeks is a small job, but in shaded rooms it can make a noticeable difference in how efficiently the plant uses available light.
If yellow leaves appear despite careful maintenance, review the environment before adding more fertilizer or water. In shaded spaces, the healthiest plants are usually the ones managed with restraint: moderate watering, modest feeding, clean foliage, and the brightest placement the room can offer.