Yellow Leaves After Fertilizing Plants

 This article explains why plants may turn yellow after fertilizing, including fertilizer burn, salt buildup, nutrient imbalance, and root stress. It also shows how to tell excess damage from deficiency, flush soil, and prevent yellowing next time.
- Why plants react negatively after fertilizing
- Fertilizer burn and salt buildup in soil
- How overfeeding disrupts nutrient balance
- Signs of root stress after feeding
- Difference between deficiency and excess damage
- How to flush soil and reset nutrient levels
- Best practices to avoid fertilizer-related yellowing
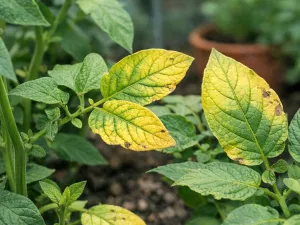
If leaves turn yellow soon after feeding, the cause is often linked to the fertilizer itself or to how it was applied. Too much fertilizer can burn roots and create salt buildup, making it harder for the plant to take up water and nutrients. Feeding dry soil, using the wrong formula, or fertilizing too often can also trigger stress. Check when you fed, how moist the soil was, and whether older or newer leaves are yellowing to help identify the problem.
Why plants react negatively after fertilizing

Yellow leaves that appear soon after feeding often point to stress rather than improvement. Fertilizer is meant to supply nutrients, but plants can only use those nutrients well when roots, moisture, temperature, and soil conditions are already in balance. If any of those pieces are off, a feeding can push the plant beyond what it can comfortably process.
Many gardeners expect fertilizer to act like a quick fix for pale foliage, slow growth, or weak stems. In reality, feeding a stressed plant can make symptoms worse. A root system that is too dry, waterlogged, compacted, or damaged may not absorb nutrients evenly. Instead of helping, the fertilizer changes the chemistry around the roots and triggers leaf yellowing, browning, or sudden wilting.
Why the timing of feeding matters
Plants respond best when they are actively growing and well hydrated. Feeding during dormancy, after repotting, during heat stress, or when the soil is bone dry increases the chance of damage. The roots are less able to regulate uptake, so salts and nutrients can build up faster than the plant can use them.
- Dry soil: Fertilizer in dry potting mix is more concentrated and can scorch root tissue.
- Recent transplanting: Freshly disturbed roots are sensitive and may react badly even to a normal dose.
- Low light: Plants growing in dim conditions use nutrients more slowly, so leftover fertilizer accumulates.
- Cold temperatures: Growth slows in cool rooms or chilly outdoor weather below 15°C (59°F), reducing nutrient demand.
Why yellowing can happen fast
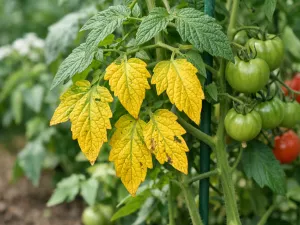
Leaf color changes do not always mean the plant suddenly became deficient. In many cases, yellowing appears because root function was interrupted. When roots are irritated, the plant may stop moving water and nutrients properly to the leaves. Older leaves may fade first, or the newest leaves may emerge pale and weak depending on which nutrient pathways were disrupted.
The speed of the reaction depends on the plant type, the fertilizer strength, and the growing medium. A fast-draining houseplant mix can show symptoms within a day or two, while a heavy outdoor soil may take longer. Container plants usually react faster because there is less soil volume to dilute excess nutrients.
If yellow leaves appear within 24 to 72 hours after feeding, treat the fertilizer as a likely trigger before assuming pests or disease. The timing itself is often the most useful clue.
Fertilizer burn and salt buildup in soil

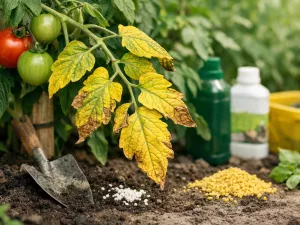
Fertilizer burn is one of the most common reasons leaves turn yellow after feeding. Despite the name, it is not heat damage. It happens when dissolved salts from fertilizer become too concentrated around the roots. Water then moves out of root cells instead of into them, leaving roots dehydrated and unable to support healthy foliage.
This problem is especially common in pots, hanging baskets, seed trays, and raised beds where repeated feeding leaves salts behind. Even if the fertilizer label looks mild, frequent applications can slowly build residue in the root zone. Over time, the soil becomes less forgiving and plants begin showing yellow edges, brown tips, or a dull washed-out color.
Typical sources of salt accumulation
Not all buildup comes from one heavy feeding. It often develops from several smaller habits that seem harmless on their own.
- Too-frequent liquid feeding: Applying fertilizer with every watering can overload the mix.
- Slow-release plus liquid fertilizer: Combining products may double the nutrient supply without realizing it.
- Hard water: Mineral-rich tap water adds extra dissolved solids over time.
- Poor drainage: Salts stay trapped when excess water cannot move through the soil profile.
- Shallow watering: Light sips moisten the top layer but do not wash residues downward and out.
What fertilizer burn looks like
The pattern often starts at the leaf tips or margins because those areas lose water fastest. In severe cases, the entire leaf yellows, then turns tan or crispy. The soil surface may also develop a white or pale crust. That crust is not always visible, but when present it strongly suggests mineral buildup.
Plants with finer roots, such as ferns, peace lilies, herbs, and many seedlings, are often more sensitive than thick-rooted shrubs or established garden plants. Young plants can be damaged by a concentration that a mature specimen might tolerate.
| Condition | Common leaf symptoms | What you may notice in the soil or pot |
|---|---|---|
| Recent fertilizer burn | Yellowing tips, brown edges, limp growth after feeding | Strong fertilizer smell, very dry root ball, runoff with high residue |
| Long-term salt buildup | Gradual yellowing, stalled growth, repeated tip burn | White crust, compacted mix, water running through unevenly |
| Water stress with fertilizer present | Yellow leaves plus wilt, especially in warm weather above 27°C (81°F) | Soil alternates between soggy and bone dry |
| Healthy feeding response | Steady green growth, no tip scorch | Even moisture, clean drainage, no surface residue |
How overfeeding disrupts nutrient balance

Plants do not benefit from unlimited nutrition. Once the root zone contains more nutrients than the plant can use, uptake becomes uneven. Some elements are absorbed too readily while others become harder to access. This is why a plant can look deficient even when plenty of fertilizer is present in the soil.
Overfeeding is not just about quantity. The ratio matters too. A fertilizer heavy in one nutrient can interfere with another. For example, too much nitrogen may push soft green growth that the roots cannot support, while excess potassium can compete with magnesium uptake. The result may be yellowing between veins, weak stems, or leaves that fade despite regular feeding.
Nutrient antagonism in simple terms
Roots absorb ions through a competitive system. When one type is present in excess, it can suppress the uptake of others. This imbalance is common in container growing, where nutrients are confined to a small volume of media.
- Excess nitrogen: Can lead to lush but weak growth and increased demand for water and micronutrients.
- Excess potassium: May reduce magnesium and calcium availability, contributing to yellowing or distorted growth.
- Excess phosphorus: Can limit uptake of iron, zinc, and manganese, especially in slightly alkaline soil.
- High overall EC: Elevated soluble salts make it physically harder for roots to take in water.
Why pH and fertilizer work together
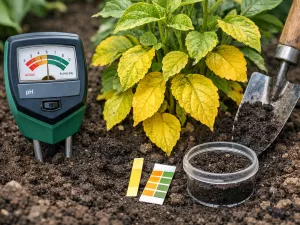
Even a balanced fertilizer can cause trouble if the soil pH drifts out of range. In many houseplant and garden situations, repeated feeding gradually shifts root-zone chemistry. That shift affects which nutrients stay available. Iron is a classic example: the soil may contain enough of it, but the plant still yellows because the roots cannot access it efficiently.
This is why adding more fertilizer to correct yellow leaves often backfires. The issue may not be a lack of nutrients at all. It may be a locked-up root zone caused by excess salts, poor pH, or damaged roots.
When a plant looks hungry after several feedings, pause before adding more. A simple reset with plain water is often safer than trying a stronger formula.
Signs of root stress after feeding

Roots usually show the first damage, but leaves reveal it. After feeding, stressed roots struggle to regulate moisture and nutrient movement, so the top growth begins to send warning signals. Yellow leaves are one of the most obvious signs, but they rarely appear alone.
Pay attention to the full pattern. A plant with root stress may yellow, wilt, stop growing, and drop leaves at the same time. The soil may stay wet longer than usual because damaged roots are not taking up water efficiently. In other cases, a dry root ball may repel water, causing fertilizer to concentrate in pockets and injure roots unevenly.
Leaf and stem symptoms to watch for
These signs are more meaningful when they appear shortly after a feeding or after a period of heavy fertilizing.
- Yellowing lower leaves: Often a general stress response when the plant sheds older foliage to conserve energy.
- Brown tips or margins: A classic sign of salt injury.
- Sudden wilt in moist soil: Suggests roots are impaired rather than simply dry.
- Soft, weak new growth: Can happen when feeding pushes top growth faster than roots can support it.
- Leaf drop: Common in sensitive houseplants after a sharp change in root-zone conditions.
What to check below the surface
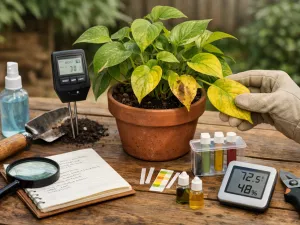
If the plant is in a pot and can be inspected safely, the root zone gives better answers than the leaves alone. Healthy roots are usually firm and pale, while stressed roots may look tan, brittle, or mushy depending on whether the issue is salt injury, drought, or rot.
- White crust on the mix: Indicates mineral residue near the surface.
- Compacted media: Limits air around roots and increases sensitivity to feeding.
- Roots circling densely: A root-bound plant dries unevenly and is easier to overfertilize.
- Sour smell: Points to poor drainage or root decline rather than simple nutrient shortage.
Outdoor plants can be harder to inspect directly, but the same clues apply. If yellowing follows a fertilizer application and the weather has been hot, windy, or dry, root stress is a strong possibility. In beds and borders, concentrated fertilizer granules placed too close to stems can also damage the crown area.
Difference between deficiency and excess damage

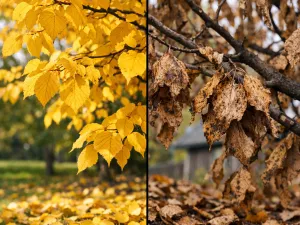
Yellow leaves can come from too little nutrition or too much, and that is where gardeners often get stuck. The key difference is context. A deficiency usually develops gradually as the plant uses up available nutrients. Excess damage often appears after a feeding, after switching products, or after increasing the dose or frequency.
The pattern on the leaves also helps. Deficiencies tend to follow predictable nutrient-specific symptoms, while excess damage often looks harsher or more irregular. Tip burn, scorched edges, and sudden wilt are more suggestive of overfeeding than of a simple shortage.
How to compare the symptoms
Use the plant's recent care history alongside what you see. One clue by itself is not enough, but several clues together usually point in the right direction.
| Clue | More likely deficiency | More likely excess or burn |
|---|---|---|
| Timing | Develops slowly over days or weeks | Appears soon after feeding or dose increase |
| Leaf edges | Usually stay soft at first | Often turn brown, dry, or crisp |
| Soil surface | No obvious residue | May show white crust or fertilizer deposits |
| Plant response to more fertilizer | May improve if deficiency is real | Usually worsens |
| Moisture behavior | Normal uptake unless roots are weak | Soil may stay wet or become unevenly dry due to root stress |
Situations that commonly confuse the diagnosis
Some nutrient problems mimic each other. Iron deficiency and fertilizer-induced lockout can both produce pale new leaves. Nitrogen deficiency and root damage can both yellow older leaves. That is why diagnosis should include recent watering habits, light levels, and whether the plant was fertilized in dry soil.
If you are unsure, the safer move is usually to stop feeding temporarily, improve watering consistency, and observe new growth. Existing yellow leaves may not recover, but healthy new leaves are a better sign that the problem is being corrected.
Do not judge recovery by old damaged leaves alone. Watch the next 1 to 3 weeks of growth, or 7 to 21 days, for cleaner color and stronger new foliage.
How to flush soil and reset nutrient levels

When fertilizer buildup is the likely cause, flushing the soil is the fastest way to lower salt concentration around the roots. The goal is to move excess dissolved nutrients out of the potting mix with plain water. This works best for container plants with drainage holes. Garden beds can be leached too, but the process is slower and depends more on soil type and weather.
Flushing should be thorough rather than repeated in small amounts. A light sprinkle does not remove much residue. You need enough water to fully saturate the soil and carry salts out through the drain holes or deeper into the soil profile where roots are less concentrated.
How to flush a potted plant
Start only if the pot drains freely. If the soil is compacted or the pot has poor drainage, flushing may need to be paired with repotting.
- Move the plant to a sink, tub, shower, or outdoor area where water can drain away easily.
- Use room-temperature water, ideally around 20 to 24°C (68 to 75°F), so roots are not shocked.
- Water slowly until the entire root ball is saturated and runoff begins.
- Continue applying water equal to roughly two to three times the pot volume. For a 2 L pot (about 0.5 gal), run 4 to 6 L (1.1 to 1.6 gal) of water through it.
- Let the pot drain completely. Do not leave it standing in a saucer full of runoff.
- Return the plant to bright, indirect light and wait to fertilize again until active recovery is visible.
When repotting is the better option
If the mix is old, dense, sour-smelling, or coated with residue, flushing alone may not be enough. In that case, repotting into fresh medium gives the roots a cleaner environment. Trim only clearly dead or mushy roots, and avoid heavy pruning unless the root loss is severe.
- Use fresh potting mix: This reduces leftover salts and improves air flow.
- Choose a pot with drainage: A pot only 2 to 5 cm (1 to 2 in) wider than the root ball is usually enough.
- Delay feeding: Wait about 2 to 4 weeks, or 14 to 28 days, before fertilizing again unless the mix is completely inert.
Aftercare following a flush
Plants often need a short quiet period after the soil is reset. Keep moisture even but not soggy, and avoid direct hot sun until the plant perks up. Remove only leaves that are fully yellow or crisp; partly damaged leaves still contribute some energy.
For outdoor plants, a deep watering over several sessions may help dilute excess fertilizer, especially after granular products. However, avoid creating waterlogged conditions in clay soil. If the plant was heavily overfed in a small area, gently scraping away visible fertilizer granules from the surface can also reduce ongoing exposure.
Best practices to avoid fertilizer-related yellowing
Preventing yellow leaves after feeding is mostly about moderation and timing. Plants need nutrients, but they need them in proportion to light, temperature, growth rate, and root health. A careful routine is more effective than strong doses meant to force fast results.
The safest feeding plans are simple. Use the right product for the plant, dilute when needed, and apply only when the plant is actively growing. Most houseplants and many container plants do better with lighter, consistent feeding than with occasional strong applications.
Habits that reduce the risk
These practices help keep the root zone stable and make fertilizer easier for plants to use.
- Water before feeding: Apply fertilizer to already moist soil unless the product specifically says otherwise.
- Use less than the label maximum: Many growers use half strength for routine feeding, especially indoors.
- Match feeding to season: Reduce or stop fertilizer during winter slowdown or cool periods below 15°C (59°F).
- Flush occasionally: Every 1 to 2 months for frequently fed houseplants, run plain water through the pot to reduce residue.
- Watch light levels: Plants in low light use fewer nutrients and are easier to overfeed.
- Avoid stacking products: Be cautious when combining compost teas, liquid feed, granules, and slow-release pellets.
Choosing a safer feeding approach
Different growing situations call for different methods. Fast-growing annuals in containers may need regular nutrition, while slow-growing foliage plants may need very little. The goal is not to fertilize on autopilot but to respond to how the plant is actually growing.
- For houseplants: Feed lightly during active growth and pause if the plant is stressed, newly repotted, or sitting in dim light.
- For vegetables and flowering containers: Use steady but measured feeding, and monitor for tip burn during hot spells above 30°C (86°F).
- For garden beds: Spread granular products evenly and keep them a few centimeters away from stems, about 5 to 8 cm (2 to 3 in) where practical.
- For seedlings: Start weak, since young roots are easily damaged by concentrated fertilizer.
Good plant care also means accepting that fertilizer cannot correct every problem. Yellow leaves may come from poor drainage, root crowding, inconsistent watering, low light, or seasonal change. When the basics are right, feeding becomes helpful rather than risky.
If you keep forgetting when you last fertilized, that is a sign to simplify the routine. A lighter schedule followed consistently is usually safer than frequent “catch-up” feedings.