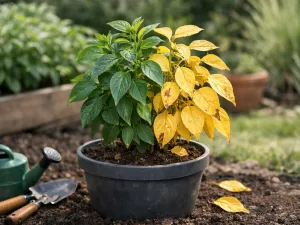
Yellow Leaf Edges Turning Pale or Fading

 This article explains why leaf edges turn yellow before the center. It covers common causes like salt buildup, fertilizer burn, water stress, wind, and dry air, plus early warning signs and simple steps to help plants regain healthy color.
- Why leaf edges discolor before the center
- Common causes of edge yellowing in plants
- Salt buildup and fertilizer burn on leaf margins
- Water stress and its effect on leaf edges
- How wind and dry air damage leaf borders
- Identifying early signs before full leaf yellowing
- Simple steps to restore healthy leaf color
When leaf edges begin to fade and look pale, it usually means the plant is stressed rather than just getting older. This symptom can be linked to uneven watering, nutrient problems, root damage, too much direct sun, or air that is too dry. Instead of reacting right away, check the whole plant and review its recent care and environment. In many cases, that closer look will reveal the cause and suggest the best fix.
Why leaf edges discolor before the center

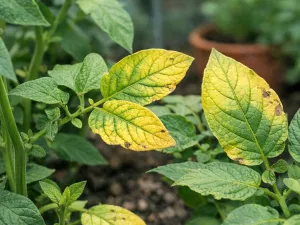
When a leaf starts fading at the edges first, it usually means the plant is responding to stress in the parts of the leaf that are hardest to support. The margins are the outermost tissue, so they are often the first area to suffer when water movement slows, salts accumulate, or dry air pulls moisture out faster than the roots can replace it.
Leaf edges also have less room for error. A small disruption in moisture, nutrient balance, or root function can show up there before the center changes color. That is why pale or yellow borders often appear while the middle of the leaf still looks green and healthy.
Why the margins are more vulnerable
The outer edge of a leaf is where water loss can become most obvious. If the plant cannot keep a steady flow of moisture moving from roots to leaves, the margins begin to fade, dry, or turn yellow first. This is especially common in broad-leaved houseplants, vegetables in containers, and plants exposed to heat or wind.
- Longer transport route: Water and dissolved nutrients must reach the farthest parts of the leaf, and the edges are at the end of that pathway.
- Faster moisture loss: Leaf borders can dry more quickly in low humidity or moving air.
- Salt concentration: Excess fertilizer salts often damage the outer tissue first, causing pale rims or scorched-looking tips.
- Stress visibility: Minor injury is easier to notice at the margins because the color contrast is sharper there.
What the pattern can tell you
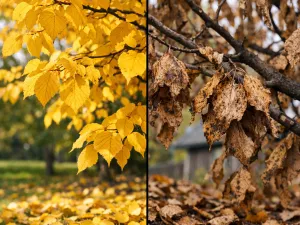
The exact look of the discoloration matters. A soft pale yellow halo around the edge often points to a developing care issue, while a crisp yellow-to-brown border can suggest stronger stress such as fertilizer burn, drought cycles, or root damage. If only older leaves are affected, the cause may be different from edge yellowing that appears on fresh growth.
Plants do not all react in the same way, but the pattern gives useful clues. Uniform fading around the leaf often suggests an environmental or watering issue. Patchy yellowing on one side can point to sun exposure, wind, or physical damage. Looking closely at where the color starts helps narrow the problem before the whole leaf declines.
Editor’s note: If the edges are pale but still soft and flexible, you usually have time to correct the issue. Once the margin turns dry and brown, that tissue will not recover, though new growth can still come in healthy.
Common causes of edge yellowing in plants

Pale or yellow leaf margins are not a single diagnosis. They are a symptom that can come from several overlapping problems, especially when a plant is growing in a pot or under changing indoor conditions. The most common triggers involve water, salts, air movement, root stress, and uneven feeding.
Before making changes, it helps to look at the whole plant. Check whether the issue appears on old leaves, new leaves, only one side, or only after feeding. Also consider recent changes such as repotting, a heat wave, stronger sun, or switching fertilizers.
Most likely plant care triggers
Some causes are far more common than others. In everyday gardening, edge yellowing often comes from a mismatch between what the roots can supply and what the leaves are losing.
- Irregular watering: Letting soil swing from very dry to very wet strains the roots and disrupts moisture flow to the leaf margins.
- Overfertilizing: Excess nutrients, especially from frequent liquid feeding, can leave salts in the soil that burn the edges.
- Low humidity: Dry indoor air or hot winds increase water loss through the leaves.
- Root crowding: Plants that are tightly root-bound may dry too fast and struggle to absorb water evenly.
- Poor drainage: Soggy soil reduces oxygen around roots, weakening their ability to support the leaves.
- Water quality issues: Hard water or softened water can contribute to mineral buildup over time.
Less obvious causes worth checking
Sometimes the yellowing is not mainly about watering. A plant under stress from temperature swings, strong afternoon sun through glass, or a cold draft may show pale borders before more obvious symptoms appear. Nutrient imbalances can also play a role, though they usually come with broader leaf changes rather than margins alone.
If the plant has recently been moved, transplanted, or pruned heavily, temporary edge fading can happen while it adjusts. In outdoor beds, roots damaged by cultivation or compacted soil may produce similar symptoms. The key is to avoid treating every yellow edge as a fertilizer deficiency. In many cases, adding more feed makes the problem worse rather than better.
| Cause | Typical edge appearance | Common setting | Useful first check |
|---|---|---|---|
| Salt buildup | Pale rim that turns dry or brown | Containers, frequent feeding | Look for crust on soil or pot edge |
| Underwatering | Yellowing with curling or crispness | Warm rooms, root-bound pots | Check soil 5 cm (2 in) down |
| Overwatering | Soft yellow margins, limp leaves | Heavy soil, poor drainage | Check for sour smell or wet root zone |
| Dry air or wind | Faded edges, especially on exposed leaves | Near vents, outdoors in breezy spots | Notice whether one side is worse |
Salt buildup and fertilizer burn on leaf margins

One of the most frequent reasons for pale or yellow leaf edges is excess soluble salts in the root zone. These salts come from fertilizers, mineral-rich tap water, and sometimes from water softeners. As they build up in the potting mix, they make it harder for roots to take in water. The plant may be sitting in moist soil and still behave as if it is thirsty.
The result often shows up first along the margins and tips. The leaf edge fades, then yellows, and may later turn tan or brown. This pattern is especially common in spider plants, dracaena, peace lilies, palms, and many foliage plants grown indoors year-round.
How fertilizer burn develops
Fertilizer does not directly “feed” a leaf edge into turning yellow. The problem is osmotic stress: too many dissolved salts around the roots interfere with normal water uptake. When root function is disrupted, the most exposed leaf tissue suffers first.
Plants are more likely to develop margin burn when they are fed on dry soil, fertilized too often, or grown in small pots where salts concentrate quickly. Slow-release pellets can also cause trouble if extra liquid fertilizer is added on top.
Signs that point to salt issues
Salt buildup has a recognizable pattern when you know what to look for. It often appears gradually rather than overnight.
- White crust: A chalky layer on the soil surface, pot rim, or drainage holes.
- Yellow-to-brown edges: Margins fade first, then become dry and crisp.
- Leaf tip damage: Tips may burn before the entire edge is affected.
- Stalled growth: New leaves emerge smaller or less vibrant.
- Fast reappearance: Symptoms continue even after watering if the soil is not flushed.
Practical recommendation: If you fertilize every time you water, cut that routine back. Many houseplants do better with a half-strength feed every 2 to 4 weeks during active growth, not year-round heavy feeding.
How to correct the root zone
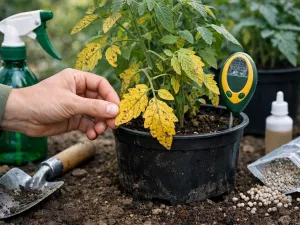
The first step is to stop feeding temporarily. Then flush the soil thoroughly with plain water so excess salts can drain away. For a small to medium pot, run enough water through the container to equal roughly two to three times the pot volume. If the pot holds 2 L (about 0.5 gal), use about 4 to 6 L (1 to 1.5 gal) of water, allowing it to drain fully.
If the soil is old, compacted, or badly crusted, repotting is often more effective than repeated flushing. Use fresh mix with good drainage and resume feeding only after the plant shows steady new growth. When you restart, apply fertilizer to already moist soil rather than to a dry root ball.
Water stress and its effect on leaf edges

Water stress does not only mean a plant is too dry. It also includes situations where the roots cannot absorb water properly, even when the soil is wet. Both underwatering and overwatering can lead to pale or yellow leaf edges because both interfere with the plant’s ability to keep the leaf margins hydrated.
This is why watering problems can be confusing. A thirsty plant and a waterlogged plant may both show fading borders, but the texture of the leaves and the feel of the soil usually reveal which one you are dealing with.
When the plant is too dry
In dry soil, the plant conserves moisture by sacrificing the most vulnerable tissue first. The edges may look lighter, then curl slightly, and later become crisp. Container plants are especially prone to this because potting mix can dry rapidly in warm weather or in root-bound conditions.
If the root ball has become very dry, water may run down the sides of the pot without soaking in. In that case, the top can look wet while the center remains dry. Rewetting slowly is more effective than giving repeated small splashes.
When the plant is too wet
Overwatered roots lose oxygen. Without enough air in the root zone, roots cannot function well, and leaves may begin to yellow from the edges or tips. The margins often look softer and less crisp than drought damage. Leaves may droop even though the soil still feels damp 5 cm (2 in) below the surface.
Persistent wetness is common in decorative pots without drainage, oversized containers, or dense mixes that stay soggy. In those conditions, edge yellowing is often an early warning before more severe root decline develops.
Quick comparison of dry versus wet stress
Instead of guessing, compare the symptoms side by side and inspect the root zone before changing your routine.
| Condition | Leaf edge look | Soil clue | Best response |
|---|---|---|---|
| Underwatering | Pale, curling, later crisp | Dry below the surface, pot feels light | Water deeply and evenly |
| Overwatering | Soft yellow margins, limp leaf | Wet for days, pot feels heavy | Let soil partly dry and improve drainage |
| Hydrophobic root ball | Repeated edge fade despite watering | Water runs off quickly | Soak thoroughly until the mix rewets |
| Root-bound plant | Edges yellow between waterings | Roots circle tightly around pot | Repot one size up |
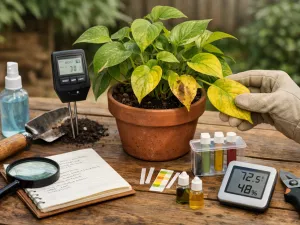
A good watering routine is based on observation, not the calendar. Check the mix with a finger, a moisture meter, or by lifting the pot. Many plants prefer watering when the top 2.5 to 5 cm (1 to 2 in) has dried, but the exact timing depends on species, pot size, light, and season.
How wind and dry air damage leaf borders

Leaf edges are often the first place to show damage from moving air and low humidity. Even if the soil is reasonably moist, a plant can lose water through its leaves faster than the roots can replace it. The margins then fade, yellow, or dry out, especially on thin-leaved or tropical plants.
Indoors, this happens near heating vents, air conditioners, radiators, and constantly open windows. Outdoors, steady wind can strip moisture from leaves, particularly in containers and raised beds where roots dry faster.
Why airflow can become a problem
Plants need air circulation, but harsh or continuous airflow is different from gentle ventilation. Strong moving air increases transpiration, which is the process of water evaporating from the leaves. If humidity is low and the root system cannot keep up, the outer leaf tissue begins to fail first.
- Dry indoor heat: Winter heating can push humidity very low, sometimes below 30%.
- Air conditioning: Cool air can still be drying when it blows directly on foliage.
- Outdoor wind: Exposed balconies, patios, and roof gardens dry leaves quickly.
- Hot reflected heat: Walls, paving, and windows can intensify moisture loss.
Plants most likely to show margin damage
Broad, soft leaves tend to show border fading sooner than thick, waxy leaves. Ferns, calatheas, peace lilies, prayer plants, and young vegetable seedlings are especially sensitive. Outdoor hydrangeas, cucumbers, and beans can also show pale or scorched edges after hot, windy weather.
If only the side facing a fan, vent, or prevailing wind is affected, environmental exposure is a strong clue. This one-sided pattern is less typical of fertilizer problems or general nutrient issues.
Editor’s note: Misting gives only brief relief and does little for long-term humidity. Moving the plant away from direct airflow and grouping plants together usually helps more than spraying the leaves.
How to reduce air-related stress
Start by repositioning the plant. A move of even 30 to 60 cm (12 to 24 in) away from a vent or draft can make a visible difference over the next few weeks. For outdoor plants, temporary wind protection from taller neighboring plants, lattice, or shade cloth can reduce stress during hot spells.
Indoors, a humidity tray or room humidifier may help sensitive species, especially if the room stays below 40% humidity. Keep in mind that humidity support works best alongside proper watering. A plant in bone-dry soil will not recover just because the air is moister.
Identifying early signs before full leaf yellowing

By the time a leaf edge turns fully yellow, the problem has usually been developing for a while. Catching the earlier signals gives you a better chance of correcting the cause before many leaves are affected. Plants often show subtle changes in texture, posture, and color before the border becomes obviously pale.
Regular close inspection matters more than dramatic intervention. Looking over the plant once or twice a week is often enough to notice patterns that would otherwise be missed.
Subtle clues that appear first
Early symptoms are easy to dismiss because they do not always look serious. A leaf may seem slightly duller, less glossy, or faintly washed out at the rim. In some plants, the edge loses its rich green color before any real yellow appears.
- Faded outline: A thin pale band forms around the margin.
- Slight curling: The edge rolls inward or feels less flat.
- Tip paling: The leaf tip lightens before the side margins do.
- Texture change: The border feels thinner, softer, or papery.
- Uneven color after watering: Leaves perk up but margins stay dull.
What to inspect before symptoms spread
Once you spot early edge fading, check the growing conditions immediately rather than waiting for stronger discoloration. A quick inspection can often separate a simple watering issue from a root-zone or environmental problem.
- Feel the soil 5 cm (2 in) below the surface to judge moisture accurately.
- Look for white mineral crust on the pot rim or top of the mix.
- Check whether the affected leaves are closest to a window, vent, or fan.
- Slide the plant out of the pot if possible and inspect for crowded or unhealthy roots.
- Review recent feeding, repotting, or temperature changes from the last 2 to 3 weeks.
Not every damaged leaf needs to be removed right away. If a leaf is still mostly green, it continues to help the plant. Wait until it is more than half yellow or brown before pruning, unless it is diseased or badly scorched. This gives you time to observe whether the problem is still progressing.
Simple steps to restore healthy leaf color
Once leaf edges have turned yellow or brown, the damaged tissue will not become green again. The goal is to stop the spread and support healthy new growth. Recovery depends on correcting the underlying cause, not on cosmetic fixes. Plants usually respond best to a few targeted changes rather than a complete overhaul of every care routine at once.
Start with the basics: root health, watering consistency, and exposure. If you improve those three areas, many plants begin producing stronger leaves within a few weeks during active growth.
A practical recovery plan
Work through the likely causes in a sensible order. This prevents overcorrecting and creating a second problem while trying to fix the first.
- Pause feeding: Stop fertilizer for 2 to 3 weeks if salt buildup is possible.
- Check drainage: Make sure excess water can leave the pot freely.
- Reset watering: Water deeply, then wait until the appropriate top layer dries before watering again.
- Flush or repot: Leach old salts from the mix or move the plant into fresh soil if the medium is exhausted.
- Reduce stress: Move the plant away from direct vents, harsh afternoon sun, or strong wind.
- Trim selectively: Remove badly damaged leaves or just the dead brown portions with clean scissors.
What improvement should look like
Recovery is measured in new growth, not in old leaves turning green again. Watch for fresh leaves with clean margins, steadier color, and better texture. Existing leaves may stay marked but should stop worsening if the cause has been corrected.
If the plant continues to decline after 2 to 4 weeks, reassess the roots and growing medium. Persistent edge yellowing despite careful watering often points to root crowding, compacted soil, or chronic salt accumulation. In severe cases, pruning some damaged roots and repotting into a fresh, airy mix is the most effective reset.
Practical recommendation: Keep a simple care note on your phone with watering dates, fertilizer use, and any plant moves. When leaf edges start fading, that short record often reveals the cause faster than memory does.
Patience matters. A stressed plant rarely rebounds overnight, but once the root zone is stable and the environment is gentler, healthy color usually returns in the next flush of growth. Focus on consistency, and the new leaves will tell you whether your adjustments are working.