Understanding Soil Layers in Plant Pots

 This article explains why soil layers form in containers, what the top, middle, and bottom zones look like, how watering creates or reduces layering, and how roots respond. It also covers common layering mistakes, when layering helps, and how to keep pot soil balanced.
Proper potting soil layers in containers can mean the difference between healthy growth and plants that stay soggy or dry out too fast. A well planned setup supports drainage at the bottom, an airy root zone in the middle, and a stable surface on top, improving water movement, airflow, and nutrient access. Knowing how each zone works helps you choose the right mix and pot arrangement for your plants.
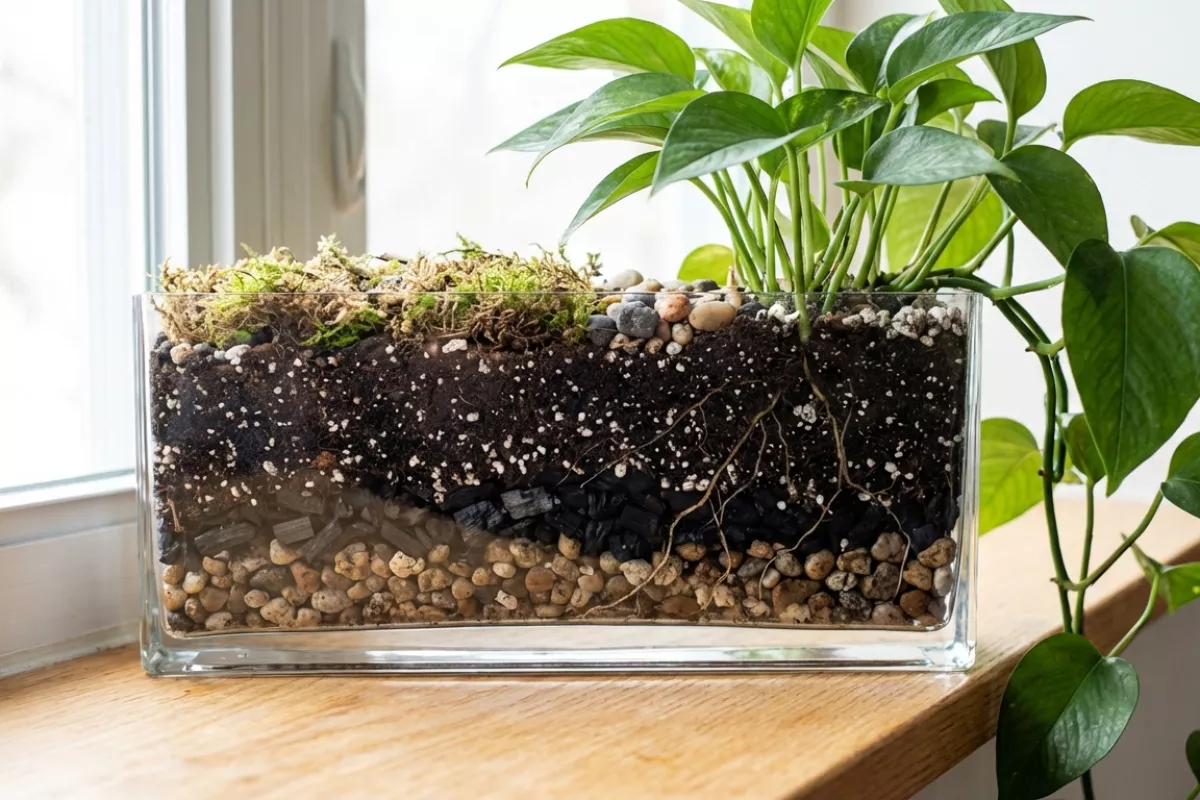
Why soil layers form in containers
In a pot, the mix doesn’t stay perfectly uniform. Over time it naturally sorts itself into zones because water, gravity, and root activity keep moving particles and dissolved materials up and down. The result is often a lighter, drier top, a more root-packed middle, and a denser, wetter bottom—especially in containers without much depth.
- Gravity-driven settling: Each watering nudges fine particles (silt, compost dust, peat fines) downward into gaps between larger pieces (bark, perlite). As those voids fill, the lower portion becomes tighter and holds water longer, while the surface can look looser and more airy.
- Water flow and the perched water effect: Containers drain differently than garden soil. Near the base, water can “hang” in the smallest pores, creating a consistently wetter zone. This is more noticeable in shorter pots, where a 2–5 cm (0.8–2 in) wet layer takes up a larger share of the total depth.
- Decomposition and compaction: Organic ingredients break down into smaller particles. That shrink-and-crumble process increases the proportion of fines, which then compact and migrate downward, forming a heavier layer that can restrict airflow.
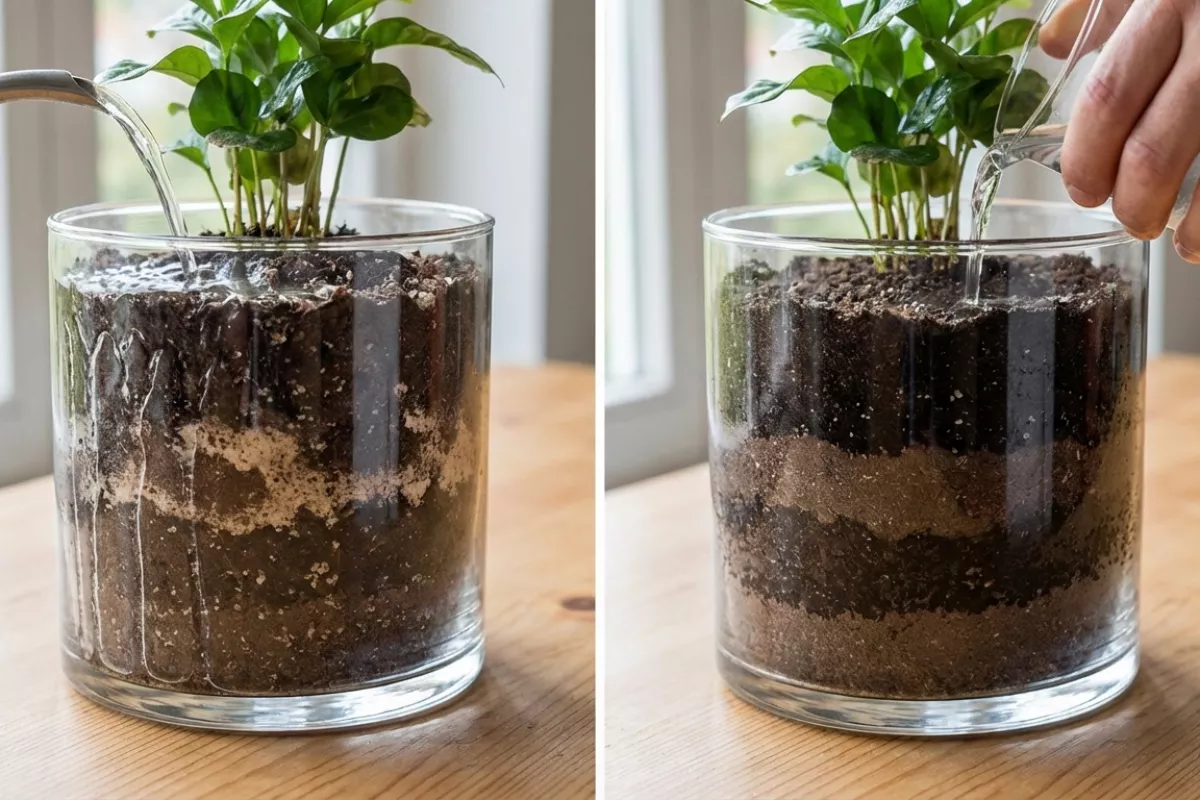
- Repeated top-watering: Pouring water onto the same spot can create channels that carry fines deeper. It can also leave a crusty surface if minerals accumulate, making the top repel water and pushing more moisture to run down the sides.
- Root growth reshapes the profile: Roots thicken the middle of the pot, binding particles and creating a “root mat.” As older roots die back, they leave small voids that later collapse, further changing how the potting soil is layered.
- Salts and fertilizer residues concentrate: Evaporation pulls dissolved salts upward, so the upper 1–2 cm (0.4–0.8 in) may develop a higher mineral load even when the lower zone stays wetter. That chemical gradient can make the top behave differently from the rest of the mix.
- Mixing differences at planting time: Even small inconsistencies—like a pocket of compost or a clump of coco coir—become more pronounced after a few waterings, because water preferentially moves through the easiest pathways.
These layers aren’t always a problem; they’re often just the container version of “soil horizons.” They become an issue when the bottom stays saturated for days, the middle turns into a tight root-and-fine-particle plug, or the top dries so fast that watering becomes uneven (wet at the edges, dry in the center).
Top, middle, and bottom zones
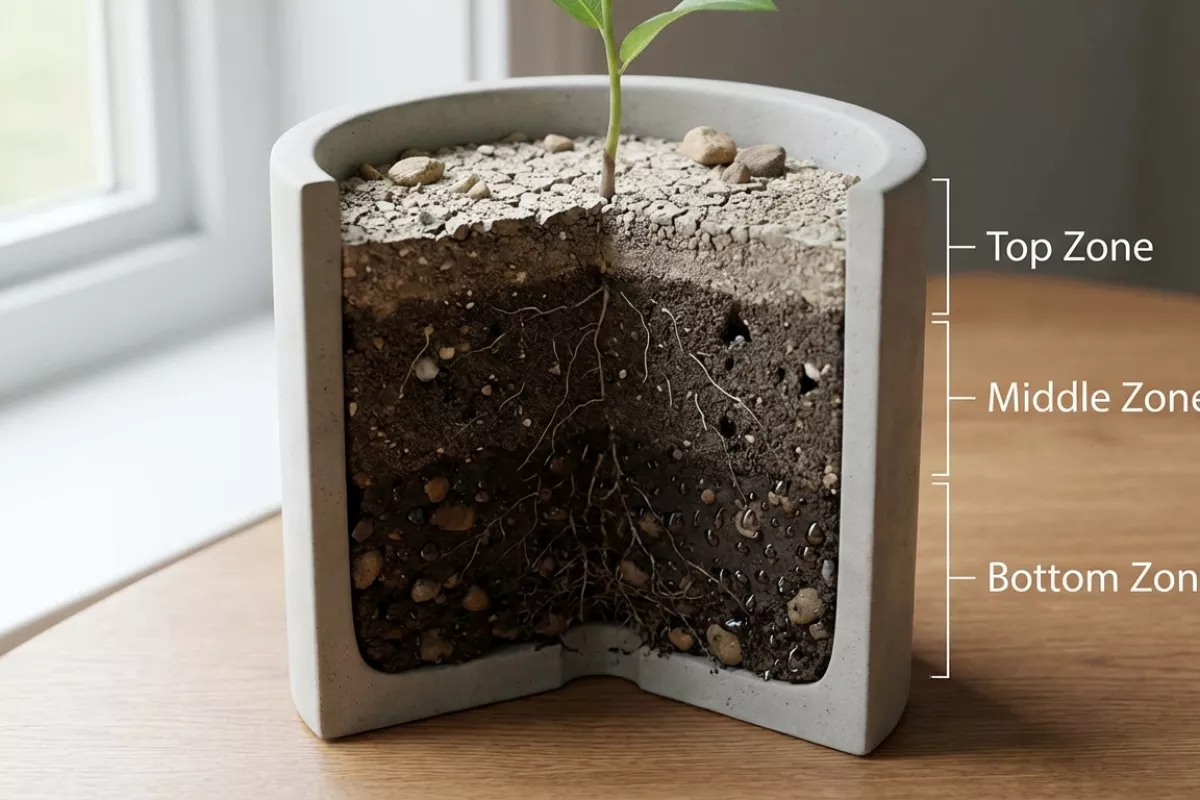
Think of a plant pot as a small landscape with three functional layers. Each layer tends to behave differently with watering, airflow, and root activity, even when you use the same potting mix throughout. Knowing what usually happens in each area helps you water more accurately and avoid problems like fungus gnats, soggy roots, or a pot that dries out too fast.
-
Upper layer (surface to a few centimeters down)
This is the most changeable area: it dries first, warms and cools quickly, and gets the most oxygen. It’s also where algae, moss, and fungus gnat larvae can show up if the surface stays damp. If you top-water lightly and often, you may only wet this zone, encouraging shallow roots. A thin mulch layer or a top dressing can slow evaporation, but it can also keep the surface wetter longer—use it deliberately. -
Middle layer (main root zone)
This is where you want the most consistent balance of moisture and air. After a thorough watering, this section should be evenly moist, not muddy. If the mix is very fine or compacted, this layer can lose air pockets and stay waterlogged; if it’s very coarse, it can drain so fast that roots struggle to access water between irrigations. When you’re checking moisture with a finger or a probe, aim to assess this region rather than judging only by the surface. -
Lower layer (near the base and drainage holes)
Gravity pulls water down, so the bottom tends to stay wettest the longest. Many pots develop a “perched water” area here: a saturated band that lingers because the mix can’t drain past a certain point, even with drainage holes. Roots sitting in this zone for long periods can suffer from low oxygen. A pot that’s too large for the plant, or a mix with too much peat/fines, makes this issue more likely. Good structure (chunkier particles) and letting the pot dry appropriately between waterings are usually more effective than adding a “drainage layer” of rocks, which often doesn’t solve the saturation band and can reduce usable soil volume.
If you want a simple mental check: the surface tells you about evaporation, the center tells you about root comfort, and the base tells you about drainage and oxygen. When troubleshooting, match the symptom to the likely zone—for example, gnats and algae point upward, limp growth can point to inconsistent moisture in the middle, and sour smells or blackened roots often point to the bottom staying too wet.
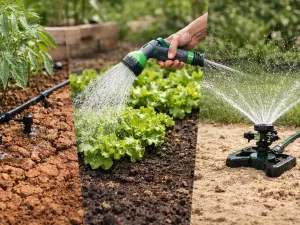
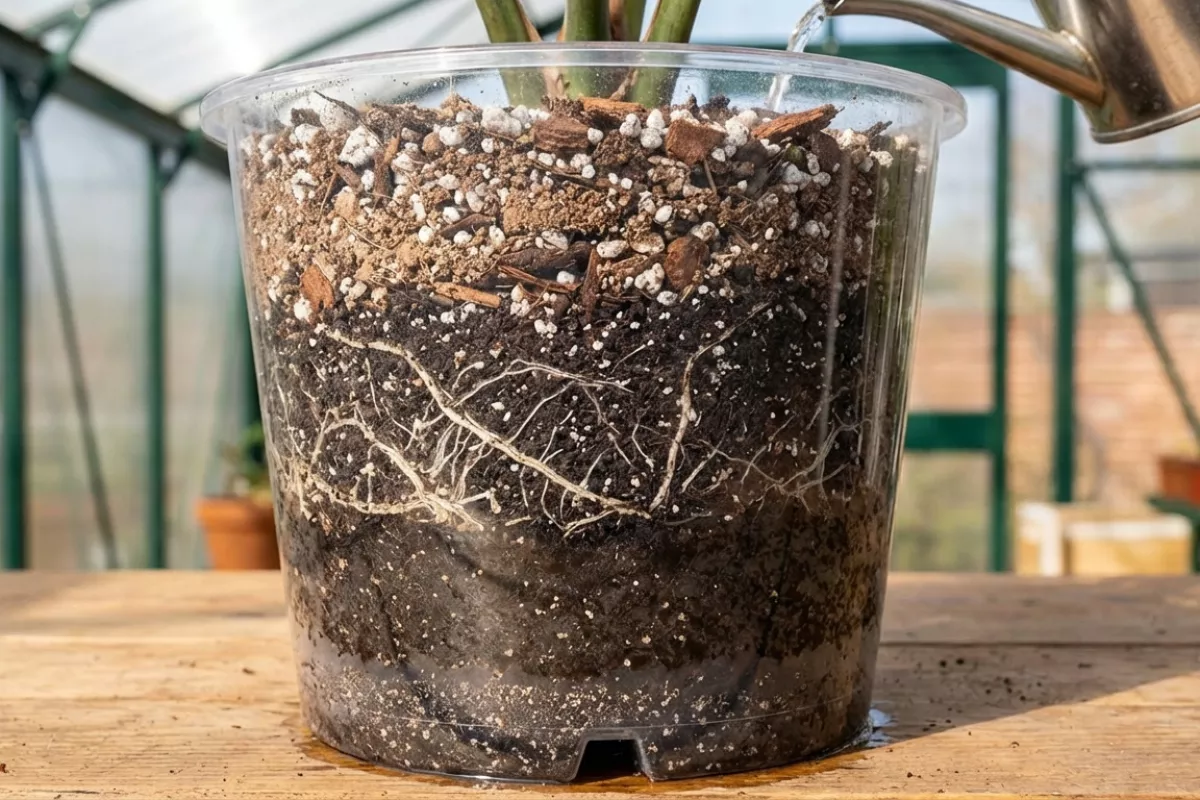
How watering affects layers
Water doesn’t move through a potting mix as a single, even front. It follows pores and pathways, which means each “layer” in the container can end up with a different moisture pattern—especially if the materials change from top to bottom.
- Watering speed changes where moisture ends up. A fast pour can run down the pot’s inner wall or through cracks, leaving dry pockets in the middle. A slower soak gives the mix time to pull water sideways by capillary action, evening out moisture between the upper and lower zones.
- Particle size differences create a moisture break. When a fine mix sits on top of a coarse layer (like bark chunks or gravel), water can “stall” above the coarse layer. The finer layer holds onto moisture until it’s wet enough for gravity to overcome that capillary barrier, so roots may stay too wet above the transition while the bottom stays comparatively dry.
- Compaction forms dense bands. Pressing one section more firmly than another reduces pore space. Water then pools above the compacted band and drains faster below it, effectively creating a soggy layer over a drier one.
- Repeated top-watering can stratify salts and fines. Minerals from tap water and fertilizer tend to accumulate where evaporation is strongest—often near the surface and along the rim. Meanwhile, tiny particles (fines) can migrate downward over time, plugging pores and slowing drainage in the lower part of the pot.
- Bottom-watering flips the gradient. Wicking from a tray saturates the lower portion first, then moves upward. This can be helpful for evenly moistening a hydrophobic top layer, but it may also keep the bottom zone wetter for longer if the mix is already dense.
- Dry pockets become water-repellent. If peat-heavy mixes dry out too much, they can resist rewetting. Water then bypasses the top layer and drains quickly, leaving the upper root zone dry even after watering.
| What you notice in the pot | What’s likely happening between layers | What to adjust next time |
|---|---|---|
| Water runs out quickly, but the plant still wilts later | Channeling down the sides or through cracks leaves a dry middle layer | Water in 2–3 passes, waiting 30–60 seconds between pours; aim around the whole surface |
| Top looks wet for days while lower roots struggle | A fine-over-coarse transition holds water above the boundary (a perched wet zone) | Use a more uniform mix throughout; avoid gravel “drainage layers” in most houseplants |
| Bottom stays soggy even when the surface dries | Fines have settled and reduced drainage in the lower layer | Repot and remove excess fines; consider adding chunkier material evenly through the mix |
| Water beads on the surface and slips to the edges | The upper layer has become hydrophobic and won’t absorb evenly | Pre-wet the mix slowly or soak from the top until it darkens uniformly; a gentle stir of the top 1–2 cm (0.4–0.8 in) can help |
A simple way to “read” the moisture profile is to check more than the surface. A wooden skewer or chopstick inserted to the lower half of the pot can show whether the upper zone is drying while the bottom remains wet, which often points to a texture change or compaction between layers.
Root behavior in layered soil
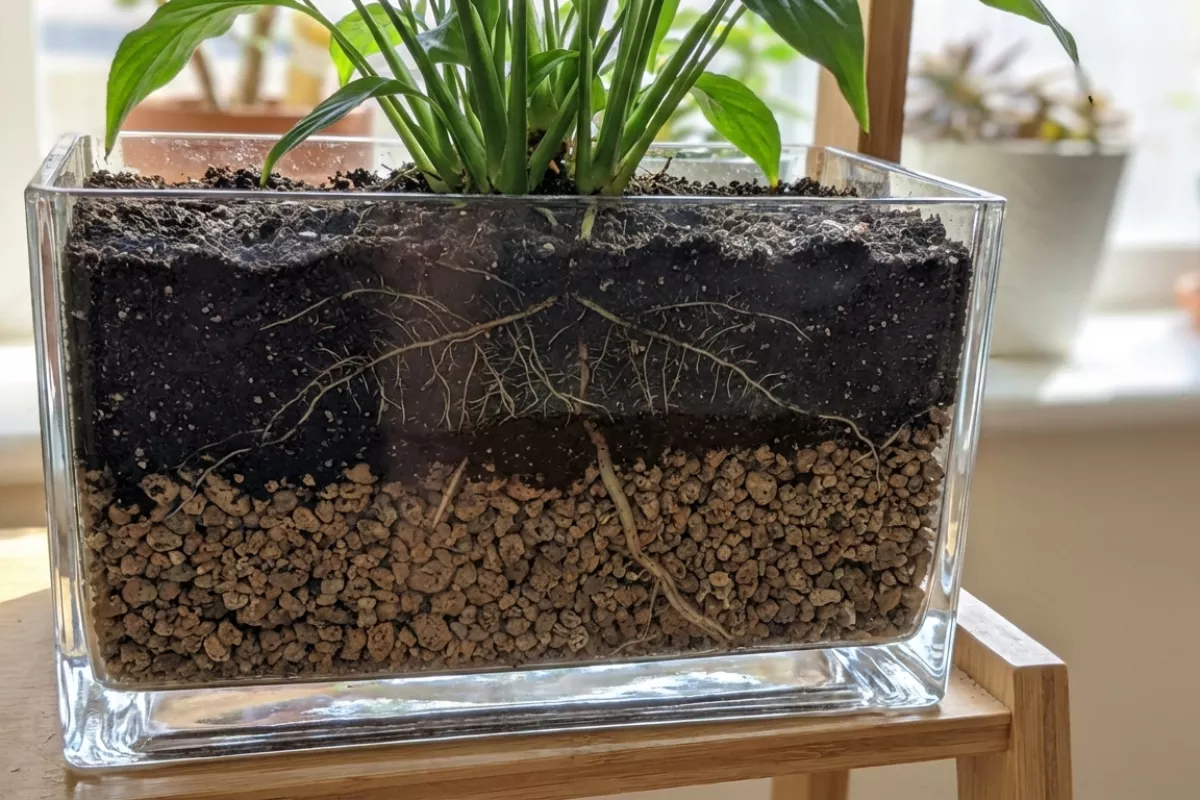
In a pot with distinct layers, roots don’t “choose” soil by label—they follow moisture, oxygen, temperature, and available nutrients. When those conditions change abruptly at a boundary (for example, fine potting mix sitting on top of a coarse drainage layer), roots often hesitate, branch sideways, or concentrate in the more comfortable zone instead of spreading evenly through the container.
A sharp texture change can create a perched water table: water hangs in the finer layer above the coarser one until the upper layer is saturated enough to push it down. That means the upper mix can stay wetter for longer while the bottom stays comparatively dry, which affects where roots proliferate. Many houseplants respond by building a dense mat in the upper portion, especially if the lower layer is either too soggy (low oxygen) or too dry (not worth exploring).
- They follow oxygen as much as water. If a lower layer stays waterlogged after watering, roots will avoid it because air spaces are filled with water. You’ll see more roots near the surface and along pot walls where gas exchange is better.
- They stall at abrupt interfaces. When particles shift from fine to coarse (or vice versa), the pore sizes change suddenly. Roots may circle along the boundary rather than penetrating, leading to a “pancake” root zone.
- They concentrate where nutrients are. If slow-release fertilizer or compost is only in the top 5 cm (2 in), feeder roots tend to stay there. If nutrients are layered deep, plants may still not access them if the lower zone is oxygen-poor.
- They adapt to consistent gradients. Gentle transitions (similar textures blended over a few centimeters/inches) are easier for roots to cross, so the plant is more likely to colonize the full pot volume.
- They can be misled by “dry bottoms.” A coarse bottom layer can dry quickly while the upper fine mix remains wet. This can tempt you to water again based on a dry drainage layer, keeping the main root zone too moist.
If you’re trying to encourage deeper rooting, the most reliable approach is uniform structure rather than stacked materials. A consistent mix gives predictable moisture movement and aeration, so roots can explore downward without hitting a sudden change in pore size. If you do layer for a reason (like a temporary top dressing or a nutrient band), keep the transition gradual and avoid putting very coarse material under very fine material, since that’s the setup most likely to trap water above the boundary.
Common mistakes with pot layering
Most problems come from trying to “engineer” drainage with extra layers instead of choosing the right potting mix and container. A few habits sound logical but can actually trap water, starve roots of oxygen, or create uneven moisture that makes plants harder to care for.
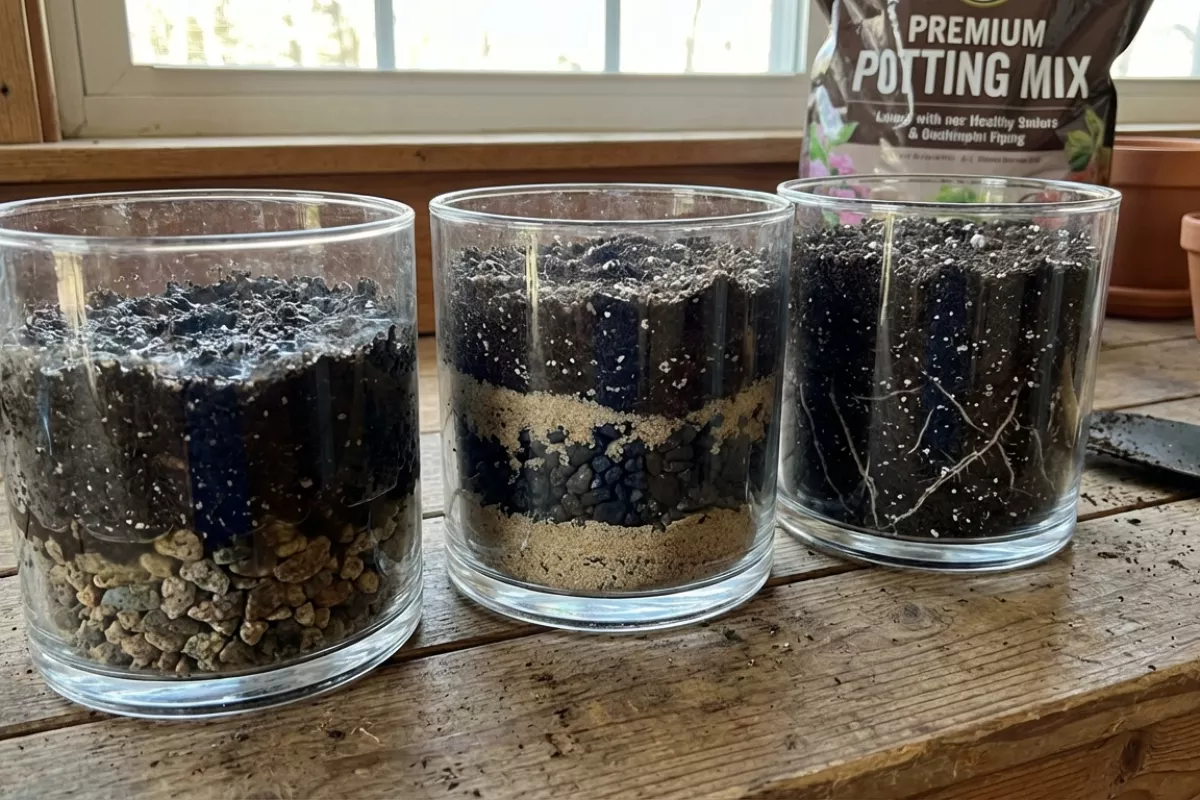
- Adding a gravel or pebble layer at the bottom for drainage. This often creates a perched water table: water sits above the coarse layer, keeping the root zone wetter for longer. If you want better drainage, adjust the soil structure (more perlite, bark, or grit) and make sure the pot has an open drain hole.
- Using “drainage layers” that steal root space. A 2–5 cm (0.8–2 in) layer of rocks reduces the volume of usable mix, so the plant dries out faster on top while still staying soggy lower down. In small pots, that lost volume matters a lot.
- Mixing incompatible textures into distinct bands. Stacking a fine, peat-heavy mix over a chunky mix (or vice versa) can create a moisture barrier where water movement slows. A more uniform blend throughout the pot usually hydrates and dries more predictably.
- Overusing landscape fabric, coffee filters, or thick “liners.” A thin mesh screen over the drain hole is fine, but dense layers can clog with fines and roots, slowing drainage over time. If you use a barrier, keep it breathable and minimal.
- Layering compost or manure as a “rich bottom layer.” Concentrated organics can stay wet and break down into sludge, especially in containers. It can also burn roots if it’s too strong. It’s safer to mix nutrients evenly or top-dress lightly.
- Putting slow-release fertilizer in a band. A hot spot of fertilizer can damage roots that grow into it. Blend it through the mix at the labeled rate, or place it on the surface where watering distributes nutrients more gradually.
- Filling the pot with heavy garden soil. In containers, native soil compacts, drains poorly, and forms hard layers. Use a potting mix designed for containers; it’s built to hold both air and water in the right balance.
- Overpacking each layer. Pressing down firmly reduces pore space and makes water move unevenly. Lightly settle the mix (tap the pot, water once) rather than compressing it by hand.
- Ignoring the pot shape and material. Tall pots, shallow bowls, terracotta, and plastic all change how moisture behaves through the profile. If you switch container types, expect to adjust the mix and watering rather than relying on extra layers to “fix” it.
- Using decorative top layers too thick. A heavy mulch of stones or thick moss can slow evaporation and keep the surface damp, which may invite fungus gnats or stem rot. If you top-dress, keep it thin—about 0.5–1 cm (0.2–0.4 in)—and watch how quickly the pot dries.
If you’re unsure what to change, start with the basics: a pot with a clear drain hole, a consistent container mix, and watering based on how the root zone dries (not just the surface). Those choices do more than any “drainage layer” ever will.
When layering is beneficial
Adding distinct layers in a plant pot can make sense when you’re solving a specific problem, not as a default step. A thoughtfully built profile can improve how water moves, where roots prefer to grow, and how quickly the potting mix dries after watering.
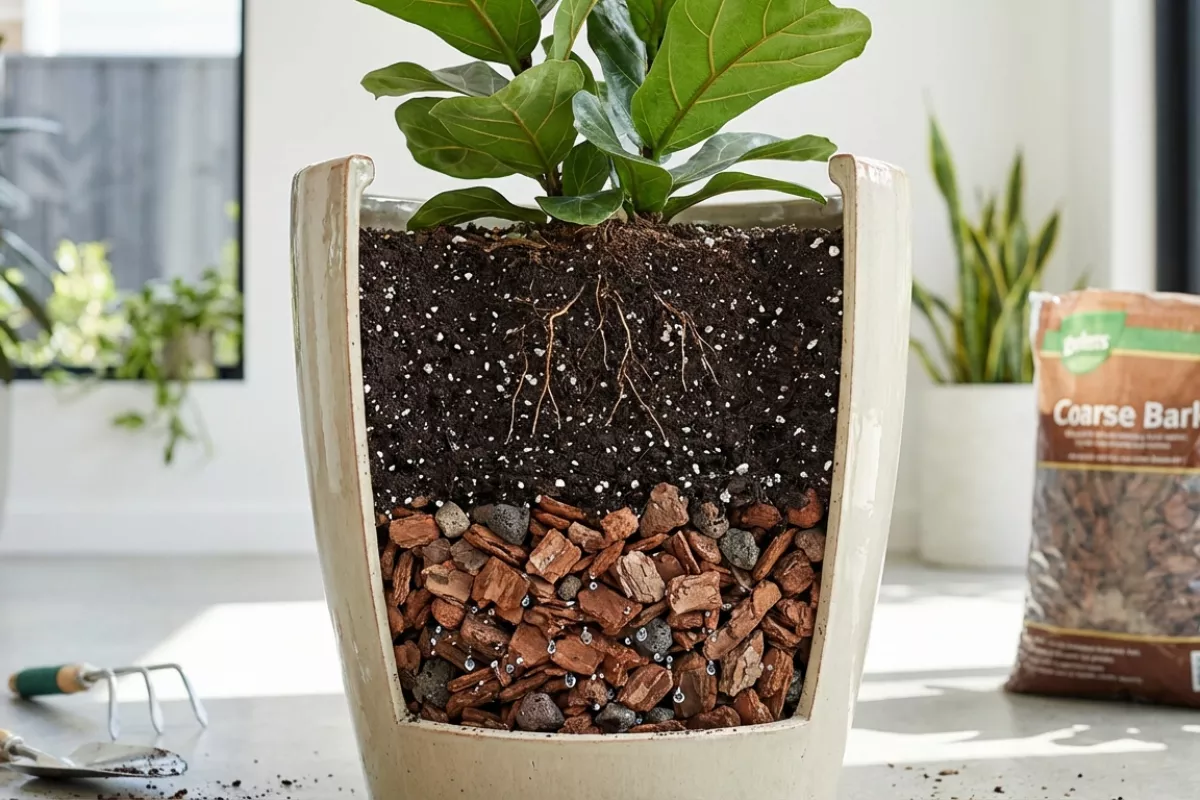
- Very deep containers where moisture lingers at the bottom: In tall pots, the lower zone can stay wet longer, especially indoors. A bottom layer of chunkier material (like coarse bark or large-particle mix) can help keep the root zone from sitting in constantly soggy media.
- Plants that need a drier “crown” but steady moisture below: Some plants are prone to rot if the base stays wet. Using a slightly grittier top layer can keep the surface and stem area drier while the lower mix holds more water.
- Top-dressing for stability and cleanliness: A thin layer of gravel, pumice, or bark on top can reduce splashing, discourage fungus gnats from laying eggs, and help keep the potting soil from floating up during watering. Keep it thin—about 1 cm (0.4 in) to 2 cm (0.8 in)—so it doesn’t block airflow.
- Separating a moisture reservoir from the root zone in self-watering setups: For planters with a water chamber, a wicking layer (or wick) can provide controlled moisture rise. This is a case where “layers” are part of the design, helping roots access water without being submerged.
- Temporary propagation or rehab situations: If you’re rooting cuttings or rescuing a plant with damaged roots, a bottom layer with higher air space can reduce the risk of anaerobic conditions while new roots form.
- Heavy-feeding plants where you want nutrients concentrated lower: A mild, slow-release amendment can be placed deeper so roots encounter it as they grow. This works best when the overall mix still drains well and you avoid creating a sharp boundary that stops roots.
Two practical guidelines keep layered potting soil from backfiring: avoid extreme texture jumps (fine peat over large stones can create a perched water zone), and keep layers modest. If you’re adding a drainage-related layer, think in terms of a small proportion of the pot height—around 2 cm (0.8 in) to 5 cm (2 in) in many containers—rather than filling the bottom with rocks.
If your goal is simply “better drainage,” you’ll usually get more reliable results by adjusting the entire potting mix (more perlite, bark, or pumice throughout) instead of building a thick base layer. Layering shines most when it’s targeted: controlling surface moisture, managing a reservoir, or fine-tuning how a tall container behaves.
How to maintain balanced pot soil
Healthy container mixes stay stable when you manage three things together: moisture, air space, and nutrients. Because pots have limited volume, small habits (how you water, what you add, and when you refresh) make a bigger difference than they do in the ground.
- Water to re-wet the whole root zone, then let it breathe. Water until you see a little runoff, then wait until the top 2–3 cm (1–1.2 in) feels dry before watering again. This avoids both soggy lower layers and bone-dry pockets that repel water.
- Check drainage and compaction early. If water sits on top for more than 30–60 seconds, the mix is likely compacted or hydrophobic. Gently loosen the top 2–5 cm (1–2 in) with a chopstick or fork, taking care not to tear major roots.
- Keep the “air layer” from collapsing. Over time, fine particles migrate downward and fill gaps. Mixing in a chunky amendment at repotting (for example, bark chips or pumice) helps maintain pore space so roots can access oxygen.
- Top-dress instead of constantly “fixing” the whole pot. Add 1–2 cm (0.4–0.8 in) of fresh mix or compost on the surface to replace what decomposes and settles. This improves structure without disturbing roots.
- Feed lightly, more often. In containers, nutrients wash out faster. Use a diluted fertilizer at 1/4–1/2 strength and apply every 2–4 weeks during active growth, rather than heavy doses that can leave salts behind.
- Flush salts when needed. If you see a white crust on the rim or the plant looks stressed despite watering, rinse the pot with 3–4 times the container volume of water (for example, 3–4 L for a 1 L pot; 0.8–1.1 gal for a 0.27 gal pot) and let it drain fully.
- Match the mix to the plant and your routine. Fast-draining blends suit drought-tolerant plants and heavy-handed watering; more moisture-retentive blends suit thirsty plants or hot, bright windows. Adjust gradually so roots can adapt.
- Use a simple “lift test” to track moisture. Learn the pot’s weight when freshly watered versus when it’s ready again. This is often more reliable than surface appearance, especially with mulches or dense canopies.
- Refresh or repot on a schedule. Most organic potting mixes break down in 12–24 months. Repot when the mix shrinks away from the pot edge, stays wet too long, or roots circle heavily. When upsizing, go up about 2–5 cm (1–2 in) in diameter to avoid excess wet soil.
| What you notice in the pot | Likely cause | What to do next |
|---|---|---|
| Water runs down the sides and out quickly, center stays dry | Hydrophobic, dried-out mix pulling from the pot wall | Bottom-water for 15–30 min (or 0.25–0.5 hr) and gently break the surface crust; consider adding fresh mix as a top-dress |
| Soil stays wet for days, fungus gnats appear | Low aeration, compaction, or oversized pot | Let it dry more between waterings; increase airflow; at repotting add chunky material and avoid jumping more than 2–5 cm (1–2 in) in pot size |
| White crust on soil or rim, leaf tips brown | Salt buildup from fertilizer or hard water | Flush with 3–4× pot volume of water; reduce feeding strength; if persistent, repot with fresh mix |
| Plant wilts quickly after watering, roots look crowded | Root-bound pot drying too fast | Repot or root-prune; replace old mix; water thoroughly until runoff to re-wet the full root zone |
| Mix level drops, surface becomes dense and crusty | Organic components decomposing and settling | Top-dress 1–2 cm (0.4–0.8 in) and lightly loosen the top layer; plan a full refresh within 12–24 months |
When you’re unsure, prioritize structure over additives: a potting mix that drains well and still holds some moisture is easier to manage than one you’re constantly correcting with extra fertilizer or frequent watering. Small, consistent adjustments usually outperform big one-time “rescues.”