Soil Structure Explained Simply for Beginners

 Covers what soil structure means, the main particle types sand, silt, and clay, how they form aggregates, and why structure matters for roots. It also explains signs of good vs poor structure, how watering can change it, and practical ways to improve soil texture.
Improving soil texture and structure is one of the quickest ways to boost plant health without changing your routine. Soil structure is how particles clump and form spaces for air and water, affecting drainage, root growth, and nutrient uptake. Learn to spot whether soil is crumbly, compacted, or soggy, and you can choose the right fix and understand the reason behind it.
What soil structure means

It’s the way soil particles (sand, silt, and clay) are arranged into small clumps and the spaces between them. Those clumps are called aggregates or peds, and the spaces are pores that hold air and water. Two soils can have the same texture (the same mix of sand/silt/clay) but behave very differently because their aggregates are built differently.
Think of it like a sponge versus a brick. A sponge has lots of connected pores, so water can soak in and roots can move through. A brick is dense and tight, so water runs off and roots struggle. Good aggregation usually means better drainage, better water storage, and easier root growth.
- Aggregates (clumps): The “building blocks” that form when particles stick together, often helped by organic matter, roots, and soil organisms.
- Pores (spaces): The channels between aggregates. Larger pores drain and let air in; smaller pores hold water for plants.
- Stability: How well those clumps hold together when watered or disturbed. Stable crumbly soil resists crusting and compaction.
- Layering: Structure can change with depth; the top 10 cm (4 in) may be loose and crumbly while deeper layers are more compact.
In practical terms, this is why gardeners talk about soil being “crumbly,” “cloddy,” or “hardpan.” Those are everyday descriptions of how the aggregates and pores are arranged. When the arrangement is healthy, water infiltrates instead of pooling, and roots can explore more soil to find moisture and nutrients.
Main soil particle types
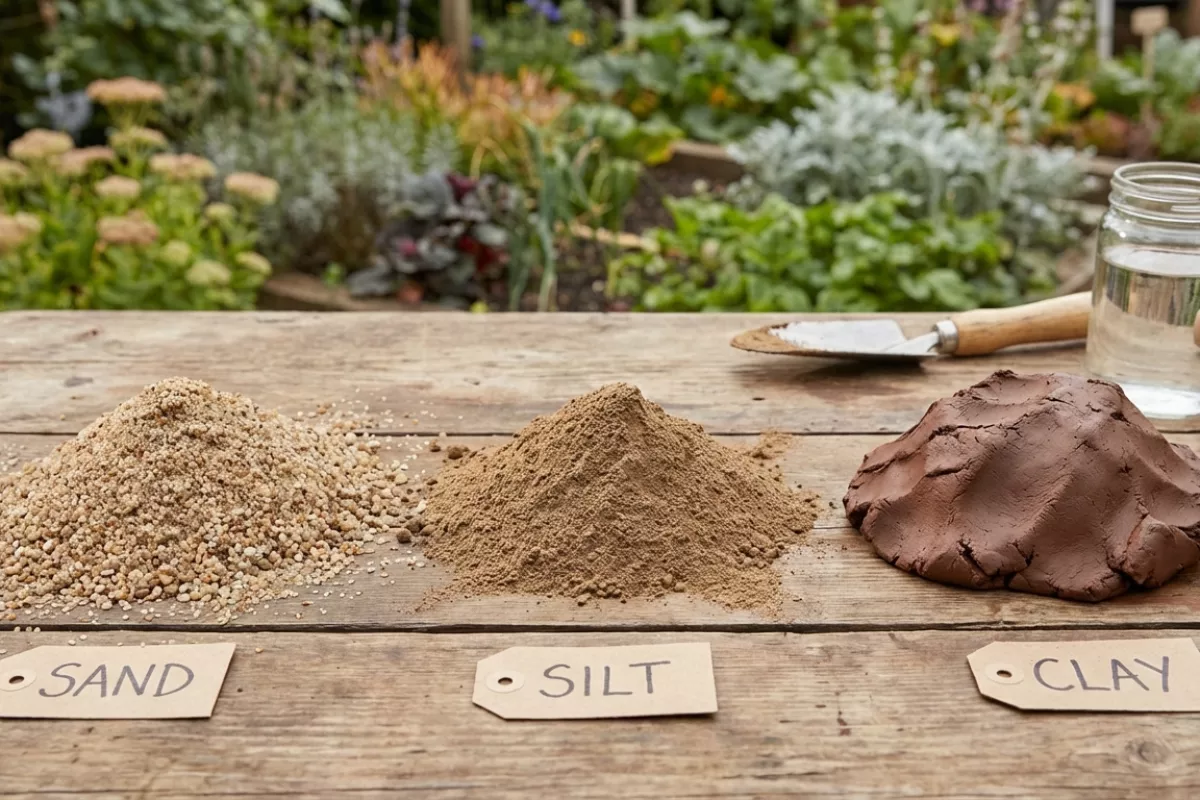
Soil is basically a mix of mineral grains of different sizes, plus organic matter and pore spaces. The grain size matters because it controls how quickly water drains, how much air is held, and how easily roots can push through. Most beginner-friendly explanations focus on three mineral particle sizes: sand, silt, and clay.
| Particle type | Typical size range | How it feels (simple test) | What it tends to do in soil |
|---|---|---|---|
| Sand | 0.05–2 mm (0.002–0.08 in) | Gritty; individual grains often felt | Drains fast, holds less water and fewer nutrients; warms quickly |
| Silt | 0.002–0.05 mm (0.00008–0.002 in) | Silky or floury when dry; smooth when wet | Holds more water than sand; can compact and crust on the surface |
| Clay | <0.002 mm (<0.00008 in) | Sticky when wet; can be rolled into thin ribbons | Holds lots of water and nutrients; drains slowly and can feel dense |
| Organic matter (not a mineral particle, but important) | Varies widely | Dark, crumbly; often smells “earthy” | Improves aggregation, boosts nutrient holding, and helps balance drainage and moisture |
Most real ground isn’t “pure” sand or “pure” clay. It’s a blend, and that blend is called the texture. A loam, for example, is a balanced mix that usually gives a good compromise between drainage and moisture storage.
- Bigger grains (like sand) create larger pores, so water moves through more easily.
- Tiny grains (like clay) create many small pores, so water sticks around longer, but air movement can be limited when it’s wet.
- Organic material helps bind grains into crumbs (aggregates), which often makes the soil easier to work and better for roots.
If you’re doing a quick check at home, a simple “feel test” can get you close: gritty points to sand, silky smooth points to silt, and sticky/ribbon-forming points to clay. Knowing which group dominates helps you predict common issues like fast drying, puddling after rain, or surface crusting.
How particles form aggregates
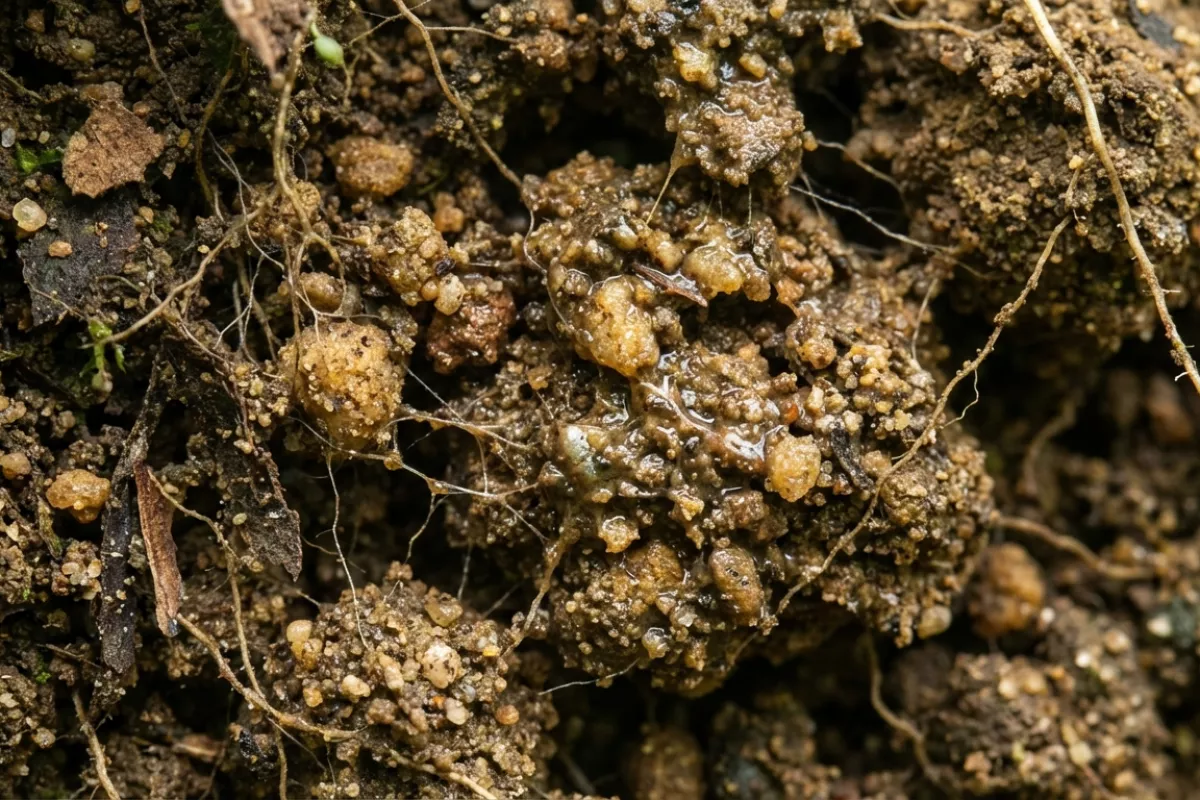
Soil particles rarely sit as perfectly separate grains. Instead, they tend to stick together into small clumps called aggregates. This happens when tiny “glues” and physical forces pull sand, silt, and clay into clusters, and then those clusters get reinforced by roots, fungi, and repeated wetting and drying.
You can think of aggregation as a two-step process: first, particles make contact; then something helps them stay together. The “something” can be organic (like microbial slime), mineral (like clay and iron compounds), or biological (like fungal threads that act like stitching).
- Contact and packing: Rain impact, foot traffic, and natural settling push particles close enough to touch. Once they’re close, weak electrical attractions can start to matter, especially for clay.
- Clay’s charge and attraction: Clay surfaces carry electrical charges that attract other particles and positively charged nutrients (like calcium). These charged bridges help bind grains into stable clusters.
- Organic “glues” from life: Bacteria and fungi produce sticky substances as they feed on organic matter. These gums coat particles and act like a bonding agent.
- Fungal hyphae and roots as ties: Fine fungal threads wrap through the soil like a net, and roots press particles together while releasing compounds that encourage sticking.
- Wetting and drying cycles: When soil wets, some bonds loosen; as it dries, particles pull closer and new bonds form. Repeated cycles often strengthen the overall structure.
- Calcium and other minerals as bridges: Calcium can help particles flocculate (come together) rather than disperse. In contrast, too much sodium tends to push particles apart, making clumps weaker and the soil more prone to crusting.
- Time and gentle disturbance: Aggregates form and reform continuously. Light mixing can create new contacts, but heavy or frequent disturbance can break clumps faster than they rebuild.
| “Glue” or force | What it does in the soil | What you might notice |
|---|---|---|
| Microbial gums (bacteria/fungi) | Coats particles and binds them into small clusters | Crumbly soil that holds together when gently squeezed |
| Clay charge and cation bridges (often calcium) | Links particles through electrical attraction and mineral “bridging” | Less cloudiness in a jar test; fewer dispersed fines |
| Fungal hyphae and fine roots | Physically enmeshes particles and reinforces clumps | Stable crumbs around roots; fewer hard crusts after rain |
| Iron/aluminum oxides (common in many subsoils) | Acts like a mineral cement, especially in warmer, weathered soils | Firm aggregates that resist slaking in water |
| Wetting–drying and freeze–thaw cycles | Creates shrink–swell and cracking that helps form and reshape peds | Natural clods breaking into smaller crumbs over seasons |
A quick beginner takeaway: stable clumps usually mean there’s a mix of organic inputs, active biology, and helpful minerals holding things together. When those supports are missing, particles separate more easily, and the soil is more likely to seal on top, puddle, or turn into hard clods when dry.
Why structure affects roots
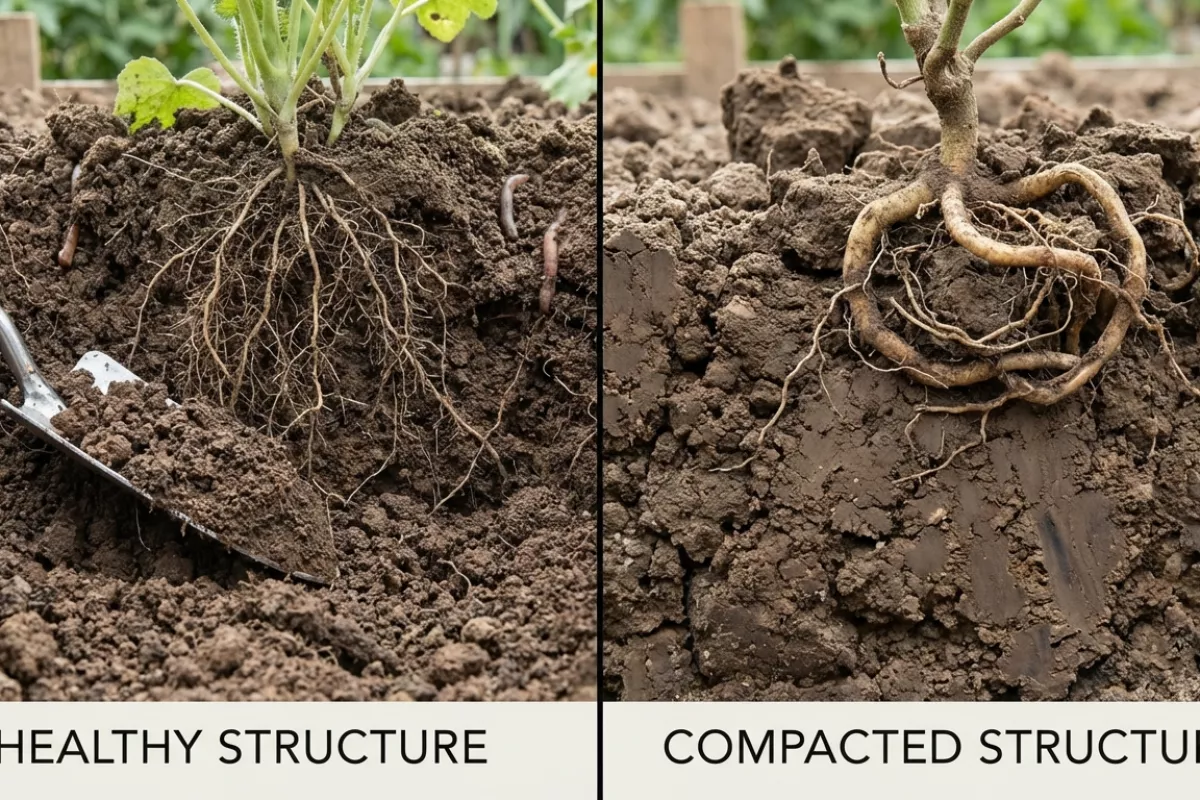
Roots don’t just need “soil” in general—they need a workable network of pores and crumbs so they can push forward, breathe, drink, and trade nutrients with microbes. When that arrangement is tight, smeared, or cloddy, roots spend more energy forcing their way through and often end up shallow, stubby, or circling in the easiest spaces.
Think of soil as a three-part system: solid particles (sand, silt, clay, organic matter), pore spaces (air and water pathways), and the way those parts are arranged (aggregates). The arrangement controls how quickly water enters, how long it stays, and whether oxygen can reach the root zone after rain or irrigation.
- Penetration and anchoring: In well-aggregated soil, roots follow tiny cracks and pores and can branch freely. In compacted layers, they hit a “wall,” thicken, and turn sideways, which reduces the volume of soil they can explore.
- Oxygen supply: Roots need oxygen for respiration. If pore spaces are mostly water-filled for long periods, oxygen drops and roots may slow down, rot, or become more vulnerable to disease.
- Water access: A good mix of large and small pores matters. Large pores help drainage and air exchange; small pores hold water between rains. If structure collapses, water may either run off quickly or sit on the surface and suffocate roots.
- Nutrient uptake: Nutrients move to roots through water flow and diffusion. When soil is dense and poorly connected, that movement slows, and roots can’t “forage” effectively, even if nutrients are present.
- Root hairs and microbial partners: Fine root hairs and mycorrhizal fungi need stable, moist pore surfaces to function well. Crusting, smearing, or repeated compaction can reduce those habitats and limit nutrient exchange.
- Temperature swings: Loose, crumbly soil warms and cools more evenly because air and water move predictably. Hard, bare crusts can heat up fast and dry out the top layer, stressing new roots and seedlings.
| Soil condition (structure clue) | What roots often do | What the plant may show |
|---|---|---|
| Crumbly aggregates with visible pores | Deep, branched growth with many fine roots | Steadier growth and better drought tolerance |
| Surface crust after rain or watering | Seedling roots stay shallow; fewer root hairs near the surface | Patchy germination, quick wilting on warm days |
| Compacted layer (often 10–30 cm / 4–12 in down) | Roots flatten, thicken, and spread sideways above the layer | Slow growth, poor performance in dry spells |
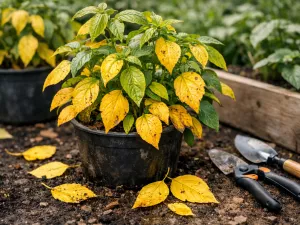
| Waterlogged, smeared, or puddled soil | Short, darkened roots; reduced branching due to low oxygen | Yellowing, stunting, higher disease risk |
| Large hard clods with gaps between them | Roots follow big cracks but miss much of the soil volume | Uneven nutrient uptake, inconsistent vigor |
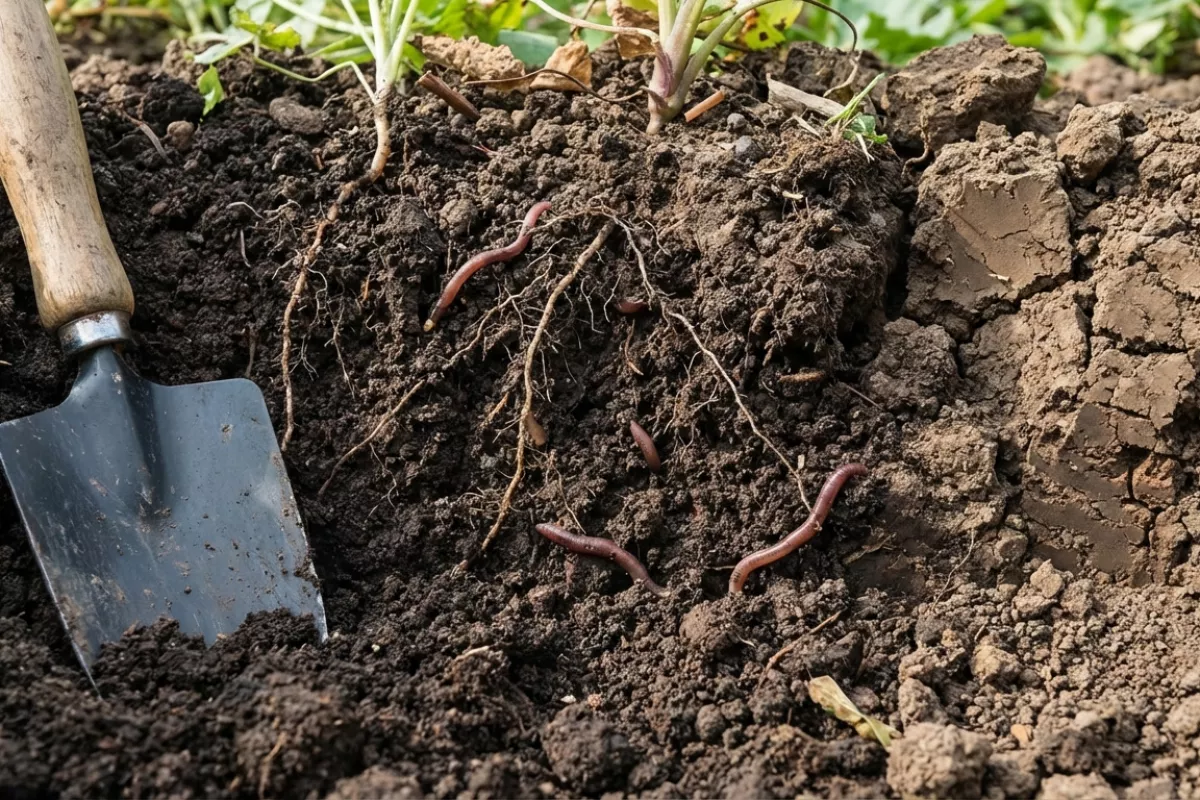
If you want a quick reality check, dig a small hole and look at where roots actually are. A healthy root zone usually shows many fine roots throughout the top 15–30 cm (6–12 in), not just a mat at the surface or a sideways “shelf” above a dense layer.
Signs of good vs poor structure
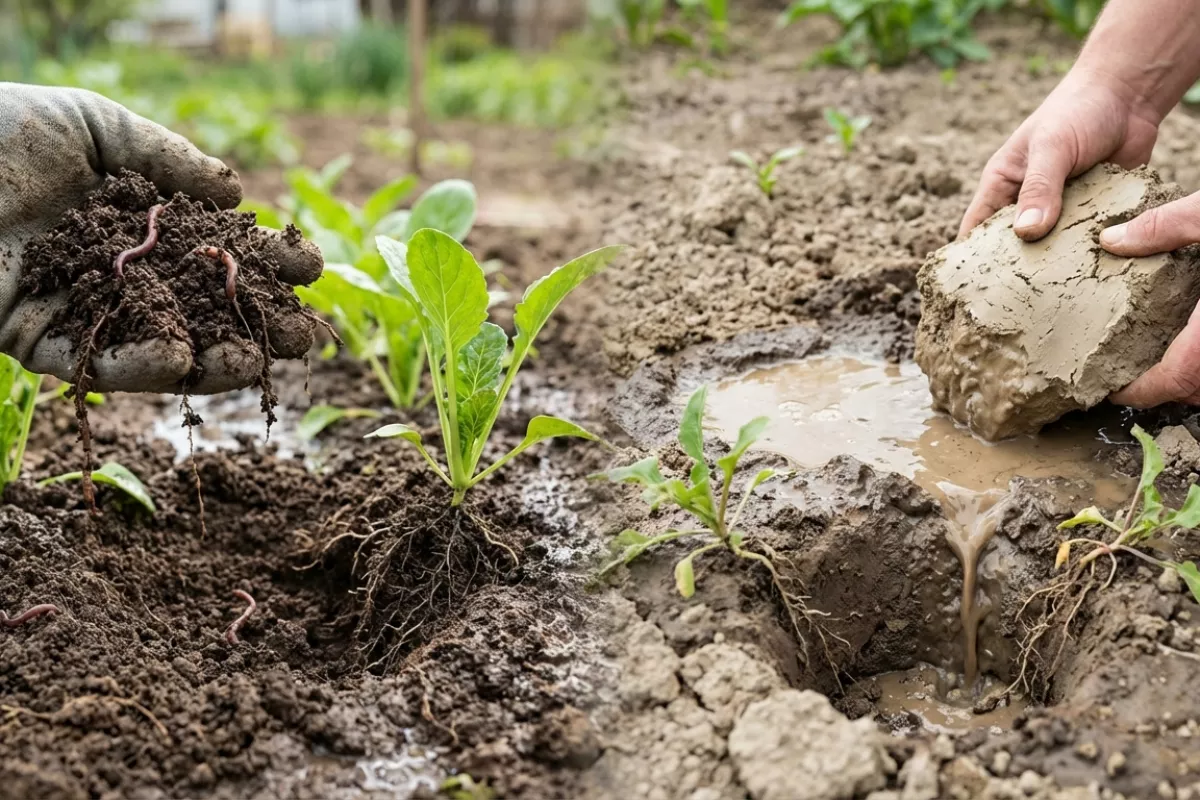
You can learn a lot about how well your ground is put together just by watching what happens after rain, digging a small hole, and noticing how roots and worms behave. Good aggregation usually looks and feels “crumbly,” while damaged structure tends to be dense, smeary, or broken into hard clods.
| What you notice | Healthier structure tends to look like | Poorer structure tends to look like |
|---|---|---|
| After rain or irrigation | Water soaks in steadily; puddles are brief; less runoff | Water sits on top, runs off, or forms rills; puddles linger |
| Surface condition | Loose, granular “crumbs” with small pores; minimal crusting | Hard crust or sealed surface; powdery dust when dry |
| Dig test (spade or trowel) | Soil breaks into stable aggregates; you see pores and channels | Big hard clods, plates, or a smeared look; few visible pores |
| Compaction signs | Spade slides in with moderate, even resistance | Sudden “hard layer” you hit at a consistent depth; difficult digging |
| Roots | Roots go down and branch normally; fine roots spread easily | Roots are shallow, thickened, or growing sideways along a dense layer |
| Earthworms and life | Worms, casts, and old root channels are common | Few worms; little evidence of channels or biological activity |
| Smell and feel | Earthy smell; moist soil feels springy and holds together without smearing | Sour/anaerobic smell in wet spots; sticky and smears when wet, brick-hard when dry |
| Plant performance | More even growth; plants handle dry spells better | Patchy growth; wilting quickly in heat; nutrient issues despite fertilizing |
If you want a quick at-home check, dig a small test hole about 20 cm (8 in) deep. Look for a sudden change from crumbly to dense, or for flat “plates” that break along horizontal layers. Also pay attention to how the soil breaks apart in your hand: stable crumbs that don’t collapse into dust are a good sign, while a smooth smear or hard chunks often point to compaction or low organic matter.
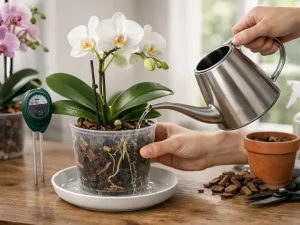
How watering changes structure
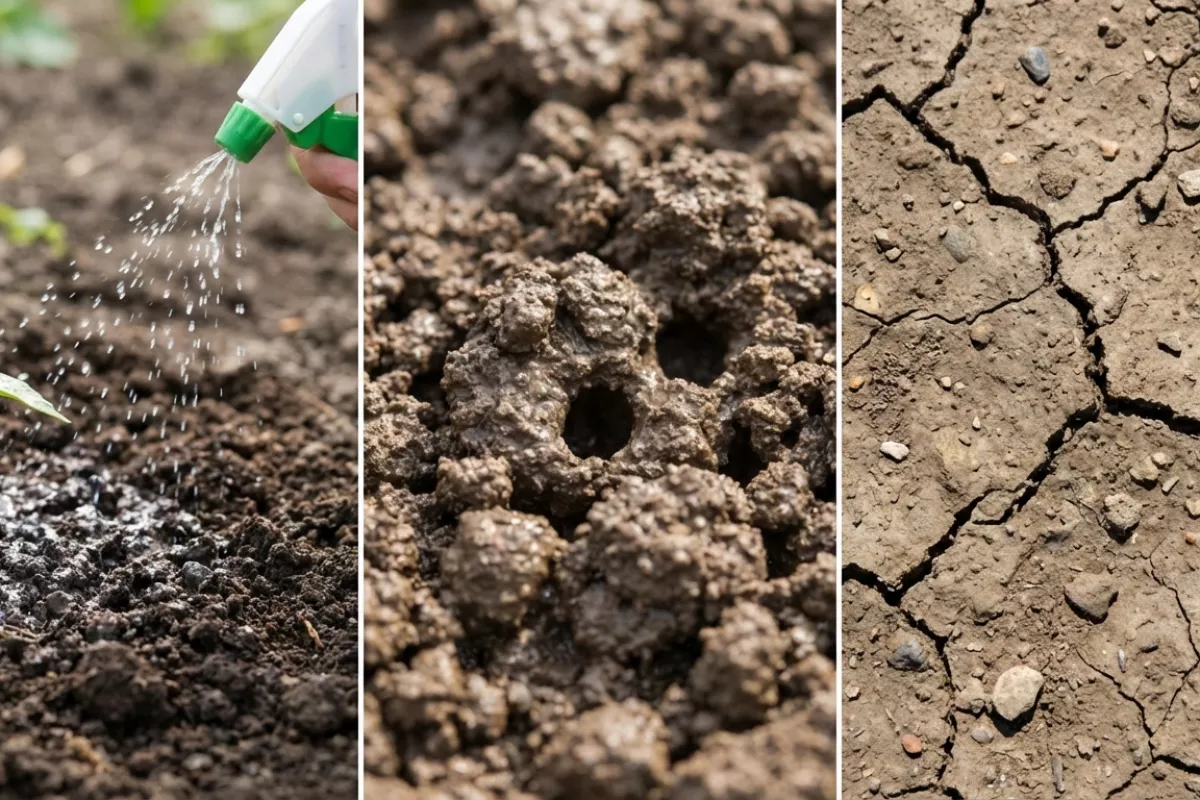
Water doesn’t just “feed” plants; it rearranges how soil particles sit together. When moisture enters the pore spaces, it changes the forces that hold grains and crumbs (aggregates) in place. Depending on how fast and how often you irrigate, you can either protect those crumbs or break them apart and end up with a sealed, compacted surface.
A useful way to think about it is cycles: wetting, draining, and drying. Each cycle slightly reshapes pores. Gentle cycles tend to keep a mix of big pores (for air and drainage) and small pores (for holding water). Harsh cycles, especially on bare soil, often collapse the larger pores and create a tighter, less breathable layer.
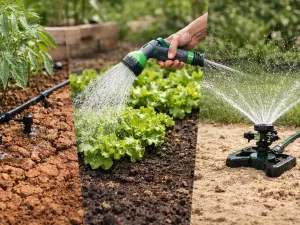
- Slow, even watering usually helps aggregation. When water soaks in gradually, it reduces surface impact and lets crumbs stay intact. Roots and soil life can then reinforce those aggregates, keeping the soil “crumbly” rather than cloddy.
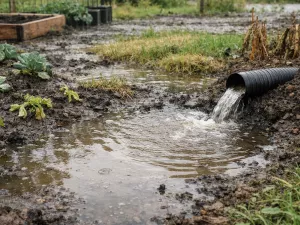
- Fast watering can cause surface sealing. A hard spray or heavy downpour can break aggregates into fine particles. Those fines wash into the top pores and plug them, forming a thin crust that slows infiltration and increases runoff.
- Overwatering pushes air out. When pore spaces stay filled for long periods, oxygen drops and beneficial organisms slow down. That can reduce the natural “glues” (like microbial byproducts) that help particles stick together.
- Drying after saturation can harden the surface. As water leaves, clays can shrink and pull particles closer, sometimes creating a dense layer. Repeated wet-then-bake cycles on exposed ground often lead to cracking and tough clods.
- Watering at the wrong time can worsen compaction. Working or walking on soil that’s very wet squeezes pores shut more easily, especially in clay-heavy ground. The same pressure on drier soil usually causes less structural damage.
Texture changes the outcome. Sandy soils drain quickly, so structure problems often show up as poor water-holding rather than crusting. Clay soils hold water longer, so they’re more prone to sealing, shrinking, and compaction if watering is heavy or too frequent.
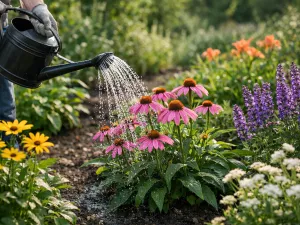
In practice, aim for moisture that encourages infiltration without keeping the soil soggy. Water more gently, keep the surface protected with mulch or plant cover, and avoid traffic when the ground is wet enough to smear. Those small habits do more for soil structure than any single “magic” amendment.
Ways to improve soil texture
Start by figuring out what you’re working with: sandy soil feels gritty and drains fast, while clay feels sticky when wet and turns hard when dry. The goal usually isn’t to “change” the sand/silt/clay ratio (that takes a very long time), but to improve how the soil behaves by building better aggregates, pore space, and consistency.
- Add organic matter regularly to help particles clump into stable crumbs. Use finished compost, well-rotted manure, leaf mold, or shredded leaves. A common approach is spreading 2–5 cm (1–2 in) on top and letting worms and water pull it down over time.
- Mulch the surface to soften extremes. A 5–8 cm (2–3 in) layer of straw, bark fines, or chopped leaves reduces crusting, slows evaporation, and cushions soil from pounding rain that can seal the surface.
- Grow cover crops to “farm” structure with roots. Grasses and cereals make dense, fibrous roots for aggregation; legumes add nitrogen; deep-rooted plants (like daikon-type radish) can open channels through compacted layers. Cut them down before they set seed and leave the residues as mulch.
- Avoid working soil when it’s too wet, especially clay. If you can roll a handful into a ribbon easily, wait—tilling or digging then can smear pores and create hard clods that persist.
- Reduce compaction by keeping foot traffic off beds and using set paths. In gardens, raised beds or permanent bed systems help because you stop stepping where you grow.
- Loosen compacted areas the gentle way. Instead of deep rototilling, try broadforking or garden-fork loosening to create cracks without flipping layers. Follow with organic matter and mulch so the openings don’t collapse again.
- Use gypsum only for specific clay problems. Gypsum (calcium sulfate) can help disperse sodium-affected soils (often called sodic soils), but it won’t magically fix every heavy clay. If puddling and crusting are severe, a soil test can confirm whether sodium is the issue.
- Mix in coarse material carefully. Adding a little sand to clay can make a cement-like mix; if you use mineral amendments, choose coarse composted bark, expanded shale, or other porous aggregates, and use enough to matter. For containers, use a purpose-made potting mix rather than trying to “upgrade” garden soil.
- Keep living roots in the ground as much as possible. Even between crops, a quick cover or an under-sown clover keeps biology active and helps maintain crumb structure.
| Soil situation | What it tends to do | Most helpful moves | What to avoid |
|---|---|---|---|
| Sandy (gritty, dries quickly) | Low water and nutrient holding; can feel “loose” but droughty | Compost often; thicker mulch; cover crops; smaller, repeated additions of organic matter | Letting beds sit bare; relying on a single big compost dose once a year |
| Clay-heavy (sticky wet, hard dry) | Slow drainage; compacts; forms clods and surface crusts | Mulch; compost topdressing; avoid working wet; broadforking; deep-rooted covers | Digging/tilling when wet; adding small amounts of sand; heavy traffic on beds |
| Silty (smooth, “floury” feel) | Prone to crusting and compaction; can erode easily | Keep covered (mulch/cover crops); add organic matter; minimize disturbance | Leaving soil bare over winter; frequent fine tillage that breaks aggregates |
| Compacted layer (hardpan from traffic or repeated tilling) | Roots stall; water sits on top; poor air flow | Permanent paths; broadfork or subsoil cracking; deep-rooted covers; steady organic inputs | More shallow tilling (can rebuild the pan); driving equipment when soil is moist |
Expect gradual change: you’ll often notice easier digging and better drainage within a season, but the most reliable improvements come from repeating the “cover, feed, and don’t compact it” routine year after year.