Brown Spots on Indoor Plants: Hidden Triggers

 Explains why indoor plants get leaf spotting, covering lighting damage, water quality and mineral buildup, humidity imbalance, and potting soil issues. Shows how to diagnose indoor causes in your home and apply practical fixes to stop new spots and help leaves recover.
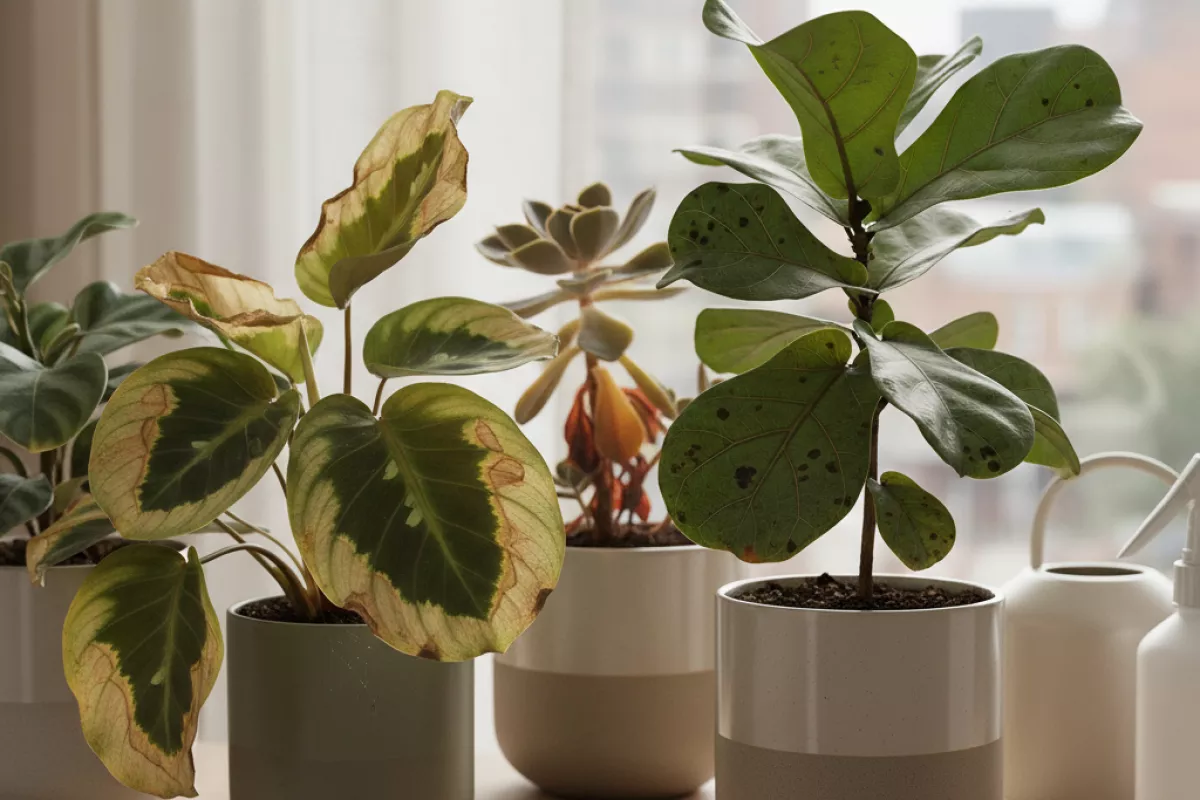
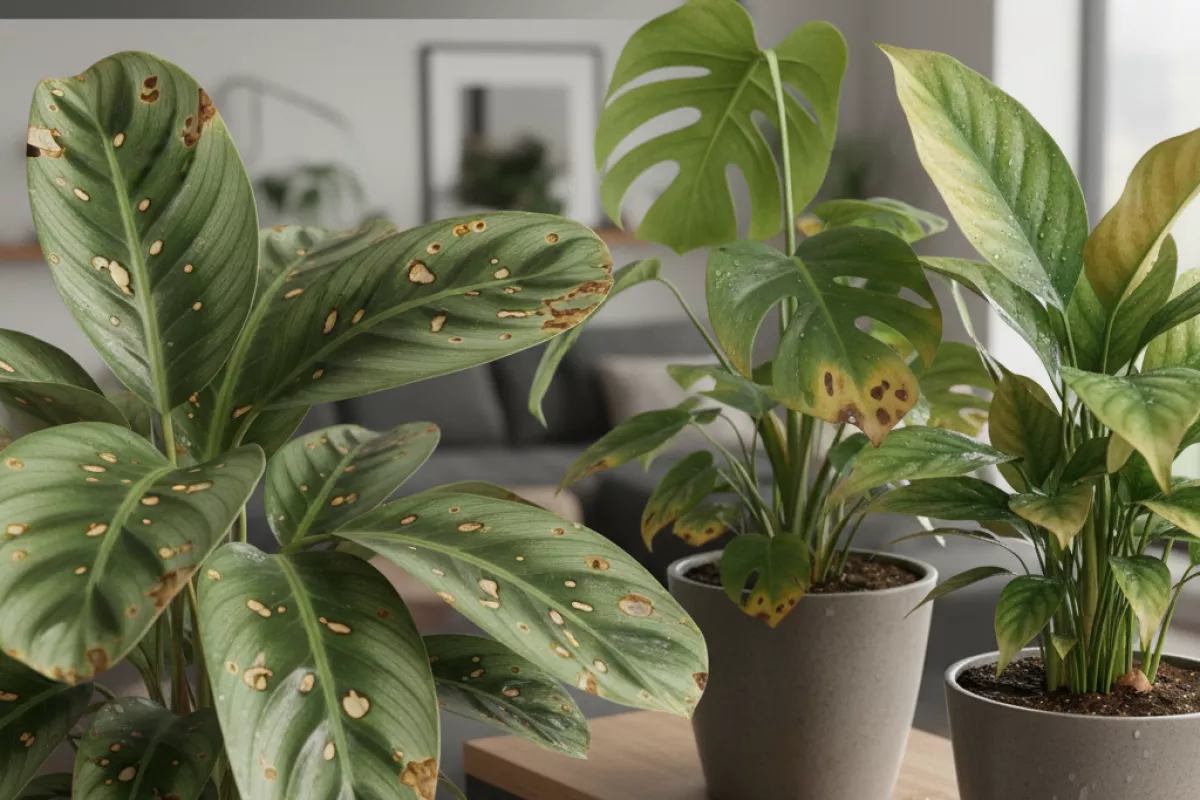
Brown patches on houseplant leaves often come from specific stressors, not just neglect. This guide covers hidden causes of spotting, including inconsistent watering, mineral or fertilizer buildup, too much or too little light, pests, low humidity, and temperature swings. Learn to interpret the patterns, check for simple mistakes, and fine-tune care early so the damage does not spread.
Why indoor plants develop spotting
Leaf marks usually show up when a plant’s tissues are stressed, damaged, or infected faster than they can repair themselves. Indoors, the triggers are often subtle: a small change in light, a watering routine that’s “almost right,” or air that stays still and damp. The color, shape, and placement of the spots are clues, but the underlying pattern is the same—something is interrupting normal leaf function.
It helps to think of spots as a symptom with a few broad categories. Some are physical injury (sun scorch, cold shock), some are physiological (salt buildup, nutrient lockout), and some are biological (fungi, bacteria, pests). Multiple causes can stack together, which is why a plant can look fine for weeks and then suddenly develop brown speckling after one off-schedule watering or a chilly night.
- Water stress (too much or too little): Overwatered roots lose oxygen and begin to fail, so leaves develop soft brown patches or dark, expanding blotches. Underwatering more often causes crisp, dry spots and browning at edges, especially on older leaves. Many indoor cases trace back to common watering mistakes to avoid, especially when soil stays wet longer than expected.
- Light mismatch: Direct sun through glass can scorch foliage, creating pale tan areas that turn brown and papery. Too little light can weaken growth and slow drying, indirectly encouraging leaf-spot diseases.
- Humidity and airflow issues: Persistently damp leaves plus stagnant air create a comfortable environment for fungal and bacterial spotting. This is common when plants are crowded together or placed near a humidifier without airflow.
- Temperature swings and drafts: Cold windows, heat vents, or sudden drops can damage leaf cells, leading to irregular brown patches. Even a short exposure to 10°C (50°F) air can stress tropical plants that prefer warmer conditions.
- Mineral salts and water quality: Hard water and excess fertilizer can leave salts in the soil, burning root tips and causing scattered brown spots or edge burn. Fluoride sensitivity in some plants can show up as spotting even when everything else seems fine.
- Nutrient imbalance or pH lockout: A plant can have nutrients present but not available due to pH issues, leading to weak tissue that spots easily. Calcium-related problems often show on new growth; magnesium issues tend to appear on older leaves first.
- Leaf wetting and splash: Water sitting on leaves for hours—especially overnight—can leave localized damage and also helps pathogens spread. Splashing soil onto leaves during watering can introduce spores and bacteria.
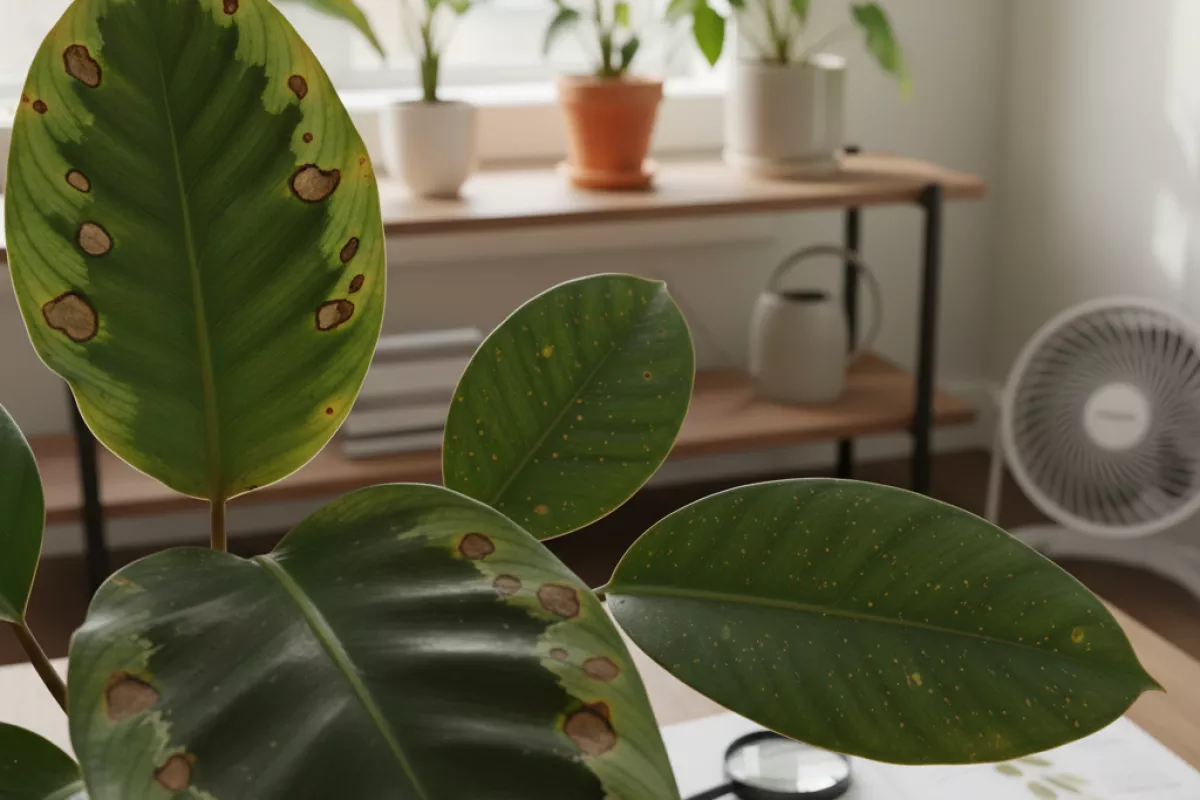
- Pests and their feeding patterns: Spider mites, thrips, and scale can cause stippling, bronzing, and small necrotic dots that later merge into larger brown areas. Damage often starts on the undersides or along veins.
- Pathogens (fungal/bacterial leaf spots): These often create spots with defined edges, yellow halos, or concentric rings, and they may spread from leaf to leaf. Indoors, outbreaks are frequently linked to high humidity and slow-drying foliage.
- Chemical injury: Sprays, soaps mixed too strong, or cleaning products can burn leaves, leaving sharply outlined brown patches where droplets sat. Always test on a small area first and avoid treating in bright light.
If you’re trying to narrow it down, look for timing and pattern: new spots appearing right after a move usually point to light or temperature; spots that keep spreading on the same leaf suggest infection; crisp edges that worsen gradually often trace back to watering, salts, or low humidity. Checking the underside of leaves and the soil line (smell, sogginess, salt crust) usually reveals the “hidden trigger” faster than focusing on the spot color alone.
Lighting problems that damage leaves
Light issues often show up as brown spots because the leaf tissue is either getting scorched, starved, or stressed by sudden changes. The tricky part is that the damage can look similar across plants, but the pattern and where it appears usually points to the real cause.
| Light-related trigger | What the brown spots typically look like | Where it appears first | What to change |
|---|---|---|---|
| Too much direct sun (leaf scorch) | Tan-to-dark brown patches, often with a crisp, papery texture; edges may curl | Sun-facing side; upper leaves closest to the window | Move the pot 30–60 cm (12–24 in) back from the glass or use a sheer curtain; rotate weekly |
| Light too weak (slow decline) | Small brown flecks that expand slowly; yellowing may come first, then dry spots | Older/lower leaves; interior foliage | Shift to a brighter spot or add a grow light for 10–12 hours/day; keep the lamp about 30–45 cm (12–18 in) above the canopy |
| Sudden change in exposure (shock) | Random-looking blotches after a move; new spots appear within days | Leaves that were already mature at the time of the move | Acclimate over 7–14 days (1–2 weeks): increase brightness gradually, not all at once |
| Heat through glass or from a lamp | Brown, brittle areas that can look “baked,” sometimes with a sharp boundary | Closest leaves to the pane or bulb | Keep foliage at least 15–30 cm (6–12 in) from hot glass and 30–45 cm (12–18 in) from strong LEDs; avoid bulbs that warm the leaf surface |
| Long photoperiod under grow lights | Dry, rusty spotting plus tired-looking leaves; growth may stall despite “more light” | Top leaves directly under the fixture | Give a dark period: aim for 8–14 hours of darkness; reduce intensity or raise the fixture by 5–10 cm (2–4 in) |
- Check the timing. Spots that appear 24–72 hours after moving a plant are more consistent with exposure shock than disease.
- Read the texture. Crispy, brittle patches usually mean scorch or heat stress; soft, water-soaked areas point elsewhere (often watering or infection).
- Don’t expect damaged tissue to “heal.” Once a spot turns brown, it won’t turn green again. Judge success by whether new growth stays clean.
- Rotate instead of relocating repeatedly. A quarter-turn every 7 days helps even out light without constant re-acclimation.
If you’re unsure whether the plant is getting too much or too little, watch the newest leaves for one to two weeks. Stable lighting should produce new growth without fresh spotting, even if older leaves keep their existing marks.
Water quality and mineral buildup
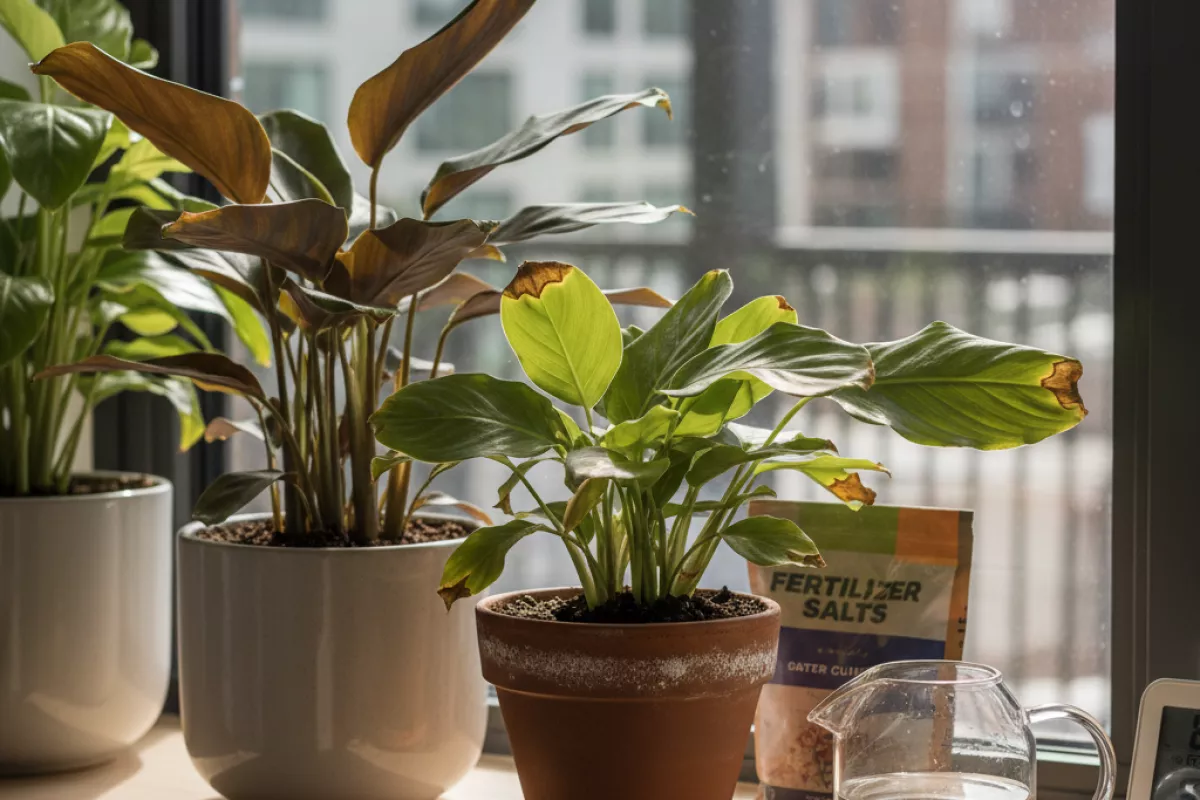
Tap water can leave a quiet trail of dissolved salts behind. As water evaporates from the pot and leaf surfaces, minerals concentrate in the soil and along the edges of leaves, which can show up as tan-to-brown spotting, crispy tips, or rusty margins that look like “burn.” This is especially common when you water a little at a time, letting residue accumulate instead of being flushed out.
Two common culprits are hard water (high calcium and magnesium) and fertilizer salts. Either one can raise the salt level around roots, making it harder for the plant to take up moisture even when the mix is damp. Some sensitive houseplants also react to chlorine/chloramine or fluoride with scattered brown specks or tip scorch.
- Leaf-tip burn and crispy edges that worsen slowly over weeks, even with “correct” watering.
- White crust on the soil surface, pot rim, or saucer—dried mineral deposits.
- Brown spots after misting with hard water; droplets dry and leave mineral rings.
- Stalled growth plus brown patches, because stressed roots can’t hydrate foliage efficiently.
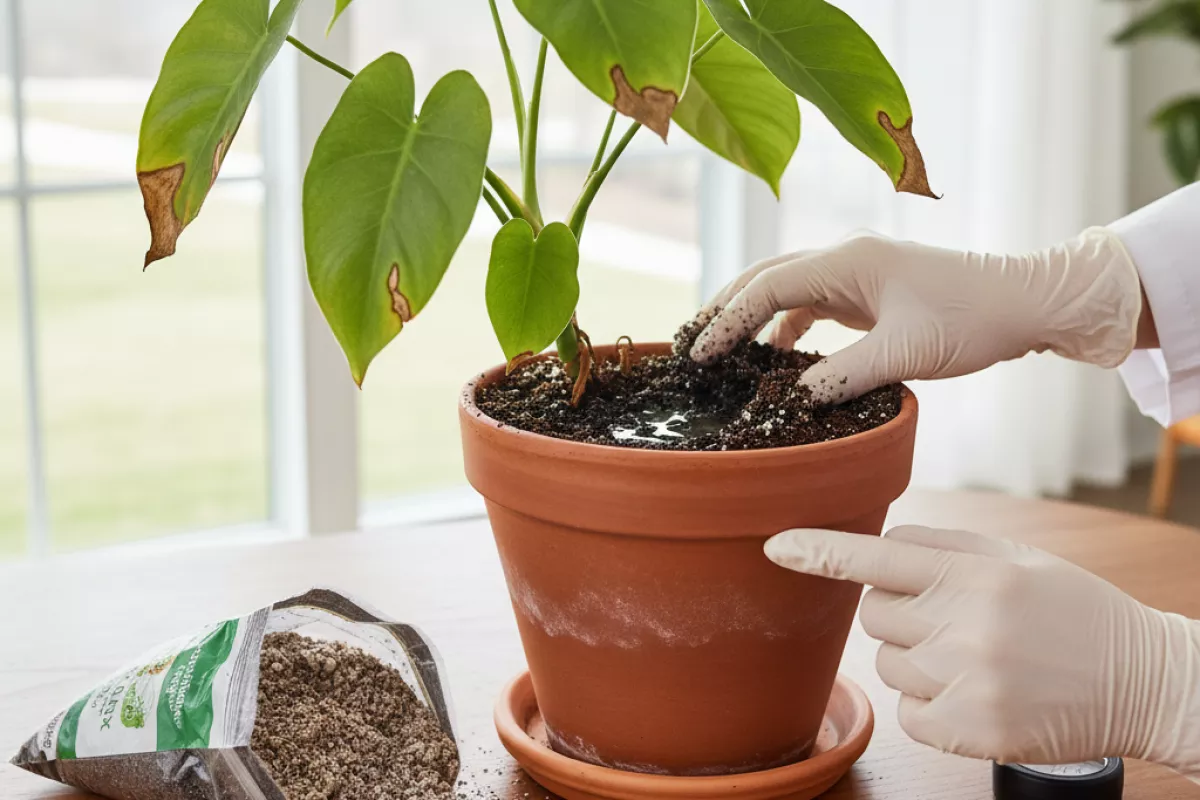
If you suspect excess salts, start with a simple reset: flush the pot thoroughly. Run room-temperature water through the soil until at least 20–30% drains out the bottom each time (about 1 L per 10 cm pot diameter, roughly 34 fl oz per 4 in, as a practical guide). Empty the saucer so the plant isn’t reabsorbing the concentrated runoff. Repeat once more a few minutes later for heavily crusted pots.
| Source of buildup | Typical clues | What to do |
|---|---|---|
| Hard tap water (high minerals) | White crust on soil/pot; tip burn; spots after misting | Switch to filtered, rain, or distilled water; avoid misting with hard water; flush monthly |
| Overfertilizing or frequent feeding | Brown edges after feeding; soil surface looks “salty”; roots seem stressed | Pause fertilizer 2–4 weeks; flush; resume at 1/2 strength and less often |
| Chlorine/chloramine sensitivity | New spots soon after watering; some plants react despite low mineral crust | Use filtered water; let water sit 24 hours (helps chlorine, not chloramine); consider activated carbon filtration |
| Fluoride sensitivity | Tip scorch and brown speckling on sensitive plants (often on newer leaves) | Use distilled or reverse-osmosis water; avoid high-fluoride fertilizers; flush periodically |
Prevention is mostly about consistency: water deeply enough to create runoff, then let the mix dry to the plant’s preference before watering again. If you fertilize, treat it like seasoning—lighter and less frequent is usually safer indoors. When brown spots persist even after switching water sources and flushing, consider other hidden triggers like low humidity, sun scorch, or root issues that can mimic salt stress.
Humidity imbalance effects
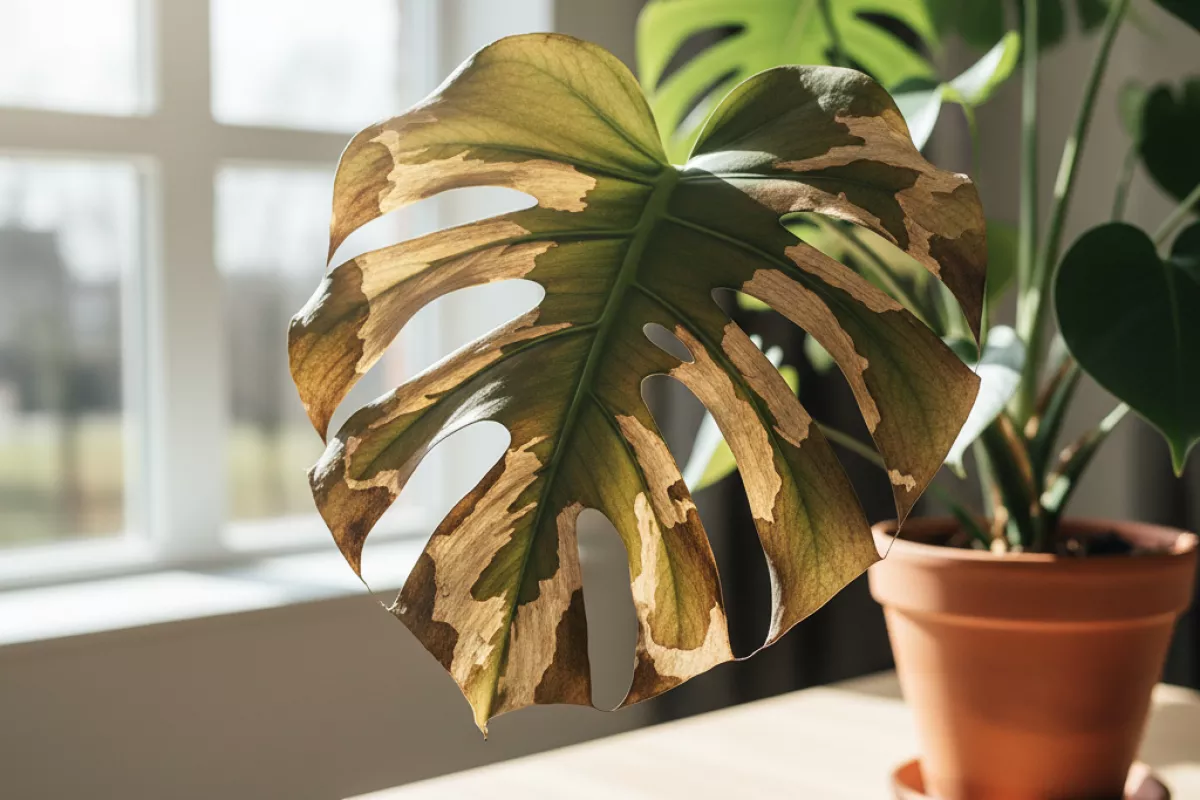
When indoor air swings too dry or stays constantly damp, leaves lose their normal balance between water loss and water uptake. That stress often shows up as brown spotting: cells at the edges or between veins dehydrate, or they stay wet long enough for microbes to get established. The tricky part is that both extremes can look similar at first glance, so it helps to match the pattern of the spots to what your room air is doing.
| What the air is like | How brown spots tend to appear | Why it happens | What to change first |
|---|---|---|---|
| Too dry (often below ~40% RH) | Crispy brown tips/edges; pale halo before browning; older leaves worsen first | Transpiration outpaces root uptake; salts can concentrate in leaf margins | Raise RH gradually; keep soil evenly moist (not soggy); move away from vents |
| Too humid with low airflow (often above ~70% RH) | Soft, dark brown patches; spots may expand; sometimes yellowing around lesions | Leaf surfaces stay wet longer; fungi/bacteria spread more easily | Increase air movement; water earlier in the day; avoid wetting foliage |
| Big day-to-night swings (e.g., 30% to 70% RH) | Random blotches or “freckling,” especially on new growth; occasional leaf curl | Rapid changes stress stomata; tissues can’t acclimate quickly | Stabilize the room (consistent heating/cooling); group plants to buffer swings |
| Cold + humid (condensation on windows) | Water-soaked spots that turn brown; damage near glass-facing side | Chilled leaf tissue + moisture leads to cell collapse and opportunistic infection | Pull plants 15–30 cm (6–12 in) from cold panes; keep leaves dry; improve circulation |
- Watch for location clues. Browning only on the side facing a heater, AC, or draft points to dry air and rapid moisture loss; spotting deep in a dense canopy points to stagnant, damp air.
- Don’t “fix” dryness by overwatering. Saturated soil can still coexist with low room humidity, and stressed roots make leaf spotting worse. Aim for steady moisture, not constant wetness.
- Misting is hit-or-miss. It briefly raises surface moisture but rarely changes room RH; on plants prone to leaf-spot disease, wet foliage can make marks spread. If you mist, do it early and ensure quick drying.
- Use a simple target range. Many common houseplants do well around 40–60% RH; if you adjust, do it slowly over several days to avoid shock.
If you suspect the air is the trigger, track humidity for a week with a small hygrometer and note when new spots appear. Once the room conditions are steadier, damaged tissue won’t turn green again, but you should see fewer fresh brown marks on new leaves.
Potting soil factors to check
Brown spots often trace back to what’s happening around the roots. When the mix stays wet too long, turns water-repellent, or carries excess salts, leaves can show patchy tan-to-brown areas, crispy edges, or dark, soggy lesions that look like disease but start as stress.
- Drainage and compaction: If water sits on the surface or the pot feels heavy for days, the mix may be too dense or broken down. Compacted media limits oxygen, which weakens roots and can trigger spotty browning higher up. Gently probe 2–3 cm (1–1.2 in) down; if it’s muddy and airless, consider loosening the top layer or repotting.
- Hydrophobic (water-repellent) mix: Very dry peat-based soil can shrink from the pot wall and let water run straight through, leaving dry pockets. That uneven moisture can cause scattered brown patches. If you see water rushing out quickly while the center stays dry, bottom-water for 20–30 minutes (or 20–30 min) and then drain well.
- Salt and fertilizer buildup: White crust on the surface, leaf-edge burn, and random brown speckling can come from mineral salts. Flush with clean water equal to 2–3 times the pot volume, letting it drain fully between pours. For a 1 L pot (34 fl oz), that’s about 2–3 L (68–101 fl oz) of water total.
- pH drift and nutrient lockout: If the mix is old or repeatedly fertilized, pH can shift and make iron, magnesium, or calcium harder to absorb. The result can look like spotting or mottling, especially on newer leaves. Refreshing the top 2–3 cm (1–1.2 in) or repotting into a balanced mix often helps more than adding extra fertilizer.
- Decomposed, “sour” soil: A swampy smell, fungus gnats, and a mix that stays wet are signs the organic components have broken down. This can lead to root dieback and brown lesions that spread from the leaf tip inward. Repot into fresh medium and trim any black, mushy roots.
- Contamination and pathogens: Reused soil, unclean pots, or splash-back can introduce fungi and bacteria. If spots are dark, expanding, or have yellow halos, isolate the plant and avoid wetting foliage until you’ve improved airflow and corrected moisture at the root zone.
- Pot size mismatch: A pot that’s too large holds moisture longer; one that’s too small dries too fast. Both extremes can lead to stress spotting. As a rule of thumb, step up only 2–5 cm (1–2 in) in diameter when repotting unless the plant is severely root-bound.
If you’re unsure which issue is driving the spotting, start with the least disruptive checks: confirm the pot has a clear drainage hole, feel moisture at root depth, and look for crusting or a musty odor. Correcting the mix and watering pattern usually stops new spots, even if old damaged areas don’t heal.
How to diagnose indoor causes
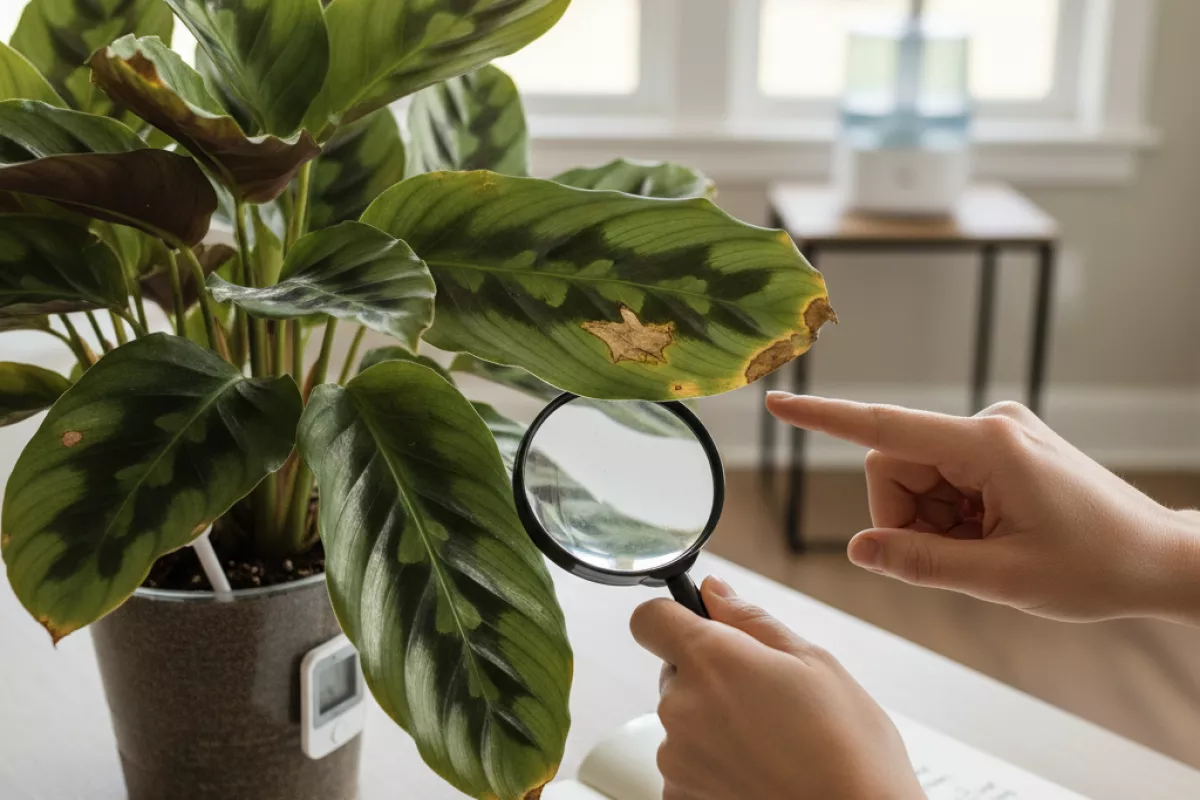
Narrowing down why leaves are developing brown spots indoors works best when you treat it like a quick investigation: confirm the pattern, check the environment, then rule out care and pest issues. Start by looking at where the spots appear (edges, centers, between veins, newest vs. oldest leaves) and how fast they’re spreading (overnight vs. over weeks).
-
Map the symptoms on the plant. Take a close look in good light and note what you see.
- Crispy brown edges/tips usually point to dry air, inconsistent watering, salt buildup, or too much fertilizer.
- Round brown patches with a yellow halo often suggest leaf-spot disease, especially if leaves stay wet for long periods.
- Bleached/tan areas that turn papery are common after sunscald from a sudden move into brighter light.
- Brown spots on the newest growth can indicate low humidity, heat blasts, or a root problem that limits water uptake.
- Older leaves spotting first is more consistent with watering errors, mineral salts, or normal leaf turnover (if mild and slow).
-
Check indoor placement and “microclimates.” A plant can be in a bright room and still sit in a harsh pocket of air.
- Measure distance to windows and vents: leaves within about 30–60 cm (12–24 in) of a heater/AC vent often spot from hot/cold drafts.
- Feel for temperature swings near glass at night; cold windows can chill foliage even when the room feels fine.
- Look for reflected heat/light from mirrors or south/west windows that can intensify exposure.
-
Do a soil and pot reality check. Many indoor brown-spot problems start below the surface.
- Push a finger 5 cm (2 in) into the mix: if it’s wet and sour-smelling, roots may be stressed from staying too damp.
- Lift the pot: if it feels heavy for days after watering, drainage or soil density may be the issue.
- Confirm there’s a drainage hole; cachepots can trap runoff and keep roots waterlogged.
- Look for a white crust on soil or pot rims, a clue for mineral/salt buildup from hard water or excess feeding.
-
Inspect leaf surfaces like a pest detective. Tiny pests can trigger stippling that later turns brown.
- Check undersides and along midribs with a flashlight; look for webbing (spider mites), black specks (thrips frass), or cottony clusters (mealybugs).
- Wipe a leaf with a damp white tissue: yellow-brown streaks can indicate mites or thrips activity.
- Isolated spots on a few leaves are more often mechanical damage or sun scorch; widespread speckling across many leaves raises pest suspicion.
-
Review your last two weeks of care. Brown spotting often follows a change rather than a long-standing routine.
- Any recent move to brighter light, a new window, or outdoors for “fresh air”?
- Did you fertilize recently, or switch to a stronger formula?
- Have you been misting or watering late in the day, leaving foliage wet overnight?
- Did you repot, and did the plant get a larger pot than needed (which can stay wet longer)?
| What you notice | Most likely indoor trigger | Quick confirmation check |
|---|---|---|
| Crispy tips and edges, especially on thinner leaves | Low humidity, irregular watering, or salt buildup | Humidity under ~40% and/or white crust on soil; tips worsen after missed waterings |
| Tan/bleached patches that turn brown and papery | Sunscald from sudden brighter light | Damage is on the window-facing side; appears within 1–3 days after moving |
| Brown spots with yellow halos; spots may merge | Leaf-spot disease encouraged by wet foliage and low airflow | Leaves stay wet for hours; spotting spreads leaf-to-leaf rather than staying isolated |
| Soft, dark brown areas near the base; plant looks thirsty while soil is wet | Overwatering or poor drainage causing root stress, especially when factors that increase root rot risk are present (dense soil, large pot, low light) | Soil stays wet >7 days; pot feels heavy; musty odor from mix |
| Fine speckling that turns bronzed/brown; tiny dots or webbing | Spider mites or thrips in dry indoor air | Undersides show webbing or moving specks; tissue wipe shows streaking |
| Scattered brown spots after watering with tap water | Mineral sensitivity or fluoride/chlorine stress (species-dependent) | Spots appear after watering; switching to filtered/distilled reduces new damage |
If you’re torn between two causes, prioritize the one that explains the pattern. For example, a single sun-facing leaf with a papery patch is rarely a watering issue, while many leaves developing soft dark spots alongside constantly damp soil is rarely just “dry air.” Once you identify the most plausible indoor trigger, change only one variable at a time so you can tell what actually helped.
Practical fixes for leaf recovery
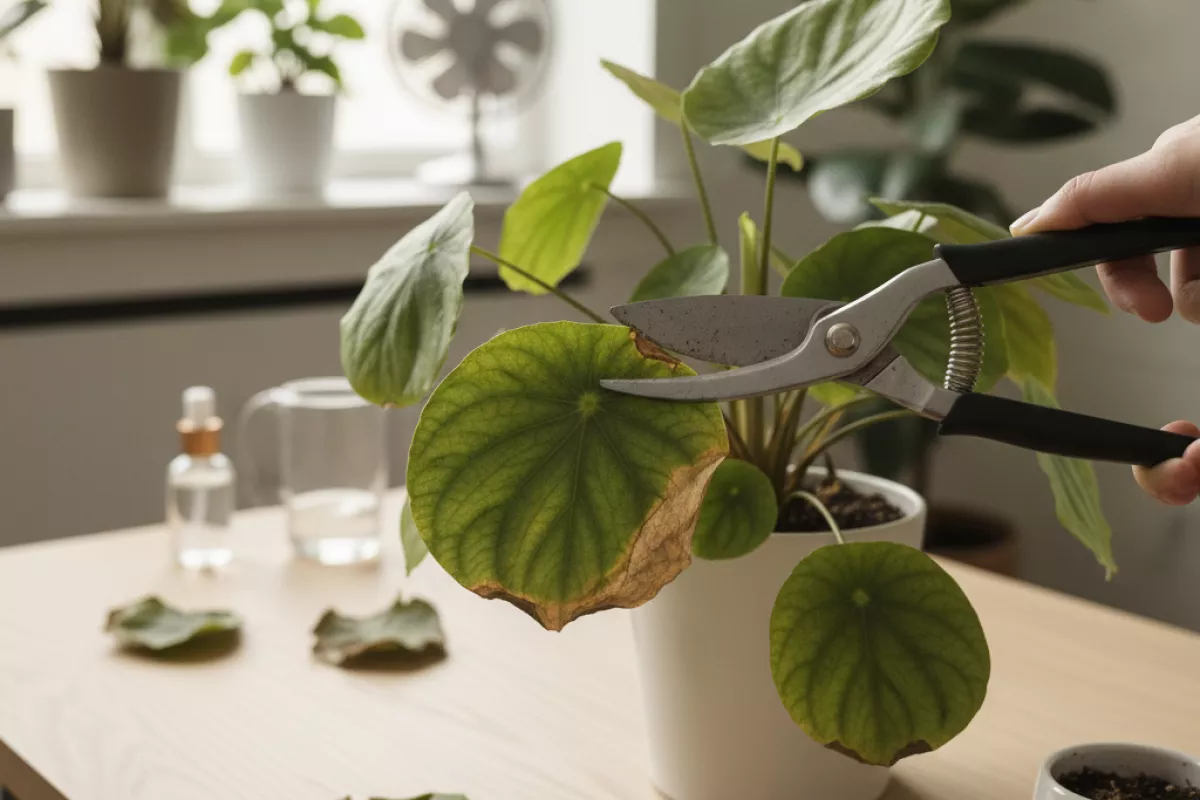
Start by stabilizing the plant’s routine: consistent light, predictable watering, and good airflow. Brown spots rarely “heal” on the damaged tissue, so the goal is to stop new marks from forming and encourage clean new growth.
- Trim what won’t recover. Snip off fully brown leaves or cut away dead sections with clean scissors. Follow the natural leaf shape and leave a thin margin of dry tissue rather than cutting into healthy green. Disinfect blades between plants (or between suspicious leaves) to avoid spreading disease.
- Reset watering with a simple check. Water only when the top 2–5 cm (1–2 in) of mix feels dry for most houseplants. If the pot feels heavy or the soil stays wet for days, pause and improve drainage before watering again.
- Fix drainage at the source. Make sure the container has a drainage hole and the plant isn’t sitting in runoff. If the mix is dense or peat-heavy and stays soggy, repot into a chunkier blend (bark, perlite, or pumice) so roots can breathe.
- Change how you water, not just how often. Follow structured watering methods that encourage deep root growth: water thoroughly until excess drains, then empty the saucer. For plants prone to spotting from wet foliage, water at soil level and keep leaves dry.
- Dial in light to prevent scorch and stress. If spots look bleached or crispy, move the plant back from harsh sun by 30–60 cm (12–24 in) or filter it with a sheer curtain. If growth is weak and leaves stay damp, increase brightness gradually over 7–14 days.
- Raise humidity without trapping stale air. If edges are browning and the air is dry, aim for moderate humidity and steady circulation. Group plants or use a humidifier; avoid constantly misting if it leaves water sitting on leaves.
- Rinse salts if you suspect fertilizer burn. White crust on soil or brown tips can mean buildup. Flush the pot with 3–4 times the container volume of water (e.g., 1 L pot gets 3–4 L / 0.26 gal gets 0.8–1.1 gal), then let it drain completely. Resume feeding at half strength after new growth looks normal.
- Check for pests that create “freckling.” Look under leaves for mites, thrips, or scale. If you see stippling, webbing, or sticky residue, isolate the plant, rinse the foliage, and treat with insecticidal soap or horticultural oil. Repeat every 7 days for 3–4 rounds to catch hatchlings.
- Quarantine when spots spread fast. Rapidly enlarging brown patches, yellow halos, or mushy areas can point to bacterial or fungal issues. Remove the worst leaves, keep water off foliage, increase airflow, and avoid crowding until the plant stabilizes.
| What the spots look like | Most likely trigger | Fastest corrective move | What to watch next |
|---|---|---|---|
| Crispy brown patches on the side facing the window | Sun scorch or heat stress | Move back 30–60 cm (12–24 in) and acclimate gradually | New leaves should emerge unmarked; old damage stays |
| Dark, soft spots that expand; sometimes a yellow ring | Overwatering plus low airflow; possible leaf-spot disease | Let mix dry, improve ventilation, remove affected leaves | Spreading should slow within 7–10 days if conditions improve |
| Brown tips/edges with white crust on soil or pot rim | Salt buildup from fertilizer or hard water | Flush with 3–4× pot volume; reduce feeding strength | Tips may still brown slightly, but new growth should be cleaner |
| Fine speckling or bronzing; tiny dots under leaves | Mites or thrips | Isolate, rinse, treat weekly for 3–4 weeks | Less new stippling; pests should be harder to find each week |
| Round tan spots after misting or splashing | Water sitting on leaves; mineral spotting | Water at soil level; wipe leaves; avoid wet foliage overnight | Fewer new circles; leaf surfaces stay dry and cleaner |
Give the plant time after you adjust one or two variables. Changing light, watering, repotting, and feeding all at once makes it hard to tell what worked and can add extra stress. In many cases, damaged tissue will not fully recover, but understanding when brown spots can be reversed helps set realistic expectations. A good sign you’re back on track is steady new growth that stays evenly colored for 2–4 weeks.