Brown Spots on Leaves: Causes and Practical Fixes

 Covers what brown spots usually mean for plant health, the most common environmental causes, how infections create spotting patterns, and how to tell damage types apart. Includes a step-by-step inspection routine, treatments by cause, when spots can be reversed, and prevention tips for healthy foliage.
Rusty brown speckles or patches on leaves often mean the plant is stressed by care or environmental conditions. You can usually pinpoint the cause by noting which leaves are affected, whether the spots are dry or soft, how quickly they spread, and any recent changes in watering, light, temperature, or airflow. This guide outlines the most common reasons and practical, dependable fixes to help your plant recover.
What brown spots usually indicate in plant health
Brown spotting is usually a sign that some leaf tissue has died (necrosis) after stress or damage. The tricky part is that very different problems can create similar-looking marks, so the best clue is how the spots look and where they show up first: older vs. newer leaves, edges vs. centers, and whether the spots are dry, soft, or ringed.
In practice, these marks tend to point to a handful of common categories. Use the patterns below to narrow the likely cause before you change your care routine.
| What you see on the leaf | What it often suggests | Why it happens | Quick way to confirm |
|---|---|---|---|
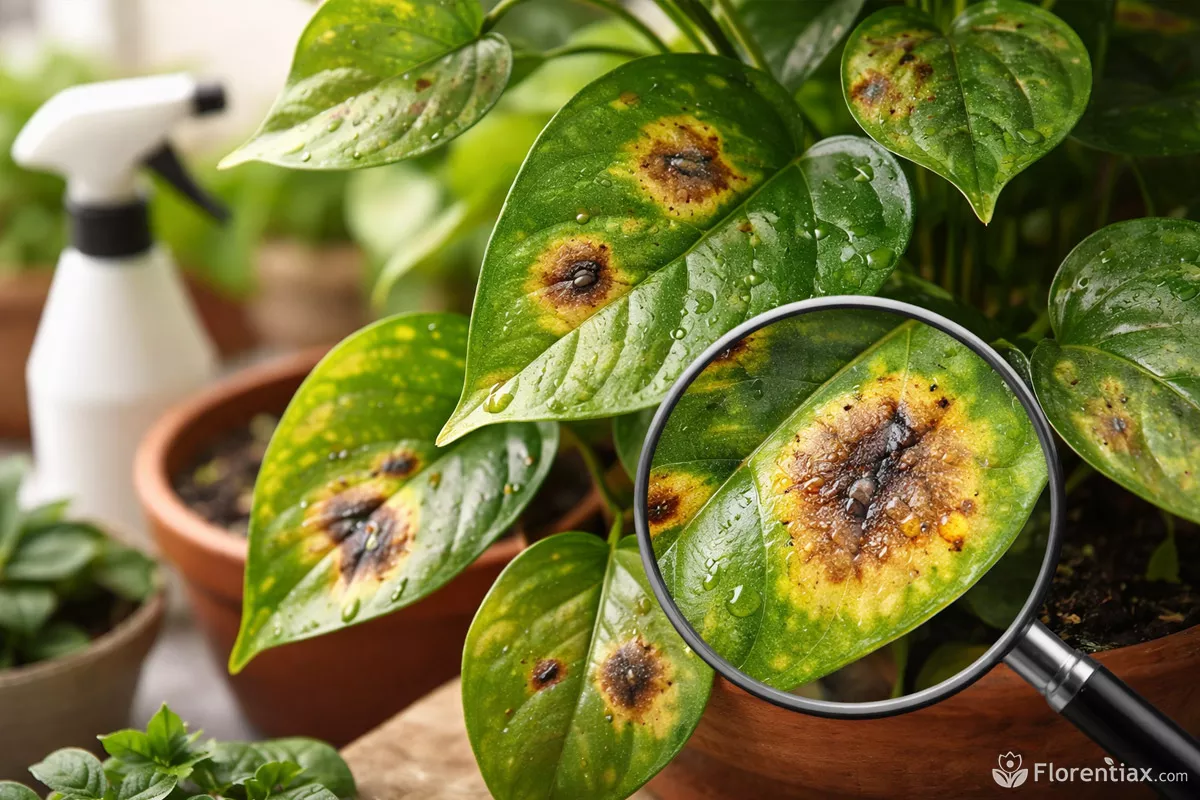
| Small, round or irregular brown spots, sometimes with a yellow halo | Leaf spot disease (fungal or bacterial) | Pathogens enter through wet leaf surfaces or tiny wounds; moisture helps them spread | Spots slowly expand; new spots appear after overhead watering or high humidity; affected leaves may drop |
| Crispy brown edges or tips, especially on older leaves | Water stress or salt buildup | Roots can’t supply enough water, or dissolved salts/fertilizer burn the margins | Soil is often very dry or, conversely, constantly wet; white crust on soil/pot rim can hint at salts |
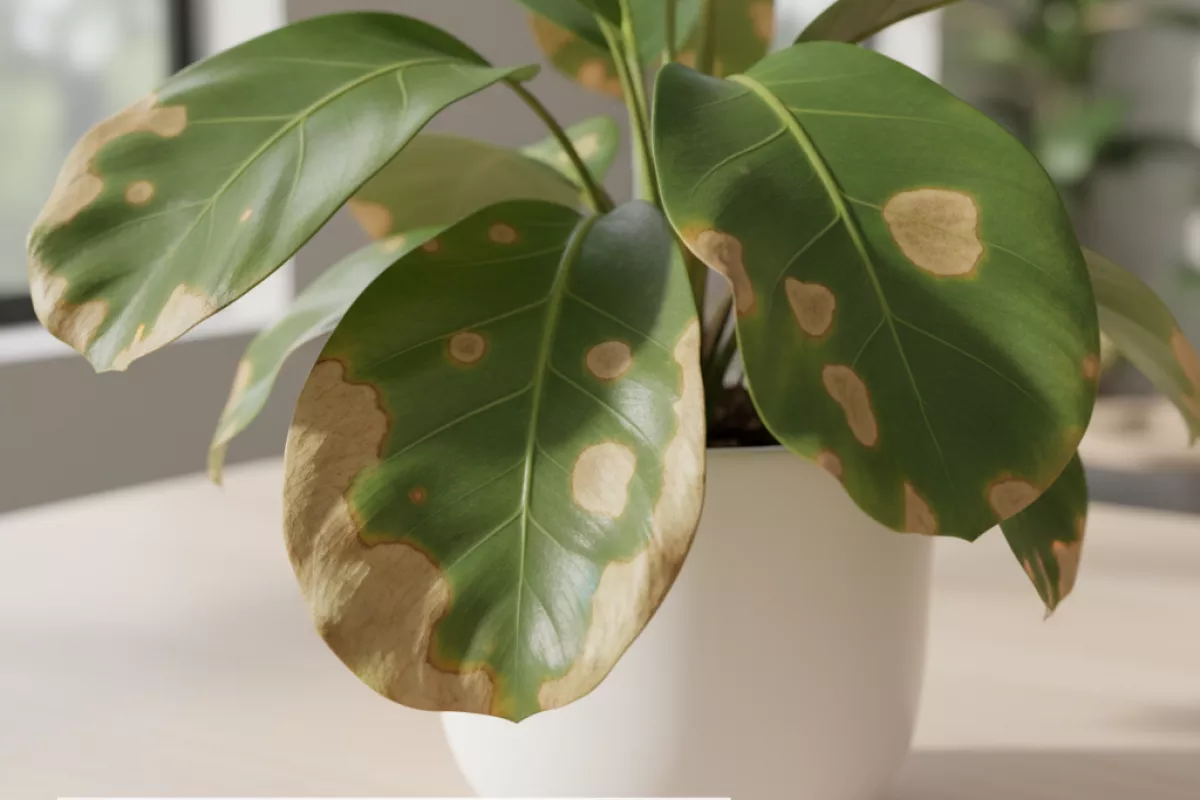
| Large tan-to-brown patches on the side facing a window or grow light | Sunscald or heat stress | Leaf tissue overheats or is suddenly exposed to stronger light than it’s adapted to | Damage is localized to the brightest/hottest exposure; newer growth may look normal if conditions stabilize |
| Dark, water-soaked spots that turn brown/black; leaf may feel soft | Overwatering-related root stress or rot | Low oxygen in soggy soil weakens roots; opportunistic microbes follow | Potting mix stays wet for many days; roots may smell sour; plant wilts even though soil is damp |
| Speckling plus silvery scarring, stippling, or tiny black dots | Pest feeding (thrips, mites, etc.) | Insects/mites pierce cells; damaged areas dry out and brown | Check undersides with a bright light; tap leaves over white paper to spot moving pests |
| Interveinal yellowing with brown patches, often starting on older leaves | Nutrient imbalance (commonly potassium or magnesium issues) | Mobile nutrients are pulled from older leaves to support new growth | Pattern follows veins (yellow between veins, browning later); growth may be slow; review feeding schedule |
One helpful rule: spots that spread (more leaves affected over time, enlarging lesions, halos) lean toward infection or pests, while spots that stay put often come from a one-time stress event like sunburn or a missed watering. If you suspect soggy soil is involved, run a quick check with the overwatering risk calculator to confirm whether your watering habits and pot setup are likely keeping roots too wet. Either way, the leaf won’t “heal” where it’s already brown, so you’re looking for whether new growth comes in clean after you adjust conditions.
Most common environmental causes
When leaf tissue develops brown patches, the trigger is often something in the growing environment rather than a pest or disease. Look at where the plant sits, how it’s watered, and what the weather has been doing over the last 7–14 days—those clues usually narrow it down fast. If your routine tends to be irregular, use how to water indoor plants without overwatering as a baseline so you can keep moisture steady without leaving roots constantly wet.
| Environmental trigger | What the spots typically look like | Quick checks | Practical fix |
|---|---|---|---|
| Sunscald (too much direct sun) | Tan-to-brown, papery areas on the most exposed leaves; edges may crisp | Spots appear after a move to a brighter window or outdoors; damage is worst on the sun-facing side | Shift to bright, indirect light or add shade cloth; acclimate over 7–10 days; keep soil evenly moist (not soggy) |
| Underwatering or irregular watering | Dry, brittle brown tips and margins; older leaves often show it first | Pot feels very light; mix pulls away from the pot; wilting improves soon after watering | Water thoroughly until excess drains; then water again when the top 2–5 cm (1–2 in) is dry; consider a moisture meter for consistency |
| Overwatering and poor drainage | Brown spots with yellowing; leaves may feel soft; lower leaves drop | Soil stays wet for days; musty smell; pot has no drainage or saucer stays full | Empty saucers; repot into a draining mix; ensure drainage holes; let the top 2–5 cm (1–2 in) dry before watering again |
| Low humidity / dry indoor air | Crispy brown edges and tips, especially on thin-leaved tropical plants | Worse in winter heating or near vents; humidity often below 40% (common indoors) | Group plants, use a humidifier, or move away from vents; aim for ~45–60% relative humidity (use a hygrometer) |
| Heat or cold stress (drafts, radiators, AC) | Sudden browning, blotches, or edge burn; sometimes looks “scorched” overnight | Plant sits within 30–60 cm (12–24 in) of a heater/AC or in a drafty doorway; recent temperature swings | Relocate to a stable spot; avoid direct airflow; keep most houseplants around 18–27°C (65–81°F) unless they prefer cooler |
| Water quality (salts, chlorine/chloramine, excess fertilizer) | Brown tips and margins; white crust on soil or pot rim | Using softened water; frequent feeding; runoff leaves mineral residue | Flush the pot with 3–4× the container volume of water (e.g., 3 L for a 1 L pot; 0.8 gal for a 0.26 gal pot) monthly; switch to filtered/rainwater; fertilize at half-strength |
| Leaf wetness + poor airflow | Round or irregular brown spots that start as water-soaked patches; may spread | Leaves stay wet for hours after misting or late-day watering; plant is crowded | Water at the soil line; increase spacing and airflow; remove badly marked leaves; avoid misting if it keeps foliage wet |
- Don’t judge by old damage. Brown tissue won’t turn green again—use new growth as your progress meter after you adjust care.
- Check pattern and location. Edge burn points to moisture/humidity/salts; top-facing patches suggest sun or heat; scattered spots that worsen when leaves stay wet often trace back to moisture sitting on foliage.
- Change one variable at a time. If you repot, move the plant, and change watering all at once, it’s harder to learn what actually caused the leaf spotting.
How infections create spotting patterns
Leaf spot diseases usually start when a pathogen lands on a wet leaf, germinates, and enters through natural openings (stomata) or tiny wounds. The plant responds by walling off the invaded tissue, which is why you often see a defined dot or patch rather than a whole leaf turning brown at once. As the infection expands and the plant keeps “compartmentalizing,” the mark develops a recognizable pattern—rings, halos, dark margins, or scattered freckles.
Moisture is the big enabler. Many fungi and bacteria need a film of water on the leaf for several hours to infect, so outbreaks follow overhead watering, frequent rain, crowded canopies, or leaves that stay wet overnight. Once established, spores or bacterial ooze spread by splashing water, hands/tools, and sometimes wind, creating new spots in clusters.
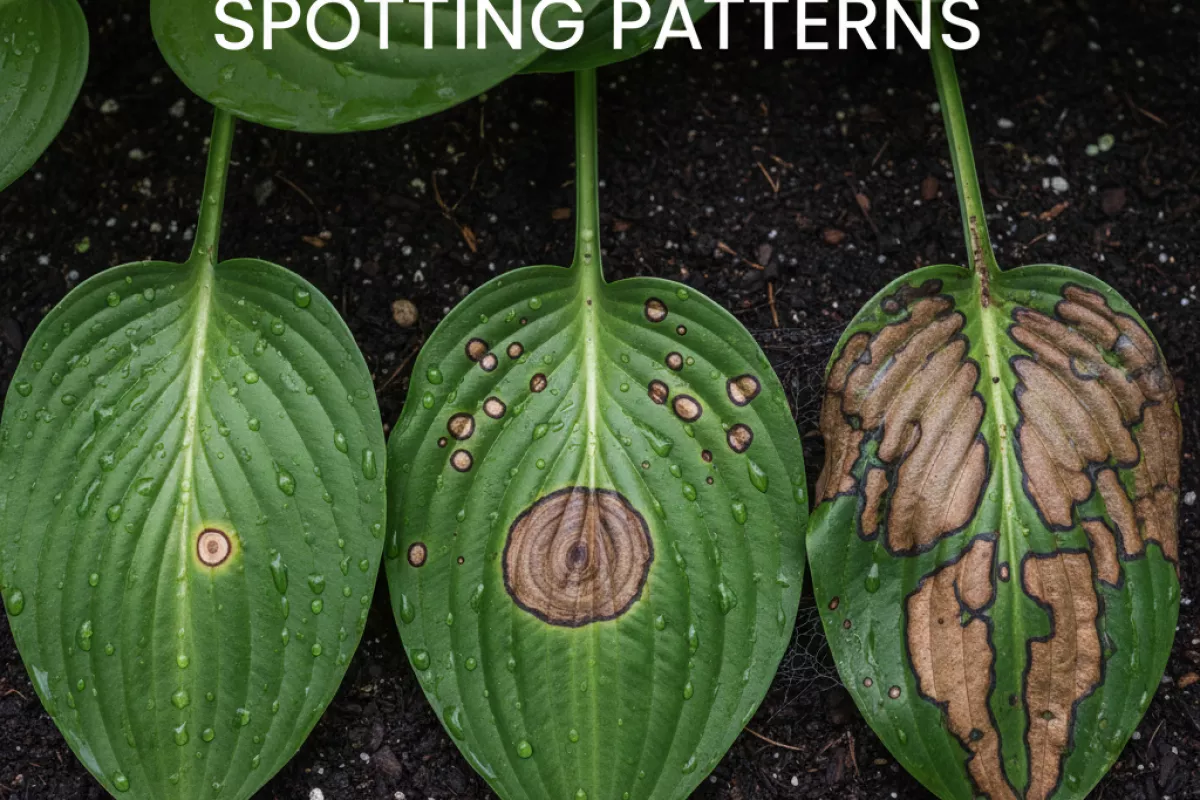
- Fungal leaf spots tend to look dry or papery, often with darker borders and sometimes concentric “target” rings. Tiny black dots in the center can be fruiting bodies, a clue the lesion is actively producing spores.
- Bacterial spots often start as water-soaked specks that turn brown or black. They may look angular because veins limit the spread, and a yellow halo is common on susceptible plants.
- Oomycete diseases (water molds) can create blotchy brown areas that expand quickly in cool, wet conditions; the underside may show a faint gray or white growth when humidity stays high.
- Viral patterns are less “spotty” and more mottled or ringed (mosaic, line patterns). Tissue may not be truly dead at first, but the discoloration can later brown as the leaf ages.
The shape of a lesion is a useful hint. Round spots suggest the pathogen is spreading evenly from a single entry point, while angular blotches point to movement constrained by leaf veins. A crisp dark edge usually means the plant has successfully slowed the advance; a fuzzy, rapidly enlarging patch suggests the organism is still moving through healthy tissue.
| What you see on the leaf | What it often suggests | Practical next step |
|---|---|---|
| Small round tan spots with dark margins; may show “target” rings | Common fungal leaf spot | Remove the worst leaves, keep foliage dry, improve airflow, avoid splashing soil onto leaves |
| Angular brown/black spots limited by veins; yellow halo; starts water-soaked | Bacterial infection favored by wet foliage | Stop overhead watering, disinfect tools, avoid handling plants when wet, isolate if possible |
| Fast-spreading brown blotches in cool, damp weather; faint growth underneath | Oomycete issue (water mold) | Reduce humidity, space plants, water early so leaves dry, remove infected debris promptly |
| Rings, mosaics, or streaky mottling; distortion without clear dead centers | Possible virus (often spread by pests) | Control aphids/whiteflies, remove severely affected plants, don’t propagate from symptomatic material |
Spotting also “maps” where conditions were right for infection. Lesions concentrated on lower leaves often trace back to soil splash and poor airflow near the potting mix; spots on the outer canopy can point to wind-driven rain or overhead irrigation. If the newest growth is clean while older leaves are marked, it may mean you already improved conditions and the disease is no longer actively spreading.
Differences between damage types

Brown marks can look similar at a glance, but the pattern (where the spots start and how they spread) usually points to the real cause. Use the leaf’s “map”: edges vs. centers, older vs. newer leaves, and whether the tissue is dry, soft, or ringed.
| What you see on the leaf | Most likely cause | Quick check | Practical fix |
|---|---|---|---|
| Dry, crispy brown edges or tips; leaf looks “scorched” | Underwatering, low humidity, salt buildup, or fertilizer burn | Feel the soil 5 cm (2 in) down; check for white crust on soil/pot rim | Water deeply until it drains; flush with 3× pot volume (e.g., 3 L per 1 L pot / 0.8 gal per 0.25 gal pot); pause feeding 2–4 weeks |
| Soft, dark brown patches; sometimes yellow halo; tissue may feel wet | Overwatering/root stress or bacterial issues | Smell and texture: sour soil, constantly wet mix, or mushy roots | Let mix dry between waterings; improve drainage; remove badly damaged leaves; avoid splashing water on foliage |
| Round spots with a darker border; tan center; may merge into larger blotches | Fungal leaf spot | Spots start on lower leaves; worse after frequent misting or rain | Remove affected leaves; increase airflow; water at soil level; keep leaves dry for 12–24 hours after watering |
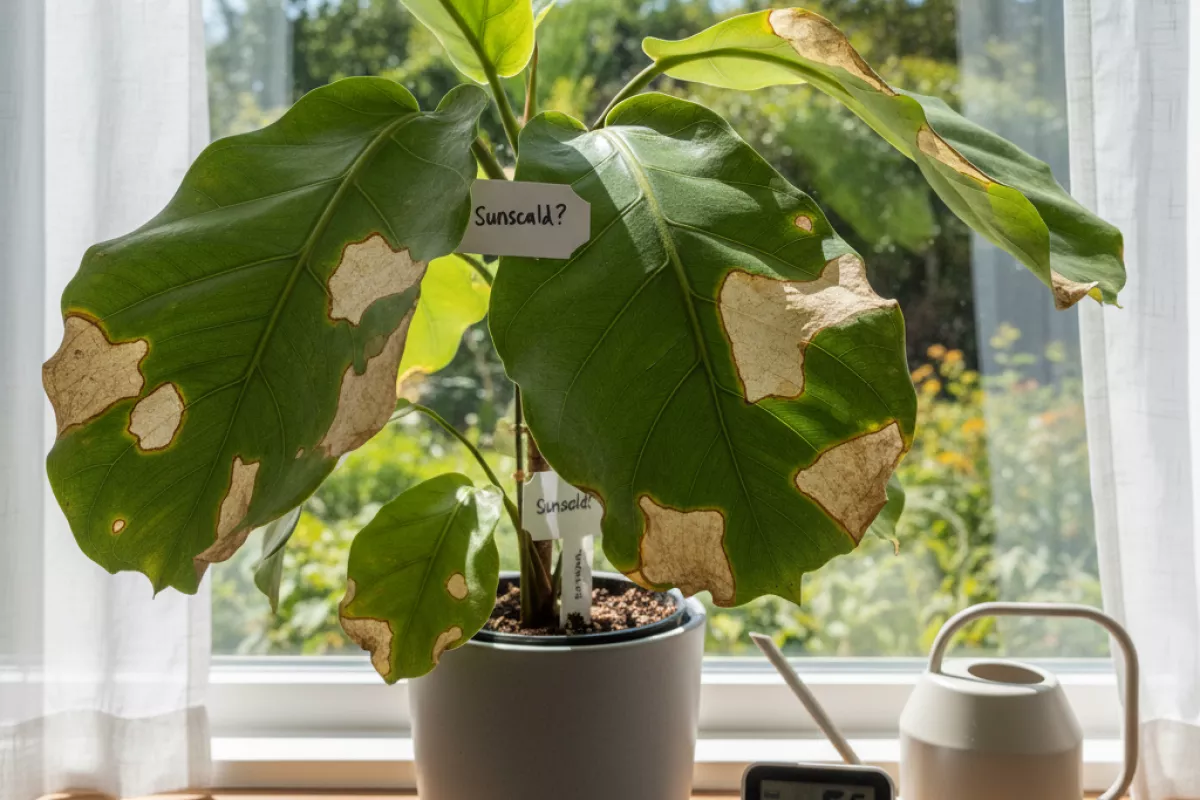
| Bleached/tan areas that later turn brown; often on the sun-facing side | Sunburn/light shock | Appears after moving plant into brighter light or outdoors | Shift to bright indirect light; acclimate over 7–14 days; use a sheer curtain or move back 30 cm (12 in) |
| Brown patches between veins while veins stay greener (interveinal browning) | Nutrient imbalance (often potassium or magnesium) or pH-related lockout | Older leaves affected first; growth may slow; feeding history inconsistent | Use a balanced feed at half strength; if using hard water, switch to filtered/rainwater; repot if mix is old/compact |
| Fine speckling that turns bronze/brown; tiny webbing or “dusty” look | Spider mites or other sap-sucking pests | Tap leaf over white paper; look under leaves along veins | Rinse foliage; treat with insecticidal soap; repeat every 5–7 days for 2–3 cycles |
| Brown spots with silvery streaks; distorted new growth | Thrips | Look for tiny, slender insects; black specks (frass) on leaf undersides | Isolate plant; remove worst leaves; treat thoroughly (undersides too) every 5–7 days; add sticky traps nearby |
If you’re torn between two causes, focus on location and texture: edge burn is commonly water/salt related, while spots with halos or rings lean toward disease, and bleached areas usually trace back to light. Also note timing—damage that appears within 24–72 hours after a change (new fertilizer, new window, missed watering) is often environmental rather than infectious.
Step-by-step inspection routine
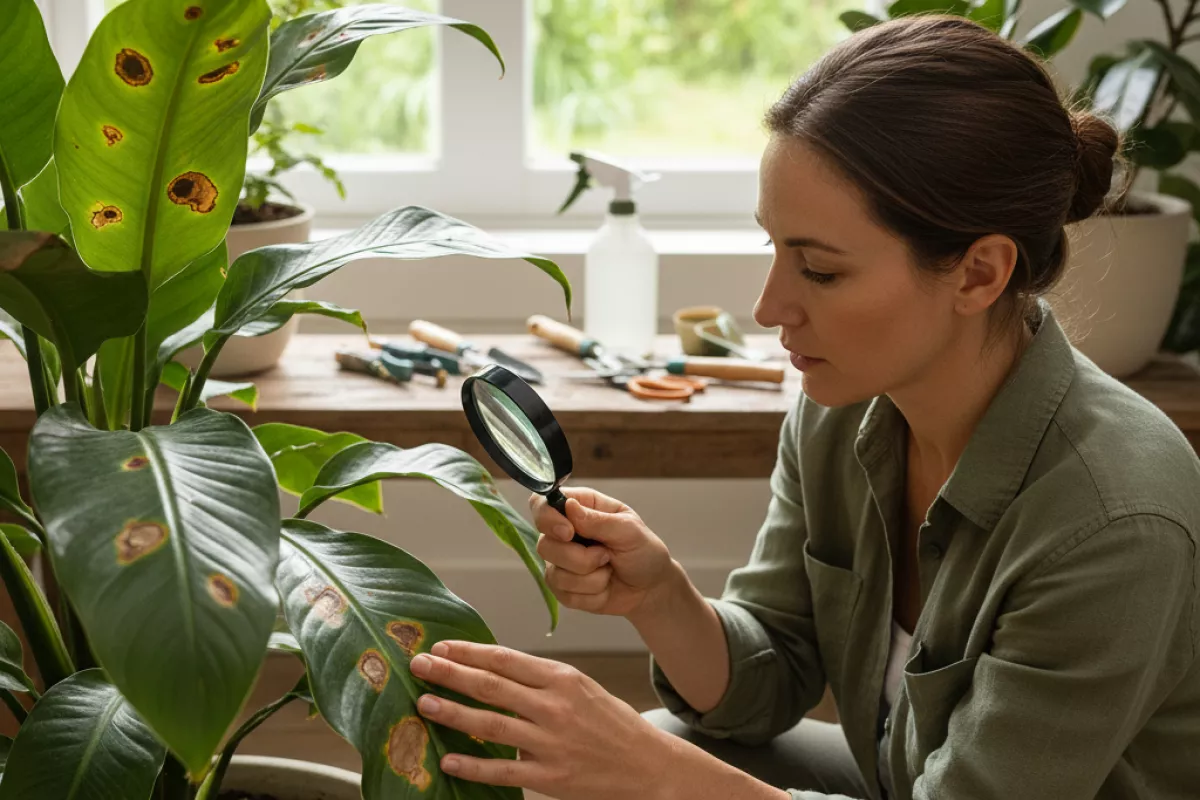
Start by slowing down and looking for patterns rather than individual marks. Brown spotting can come from water stress, sun scorch, pests, nutrient issues, or disease, and the quickest way to narrow it down is to inspect the whole plant and its growing conditions in a consistent order.
- Confirm what “brown” looks like on this plant.
- Are the spots dry and papery (often scorch or underwatering) or soft and dark (often rot or bacterial issues)?
- Do you see a yellow halo around lesions (common with several leaf spot diseases)?
- Are the edges crisping first, or are there scattered dots across the blade?
- Check which leaves are affected (location matters).
- Oldest, lowest leaves first: think watering inconsistency, root crowding, or mobile nutrient shortages.
- Newest growth first: consider sunburn after a move, cold damage, spray burn, or immobile nutrient issues.
- Only the side facing a window or lamp: light/heat stress is more likely than infection.
- Flip leaves over and inspect the “underside story.”
- Look for mites (fine stippling and webbing), thrips (silvery scarring and tiny black specks), or scale (raised bumps).
- Use a white paper test: tap a leaf over white paper; moving specks can indicate pests.
- Check along the midrib and where the leaf meets the petiole; pests hide in tight seams.
- Look for spread and symmetry.
- Random, expanding spots that appear on multiple leaves: more consistent with fungal/bacterial leaf spot.
- Uniform browning on many leaves at once: more consistent with environmental stress (temperature swing, watering change, chemical exposure).
- One or two leaves only: mechanical damage or a localized burn is possible.
- Inspect the potting mix and roots (the fastest reality check).
- Press a finger 2–3 cm (1–1.2 in) into the mix: soggy for days suggests poor drainage; bone-dry suggests missed watering.
- Smell the pot: sour or swampy odor can point to root rot.
- If the plant is struggling, slide it out and check roots: healthy roots are usually firm and light-colored; rotting roots are often brown/black and mushy—pair this with yellow leaves signal root rot to confirm whether the spotting is part of a root stress pattern.
- Review recent changes from the last 7–14 days (1–2 weeks).
- Moved closer to sun, heater, AC, or a drafty window?
- Repotted, fertilized, or sprayed with neem/soap? Concentration or timing can cause spotting.
- Heat wave or cold snap: even 5–8°C (9–14°F) swings can stress sensitive plants.
- Check watering quality and leaf-wetting habits.
- Frequent overhead watering plus slow air movement can encourage leaf spot diseases.
- Hard water can leave mineral residue; repeated buildup can contribute to edge burn on some species.
- If you mist, note whether droplets sit for hours; wet foliage overnight is a common trigger for spotting.
- Decide on immediate triage while you diagnose.
- Isolate the plant if spots are spreading quickly or look water-soaked.
- Remove the worst leaves with clean scissors; don’t compost suspect diseased material indoors.
- Improve airflow and avoid wetting foliage until you’re confident it’s not an infection.
| What you observe | Most likely direction | Quick confirmation check | First practical fix |
|---|---|---|---|
| Crispy brown patches on the brightest-exposed side | Sun/heat scorch | Damage matches light pattern; new growth looks normal after moving back | Shift back 30–60 cm (12–24 in) from harsh sun; acclimate gradually |
| Brown tips/edges, soil often dries hard | Underwatering or low humidity | Mix is dry 2–3 cm (1–1.2 in) down; leaves feel thin or brittle | Water thoroughly, then keep a steadier cycle; group plants or use a tray with pebbles |
| Dark, soft spots; pot stays wet; musty smell | Overwatering/root stress | Roots show mushy sections; mix is dense or drains slowly | Let mix dry partially; repot into a chunkier medium and trim rotten roots |
| Small spots with yellow halos that slowly expand | Fungal/bacterial leaf spot | Spots increase in number; worse after leaf-wetting | Remove affected leaves, keep foliage dry, increase airflow; sanitize tools |
| Stippling, silvery scarring, tiny specks or webbing | Pests (mites/thrips) | Tap test on white paper; inspect undersides with a lens | Rinse leaves, isolate, then treat repeatedly (e.g., insecticidal soap) per label |
| Spotting appears after feeding or spraying | Chemical or fertilizer burn | Pattern follows spray droplets or shows shortly after application | Flush soil with water; avoid spraying in strong light; dilute to label rate |
If you’re still unsure after this pass, take two photos: one of the whole plant and one close-up of a typical spot (top and underside). Comparing “where it is” and “how it looks” usually points you to the right cause faster than guessing based on color alone.
Treatment methods based on cause
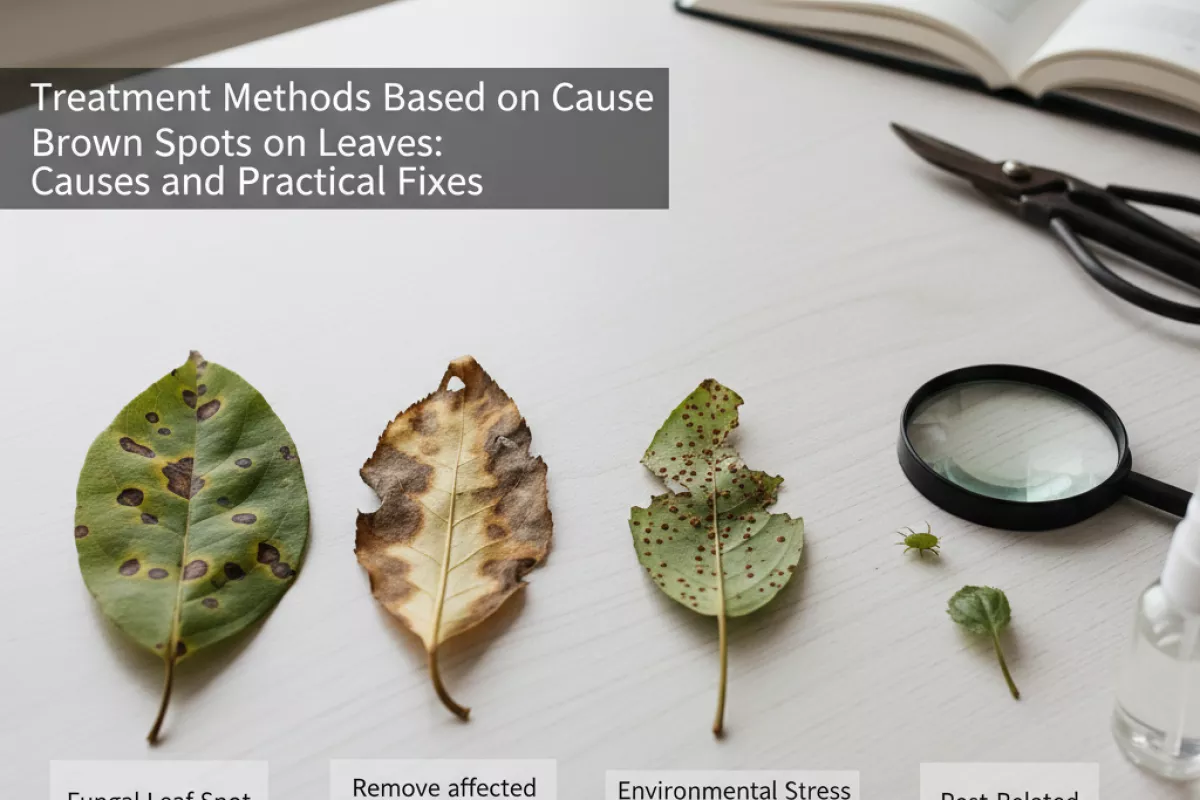
Fixing brown leaf spots starts with matching the response to what’s causing the damage. Some problems spread (fungi, bacteria), some are environmental (sun, salts, watering), and others are pest-related. Use the quick guide below to choose actions that actually fit the symptom pattern you’re seeing.
| Likely cause | What to do now (practical steps) | Prevention going forward |
|---|---|---|
| Fungal leaf spot (often round spots, may have yellow halos; spreads in humid conditions) |
|
|
| Bacterial leaf spot (water-soaked or angular spots; can look greasy; spreads with splashing) |
|
|
| Overwatering / poor drainage (brown patches plus yellowing, soft stems, musty soil) |
|
|
| Underwatering / low humidity (crispy brown edges or tips; leaves feel papery) |
|
|
| Sunscald / heat stress (bleached or tan patches that turn brown; often on the sun-facing side) |
|
|
| Nutrient issues (irregular browning plus chlorosis; pattern depends on nutrient) |
|
|
| Salt or chemical burn (brown tips/edges after fertilizing; white crust on soil; tap-water sensitivity) |
|
|
| Pests (stippling, tiny spots that merge; webbing or specks; distorted new growth) |
|
|
Whatever the trigger, damaged tissue won’t turn green again, so judge success by whether new leaves emerge clean and existing spots stop expanding. If symptoms continue despite corrections, treat it like an identification problem: re-check watering, inspect for pests at night, and if you see stippling or webbing, use severe spider mite problems to switch from casual rinsing to a repeatable treatment cycle that actually breaks the hatch pattern.
When spots can be reversed
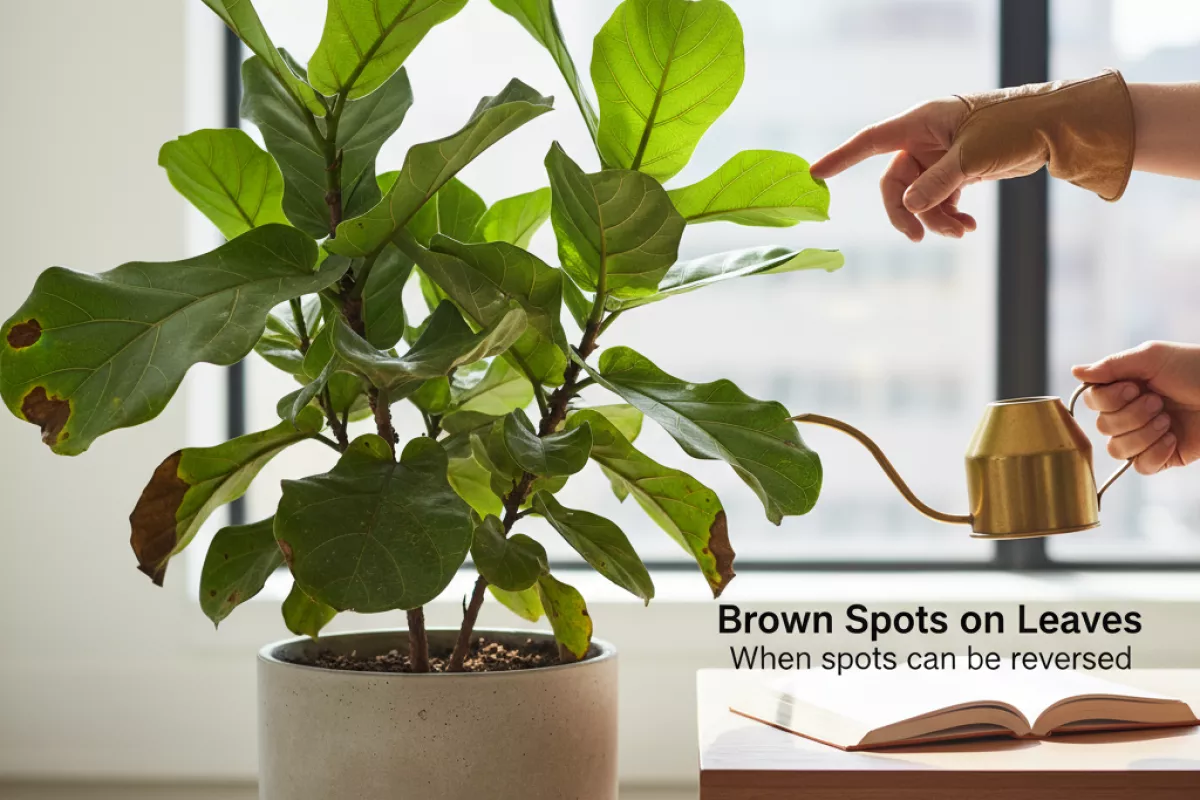
Some leaf discoloration improves once the underlying stress is fixed, but it helps to be clear about what “reversible” means. In most cases, the existing brown tissue won’t turn green again. What you’re looking for is whether the plant stops producing new marks and starts pushing healthy new growth.
A quick rule of thumb: if the spot is caused by a temporary care issue (water, light, nutrients, salts), you can usually stabilize the plant and prevent further damage. If it’s caused by a pathogen (many fungi/bacteria) or physical injury, you can often stop the spread, but the damaged areas remain as scars.
- Watering mistakes (too much or too little): Often recoverable. Correct the schedule and check drainage; new leaves should emerge clean. Old blotches typically stay.
- Sunscald/light shock: Recoverable in the sense that damage stops once the plant is moved to gentler light. Burned patches don’t heal, but fresh growth can be normal.
- Low humidity or dry air: Usually improves quickly after conditions change. Aim for steadier moisture in the air rather than sudden swings; crisp edges won’t revert.
- Fertilizer burn or salt buildup: Often fixable. Pause feeding and flush the pot with water until it runs freely from the drainage holes; then resume at a lower dose. The plant’s next leaves are the real test.
- Mild nutrient deficiency: Commonly reversible if corrected early. Once you supply the missing nutrient, new growth should look better, though older leaves may keep their spots.
- Minor pest damage: Can be contained. After treatment, you should see fewer new speckles; the original stippling or scars remain.
- Leaf spot diseases: Sometimes controllable, sometimes not. If you catch it early, remove affected leaves, improve airflow, and avoid wetting foliage; you may prevent new lesions even though existing ones persist.
| Cause category | What “recovery” looks like | What won’t change | What to do first |
|---|---|---|---|
| Water stress (over/underwatering) | New leaves emerge without brown patches; wilting slows within days | Necrotic (dead) brown areas stay brown | Adjust watering and confirm drainage; let the top 2–5 cm (1–2 in) dry for many houseplants |
| Light injury (sunburn, sudden increase) | No new scorched areas after moving/gradual acclimation | Bleached or papery sections won’t re-green | Shift to bright indirect light; acclimate over 7–14 days |
| Salt/fertilizer burn | Leaf edges stop browning; new growth looks cleaner | Burned tips remain as dry brown margins | Flush the pot thoroughly; restart feeding at 1/4–1/2 strength |
| Nutrient deficiency (early) | New growth improves after correcting nutrition | Old spots on older leaves often remain | Use a balanced fertilizer or targeted nutrient based on symptoms; avoid overcorrecting |
| Fungal/bacterial leaf spot | Spread slows/stops; fewer new lesions appear | Existing spots remain as scars or holes | Remove affected leaves, isolate the plant, keep foliage dry, increase airflow |
| Physical damage (bruising, cold/heat shock) | Plant resumes normal growth once conditions stabilize | Damaged tissue won’t repair | Prevent repeats: protect from drafts below 10°C (50°F) or hot vents above 32°C (90°F) |
If you’re unsure which bucket you’re in, watch the pattern over time: take a photo today, then compare in 7–10 days. If brown spots on leaves are still appearing on the newest growth after you’ve corrected care, it’s a sign to look harder for pests or disease rather than assuming it’s just an old mistake catching up.
Prevention strategies for healthy foliage
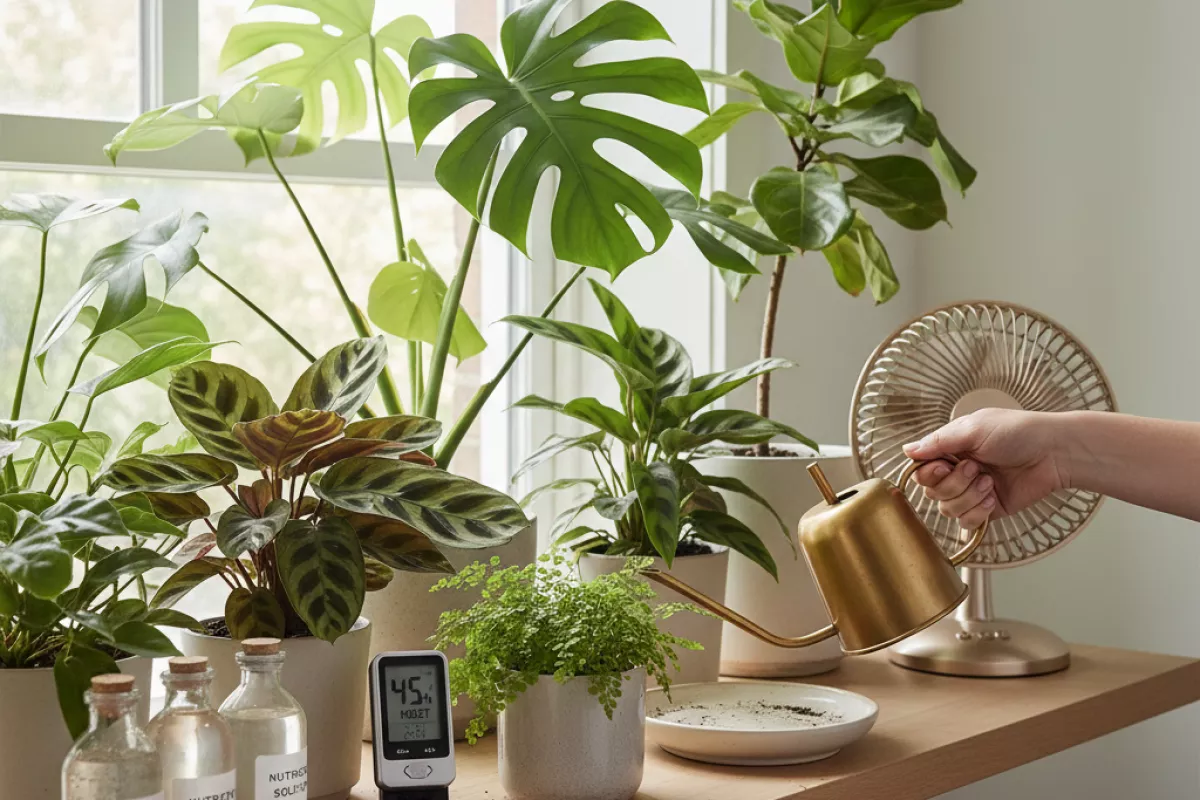
Stop leaf spotting before it starts by keeping the plant’s environment steady and the leaves dry. Most brown patches trace back to a few repeat offenders: inconsistent watering, poor airflow, excess salts, sun scorch, and early pest or disease pressure. A simple routine beats “rescue mode” every time.
- Water with a schedule, not a guess. Check moisture 2–5 cm (1–2 in) down; water when that layer is dry for most houseplants, and avoid frequent small sips that keep roots stressed. Empty saucers after 10–15 minutes to prevent soggy roots.
- Aim water at the soil, not the foliage. Wet leaves plus stagnant air invites fungal and bacterial spotting. If you must rinse dust off, do it early in the day so leaves dry fully.
- Improve airflow without chilling the plant. Space plants so leaves don’t constantly touch, and use a gentle fan if a room is still. Avoid cold drafts below 10°C (50°F) for tropicals, which can trigger blotches and edge browning.
- Match light to the plant’s tolerance. Sudden moves into strong sun can cause scorch marks. Acclimate over 7–14 days, increasing exposure gradually, and use a sheer curtain if midday rays are intense.
- Keep humidity in a safe middle range. Very dry air can brown tips, while constantly damp air can worsen spotting. For many indoor plants, 40–60% relative humidity is a practical target; group plants or use a humidifier rather than misting leaves repeatedly.
- Feed lightly and flush salts. Overfertilizing can burn leaf tissue and mimic disease. During active growth, use a diluted feed (for example, 1/2 strength) and mix fertilizer correctly so concentration stays consistent; then flush the pot with clean water every 4–8 weeks, letting at least 2–3× the pot’s volume run through (e.g., 2 L (68 fl oz) for a 1 L (34 fl oz) pot).
- Use clean tools and tidy habits. Disinfect pruners between plants, remove fallen leaves, and trim badly damaged foliage so it doesn’t harbor pathogens. Bag and discard infected debris rather than composting it.
- Quarantine new or struggling plants. Keep newcomers separate for 10–14 days to watch for pests or spreading lesions. Early isolation prevents a small issue from becoming a room-wide problem.
- Inspect weekly, especially undersides. Catching mites, thrips, and scale early prevents stippling that later turns into brown patches. Wipe leaves with a damp cloth and look for webbing, black specks, or sticky residue.
- Choose the right pot and soil. Ensure drainage holes are clear and use a mix that suits the species. Compacted, water-holding soil is a common setup for root stress that later shows up as spots and yellowing.
| Risk factor | What you’ll notice first | Preventive habit |
|---|---|---|
| Overwatering / poor drainage | Soft, spreading brown areas; yellowing; musty soil | Water only after the top 2–5 cm (1–2 in) dries; empty saucers; use airy mix |
| Underwatering / irregular watering | Crispy edges, tip burn, curling | Check moisture on a set day; soak thoroughly, then let excess drain |
| Leaf wetness + low airflow | Round spots with halos; spots that multiply | Water soil-level; increase spacing; keep leaves dry overnight |
| Sun scorch | Tan to brown bleached patches on exposed side | Acclimate over 7–14 days; filter harsh light at midday |
| Salt buildup (fertilizer/hard water) | Brown tips/edges; white crust on soil | Dilute feed; flush every 4–8 weeks; alternate with filtered water if needed |
| Pests (mites, thrips, scale) | Speckling, silvery streaks, sticky residue | Weekly underside checks; wipe leaves; quarantine new plants 10–14 days |
If you’re unsure what’s driving the browning, change one variable at a time (light, watering, airflow) and watch new growth. Old spots won’t heal, but healthy new leaves are your sign the routine is working.