Spider Mites on Plants – Identification and Control

 Covers what spider mites are and how they look, early infestation signs, where they hide and feed, and the damage patterns they cause. Explains a simple inspection to confirm them, effective treatment options, what to do when infestations get severe, and preventive care to stop recurrence.
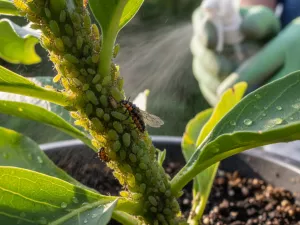
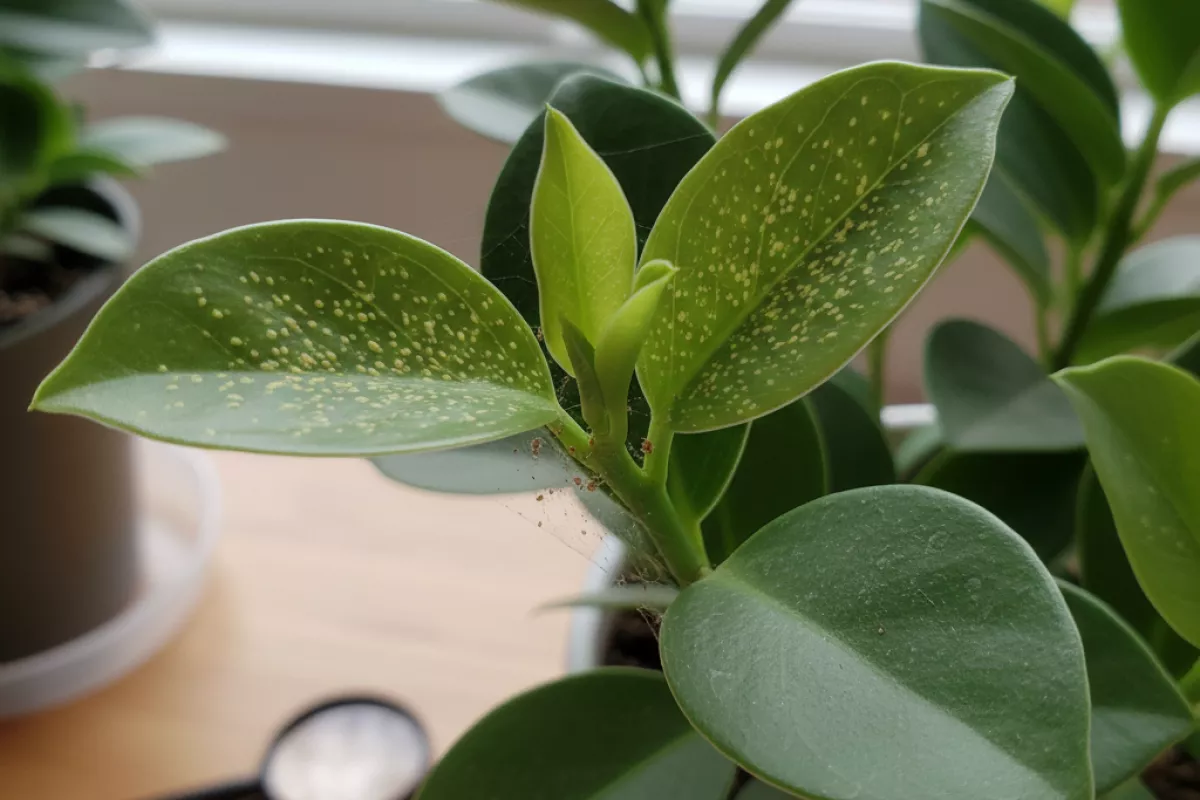
Tiny webbing and pale speckling on leaves can be early signs of spider mite damage, even before you see the mites themselves. These sap-sucking pests reproduce rapidly in warm, dry conditions and can weaken plants fast. Inspect leaf undersides, isolate affected plants, and improve humidity and airflow. Prompt treatment with water sprays or appropriate controls can stop infestations early and support recovery.
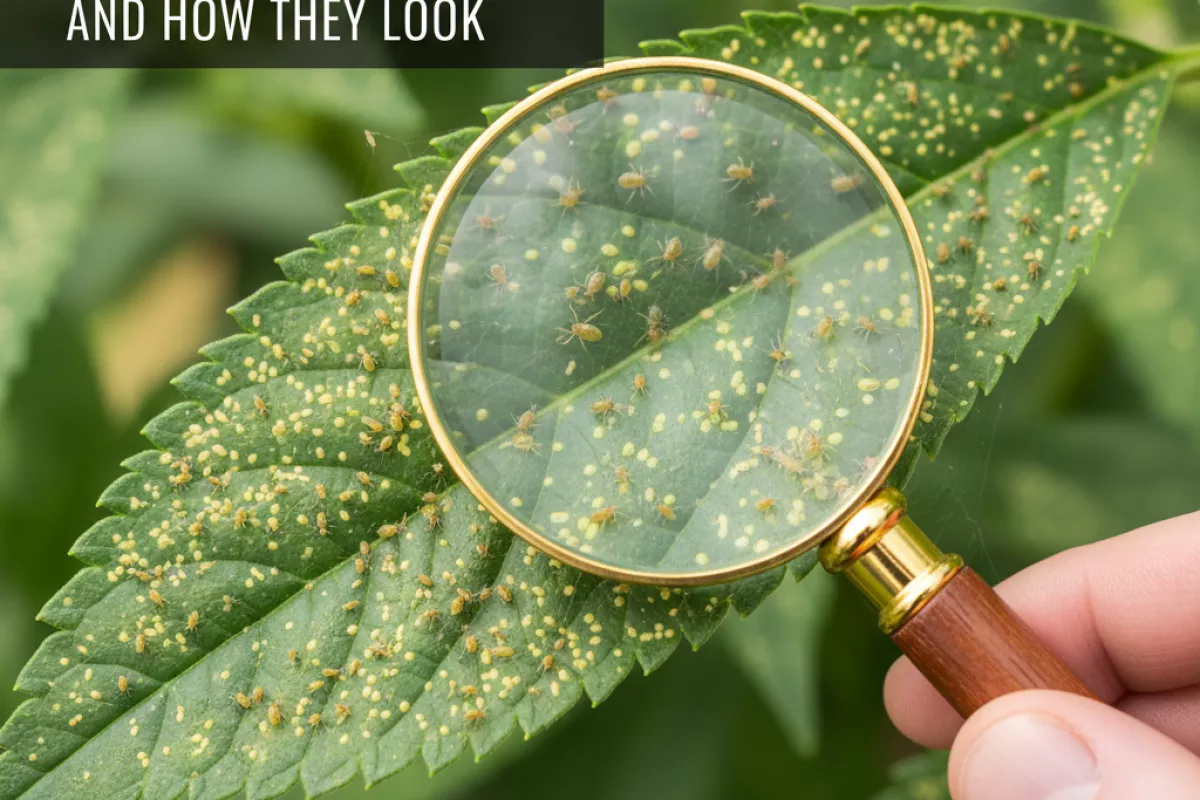
What spider mites are and how they look
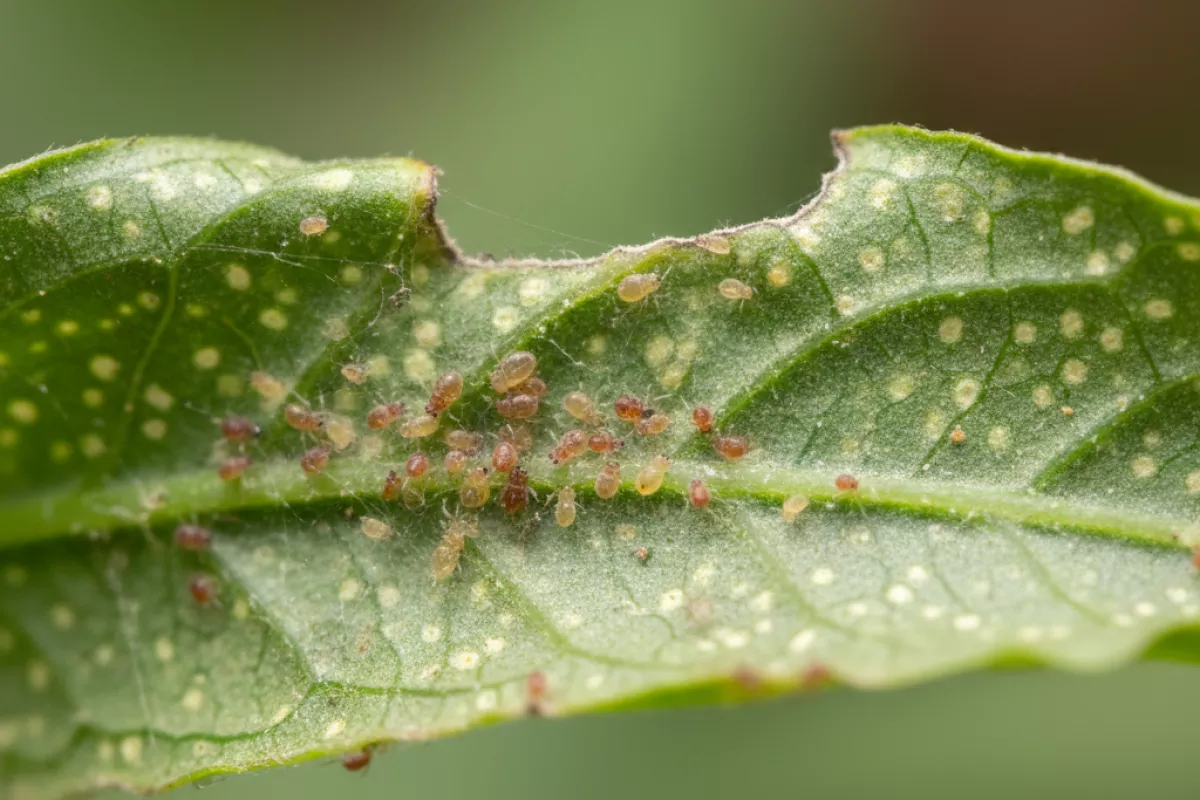
These pests are tiny plant-feeding arachnids (more closely related to spiders and ticks than to insects). They pierce leaf cells and drink the contents, which is why early damage often looks like pale speckling rather than chewed holes. Because they’re so small, most people notice the symptoms first and the mites second.
Adult mites are usually about 0.4–0.5 mm (0.016–0.020 in) long, so you may need a hand lens to see details clearly. Many species appear yellow-green to tan, but they can also look reddish or brown depending on the species, season, and what they’ve been feeding on. Eggs are even smaller and are typically round and translucent to pearly.
- Size: Pinpoint-small; adults around 0.4–0.5 mm (0.016–0.020 in), with eggs and young stages smaller.
- Body shape: Oval, with eight legs as nymphs and adults (young larvae may have fewer legs early on).
- Color: Variable—often pale yellow/green, sometimes amber, rusty red, or dark brown.
- Where they hide: Most commonly on the undersides of leaves, along the midrib and veins, and in tight plant crevices.
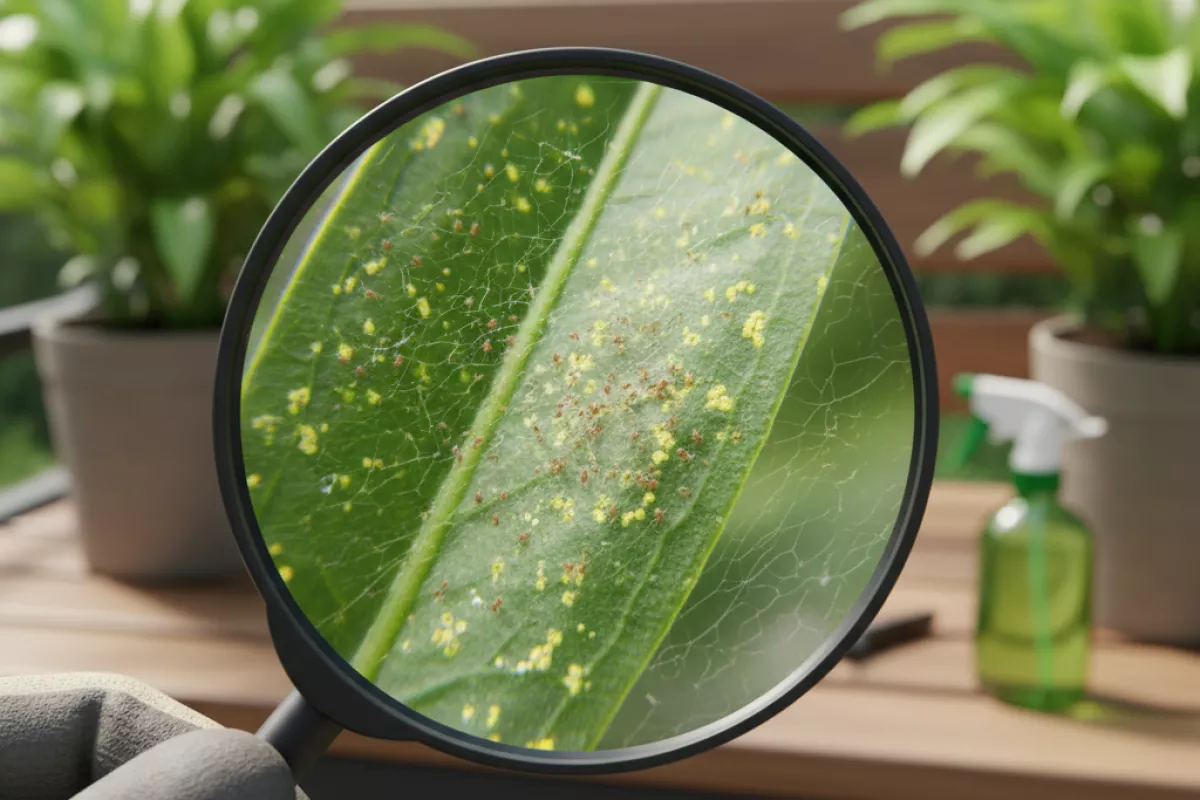
- Webbing: Fine silk may appear when populations are high; it can look like dusty threads between leaf stems and leaf undersides.
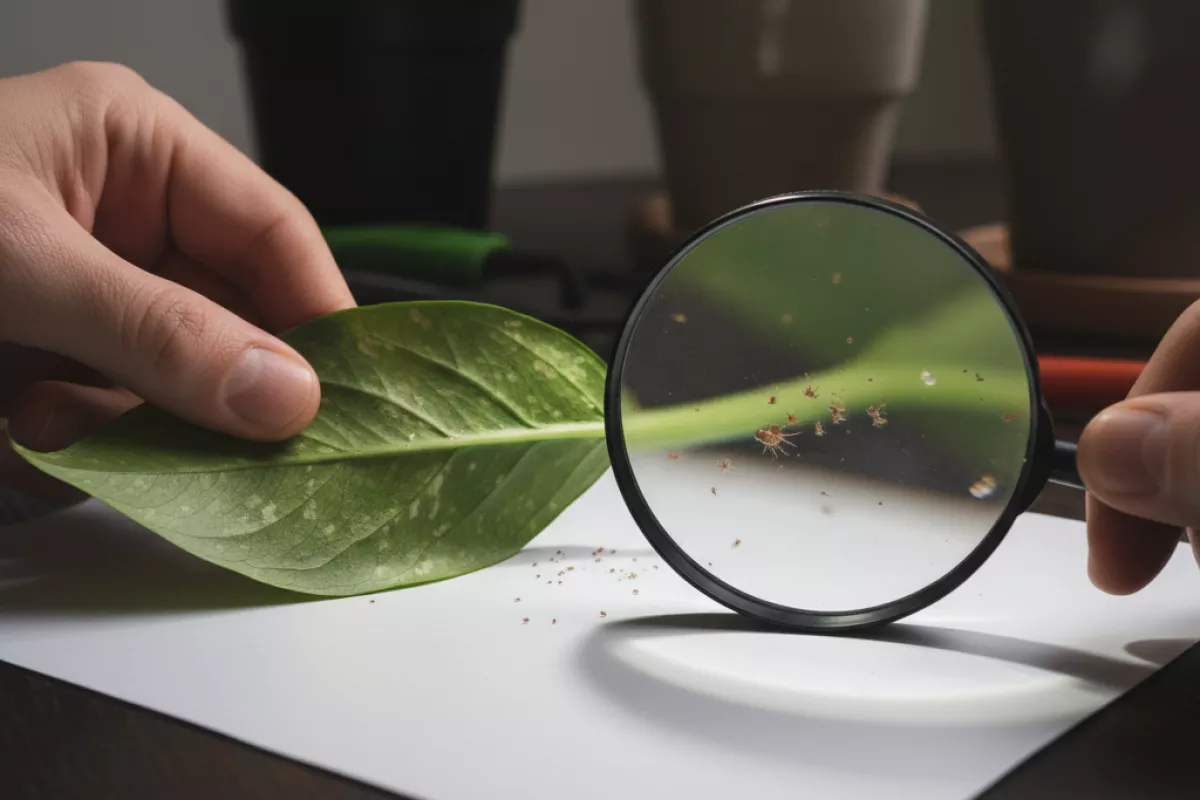
A quick way to confirm them is the “tap test”: hold a white sheet of paper under a leaf and tap the foliage. If tiny moving dots fall onto the paper and slowly crawl around, you’re likely dealing with mites rather than nutrient issues or sunscald. Under magnification, you may also see clusters of round eggs near webbing or along leaf veins.
| What you notice | What it usually means |
|---|---|
| Fine pale “stippling” on leaves (tiny light dots) | Feeding damage from cell punctures; often the earliest visible sign |
| Bronzing or dull, dusty-looking foliage | Ongoing feeding; chlorophyll loss and stressed leaf tissue |
| Leaf edges curling, drying, or dropping | Advanced infestation or plant stress compounded by heat and low humidity |
| Fine webbing between petioles and leaf undersides | High populations; webbing helps them move and shelter |
| Tiny moving specks on white paper after tapping a leaf | Live mites present; confirm with a 10× hand lens if possible |
Early signs of infestation on plants
Catch a mite problem early and you can often stop it with simple steps. The tricky part is that the first symptoms look like mild drought stress or nutrient issues, especially on indoor plants and greenhouse crops. Check the newest growth and the undersides of leaves first; that’s where colonies usually build up.
- Fine stippling on leaves: tiny pale dots or “sandblasted” specks that start near veins and spread outward. This is feeding damage from piercing mouthparts.
- Dull, faded color: leaves lose their shine and look gray-green or bronzed, even when watering is consistent.
- Leaf undersides look dusty: you may see pepper-like specks (mites, shed skins, and frass) clustered along midribs and leaf folds.
- Very thin webbing: delicate threads between petioles and leaf edges, often easiest to spot in early morning light or after a light misting.
- New growth stalls or deforms: tips may stay small, look crinkled, or fail to unfurl properly as feeding concentrates on tender tissue.
- Leaves dry and drop sooner than expected: older leaves yellow, crisp at the edges, then fall, even though the plant isn’t root-bound.
- “Tap test” reveals movement: hold a white sheet of paper under a leaf and tap the stem; tiny moving dots on the paper can indicate mites (a hand lens helps confirm).
| What you notice | What it often suggests | Quick way to confirm |
|---|---|---|
| Light speckling that doesn’t wipe off | Early feeding injury | Inspect undersides with a 10× hand lens; look for tiny oval bodies and translucent shed skins |
| Bronzing or a dull, gray cast | Ongoing damage and chlorophyll loss | Compare a suspect leaf to a shaded, protected leaf on the same plant |
| Fine webbing at nodes and leaf edges | Population is climbing | Mist lightly with water; threads become easier to see against the leaf surface |
| Leaf drop plus crispy margins | Stress compounding the infestation (heat, low humidity) | Check the hottest, driest spot first (near vents, windows, or heaters) |
| Distorted new leaves or stunted tips | Feeding concentrated on tender growth | Look at the newest leaves with magnification; mites often cluster along folds |
If you’re unsure whether it’s mites or something else, look for a pattern: damage usually starts as pinpoint stippling, then turns into bronzing, then webbing as numbers increase. Also note conditions—spider mites thrive in warm, dry air, so symptoms often show up faster when indoor temperatures hover around 25–30°C (77–86°F) and humidity is low.
Where mites hide and feed
These tiny pests spend most of their time on the most protected parts of a plant, which is why an infestation can look “mysterious” at first. They prefer thin, tender tissue and sheltered surfaces where they can pierce cells and sip out the contents, leaving behind pale stippling and a dull, dusty look.
Start your inspection on the underside of leaves. That’s the most common hangout because it’s shaded, less exposed to rain or overhead watering, and harder for predators (and you) to reach. When populations build, they spread outward to nearby leaves and stems and may begin producing fine webbing that catches dust and makes the damage easier to spot.
- Leaf undersides (especially along the midrib and veins): A favorite feeding zone; look for tiny moving specks, pale pinpricks, and faint yellowing between veins.
- Leaf edges and folds: Curled margins, cupped leaves, and tight folds create pockets that protect eggs and juveniles.
- New growth and soft tips: Tender tissue is easier to puncture, so fresh shoots and expanding leaves often show the first distortion or bronzing.
- At the junctions: Check where leaf meets petiole and where petiole meets stem; mites and eggs can tuck into these creases.
- Webbing “bridges” between leaves and stems: When numbers are high, webbing can connect plant parts and shelter colonies as they spread.
- Nearby surfaces: Heavy infestations can extend to plant stakes, pot rims, and the undersides of benches, then crawl back onto foliage.
They’re most active in warm, dry conditions, so pay extra attention to plants near heat sources, sunny windows, or areas with low humidity. A quick check with a white sheet of paper can help: tap a leaf over the paper and watch for tiny dots that move slowly; that motion is often easier to see than the mites themselves.
Damage patterns caused by mites
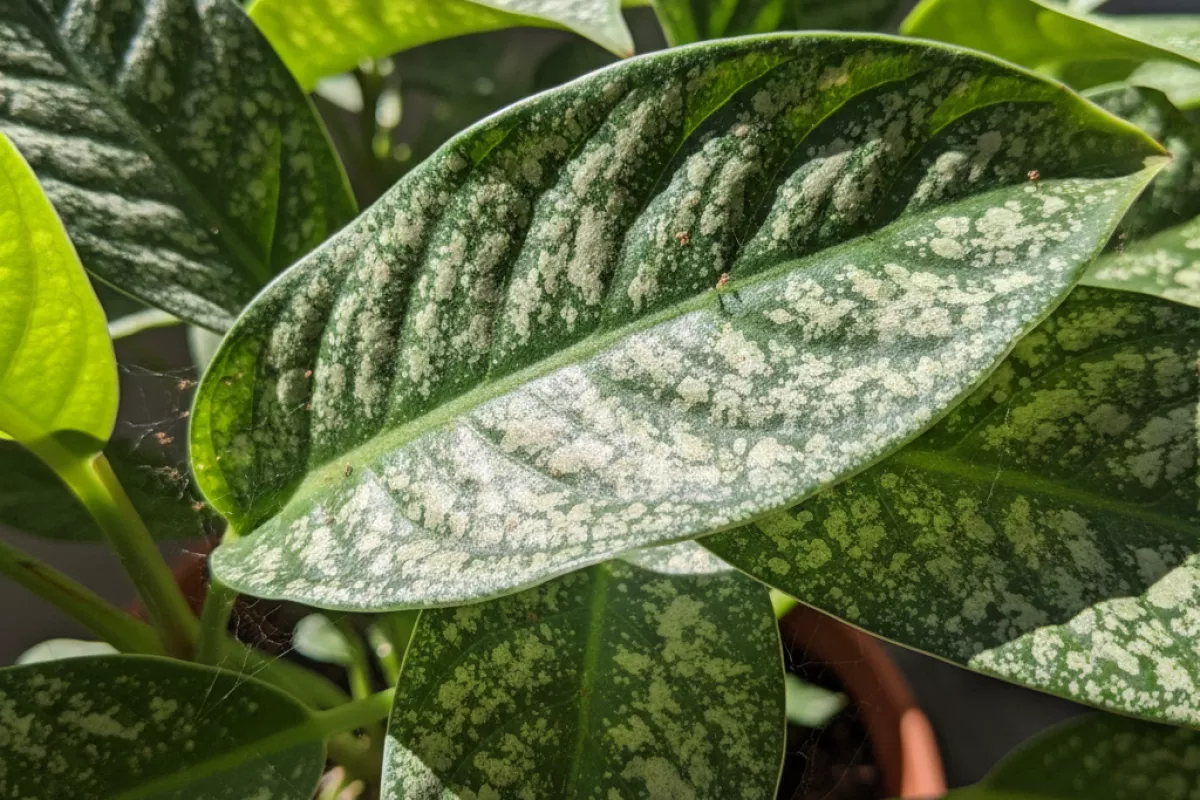
Feeding by these tiny sap-suckers leaves a fairly consistent trail: leaves lose their deep green color first, then develop a speckled, dusty look, and finally dry out or drop. The clues are easiest to spot on the upper leaf surface in bright light, while the mites themselves usually stay on the undersides.
- Fine stippling (pinprick dots): early damage looks like pale, scattered dots where chlorophyll has been removed. On broad leaves, this can resemble light sandblasting.
- Bronzing or silvery cast: as feeding continues, stippling merges into larger patches, often turning leaves bronze, gray-green, or slightly metallic.
- Yellowing between veins: some plants show interveinal chlorosis first, with veins staying greener than the surrounding tissue.
- Leaf curl and distortion: tender new growth may twist, cup, or pucker, especially on houseplants and many ornamentals.
- Dry, crisp edges: margins brown and become brittle, particularly when plants are already under heat or drought stress.
- Premature leaf drop: heavily affected leaves shed to conserve resources, leaving plants thin and weak-looking.
- Stunted growth: repeated feeding reduces photosynthesis, so plants lag behind in size and vigor even if they don’t immediately defoliate.
- Webbing: fine silk threads appear along veins, petioles, and growing tips as populations build; dust and debris often stick to the webbing, making it more visible.
- Flower and fruit impacts: buds may abort, petals can look dull or flecked, and fruit may size unevenly or show russeted, rough patches.
| What you see | What it usually suggests | Where to check first |
|---|---|---|
| Scattered pale dots that don’t rub off | Early feeding; population may still be low | Undersides of older leaves near the midrib |
| Bronze/silvery patches, dull overall color | Ongoing feeding and reduced photosynthesis | Upper leaf surface in bright light; flip to confirm mites below |
| Fine webbing in leaf axils or at tips | High numbers; rapid spread likely | New growth, stem junctions, and crowded interior foliage |
| Crisp edges, leaf drop, general decline | Severe stress; plant may be struggling to recover | Whole plant, especially hot/dry exposure zones |
One reason spider mite injury is missed is that it can mimic nutrient issues. A quick check helps: stippling from mites stays as tiny, discrete dots and doesn’t wipe away, while dust or mildew often smears. If you tap a leaf over white paper, you may see tiny moving specks; that’s often enough to connect the leaf symptoms to an active infestation.
Damage also tends to appear in “hot spots.” Plants near sunny windows, heaters, or dry airflow often show worse symptoms first, because warm, dry conditions speed up mite reproduction and make leaves more vulnerable.
Simple inspection method for confirmation
Confirming an infestation is easiest when you combine a close look with a quick “tap test.” Because these pests are tiny and often hide on the undersides of leaves, you’re looking for a pattern of clues rather than one obvious bug.
- Start with the most telling leaves. Check older, lower leaves first, then any leaves showing pale speckling, bronzing, or a dusty look. Flip the leaf over and focus on the veins and where the leaf meets the petiole (leaf stem).
- Use bright light and mild magnification. A phone flashlight plus a 10× hand lens (or a phone macro lens) makes a big difference. Look for tiny moving dots and fine, silky webbing stretched between veins or from leaf to leaf.
- Do the white paper tap test. Hold a sheet of plain white paper under a suspect leaf and tap or flick the leaf firmly 3–5 times. Any mites will fall onto the paper and start moving; gently tilt the paper to spot the motion more easily.
- Differentiate from look-alikes. If the dots jump like fleas, you may be seeing springtails. If you see pear-shaped insects clustered with sticky residue, use identify and control aphids to confirm quickly. Spider mites tend to crawl and are often paired with stippling and webbing.
- Check multiple spots on the plant. Inspect at least 3–5 leaves from different areas (top, middle, bottom). A single “clean” leaf doesn’t rule anything out; early infestations can be patchy.
- Record what you find and recheck soon. If you’re unsure, take a close photo and repeat the inspection in 48–72 hours (2–3 days). A fast increase in speckling, crawling dots, or webbing strongly supports a mite problem.
- What confirms it: moving pinhead-sized mites on the paper, plus leaf stippling and/or fine webbing on undersides.
- What makes it less likely: no movement on the paper after repeated taps and damage that looks more like uniform yellowing from watering or nutrition issues.
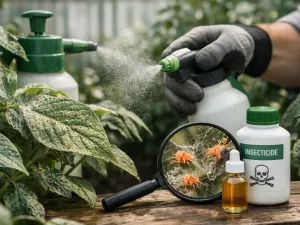
Effective treatment options
Stop the outbreak by combining fast knockdown with follow-up care. These tiny sap-feeders multiply quickly in warm, dry conditions, so the best results come from repeating treatments, improving humidity, and targeting the undersides of leaves where colonies and eggs cluster.
- Isolate the plant and prune hotspots. Move the affected plant away from others and remove the worst-infested leaves or tips. Bag and discard the cuttings so pests don’t crawl back.
- Rinse thoroughly (first-line for light infestations). Use a firm spray of lukewarm water to blast leaf undersides, stems, and leaf joints. Repeat every 2–3 days for 1–2 weeks to keep knocking down newly hatched mites.
- Wipe leaves for sturdy houseplants. For plants with broad, tough leaves, wipe both sides with a damp cloth. This physically removes webbing, eggs, and adults and helps any follow-up spray contact the surface evenly.
- Use insecticidal soap (contact control). Spray until the plant is evenly coated, especially the underside of leaves. Because soaps work on contact and don’t reliably kill eggs, reapply every 5–7 days for 3–4 rounds. Test on a small area first and avoid spraying in strong sun to reduce leaf burn.
- Apply horticultural oil or neem oil (smothering action). Oils can suppress multiple life stages by coating them, but coverage is everything. Treat in the cooler part of the day and repeat every 7–10 days. Don’t apply oil to drought-stressed plants, and avoid combining with sulfur-based products within about 30 days.
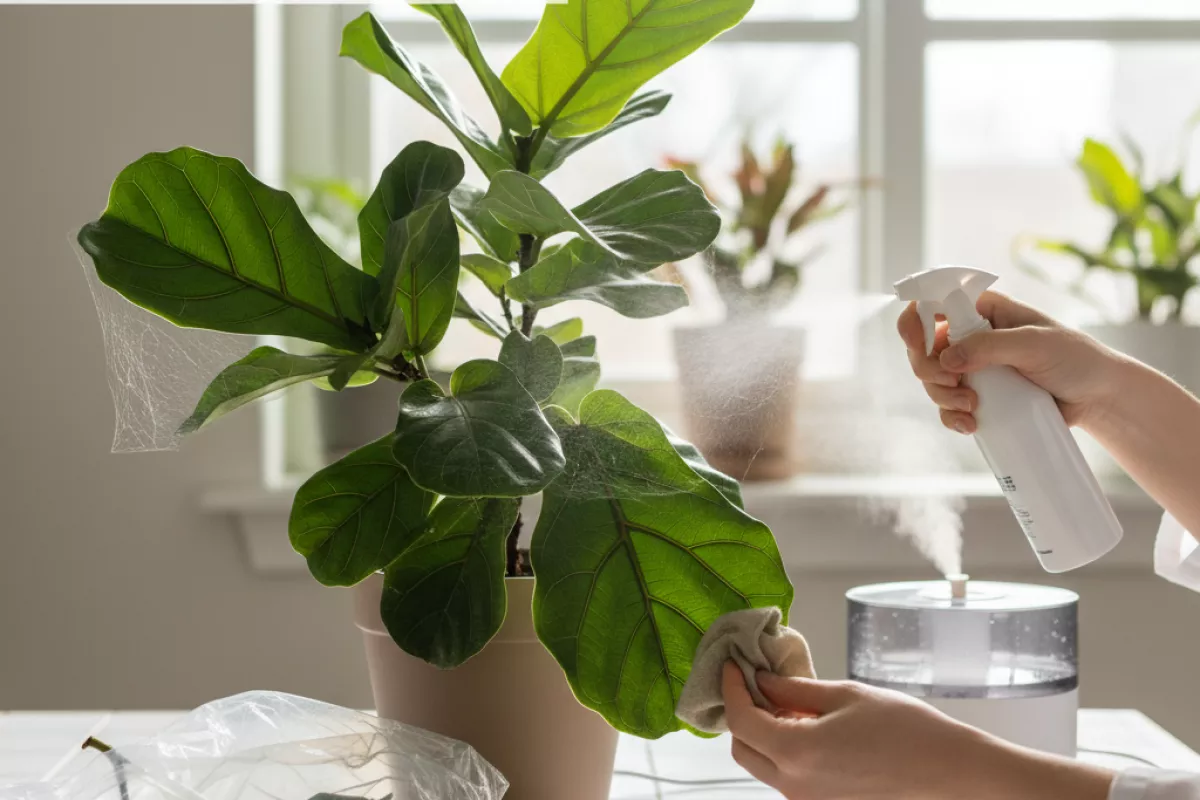
- Increase humidity and reduce heat stress. Many spider mite problems accelerate when air is very dry. Aim for steadier moisture around the plant (without waterlogging the soil). A humidifier nearby often helps more than occasional misting, which dries quickly and can encourage leaf spot on some species.
- Introduce beneficial predators (best for ongoing prevention). Predatory mites can be very effective in indoor growing areas, greenhouses, and on clustered plants. They work best when you catch the issue early and avoid broad-spectrum pesticides that would kill the helpers.
- Consider a targeted miticide for severe cases. If webbing is heavy and leaves are bronzing or dropping, a product labeled for mites may be needed. Rotate active ingredients to slow resistance, follow label intervals, and treat at least 2–3 times to cover hatch cycles. If the label gives a rate per 1 L (0.26 gal) or per 1 gal (3.8 L), mix precisely rather than “eyeballing.”
- Clean the area to prevent reinfestation. Wash pots, saucers, and nearby surfaces; launder curtains or plant stands if webbing is present. Vacuuming around the plant can remove stragglers, especially in dry indoor spaces.
When infestations become severe

At a certain point, a light outbreak turns into a plant-wide problem: leaves lose their color, growth stalls, and fine webbing starts to connect stems and leaf undersides. By then, spot-treating a few leaves usually isn’t enough. The goal shifts to stopping spread, reducing the mite population fast, and helping the plant recover without adding extra stress.
- Confirm it’s widespread. Check multiple areas (top, middle, and lower canopy). If you see stippling on many leaves, webbing across several nodes, or mites on new growth, treat the whole plant.
- Isolate immediately. Move the plant away from others, ideally to a separate room or at least 1–2 m (3–6 ft) apart. Mites crawl and hitchhike on hands, tools, and sleeves.
- Remove the worst foliage. Prune heavily damaged leaves and bag them before carrying through the house. Don’t compost. This reduces the number of eggs and adults you’re fighting.
- Rinse thoroughly, not gently. A firm shower to the undersides of leaves can knock down large numbers. Repeat every 2–3 days. Let the pot drain fully so roots don’t sit in water.
- Use a “rotation” mindset. Eggs are the hard part. Plan multiple treatments spaced 3–7 days apart (depending on product label and temperature) to catch newly hatched mites before they reproduce.
- Cover all surfaces. Sprays must reach leaf undersides, petioles, and tight crevices. Incomplete coverage is a common reason severe spider mite issues keep rebounding.
- Reduce plant stress. Keep the plant evenly watered and out of harsh sun for a few days after treatment. If the potting mix stays wet too long or compacts easily, improving healthy soil for plant roots can speed recovery by restoring oxygen around the root zone. Avoid heavy fertilizing until new, clean growth appears.
| What you’re seeing | What it usually means | What to do next |
|---|---|---|
| Webbing across multiple leaves and stems | High population; mites are well established and protected | Rinse first, then treat the entire plant; repeat on a schedule to break the life cycle |
| New growth is curled, pale, or distorted | Feeding pressure is affecting tender tissue | Prioritize coverage on tips and undersides; remove badly deformed leaves if they won’t recover |
| Stippling/yellowing on most leaves, leaf drop starting | Plant is losing photosynthetic capacity | Prune the worst leaves, stabilize watering, and avoid heat stress while you treat |
| Reinfestation within 7–14 days after treatment | Eggs survived, coverage was incomplete, or nearby plants are a reservoir | Increase rinse frequency, tighten treatment intervals, and inspect/treat neighboring plants and windowsills |
If the plant is small and the infestation is heavy, it can be reasonable to discard it rather than risk the rest of your collection. Seal it in a bag, clean the area, and monitor nearby plants for 2–3 weeks. For valuable plants, persistence matters more than intensity: consistent, well-timed follow-ups are what finally bring spider mites under control.
Preventive care to avoid recurrence

Keep future flare-ups unlikely by making the growing area less comfortable for mites and easier for you to monitor. Most repeat problems come from dry air, stressed plants, and missed early warning signs on the undersides of leaves. Stable watering reduces stress and helps plants tolerate minor feeding—use proper watering methods as your baseline.
- Quarantine new plants: Isolate newcomers for 10–14 days (1.5–2 weeks) and inspect leaf undersides with a hand lens. A quick rinse in the sink or shower can knock off hitchhikers before they spread.
- Raise humidity where it makes sense: Spider mites thrive in hot, dry conditions. For many houseplants, aim for about 50–60% relative humidity (use a hygrometer). Grouping plants or using a humidifier is more reliable than occasional misting, which dries quickly and can encourage leaf spots on some species.
- Water consistently and reduce stress: Drought-stressed plants are easier targets. Water when the top 2–5 cm (1–2 in) of potting mix is dry for typical houseplants, adjusting for species and pot size. Avoid letting plants swing between bone-dry and waterlogged.
- Limit dusty leaves: Dust gives mites shelter and makes scouting harder. Wipe smooth leaves with a damp cloth or rinse foliage every few weeks; let plants dry with good airflow afterward.
- Prune and thin crowded growth: Dense canopies hide early colonies. Remove heavily infested leaves and thin congested stems so spray coverage reaches leaf undersides.
- Use airflow, not heat blasts: Gentle circulation helps plants dry after rinsing or treatment, but avoid placing plants directly in hot drafts from heaters or vents, which lowers humidity and favors mites.
- Be cautious with high-nitrogen feeding: Overfertilizing can push tender, fast growth that pests prefer. Feed at label rates during active growth, and mix fertilizer correctly instead of eyeballing concentration; avoid “extra” doses as a quick fix for pale leaves.
- Clean the area around plants: Remove fallen leaves and weeds (indoors and outdoors). Wash trays, pots, and tools between plants, especially after an outbreak.
Set a simple scouting routine so you catch problems while they’re still small. Check susceptible plants weekly in warm weather or during winter heating. Look for pale stippling, fine webbing, and tiny moving dots along veins and leaf edges; a white paper “tap test” makes them easier to spot.
| Routine | How often | What to do |
|---|---|---|
| Quick inspection | 1× per week (more during heat waves) | Check 3–5 leaves per plant, especially undersides; isolate anything suspicious. |
| Rinse or wipe foliage | Every 2–4 weeks | Rinse leaves with lukewarm water or wipe with a damp cloth; focus on leaf undersides. |
| Humidity and watering check | 2× per week | Confirm humidity is stable; water before plants become stressed (avoid repeated dry-downs). |
| Deep clean after an outbreak | Once, then repeat in 7–10 days | Wash pots/trays, remove debris, and re-check nearby plants to catch stragglers and newly hatched mites. |
If you use biological controls, keep them working by avoiding broad-spectrum insecticides and by maintaining moderate humidity. Predatory mites and other beneficials can prevent a rebound, but they need a stable environment and early deployment to stay ahead of a growing population.