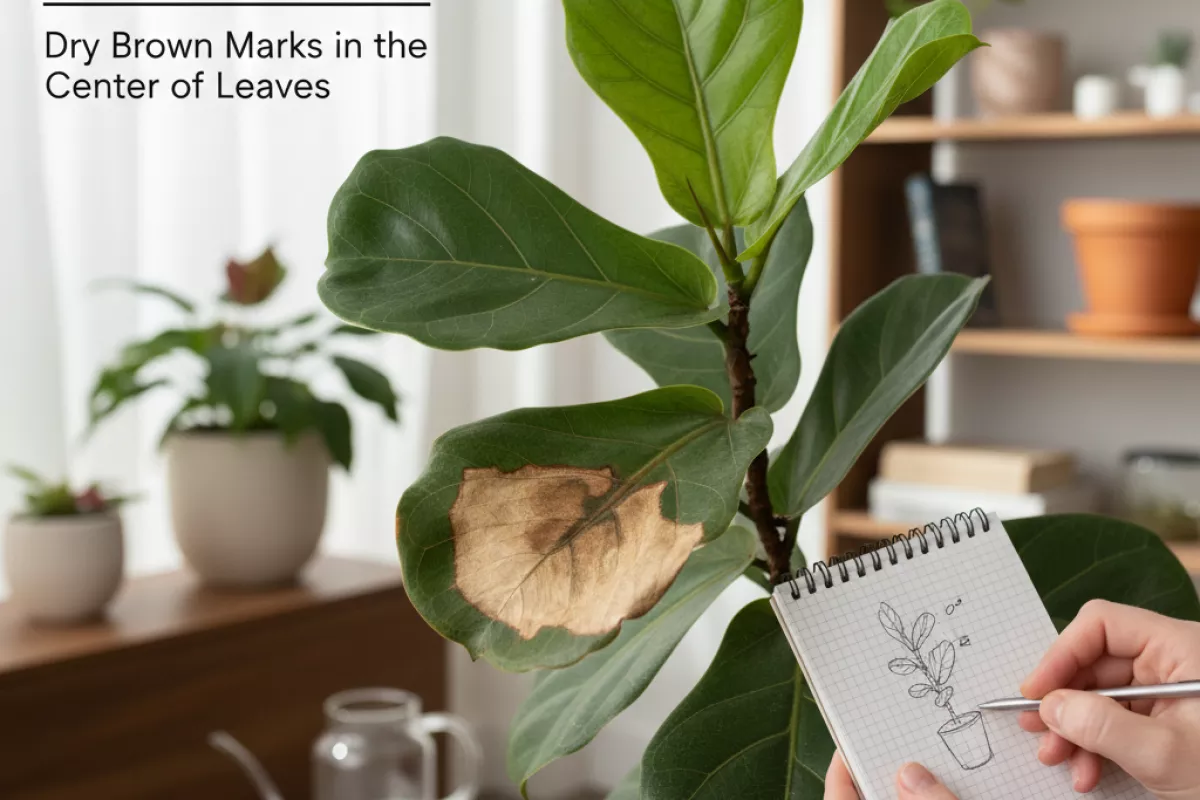
Dry Brown Marks in the Center of Leaves

 Explains why marks show up in leaf centers and what tissue damage patterns can reveal. Covers how sun exposure, heat stress, and nutrient imbalances look, plus quick checks to confirm the cause. Gives recovery steps and preventive care for future growth.
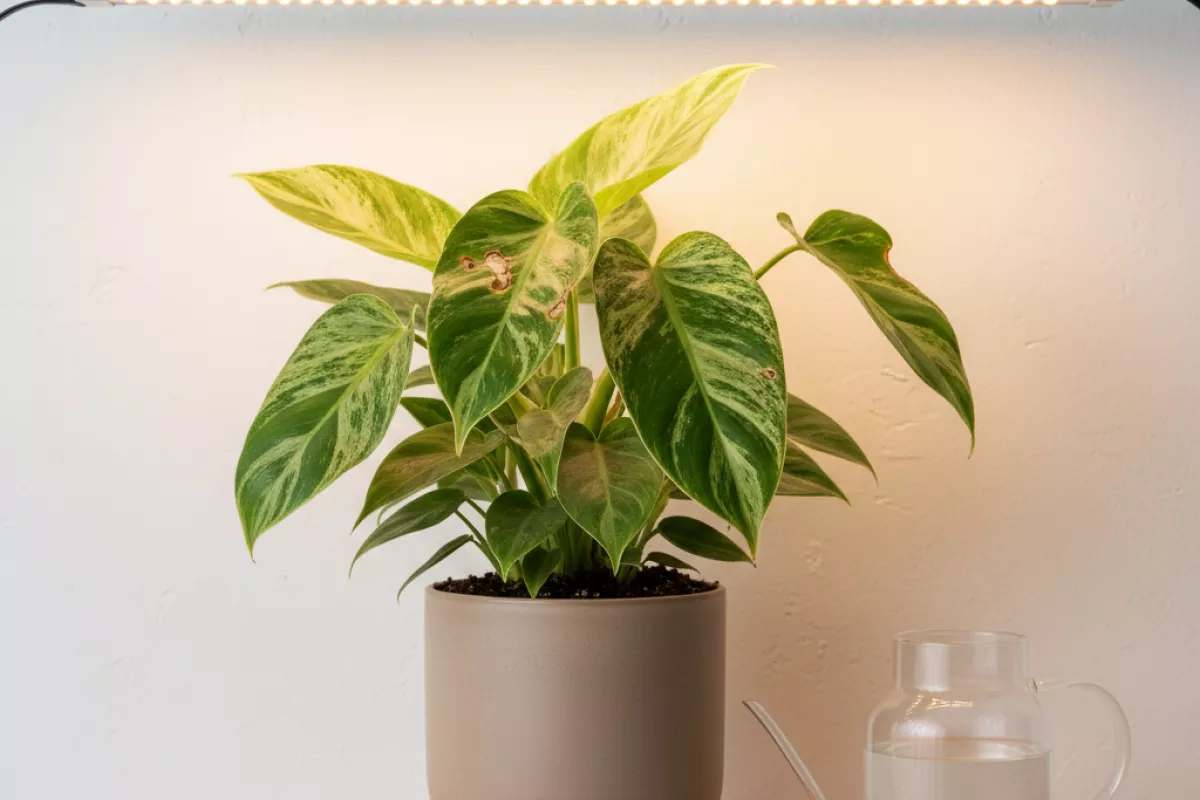
Crisp brown spots appearing in the middle of otherwise healthy leaves usually signal stress, not normal aging. Common triggers include sun scorch, uneven watering, fertilizer burn, pests, or the start of a disease. Look for patterns in where the spots form and think about recent changes in light, watering, or feeding so you can adjust care quickly and prevent further damage.
Why marks appear in leaf centers
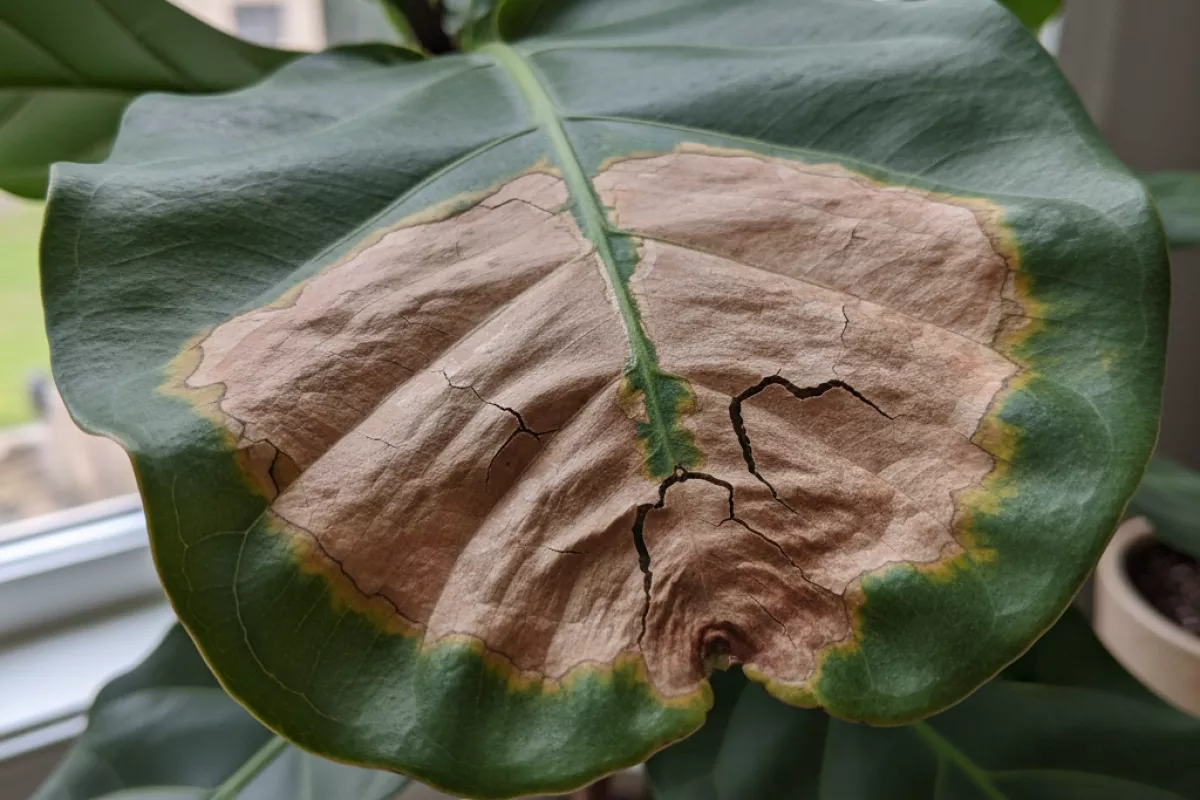
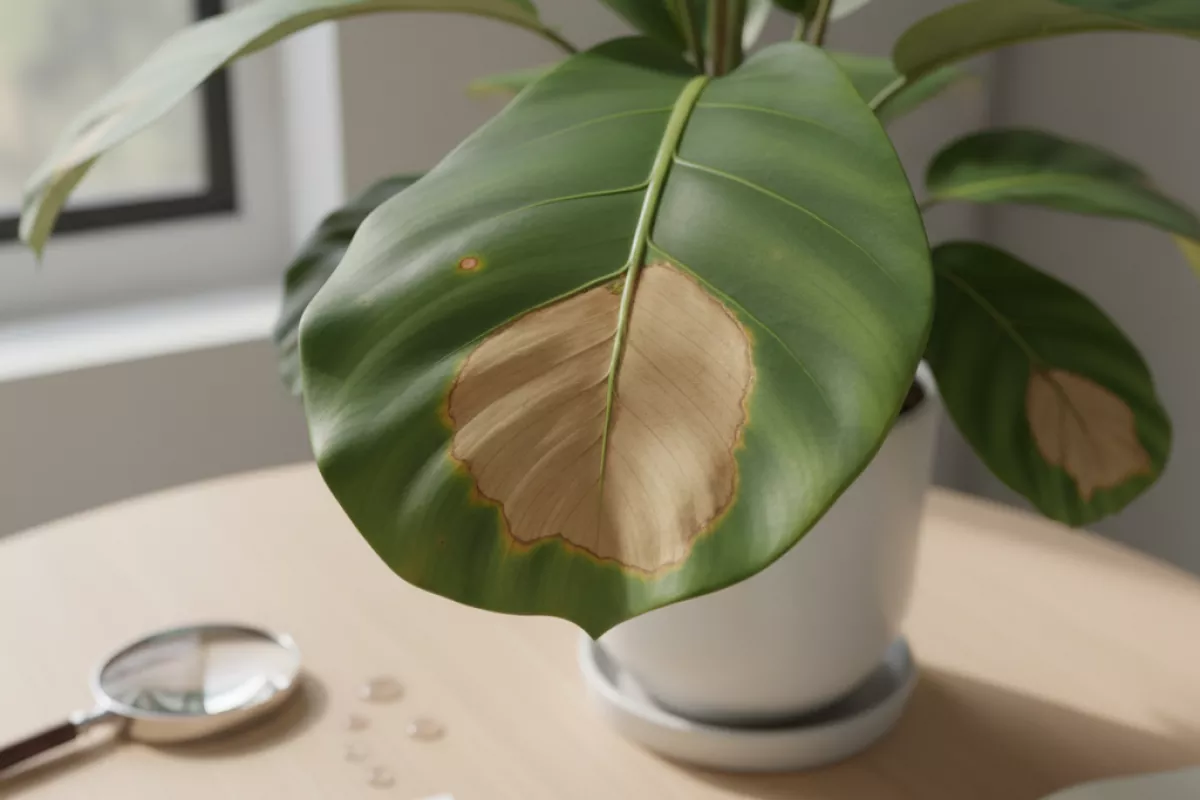
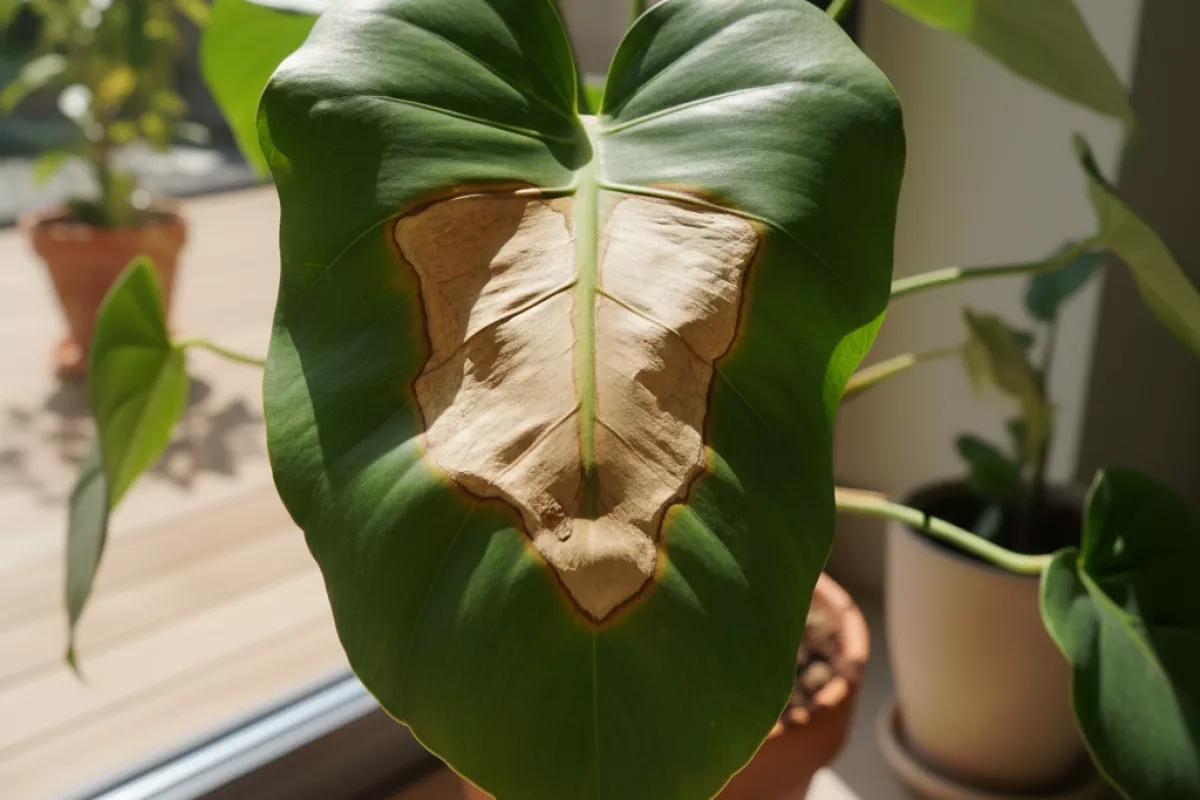
When a leaf develops a dry brown patch in the middle, it usually means the tissue in that spot stopped getting what it needed (water, nutrients, or stable conditions) and then died back. Centers can be surprisingly vulnerable because they’re often the “catch point” for intense light, heat buildup, and moisture that sits on the blade instead of running off.
- Sun scorch through glass or sudden light changes: A plant moved from low light to bright sun can get localized burn marks, especially where the sun hits most directly. The damaged area dries into a tan-to-brown spot, sometimes with a crisp edge.
- Inconsistent watering and brief drought stress: If the potting mix swings from very dry to very wet, cells can collapse in the leaf blade. The center may show damage first on broad leaves because it’s farther from the main veins that supply moisture.
- Mineral or fertilizer burn: Excess salts from over-fertilizing or hard water can dehydrate leaf tissue. This often shows as dry patches that start between veins and can appear mid-leaf rather than only at the tips.
- Leaf wetness plus strong light: Water droplets can keep a small area wet long enough to disrupt the leaf surface, and under bright light the spot can dry unevenly and turn brown. (This is more “leaf stays wet” stress than a true magnifying-glass effect.)
- Low humidity with warm air: Dry indoor air, especially near vents or heaters, increases moisture loss. A plant might cope at the edges for a while, but the leaf blade can still develop brittle, papery centers after repeated stress.
- Cold or heat injury: A leaf pressed against a cold window in winter or exposed to hot air can get a dead patch that later dries out. Even a short exposure to 10°C (50°F) drafts can leave delayed browning on sensitive plants.
- Pests that rasp or pierce tissue: Thrips, spider mites, and some true bugs can cause stippling that merges into larger brown areas. The center of the leaf is a common feeding zone because it’s broad and sheltered.
- Fungal or bacterial leaf spots: Some infections start as small, water-soaked dots that expand and dry. Centers may turn tan with a darker border; in humid conditions you might see multiple spots that eventually join.
- Physical damage that shows up later: Creasing, rubbing, or pinching a leaf can break cells without obvious immediate discoloration. Days later, that injured section dries and becomes a brown “island” in the middle.
A quick way to narrow it down is to look at the pattern: crisp, bleached-to-brown areas often point to light/heat; scattered speckling suggests pests; round spots with darker margins lean toward disease; and widespread mid-leaf dryness alongside crunchy edges often tracks back to watering swings, salts, or low humidity.
Tissue damage patterns and causes
Dry, brown spots that show up in the middle of a leaf usually mean the tissue in that area died first, then dried out. The “shape” of the damage is often more useful than the color: it can hint at whether the problem started from heat/light stress, inconsistent watering, salt buildup, pests, or an infection that moved through the leaf.
| What the mark looks like | Most likely causes | Why it happens (quick logic) |
|---|---|---|
| Crispy tan-to-brown patch near the center; edges of the spot look sharp; nearby tissue may look bleached first | Sunscald or heat stress (often after moving a plant to brighter light) | Cells overheat or receive more light than they can use, so they collapse and dry; damage often appears on the most exposed surface. |
| Irregular brown area with a pale/yellow “halo”; spot may expand over days | Leaf-spot disease (fungal or bacterial) | Pathogens kill tissue as they spread; the halo can be the plant’s reaction zone around the infection. |
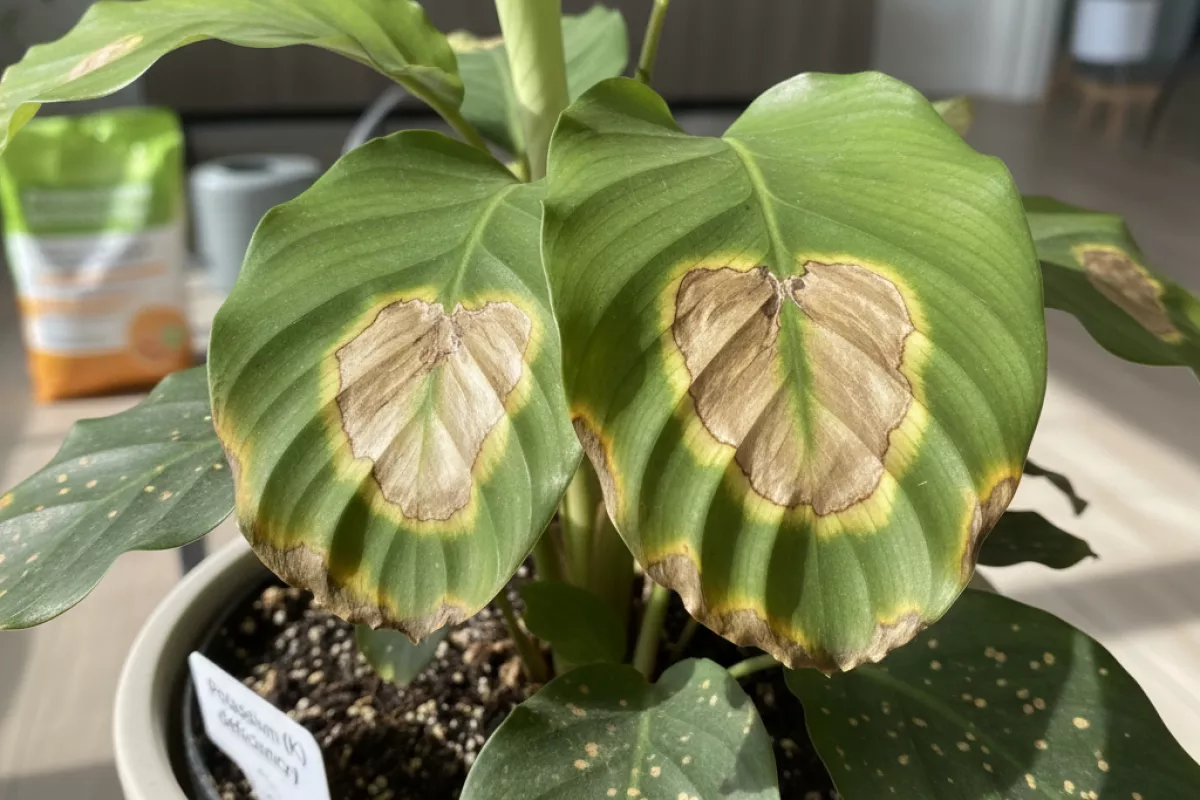
| Brown patch between veins while veins stay greener longer; may start as yellowing that turns papery | Nutrient imbalance (commonly potassium or magnesium issues) or root stress limiting uptake | Mobile nutrients are pulled from older tissue first; weak areas between veins show damage before the “framework” does. |
| Dry, brittle “dead island” in the center; leaf edges may still look fine; multiple leaves affected after a fertilizer change | Salt buildup from overfertilizing or hard water | Excess salts draw water out of cells (osmotic stress), creating localized scorch that later turns crisp. |
| Brown spot with tiny black dots or specks inside the lesion | Fungal fruiting bodies (common in some leaf-spot fungi) | Those dots can be spore structures; lesions often stay fairly circular or angular depending on the leaf’s structure. |
| Patchy bronzing that turns brown; fine stippling nearby; may be worse on undersides | Spider mites or thrips | Feeding punctures many cells; the area first looks speckled, then merges into dry brown patches as tissue dies. |
| Center spot that looks water-soaked at first, then dries; may follow a drip line or splash pattern | Water sitting on leaves + strong light, or splash-borne pathogens | Droplets can keep tissue wet long enough for infection, and in bright conditions can contribute to localized damage where water lingered. |
- Location matters: Mid-leaf lesions that don’t start at the tip are less typical of simple underwatering alone, and more suggestive of sun/heat injury, pests, splash patterns, or disease entry points.
- Texture is a clue: Crispy and papery usually indicates old, finished damage; soft or greasy-looking tissue points to active infection or ongoing rot.
- Pattern across the plant helps narrow it down: If only the most exposed leaves show it, suspect light/heat. If lower or older leaves show it first, think nutrition or salt stress. If random leaves across the canopy show expanding spots, disease or pests move higher on the list.
- Timing after changes: New marks appearing within 2–7 days after moving a plant closer to a window or under a stronger grow light are consistent with scorch, especially if the distance was reduced by more than about 15–30 cm (6–12 in).
Sun exposure and heat stress effects
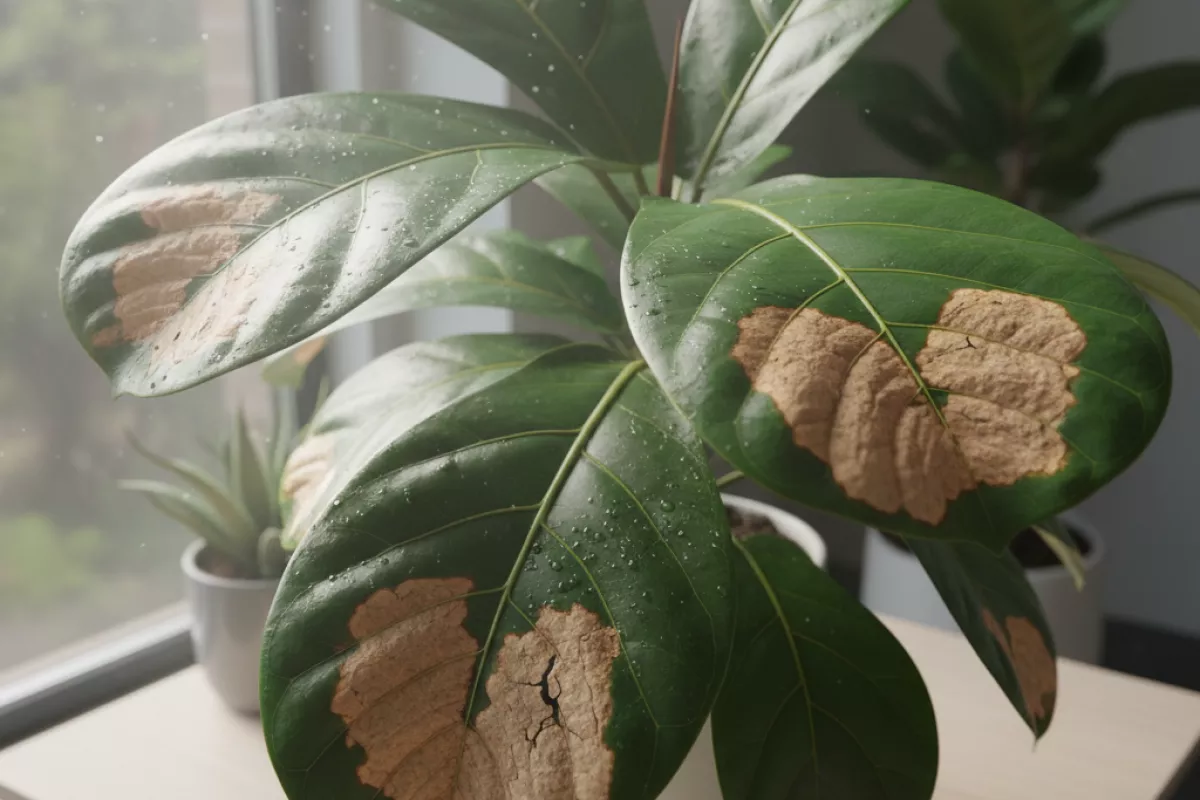
Too much direct light combined with high temperatures can “cook” the middle of a leaf, leaving a dry, papery brown patch while the edges stay greener. This often shows up after a sudden move to a brighter window, a heat wave, or a hot afternoon on a patio where the plant gets intense rays for several hours.
- What it looks like: a tan-to-dark brown spot that feels crisp, usually in the most exposed area of the leaf blade. The tissue may look slightly bleached first (pale yellow/white), then turns brown and brittle.
- Where it appears: commonly on the uppermost leaves or the side facing the sun. If light hits through glass, the damage can be centered where the beam concentrates.
- Timing clues: symptoms can develop fast—within 24–72 hours—after a jump in light intensity or temperatures above about 32°C (90°F), especially with low humidity and dry potting mix.
- Why the center gets hit: the mid-leaf area can overheat when transpiration can’t keep up (stomata close to conserve water), so the leaf can’t cool itself effectively.
| Clue | More consistent with sun/heat injury | More consistent with other causes |
|---|---|---|
| Pattern on the plant | Mostly on the sun-facing side or top leaves; sharp “exposed vs. shaded” difference | Spots scattered throughout the plant, including shaded interior leaves |
| Spot shape and texture | Irregular patch that becomes dry and papery; may have a pale halo from bleaching | Soft, water-soaked areas; concentric rings; fuzzy growth; or tiny dots that spread |
| Speed of appearance | Sudden onset after a bright day, hot car ride, or moving outdoors | Gradual progression over 1–3 weeks, often starting as small lesions |
| Leaf position | Most exposed leaves first; shaded leaves often stay normal | New growth distorted (pests/nutrients) or oldest leaves affected first (some deficiencies) |
| Environmental trigger | Hot window glass, reflected light, heat from vents/radiators, low humidity | Overwatering/poor drainage, persistent wet foliage, contaminated tools, poor airflow |
What to do next depends on whether the damage is ongoing. The brown tissue won’t turn green again, but you can stop new marks from forming by adjusting conditions.
- Reduce intensity gradually: move the plant back 30–60 cm (12–24 in) from the brightest glass, or use a sheer curtain during peak hours. If moving outdoors, acclimate over 7–14 days.
- Watch heat sources: keep foliage away from hot windows, heaters, and vents; even a few hours above 35°C (95°F) can scorch tender leaves.
- Support cooling with moisture balance: water thoroughly when the top 2–5 cm (1–2 in) of mix is dry (species-dependent), and avoid letting the pot bake bone-dry in full sun.
- Don’t mist as a fix: misting rarely cools leaves for long and can encourage spotting in some plants; improving airflow and moving out of harsh rays is more reliable.
- Trim for appearance only: you can snip off badly damaged leaves or trim brown centers if it bothers you, but prioritize preventing fresh injury on new growth.
If you’re unsure, check whether new leaves emerging after you adjust light and temperature stay clean. When the next flush looks normal, the cause was likely light/heat stress rather than a spreading disease.
Nutrient imbalance symptoms
Dry, brown marks that show up in the middle of a leaf can come from the plant running short on a key element, getting too much of one, or being unable to absorb what’s already in the pot. A helpful clue is where the damage starts (older vs. newer leaves) and whether the brown area is surrounded by yellowing, crisp edges, or distorted growth.
| Likely imbalance | What you typically see (including “brown center” patterns) | Where it shows first | Common trigger |
|---|---|---|---|
| Potassium (K) deficiency | Small tan spots that expand into dry, papery patches; may look like a scorched island in the leaf blade with a yellow halo | Older leaves | Under-fertilizing, heavy flushing, or fast growth outpacing feeding |
| Magnesium (Mg) deficiency | Interveinal yellowing (veins stay greener) followed by rust-brown, dry patches that can appear mid-leaf | Older leaves | High potassium or calcium competing with Mg uptake; very soft water |
| Calcium (Ca) deficiency | New leaves emerge misshapen; scattered necrotic dots that can merge into brown dead areas, sometimes in the center rather than the edge | New growth | Irregular watering, low transpiration (stagnant air), or root stress limiting Ca movement |
| Phosphorus (P) deficiency | Dull, darker foliage; slow growth; older leaves may develop brown necrotic patches after a period of purpling or bronzing | Older leaves | Cold root zone, compacted mix, or consistently low feeding |
| Fertilizer burn / salt buildup (excess nutrients) | Crispy brown areas that can start as spots and spread; leaf tissue feels dry and brittle; sometimes a “burnt center” where droplets or salts concentrated | Often older leaves first, but can affect any | Too-strong fertilizer, frequent feeding without runoff, or hard water leaving residues |
| Iron (Fe) or manganese (Mn) lockout | New leaves turn pale or yellow between veins; later, small brown specks may appear in the blade | New growth | pH out of range causing micronutrients to become unavailable |
- Older leaves affected first usually points to mobile nutrients (like K, Mg, P) being pulled from older tissue to support new growth.
- Newest leaves affected first leans toward immobile nutrients (like Ca and many micronutrients), where shortages show up at the growing tips.
- Brown patches with a yellow ring often indicate a deficiency progressing into necrosis, while uniform crisping plus residue on the soil surface suggests excess salts.
- Spots that match drip marks can be worsened by concentrated fertilizer splashes or foliar sprays drying on the leaf, leaving localized burn in the center.
If you suspect a feeding issue, avoid “stacking fixes” all at once. Make one change, then watch the next set of leaves: dead tissue won’t turn green again, but new growth should come in cleaner if the balance is improving.
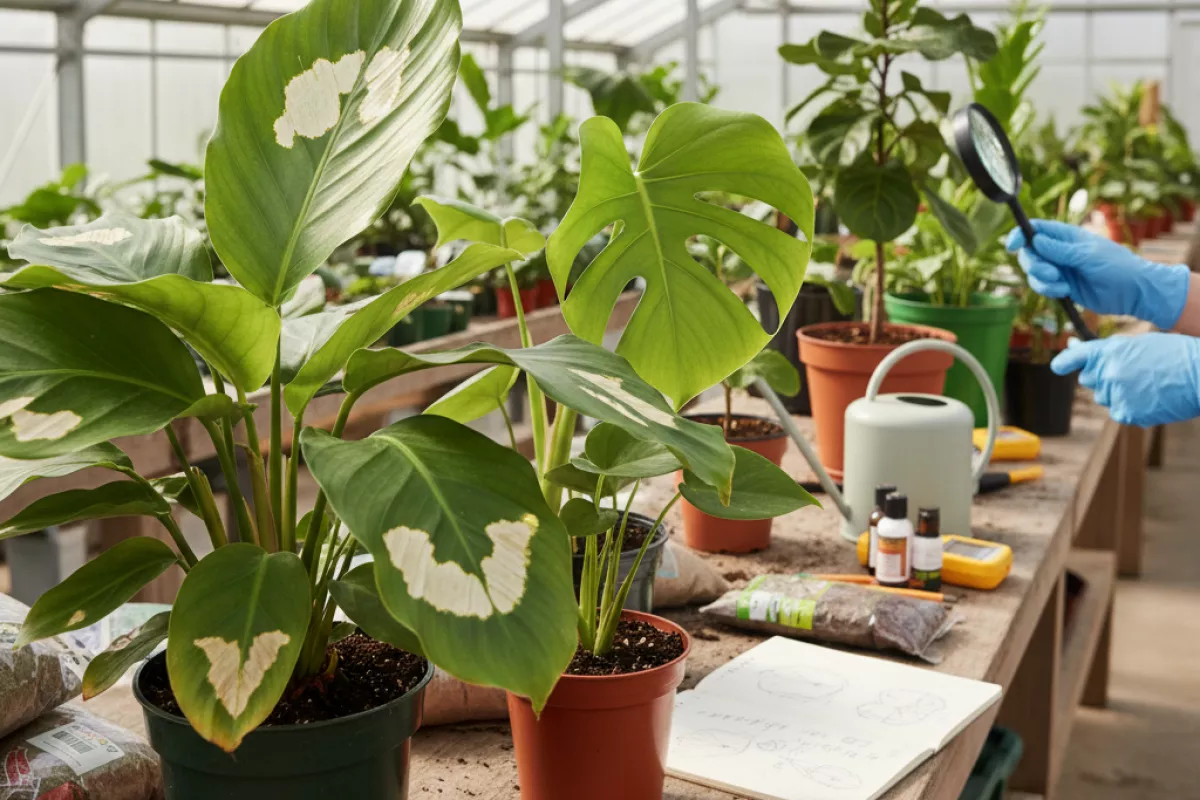
How to determine the exact cause
Start by looking for patterns: which leaves are affected, where the spots begin, and what changed in the last 1–2 weeks. Dry brown patches in the middle of a leaf can come from several issues that look similar at first glance, so narrowing it down is mostly about matching symptoms to recent care and the plant’s environment.
- Map the damage on the plant
- Only older, lower leaves: more consistent with watering stress, salt buildup, or normal aging (especially if the plant is pushing new growth).
- Only newer, upper leaves: often points to light/heat stress, pests feeding on tender tissue, or a nutrient issue.
- Random leaves across the plant: think localized sun scorch, splashed-on chemicals, or a spreading disease.
- Check the spot’s “signature” up close
- Crispy center with a yellow halo: common with leaf spot diseases or chemical burn from sprays/fertilizer droplets.
- Bleached/tan patch that later turns brown and papery: typical of sunburn after moving a plant closer to a bright window or outdoors.
- Many tiny speckles that merge into a larger dry patch: often pest feeding (thrips/spider mites) or repeated low humidity stress.
- Brown area with dark border or concentric rings: more suggestive of fungal/bacterial leaf spot.
- Rule out watering and root problems first
- Feel the mix 5–7 cm (2–3 in) down. If it stays wet for days, roots may be stressed; if it’s bone-dry and pulling from the pot edge, the plant may be cycling between drought and soak.
- Lift the pot: a plant that feels heavy long after watering can indicate poor drainage; a pot that becomes very light quickly can indicate hydrophobic soil or a root-bound plant.
- Look for a musty smell, fungus gnats, or black/mushy roots (if you can inspect). Those point away from “simple dryness” and toward root rot or chronic overwatering.
- Audit light and heat exposure
- Note any recent move. A jump from medium light to direct sun can scorch leaf centers within a few days.
- Check for hot spots: leaf tissue touching glass, heat vents, radiators, or grow lights too close. As a rough guide, many houseplants need at least 30–60 cm (12–24 in) distance from strong LEDs, depending on wattage and lensing.
- If damage appears on the side facing the window/light, that directional pattern strongly supports burn.
- Inspect for pests with a simple routine
- Use a bright light and check the undersides, petioles, and new growth.
- Tap a leaf over white paper: moving “dust” can be mites or thrips larvae.
- Look for silvery streaks, black specks (frass), fine webbing, or distorted new leaves—these often appear before large brown patches form.
- Consider fertilizer, water quality, and sprays
- If you recently fertilized, flushed, or sprayed (leaf shine, neem, insecticidal soap), suspect chemical burn—especially if droplets sat on the leaf under bright light.
- Hard water and frequent feeding can leave salts that stress leaf tissue. A clue is white crust on soil or pot rims.
- If you mixed concentrates, confirm the dose. When in doubt, skip feeding for 2–4 weeks and water thoroughly until excess drains out.
| What you observe | Most likely direction to investigate | Quick confirmation step |
|---|---|---|
| Tan/bleached patch that turns crispy; mostly on the light-facing side | Sun/heat scorch | Check if the plant was moved recently or if leaves touch hot glass; new damage stops after shading/relocating |
| Brown center with yellow halo; spots slowly spread | Leaf spot disease (fungal/bacterial) | Isolate plant; avoid wetting leaves; see if new spots appear after overhead watering |
| Fine speckling, silvering, or streaks before browning | Thrips or spider mites | Tap-test over white paper; inspect undersides with a flashlight for webbing or tiny moving insects |
| Random crisp patches after feeding or spraying | Chemical/fertilizer burn | Review recent applications; look for drip patterns; rinse leaves with plain water and stop treatments temporarily |
| Older leaves affected; soil alternates very dry and very wet | Inconsistent watering / root stress | Check moisture 5–7 cm (2–3 in) down; inspect roots if symptoms keep progressing |
If you’re still unsure, do a controlled test: change only one variable (move out of direct sun, adjust watering intervals, or stop foliar sprays) and watch the newest leaves for 7–14 days. Existing brown tissue won’t turn green again, so the goal is to see whether fresh growth stays clean and whether new marks stop appearing.
Corrective steps for recovery
Act quickly, but change one thing at a time. Dry brown spots in the middle of a leaf usually mean the tissue has already died, so the goal is to stop new damage and help the plant push healthy growth.
- Confirm the pattern on multiple leaves.
- If only the oldest leaves are affected, suspect watering inconsistency or nutrient issues.
- If newer leaves show crisp patches, suspect light/heat stress, low humidity, or salt buildup.
- If spots are soft, spreading, or have yellow halos, treat it as a possible disease issue and isolate the plant.
- Fix watering rhythm and drainage first.
- Water thoroughly until excess drains out, then empty the saucer so roots aren’t sitting in water.
- Let the top 2–5 cm (1–2 in) of mix dry for many houseplants before watering again; for thirstier plants, wait for the top 1–2 cm (0.4–0.8 in).
- If the pot feels heavy for days and the mix stays wet, improve aeration (add perlite/pumice) and check for blocked drainage holes.
- Reduce light and heat stress.
- Move the plant 30–90 cm (12–36 in) back from a hot window or grow light, then re-acclimate gradually over 7–14 days.
- Keep leaves away from radiators, vents, and heaters; warm, dry air can scorch the center of leaves even when soil moisture seems fine.
- Aim for steady temperatures around 18–27°C (65–81°F) for most tropical houseplants.
- Raise humidity without making the foliage stay wet.
- Target roughly 40–60% relative humidity for many indoor plants; sensitive species may prefer 60–70%.
- Use a humidifier or group plants together; if you use a pebble tray, keep the pot above the waterline.
- Avoid frequent misting if airflow is poor, since it can encourage spotting problems.
- Flush excess salts and adjust fertilizing.
- Once a month or so, flush the pot with 3–4 times the container volume of water (for example, 3–4 L per 1 L potting mix (0.8–1.1 gal per 0.26 gal)) to remove fertilizer salts, then let it drain fully.
- Pause feeding for 2–4 weeks if you suspect overfertilizing; restart at 1/4–1/2 strength during active growth.
- If your tap water is hard or softened, consider using filtered or rainwater to reduce mineral buildup.
- Inspect for pests and treat if needed.
- Check the underside of leaves and along midribs for mites, thrips, or scale; stippling and dry patches can follow feeding damage.
- Rinse the plant in lukewarm water, then apply insecticidal soap or horticultural oil as directed; repeat every 7–10 days for 2–3 rounds.
- Remove badly damaged tissue safely.
- Trim fully brown, crispy sections with clean scissors; keep cuts within dead tissue so you don’t create new wounds.
- If more than 30–50% of a leaf is affected, remove the whole leaf at the petiole to redirect energy to new growth.
- Disinfect tools with 70% isopropyl alcohol between plants to avoid spreading pathogens.
- Repot only when the root zone is part of the problem.
- Repot if the mix is compacted, hydrophobic (water runs down the sides), smells sour, or roots are circling tightly.
- Choose a pot only 2–5 cm (1–2 in) wider than the root ball to prevent soggy soil.
- After repotting, keep light slightly lower for 5–7 days and water sparingly until you see new growth.
Watch the next 2–3 weeks for improvement: new leaves should emerge clean, and existing spots should stop expanding. The old brown centers won’t turn green again, but stable damage and healthy new growth are the signs you’ve corrected the underlying stress.
Preventive care for future growth
Stop new dry brown spots from forming by dialing in the basics: stable moisture, consistent light, and gentle handling of leaves. Most center-of-leaf browning starts when the plant can’t move water and nutrients evenly through the blade, or when tissue gets stressed by sudden changes.
- Water with a rhythm, not a rescue. Let the top 2–5 cm (1–2 in) of mix dry for many common houseplants, then water thoroughly so excess drains out. Avoid long dry spells followed by heavy soaking, which can trigger patchy necrosis in the middle of leaves.
- Use the right water and flush salts. If you see crust on the soil or pot rim, mineral buildup may be contributing to brown patches. Every 4–8 weeks, flush the pot with 2–3× the container volume of water (for example, 2 L (0.5 gal) through a 1 L (0.25 gal) pot), then let it drain fully.
- Keep humidity steady, but don’t leave leaves wet. Aim for 40–60% relative humidity for many tropicals; sudden drops can dry leaf tissue from the inside out. Increase humidity with a room humidifier rather than frequent misting, which can encourage spotting and fungal issues.
- Match light to the plant and avoid abrupt moves. Gradually shift plants over 7–14 days when changing locations. Direct sun after a low-light period can scorch leaf centers, while too little light can weaken leaves and make them more prone to damage.
- Protect from temperature swings and drafts. Keep most houseplants in the 18–27°C (65–81°F) range and away from heating vents or cold windows. A nightly drop to 10°C (50°F) or a hot blast can cause localized browning that shows up days later.
- Feed lightly and on schedule. Overfertilizing can burn tissue and underfeeding can leave leaves fragile. During active growth, use 1/4–1/2 strength fertilizer every 2–4 weeks (or follow your product’s label) and pause or reduce in low-light seasons.
- Check roots and potting mix once or twice a year. Compacted soil and crowded roots reduce even water flow to the leaf center. Repot when roots circle heavily, using a fresh, airy mix and a pot only 2–5 cm (1–2 in) wider than the old one.
- Inspect for pests early. Thrips, mites, and leafhoppers can cause dry, tan-brown patches that start between veins. Look under leaves weekly; if you see stippling, silvery scarring, or tiny moving dots, isolate the plant and treat promptly.
- Prune damaged tissue cleanly. Brown areas won’t turn green again. Trim with sterilized scissors, following the leaf’s natural shape, and remove severely affected leaves so the plant can focus on new growth.
| Routine | What to do | Why it helps |
|---|---|---|
| Weekly | Check soil moisture and inspect leaf undersides for pests; rotate the pot 1/4 turn. | Prevents drought swings, catches infestations early, and keeps light exposure even. |
| Every 2–4 weeks | Wipe leaves with a damp cloth; fertilize at 1/4–1/2 strength during active growth. | Cleaner leaves photosynthesize better; steady nutrition reduces stress-related spotting. |
| Every 4–8 weeks | Flush the pot with 2–3× container volume of water (e.g., 2 L (0.5 gal) through a 1 L (0.25 gal) pot). | Limits salt buildup that can dry and burn leaf tissue. |
| Seasonally | Adjust watering and feeding as light changes; avoid placing plants near heaters or cold glass. | Reduces shock from environmental shifts that often precede center-leaf browning. |
| Every 6–12 months | Check roots and refresh mix if compacted; repot if rootbound by 2–5 cm (1–2 in). | Improves airflow and water distribution, supporting healthier new leaves. |
If you’re unsure which factor is driving the dry brown marks, change only one variable at a time (for example, light placement first, then watering cadence). New leaves are the best indicator: when they emerge evenly colored and flexible, your adjustments are working.