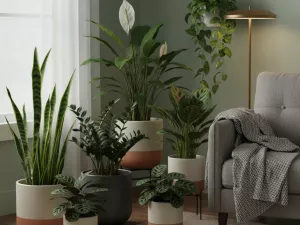
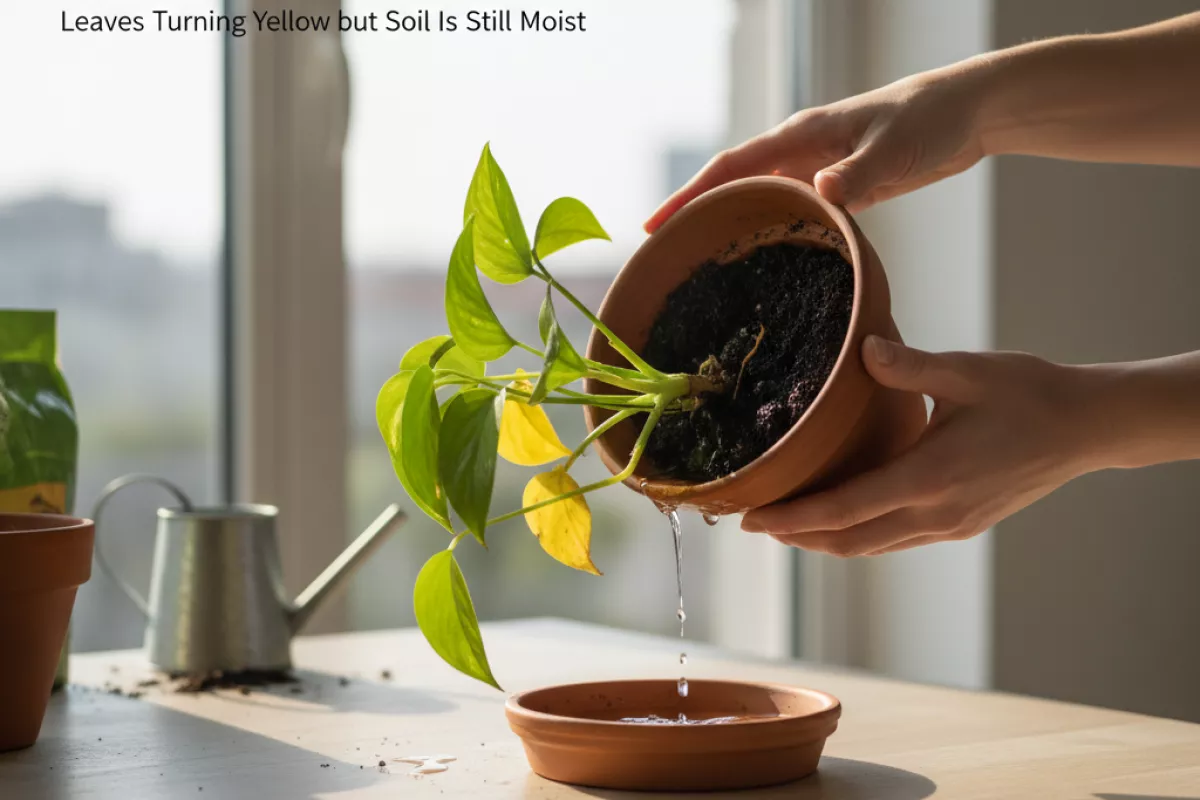
Leaves Turning Yellow but Soil Is Still Moist

 Explains why wet soil can turn leaves yellow by suffocating roots and cutting off oxygen, how to spot hidden overwatering, and how soil texture and poor pot drainage hold water. Covers safe ways to dry soil, prevent ongoing moisture stress, and signs of recovery.
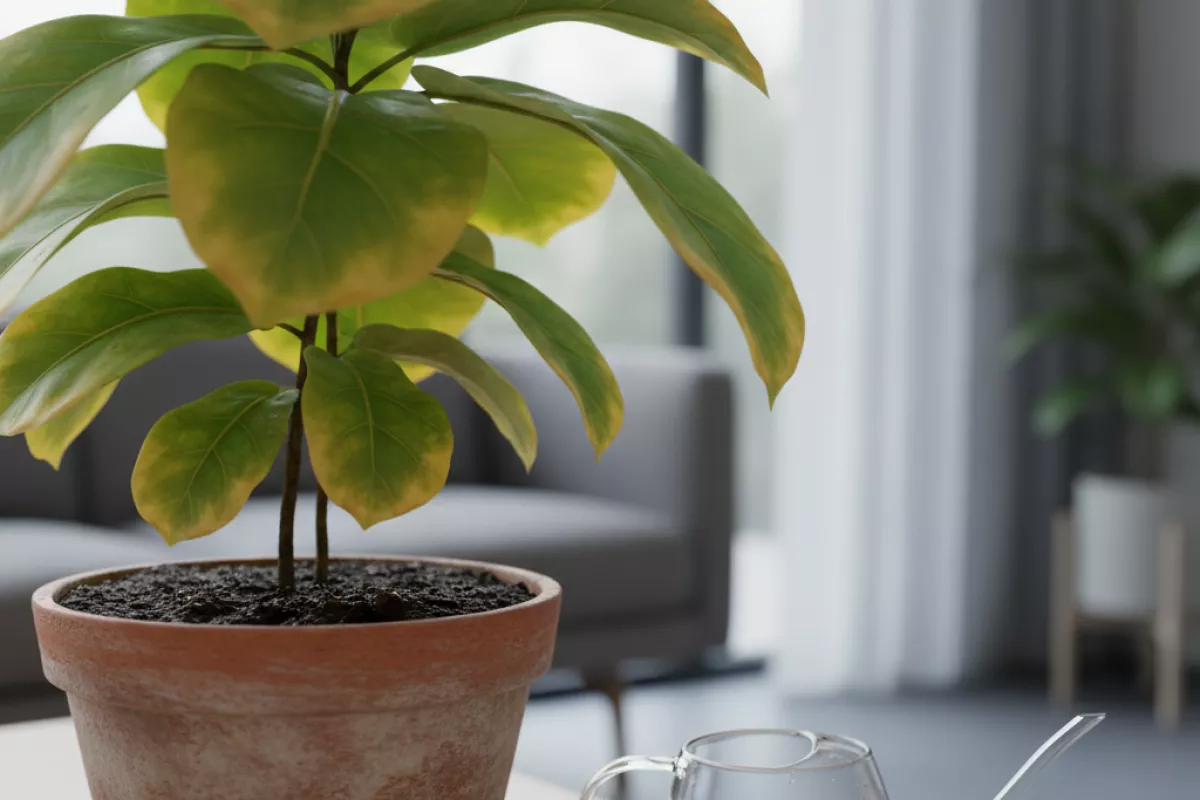
If leaves are turning yellow while the potting mix still feels damp, the problem is usually stressed roots rather than thirst. Common causes include poor drainage, compacted soil, low light, or nutrients the plant cannot absorb. Check that the pot has drainage holes, the mix is airy, and the plant gets enough light. Adjust watering and refresh the soil if needed to prevent further leaf drop.
Why wet soil leads to yellow foliage
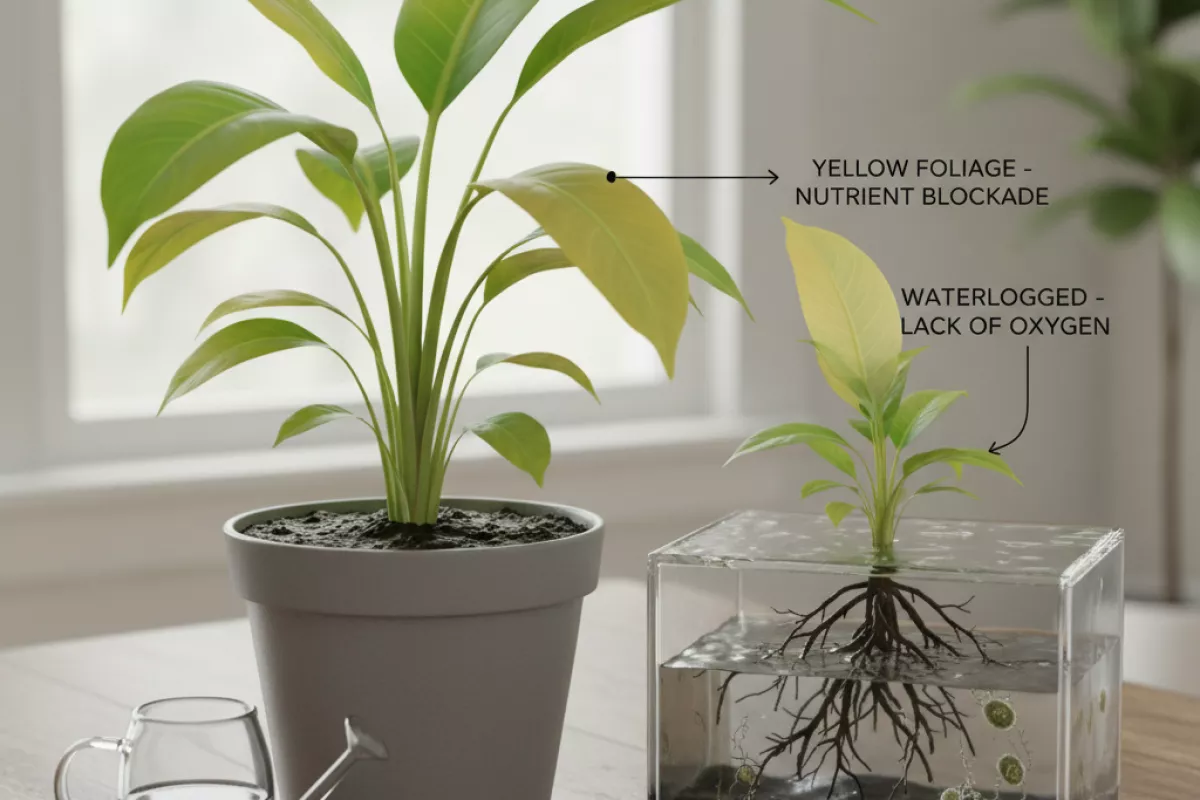
When potting mix or garden soil stays damp for days, roots can’t breathe properly. Roots need oxygen to take up water and nutrients; in waterlogged conditions, air spaces fill with water, and the plant starts acting “thirsty” even though the soil feels wet. The result is often pale, yellowing leaves because the plant can’t move chlorophyll-building nutrients where they’re needed.
Constant moisture also changes what’s happening underground. Beneficial root hairs die back, and rot organisms thrive, especially if the container has poor drainage or the ground is compacted. Once roots are damaged, the plant struggles to absorb nitrogen, iron, and magnesium, which commonly shows up as yellow foliage (sometimes with green veins still visible).
- Low oxygen in the root zone: Saturated soil limits gas exchange, so roots can’t respire efficiently. This slows growth and reduces nutrient uptake, leading to a washed-out look.
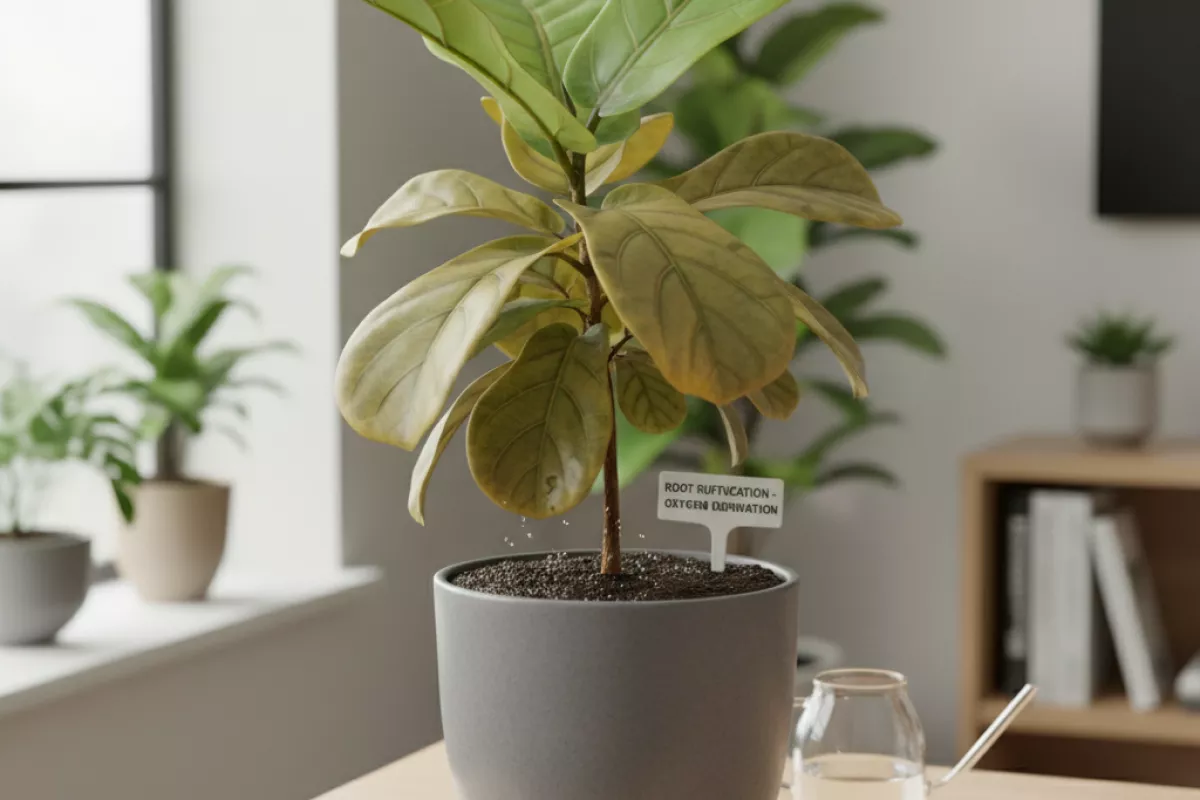
- Root rot and tissue breakdown: Prolonged dampness encourages fungi and water molds. Rotting roots turn brown/black and mushy, and the top growth yellows because the “plumbing” is failing.
- Nutrient lockout even when nutrients are present: In overly wet, cool soil, roots may be unable to take up key minerals. You can have fertilizer in the pot and still see chlorosis because uptake is the problem, not supply.
- pH shifts and reduced microbial balance: Waterlogged conditions can alter pH and microbial activity, changing how available iron and manganese are. That often causes new leaves to yellow first.
- Salt buildup from frequent watering: If you water often “just in case,” minerals can accumulate as water evaporates. Leaf tips may brown while the rest of the leaf turns yellow.
- Cold, wet soil slows everything down: At lower temperatures, roots absorb less. A plant sitting in persistently moist mix at 10°C (50°F) can yellow faster than the same plant at 24°C (75°F).
| What you notice above the soil | What’s likely happening below | Why leaves lose color |
|---|---|---|
| Older leaves yellow first, overall pale plant | Roots are stressed and can’t take up nitrogen well | Reduced chlorophyll production from poor nutrient uptake |
| New leaves yellow with greener veins | Iron/manganese availability drops in soggy or imbalanced soil | Chlorosis develops in young tissue first |
| Wilting even though the pot feels heavy | Root hairs die back; oxygen starvation limits water movement | Plant can’t regulate water and nutrients, so foliage fades |
| Yellowing plus soft stems or a “swampy” smell | Root rot organisms are active; roots are decaying | Damaged roots can’t support healthy green growth |
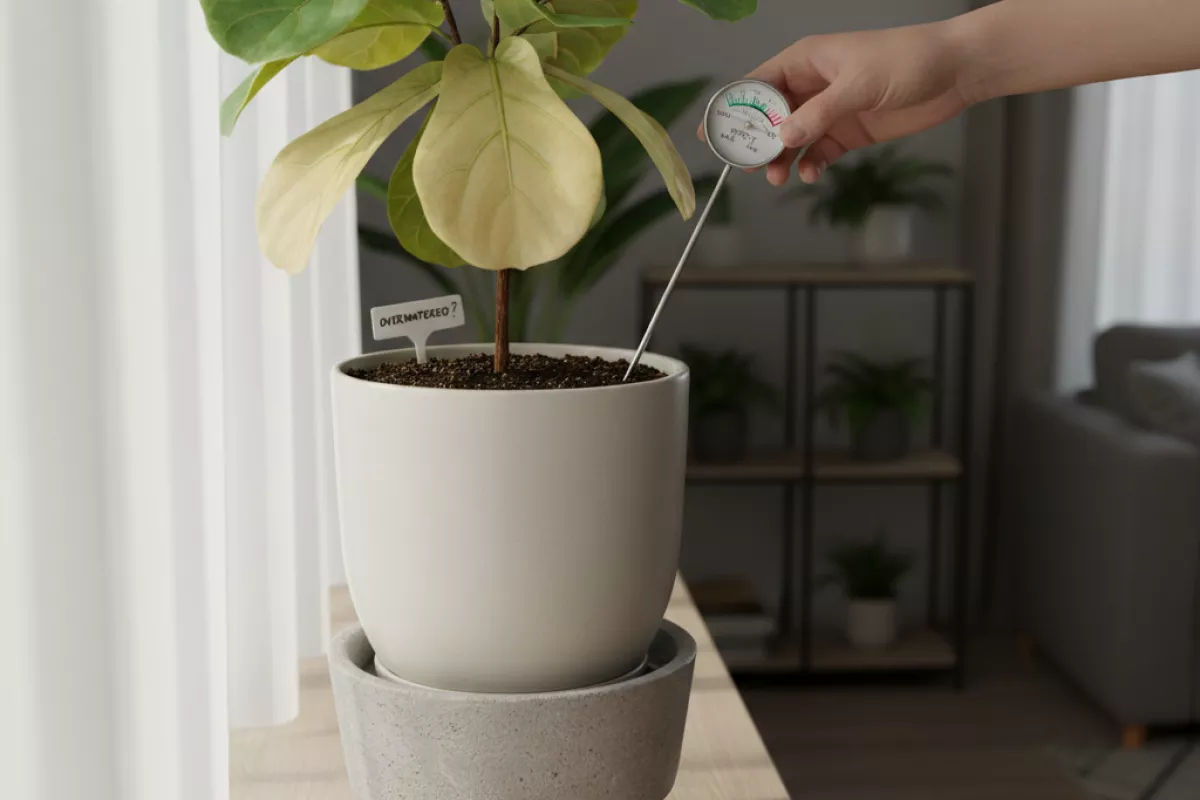
If the soil is consistently moist to the touch 2–5 cm (1–2 in) down, the issue is usually not “more water,” but less time wet and more air around the roots. Fixing drainage, spacing out watering, and letting the root zone re-oxygenate is often what stops the yellowing from spreading.
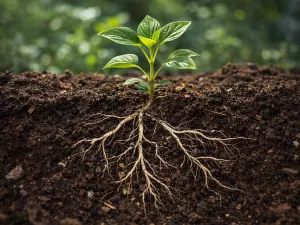
Root suffocation and oxygen deprivation
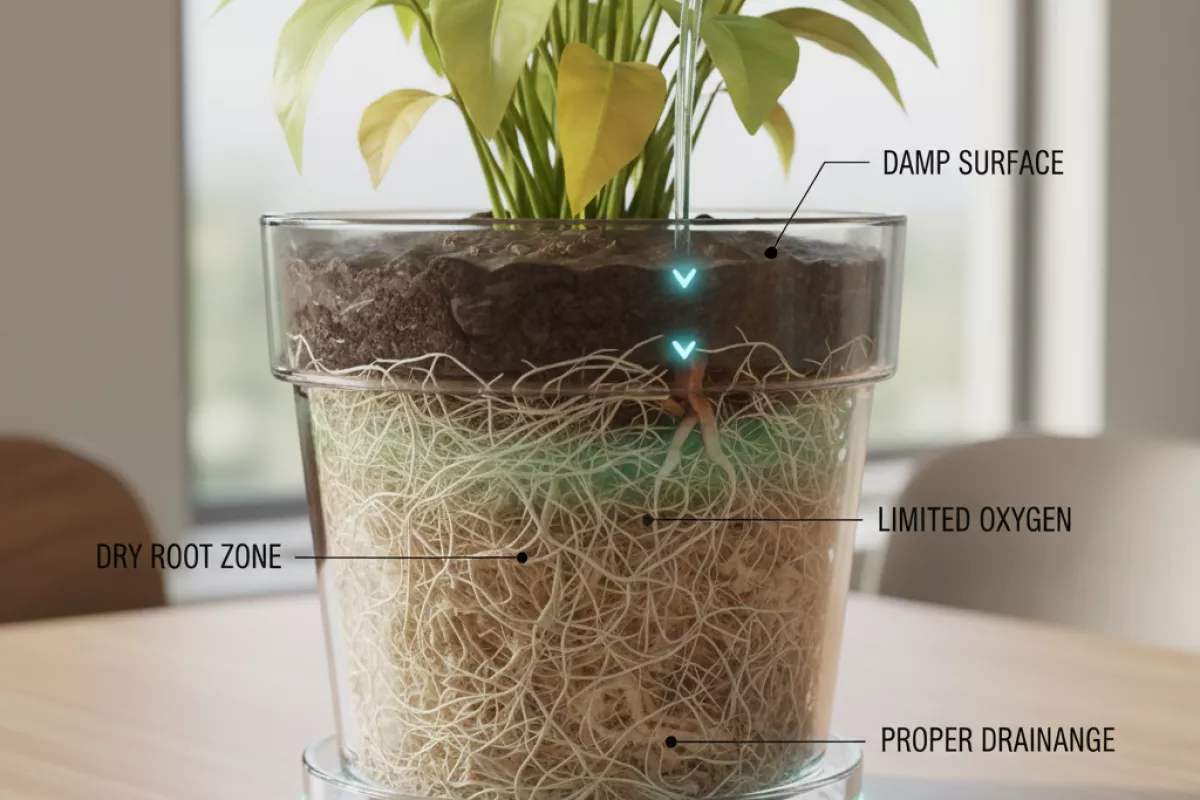
Yellowing leaves with soil that never seems to dry often points to a lack of air around the roots. Even when there’s plenty of water, roots still need oxygen to take up nutrients and keep foliage green. When the pore spaces in the potting mix stay filled with water, the plant can act “thirsty” and chlorotic at the same time.
This tends to show up after frequent small waterings, heavy mixes that compact, or containers without enough drainage. It can also happen outdoors after long rainy stretches, especially in clay soils that hold water tightly.
- What you’ll notice above the soil: older leaves turning pale yellow first, limp growth, slow recovery after watering, and sometimes leaf drop even though the mix feels damp.
- What you’ll notice at the roots: fewer fine white roots, a sour/“swampy” smell, and roots that look tan to brown instead of firm and pale.
- Why yellow happens: stressed roots can’t absorb nitrogen, iron, and other nutrients efficiently, so chlorophyll production drops and leaves fade.
| Likely cause | Clues you can check | What to do next |
|---|---|---|
| Potting mix staying saturated | Top feels wet for days; pot feels heavy; algae or fungus gnats may appear | Pause watering until the top 2–5 cm (1–2 in) dries; switch to deeper, less frequent watering |
| Compacted or fine-textured soil | Water pools on top before soaking in; mix looks dense and muddy when wet | Repot into a chunkier blend; add aeration components (e.g., perlite/bark) and avoid pressing the mix down |
| Poor drainage (no holes or blocked holes) | Water collects in the bottom; saucer stays full; roots circle in a wet layer | Use a pot with drainage; empty saucers after 10–15 minutes; clear blocked holes |
| Cold, low-light conditions slowing drying | Yellowing worsens in winter; soil stays moist longer; growth stalls | Reduce watering frequency; move to brighter light; keep temperatures around 18–24°C (65–75°F) if the plant allows |
If you suspect the root zone has been waterlogged for a while, check the roots. Slide the plant out and look for firm, light-colored roots. Trim any mushy sections with clean scissors, then repot into fresh, airy mix and a container that drains freely. After repotting, water once to settle the soil, then let it dry to the appropriate depth before the next watering.
Going forward, aim for a wet-to-dry cycle that matches the plant type and pot size. A simple habit that helps: lift the pot to judge weight, and only water when it feels noticeably lighter and the top layer has dried to the depth your plant prefers.
How to recognize hidden overwatering
When leaves yellow while the potting mix still feels damp, the issue is often too much water sitting where you can’t easily see it: in the lower half of the pot, inside a dense root ball, or in a cachepot that quietly collects runoff. The surface can be misleading, especially in deeper containers or mixes that hold water unevenly.
- The pot stays heavy for days after watering. Weight is one of the most reliable clues that moisture is lingering below the top layer.
- Yellowing starts on older leaves and progresses upward, sometimes with soft, limp petioles rather than crisp, dry edges.
- Leaves feel limp even though the soil is wet. Roots short on oxygen can’t move water properly, so the plant looks “thirsty” in a wet pot.
- A sour, swampy smell from the drainage holes or soil surface suggests stagnant conditions.
- Fungus gnats keep showing up. They thrive when the top few cm/in stay consistently moist.
- Brown or black leaf tips that are soft (not crunchy) can point to stressed roots rather than underwatering.
- Slow growth and smaller new leaves, even during the plant’s active season, can happen when roots are struggling.
- White crust isn’t the only “salt” sign: fertilizer salts can build up because the mix never cycles through a proper dry-down, compounding stress.
A quick check beats guessing: slide a wooden skewer or chopstick down near the pot’s edge and leave it for 30–60 seconds. If it comes out dark, cool, and damp from the bottom half, the root zone is still wet even if the top feels only slightly moist.
| What you observe | What it usually means | How to confirm |
|---|---|---|
| Top 2–3 cm (1–1.2 in) feels dry, but pot is heavy | Lower soil layers are holding water | Skewer test to the bottom; compare pot weight to a fully dry baseline |
| Yellow leaves plus limpness in a moist pot | Roots are oxygen-starved, not necessarily thirsty | Check drainage holes for standing water; inspect roots if symptoms persist |
| Musty smell, algae on soil, or gnats | Chronic surface moisture and slow evaporation | Let the top 5 cm (2 in) dry; reduce watering frequency and improve airflow |
| Water runs down the sides and out quickly | Hydrophobic or compacted mix; root ball stays wet in pockets | Water slowly in stages; check if the center stays damp longer than edges |
| Drainage holes drip long after watering | Water is trapped in a saucer/cachepot or the mix drains poorly | Empty saucers within 10 minutes; ensure the inner pot isn’t sitting in water |
If you suspect excess moisture, don’t automatically “fix” it by watering less only once. The more telling pattern is whether the pot ever reaches a light, airy state between waterings. If it doesn’t, the problem is usually drainage, pot size, or soil structure rather than your schedule alone.
Soil texture problems causing water retention
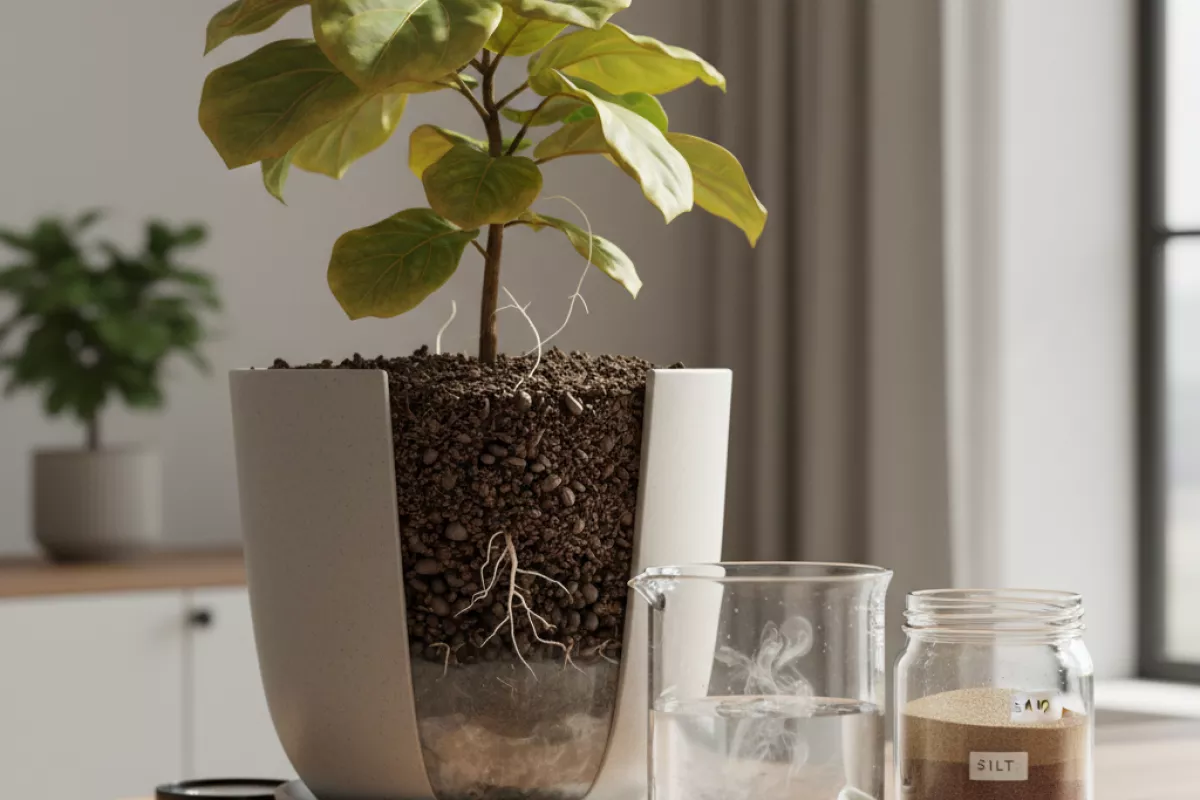
When leaves yellow while the pot still feels damp, the issue is often that water is staying in the root zone instead of draining and pulling fresh air in behind it. That’s frequently a texture and structure problem: the soil particles pack too tightly, the pore spaces are too small, or the mix collapses over time. Roots then sit in low-oxygen conditions, which can mimic nutrient deficiency even when nutrients are present.
Texture is about particle size (sand vs. silt vs. clay). Structure is how those particles clump and create channels for water and air. A mix can look “wet” on top yet be waterlogged below, especially in containers where gravity drainage is limited.
| Texture/structure issue | What you’ll notice | Why it keeps soil moist | Practical fix |
|---|---|---|---|
| High clay or heavy garden soil used in pots | Sticky, dense soil; slow to dry; pot feels heavy for days | Tiny pores hold water tightly and reduce air exchange | Repot into a lighter container mix; add coarse components (pine bark, perlite, pumice) rather than more fine compost |
| Too many fine particles (compost, peat dust, “black” soil) | Top crusts over; water pools briefly then drains slowly | Fine particles fill gaps between larger ones, eliminating drainage channels | Sift out dust if possible; blend in chunky material; avoid “all-compost” mixes for most houseplants |
| Compaction from frequent watering or pressing soil down | Soil surface looks smooth and hard; water runs down the sides | Compacted soil loses macropores (air spaces) and wicks water unevenly | Gently loosen the top 2–3 cm (0.8–1.2 in); repot if the whole root ball is tight and dense |
| Hydrophobic peat (dries then repels water, re-wets unevenly) | Water seems to “disappear” but the center stays dry or the bottom stays soggy | Uneven wetting creates pockets: some stay saturated, others stay dry | Bottom-water 15–30 min (15–30 min) to rehydrate evenly; consider switching to a bark-forward mix |
| Soil breakdown over time (mix turns mushy) | Older potting mix looks finer than when new; musty smell | Decomposed particles collapse, reducing drainage and oxygen | Refresh/repot on a schedule; replace at least part of the mix rather than just top-dressing |
- Quick at-home check: Water thoroughly, then see how long it takes the pot to feel noticeably lighter. If it’s still heavy after 3–5 days (3–5 days) in normal indoor conditions, the mix likely holds too much water for that plant.
- Look for “perched water” signs: A sour smell, fungus gnats, or yellowing lower leaves can point to a saturated layer at the bottom of the pot even when the surface seems fine.
- Choose amendments that create air pockets: Coarse bark, perlite, or pumice improve drainage because they add stable, larger pores. Adding more compost usually does the opposite.
If you suspect texture is the culprit, the most reliable solution is repotting into a mix with larger, more stable particles and a pot with drainage holes. It’s hard to “fix” a consistently soggy root zone with watering tweaks alone when the soil itself is built to stay wet.
Pot drainage and container design issues
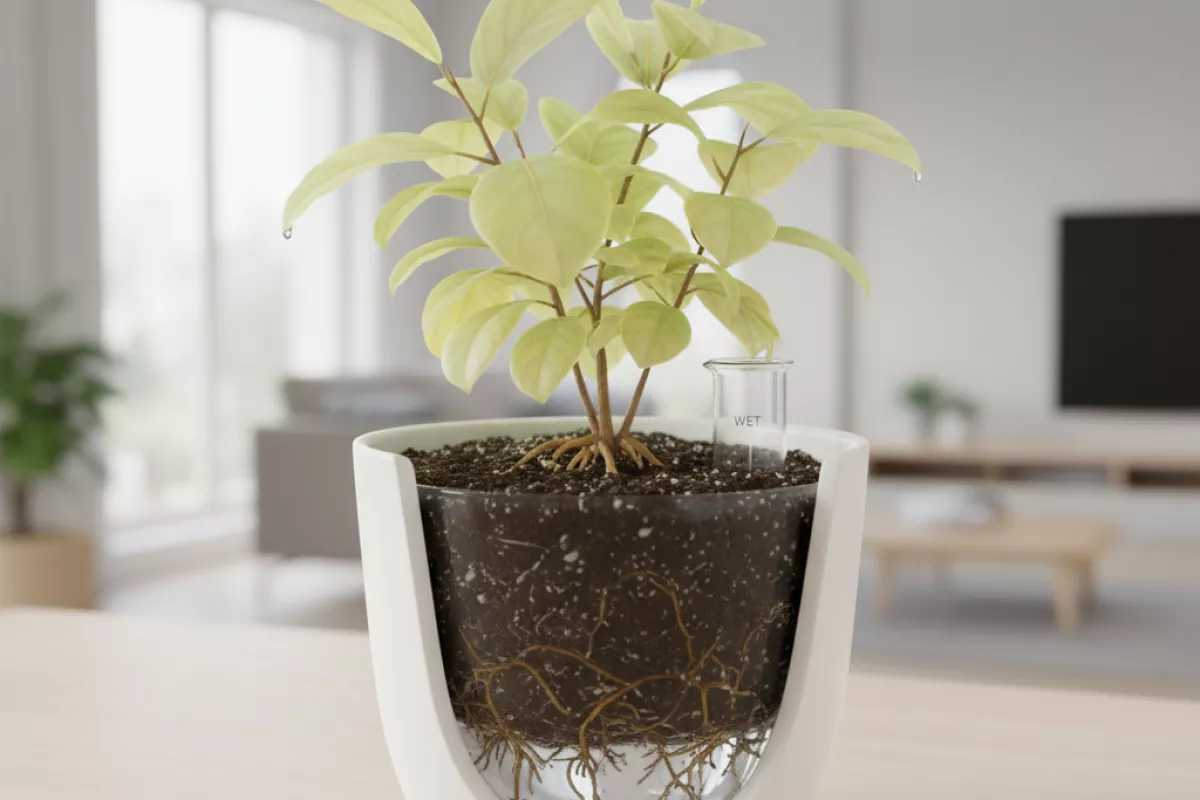
When leaves yellow while the mix still feels damp, the container itself is often the bottleneck. Water may be sitting in the bottom, moving too slowly through the root zone, or getting trapped in a “perched” wet layer that stays saturated long after the top looks fine. That keeps roots short on oxygen, and the plant responds with limp growth, pale foliage, and yellowing that starts on older leaves.
- Too few (or no) drainage holes: Decorative cachepots, bowls, and some self-watering setups can hold a hidden reservoir. If you can’t see water draining out after a thorough watering, assume it’s pooling somewhere.
- Drainage holes that are too small or blocked: Fine roots, compacted mix, mineral crust, or a mesh that’s too tight can slow outflow. A single tiny hole can behave like no hole at all once debris collects.
- Saucer or outer pot holding runoff: If the pot sits in water for more than 10–15 minutes, the mix can wick it right back up. Empty the saucer after watering, especially in cool rooms.
- “Rocks in the bottom” myth: A gravel layer doesn’t improve drainage; it often raises the saturated zone higher into the pot. Use a well-structured mix instead of a false bottom.
- Pot shape and depth: Very tall pots can keep the lower section wet for a long time, while very shallow pots can go from wet to dry fast. Match the container to the plant’s root style and your watering habits.
- Material matters: Plastic and glazed ceramic hold moisture longer; terracotta breathes and dries faster. If you’re prone to overwatering, porous pots can be more forgiving.
- Overpotting: A pot that’s much larger than the root ball stays wet because roots can’t use the water quickly. As a rule of thumb, step up only about 2–5 cm (1–2 in) in diameter at a time for most houseplants.
| Container/design issue | What you’ll notice | Practical fix |
|---|---|---|
| No drainage hole (or inner pot missing) | Soil stays wet for many days; musty smell; yellowing despite careful watering | Move to a pot with drainage; if using a cachepot, keep the plant in a holed nursery pot and pour off excess water |
| Saucer/outer pot holding water | Bottom of pot feels colder and heavier; algae on saucer; recurring soggy mix | Empty runoff after 10–15 minutes; elevate pot slightly so it doesn’t sit flush in water |
| Overpotting (container too large) | Top dries but lower half stays damp; slow growth; repeated yellow lower leaves | Downsize to a snugger pot; choose one only 2–5 cm (1–2 in) wider than the root mass |
| Blocked or undersized drainage holes | Water drains very slowly; mix compacts; roots circle near the bottom | Clear holes; repot into a container with multiple holes; avoid overly fine, compacting mixes |
| Non-breathable pot material in low light/cool temps | Mix stays moist longer than expected; leaf yellowing increases in winter | Switch to terracotta or reduce watering frequency; increase airflow and light where possible |
If you suspect the bottom is staying wet, do a quick check: tip the pot and see if water drips out, or slide the plant out slightly and feel the lower mix. If it’s soggy and smells sour, improving drainage and right-sizing the container usually helps more than watering “less often” alone, because the real problem is how long the roots stay oxygen-starved.
Steps to dry soil safely
Reduce the excess moisture gradually so roots can recover without being shocked. The goal is to increase oxygen around the root zone, not to “bake” the potting mix or force rapid dehydration.
- Pause watering and empty the saucer.
Skip the next watering or two, and pour off any standing water in the drip tray or cachepot. If the container has been sitting in water for more than 10 minutes, the mix can stay saturated and starve roots of air.
- Check drainage and clear blockages.
Confirm the pot has drainage holes and they’re not clogged by roots or compacted soil. If needed, gently lift the plant and poke the holes clear with a chopstick or similar tool.
- Increase airflow at the soil surface.
Move the plant to a spot with better air circulation (away from cold drafts). A small fan on low, placed about 60 cm (24 in) away, can help moisture leave the top layer more evenly.
- Improve light (without overheating).
Brighter indirect light helps the plant use water faster. Avoid harsh midday sun that can heat the pot and stress already-struggling roots.
- Loosen the top layer carefully.
If the soil is crusted, gently scratch the top 1–2 cm (0.4–0.8 in) with a fork or your fingers. Don’t dig deep; you’re just opening channels for air exchange, not disturbing roots.
- Use wicking for stubbornly wet pots.
If the mix stays soggy, set the pot on a thick layer of dry paper towels or an absorbent cloth for 30–60 minutes, then replace with a dry layer if needed. This pulls out some water without compressing the soil.
- Consider a “breather” repot only if it’s not drying.
If the potting mix remains wet for more than 7–10 days (or it smells sour), slide the root ball out and inspect. Trim only obviously black, mushy roots with clean scissors, then repot into fresh, airy mix in a pot that’s the same size or only 2–5 cm (0.8–2 in) wider. Avoid upsizing too much; extra soil stays wet longer.
- Hold fertilizer until new growth looks steady.
Feeding a stressed plant can worsen yellowing. Wait until the top 3–5 cm (1–2 in) dries between waterings and the plant resumes normal growth.
| What you notice | What to do next |
|---|---|
| Top feels damp, but not muddy; no odor | Pause watering, increase airflow, and give brighter indirect light for a few days. |
| Soil stays wet for 7–10 days; pot feels heavy | Check drainage holes, loosen the surface 1–2 cm (0.4–0.8 in), and try wicking. |
| Sour smell, fungus gnats, or black/mushy roots | Unpot and inspect roots; remove rot and repot into a chunkier, better-draining mix. |
| Leaves keep yellowing even as soil dries | Remove the worst leaves, keep watering conservative, and reassess light, temperature, and root health. |
Avoid “quick fixes” like blasting the pot with heat, leaving it in full sun to dry, or mixing in sand on top. Those approaches often compact the mix or overheat roots, which can make yellowing worse even if the surface looks dry.
Preventing chronic moisture stress
Stop the yellowing cycle by focusing on how water moves through the pot or bed, not just whether the surface feels damp. Many plants show “wet soil” while roots are still struggling because oxygen is limited, drainage is uneven, or watering is happening at the wrong depth.
- Match watering to root depth, not the top layer. Water slowly until you see a little runoff from the drainage holes, then empty the saucer after 10–15 minutes. Outdoors, aim to moisten the root zone rather than sprinkling lightly every day.
- Use a simple moisture check before you add more. Push a finger 5–7 cm (2–3 in) down or use a wooden skewer; if it comes out cool and dark, wait. If it’s barely damp and the plant is drooping, it’s time to water.
- Improve air exchange around roots. Choose pots with drainage holes, avoid decorative cachepots that trap water, and don’t let containers sit in standing water. For compacted garden soil, gently loosen the top 5–10 cm (2–4 in) to reduce crusting and help oxygen reach the root zone.
- Fix the “perched water” problem in containers. If the mix stays soggy for days, it’s often too fine or broken down. Repot into a chunkier medium (for many houseplants, adding bark or perlite helps) and avoid packing it down tightly.
- Water earlier in the day and keep it consistent. Big swings (bone-dry to soaked) stress roots and can trigger yellow leaves even when the pot feels moist afterward. A steady rhythm is easier on the plant than rescue watering.
- Adjust for temperature and light. In low light or cool rooms, plants use less water, so soil stays wet longer. In brighter windows or warm spells, they may need deeper watering more often even if the surface still feels damp.
- Don’t fertilize a stressed root system. If leaves are yellowing and the medium is staying wet, pause feeding until new growth looks normal. Salts can build up in consistently moist soil and worsen root irritation; a thorough flush with clean water can help if the pot drains well.
- Watch the newest leaves, not the oldest. Older yellow leaves won’t turn green again, but you can judge progress by whether new growth stays firm and evenly colored over the next 1–3 weeks.
| Situation you notice | What it usually means | What to change next |
|---|---|---|
| Soil feels wet for 4–7 days, leaves yellow, stems soft | Low oxygen around roots; drainage too slow | Repot into a better-aerated mix, confirm drainage holes, water only when the top 5–7 cm (2–3 in) starts to dry |
| Top is moist but plant wilts midday, pot feels light | Water isn’t reaching the full root ball; hydrophobic dry pockets | Bottom-water 15–30 minutes, then drain; next time water slowly in 2 passes to re-wet evenly |
| Moist soil, yellowing between veins on newer leaves | Nutrients not being taken up well due to root stress or pH issues | Stabilize watering first; once growth improves, feed lightly and avoid overwatering that keeps roots inactive |
| Moist soil, fungus gnats, sour smell | Organic mix staying constantly wet; microbial imbalance | Let the top 5–7 cm (2–3 in) dry between waterings, improve airflow, consider replacing the top layer or repotting if odor persists |
If you make one change, make it this: ensure the container or bed drains freely and then water deeply only when the root zone has started to dry. That combination prevents both “wet feet” and the hidden drought that happens when water never reaches the lower roots.
Recovery indicators after correction
Improvement usually shows up in stages: first the plant stops getting worse, then new growth looks healthier, and only later do older yellow leaves fade or drop. Don’t expect the damaged foliage to turn fully green again; the better sign is what happens at the growing tips.
- Yellowing slows or stops spreading to additional leaves within about 3–7 days (timing varies by species and temperature).
- New leaves emerge a more normal color (less pale, less blotchy) and hold that color as they expand.
- Leaf texture firms up: less limp or “soft,” with better turgor during the day. (Some plants perk up within 24–72 hours after roots get oxygen again.)
- Soil starts drying on a predictable rhythm: the top 2–5 cm (1–2 in) dries between waterings, rather than staying wet for many days.
- Roots look and smell healthier if you check them: creamy/white or light tan, not dark, mushy, or foul-smelling.
- Less leaf drop: the plant may shed a few already-yellow leaves, but it shouldn’t keep dropping green ones.
- Stems stay firm at the base. Soft, collapsing stems are a warning sign that the problem is still active.
- Growth resumes: you see longer internodes, new buds, or fresh shoots once the plant is back in balance.
| What you observe | What it usually means | What to do next |
|---|---|---|
| No new yellow leaves; existing yellow remains | Stress has stabilized; older damage is permanent | Hold steady; avoid extra fertilizer “rescues” |
| New growth is greener but small or slightly pale | Roots are recovering, but uptake is still catching up | Keep watering conservative; reassess light and temperature |
| Soil dries in 2–5 days instead of staying soggy | Air exchange improved and roots are functioning again | Water only when the top 2–5 cm (1–2 in) is dry |
| Continued yellowing plus limp leaves despite moist soil | Root damage/rot may still be progressing | Inspect roots; trim rot; refresh mix and improve drainage |
| Leaf edges brown and crispy while soil is moist | Salt buildup or uneven watering after correction | Flush with clean water and let excess drain; pause feeding |
| Fungus gnats persist and the surface stays wet | Top layer remains too damp; organic matter breaking down | Let the top dry; use a thin dry top-dressing; reduce frequency |
If you’re tracking progress, take a photo from the same angle every 3–4 days and note when the pot feels lighter. That makes it easier to see whether the plant is truly bouncing back or just cycling through more stress.
Give it time: many houseplants need 2–4 weeks to show clear improvement after drainage, watering, or potting changes, and longer if the root system was heavily affected. If symptoms worsen after 7–10 days with better watering habits, it’s worth checking roots again rather than waiting for a turnaround that may not come.