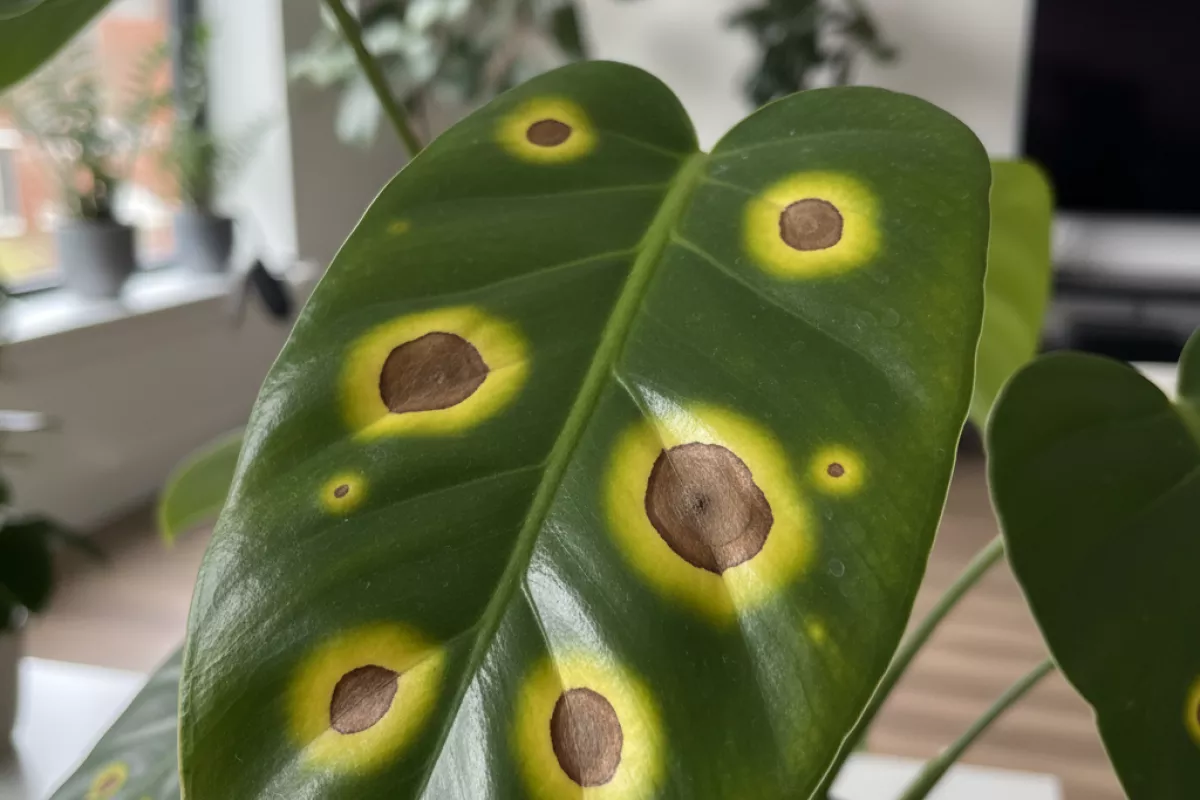
Brown Spots With Yellow Halos: Early Warning Signs

 Covers why halos form around leaf spots, which diseases commonly cause halo patterns, how infections spread across leaves, and how to tell fungal halos from nutrient issues. Also explains inspection methods, treatment steps, prevention tips, and conditions that raise risk.
Small brown lesions with a yellow ring on leaves often signal early plant stress. They may indicate fungal or bacterial disease, sun scorch, pest damage, or problems with watering or nutrient balance. Spotting them early lets you adjust care, check for insects, improve airflow and light conditions, and isolate affected plants if needed to prevent spread and reduce leaf loss.
Why halos form around leaf spots
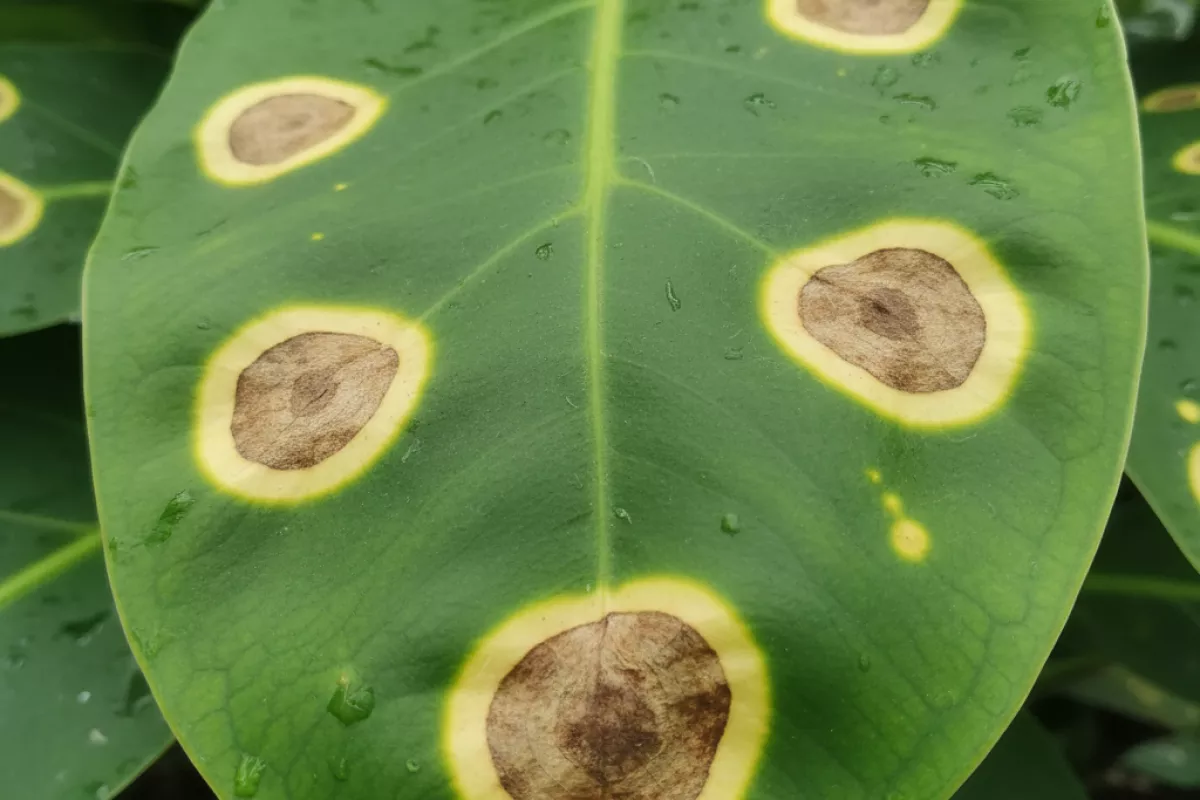
The yellow ring you see around a brown lesion is usually the plant’s tissue reacting to stress, not “extra damage” spreading outward. Chlorophyll breaks down in the cells surrounding the spot, so the area looks pale or lemon-yellow even before it turns brown. That color shift is often an early clue that the leaf is fighting something—an infection, a toxin, or an environmental hit.
In many cases, the halo is driven by plant hormones and defense chemistry. When a pathogen starts feeding or releasing enzymes, the plant may wall off the area by changing how water, sugars, and signals move through nearby cells. Those surrounding cells can temporarily lose chlorophyll, giving the classic yellow margin.
- Pathogen toxins and enzymes: Some bacteria and fungi produce compounds that disrupt chloroplasts or cell membranes. The center becomes necrotic (brown), while the nearby tissue is stressed but still alive, so it yellows first.
- “Quarantine” response: Plants sometimes create a boundary zone to slow spread. That boundary can involve oxidative bursts and localized cell shutdown, which commonly shows up as chlorosis (yellowing) around the lesion.
- Water and nutrient flow disruption: Damage to tiny veins can reduce water delivery and nutrient transport to the surrounding area. The result can look like a bright ring even when the spot itself stays the same size for a while.
- Sun + wet leaf synergy: Wet leaves under strong light can amplify injury. The tissue around a small wound may yellow broadly after a hot afternoon around 30°C (86°F), especially if the leaf stayed wet for 6 hours (0.25 days) or more.
- Chemical or fertilizer splash: Droplets of pesticide, soap, or concentrated fertilizer can burn a central patch, with a yellow margin where the dose was lower. This pattern often appears suddenly after spraying or feeding.
Halos can also change with time. A fresh lesion may have a crisp yellow ring for a few days, then the center enlarges and the halo fades as the surrounding tissue either recovers (greens back up) or collapses (turns tan/brown). That’s why it helps to check whether the ring is expanding, staying stable, or disappearing.
If you’re trying to interpret what you’re seeing, focus on the pattern across the plant: a few isolated spots with halos after a spray event suggests chemical injury, while many small lesions with consistent yellow margins—especially on new growth—leans more toward a living cause like bacteria or fungi. Either way, the halo is a sign the leaf is under pressure and worth investigating early.
Diseases commonly linked to halo patterns
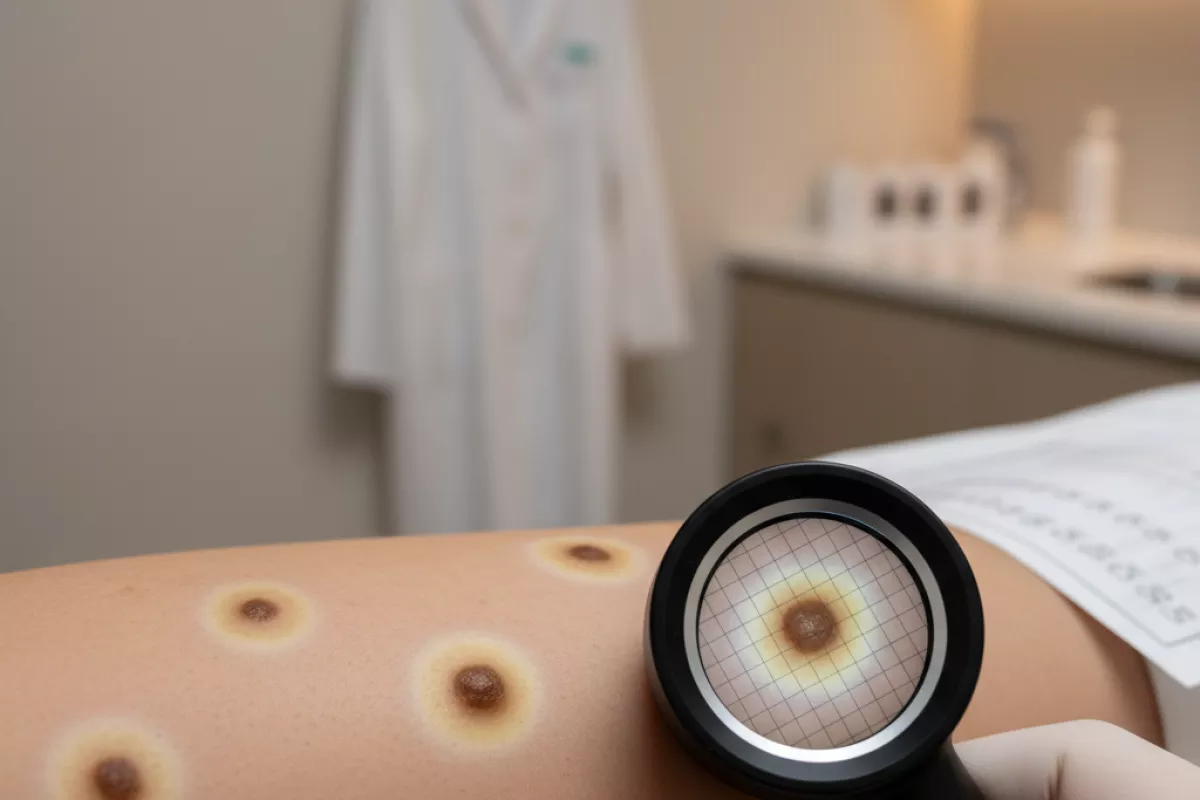
When a brown spot is surrounded by a yellow rim, it often points to inflammation, pigment change, or reduced blood flow around a central lesion. The halo itself isn’t a diagnosis, but it can narrow the possibilities—especially when you consider location (face vs. trunk vs. legs), symptoms (itch, pain, numbness), and how quickly the mark is changing.
| Condition | Typical look and where it shows up | Clues that make it more (or less) likely | What clinicians usually do next |
|---|---|---|---|
| Halo nevus (mole with a halo) | A central brown mole with a lighter or yellowish ring; often on the trunk in teens and young adults | Often symmetric and slowly evolving; may fade over months. New halos in adulthood or an irregular center deserve closer attention | Skin exam and dermoscopy; biopsy if asymmetry, rapid change, bleeding, or atypical features |
| Tinea corporis (ringworm) | Round or oval patch with a more active edge; can look brown with a yellowish rim, usually on arms, trunk, or thighs | Itch and fine scale are common; the border may expand outward. Steroid creams can mask the scale and make it look “odd” | Scraping for KOH microscopy or fungal culture when unclear; topical antifungals if confirmed |
| Impetigo or ecthyma (bacterial skin infection) | Crusted sore that can leave a brown center with surrounding yellow crusting or discoloration; often on face or legs | Tenderness, oozing, honey-colored crust, or a nearby scratch/insect bite; ecthyma tends to be deeper and can scar | Clinical diagnosis; sometimes a swab for culture; topical or oral antibiotics depending on severity |
| Insect-bite reaction / papular urticaria | Brownish spot after a bite with a yellow-red halo; commonly on ankles, legs, or exposed areas | Itch is typical; may appear in clusters. The center can darken as it heals (post-inflammatory hyperpigmentation) | Symptom control (anti-itch measures); evaluate for secondary infection if increasing pain, warmth, or pus |
| Contact dermatitis (irritant or allergic) | Patchy discoloration with a faint yellow rim around a darker area, often where skin touched a trigger (watchband, adhesive, plant sap) | Burning or itch; shape may match exposure pattern. Repeated exposure can leave lingering brown marks | History of exposures; patch testing if recurrent; short course anti-inflammatory treatment if appropriate |
| Venous stasis dermatitis / hemosiderin staining | Brown patches on lower legs with surrounding yellow-brown discoloration; swelling may be present | Worse after standing; varicose veins or ankle edema. Skin can feel tight or itchy; ulcers may develop near the ankles | Assess circulation; compression therapy guidance; rule out arterial disease before strong compression |
| Diabetic dermopathy (“shin spots”) | Small, round-to-oval brown spots on shins; sometimes a subtle yellow-brown halo as they fade | Usually not painful or itchy; often multiple and bilateral. More common with long-standing diabetes | Clinical diagnosis; focus on diabetes control and skin protection; evaluate if ulcers, pain, or rapid change |
| Erythema migrans (Lyme disease rash) | Expanding patch that can develop a darker center with a paler or yellowish outer ring; often on trunk, groin, or behind knees | History of tick exposure; may be warm but not very itchy. Can expand beyond 5 cm (2 in) over days | Clinical diagnosis in the right setting; prompt antibiotics; testing may be deferred early depending on timing |
| Skin cancer warning signs (melanoma or pigmented basal cell carcinoma) | New or changing brown spot; the surrounding “halo” may reflect inflammation or regression rather than a true ring | Asymmetry, irregular border, multiple colors (brown/black/blue/gray), bleeding, or rapid evolution are concerning—especially after age 30 | Urgent dermatology assessment; dermoscopy and biopsy when suspicious |
If the center becomes painful, ulcerates, or the ring spreads quickly—especially beyond about 5 cm (2 in)—it’s worth getting checked sooner rather than later. Photos taken a few days apart can help capture changes that are easy to miss day to day.
How infection spreads across leaves
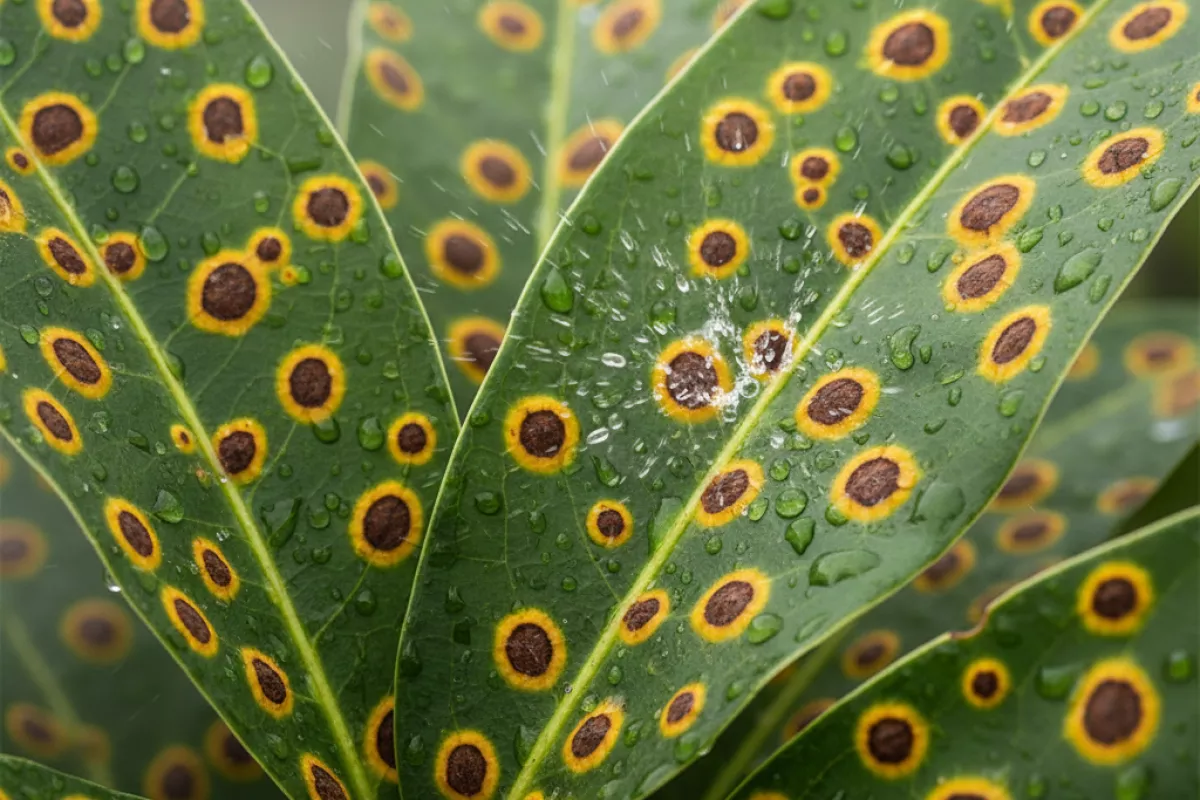
Once a pathogen gets established, it rarely stays confined to the first brown spot. It moves outward through splashing water, humid air, and simple contact, turning a few isolated lesions into a scattered pattern across the canopy. The yellow halo is often the plant’s stress response around an active infection site, so new halos appearing on nearby leaves can be a clue that spread is ongoing.
- Water splash (rain or overhead watering): Droplets hit an infected spot and fling spores or bacteria onto neighboring leaves. This is why new lesions often show up in a rough “spray” pattern, especially after storms or sprinkler cycles.
- Leaf-to-leaf contact: When foliage is dense, wet leaves rub together and transfer microbes. Vines and crowded houseplants can spread symptoms quickly because the canopy stays in contact for hours.
- Hands and tools: Pruning shears, gloves, and even brushing past plants can move infectious material from one leaf to the next. If you notice spots appearing along a line where you worked, this route is worth considering.
- Wind-driven moisture: Wind alone doesn’t usually “carry” heavy droplets far, but wind plus mist or rain can push contaminated moisture deeper into the plant and onto fresh tissue.
- Insects and other tiny movers: Some insects create small wounds or carry microbes on their bodies, giving infections an easy entry point and a ride to new leaves.
Timing matters because many leaf spot problems need a wet window to infect. A leaf that stays damp for 6–12 hours can be far more vulnerable than one that dries quickly, and warm conditions around 20–30°C (68–86°F) often speed up colonization for common fungal and bacterial issues. That’s why symptoms can seem to “jump” after a humid night even if you didn’t change anything else.
Watch where the newest brown spots with yellow halos appear. Lesions starting on the lower leaves often point to splash-up from soil or debris, while damage concentrated on the inner canopy suggests poor airflow and prolonged moisture. If the newest marks cluster near pruning cuts or where leaves were handled, mechanical spread is a likely contributor.
Distinguishing fungal halos from nutrient issues
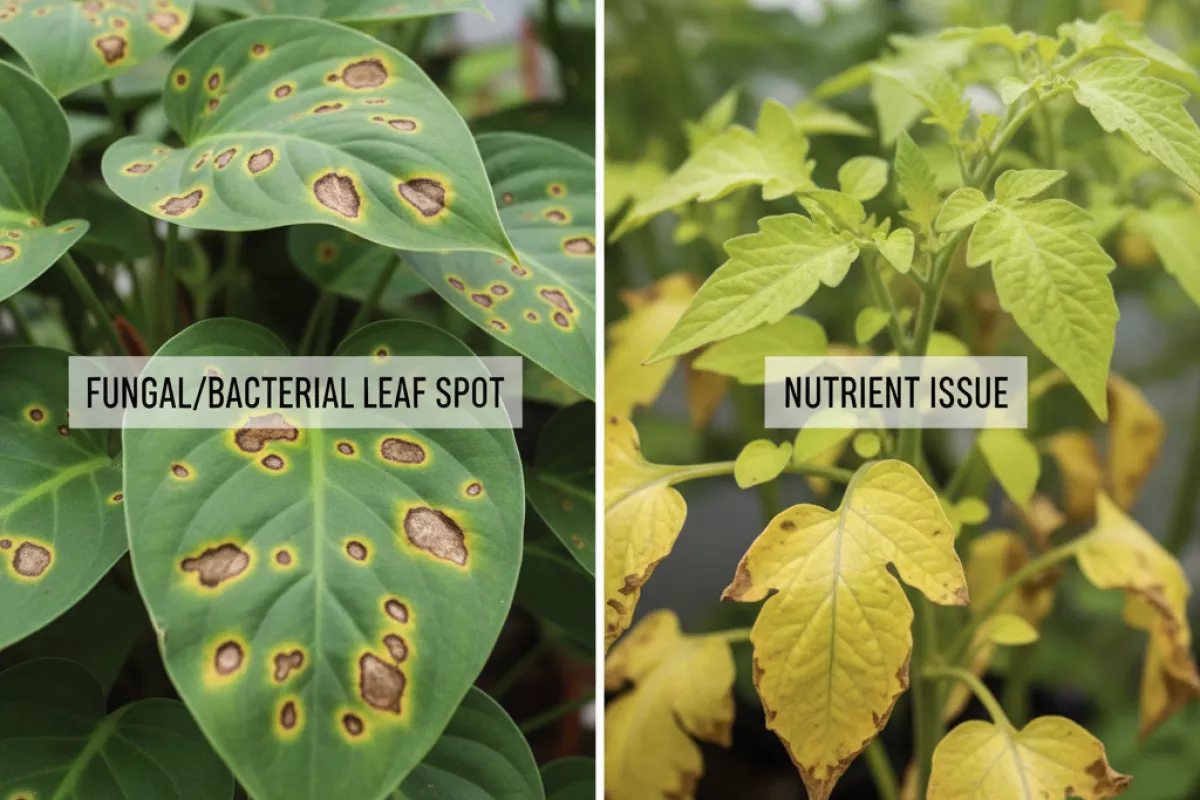
When you see brown spots ringed with yellow, the fastest way to narrow the cause is to look for patterns: how the spots are shaped, where they appear on the plant, and whether they’re spreading. Infections tend to look “patchy” and contagious, while deficiencies usually show up as a more uniform change tied to leaf age and overall growth.
| Clue | More consistent with fungal/bacterial leaf spot | More consistent with nutrient issue (deficiency or imbalance) |
|---|---|---|
| Pattern across the plant | Irregular distribution; starts on a few leaves and expands outward | More uniform pattern; many leaves show similar symptoms at once |
| Spot shape and edge | Distinct lesions with sharper borders; may have a darker rim or “target” rings | Less like discrete lesions; more like blotches or general chlorosis between veins |
| Halo behavior | Yellow ring often tight around the spot; may widen as the lesion enlarges | Yellowing tends to spread beyond a single spot, following veins or leaf sections |
| Leaf age affected first | Often older, lower leaves first (splash-up), but can hit any leaf depending on spread | Depends on nutrient: mobile nutrients (like nitrogen) show on older leaves first; immobile (like iron) show on new growth |
| Speed of change | Can progress quickly after wet periods; new spots appear after rain/overhead watering | Usually slower; tied to feeding schedule, pH drift, or depleted soil over time |
| Texture and surface signs | May look water-soaked early; can develop tiny black dots or dusty growth in humid conditions | No fuzzy growth; leaf tissue may thin or scorch at edges without “spore-like” signs |
| Where it shows up | Common on leaves that stay wet or crowded areas with low airflow | Often linked to root-zone conditions (pH, salts, poor uptake), not leaf wetness |
| Response to watering changes | Improves when leaves stay dry (watering at soil level, better spacing) | Little change from leaf-drying alone; improves more with corrected nutrition and pH |
If you’re still unsure, try a simple “rule-out” check. First, remove one badly affected leaf and inspect it closely in good light. If the brown area is a defined lesion and the yellow ring looks like a boundary around damaged tissue, disease is higher on the list. If the leaf shows broader yellowing that doesn’t respect spot edges, think deficiency or lockout.
- Check recent conditions: Several days of high humidity or frequent overhead watering often line up with leaf spot flare-ups.
- Look for spread: Mark 2–3 spots with a pen and recheck in 48–72 hours. New spots appearing elsewhere suggests an infectious cause.
- Assess the root zone: If the plant is in a container, salt buildup from fertilizer can mimic “halo” symptoms. Flush with plain water until you get steady drainage, then resume a balanced feed.
- Match symptom to leaf age: Problems concentrated on the newest leaves point more toward iron or manganese uptake issues; older-leaf yellowing with weak growth leans toward nitrogen or magnesium.
It’s also possible to have both at once: a mild nutrient imbalance can weaken leaves, making them easier targets for pathogens. If the plant keeps producing new, clean growth after you improve airflow and adjust feeding, you’re likely on the right track—even if older spotted leaves never fully “heal.”
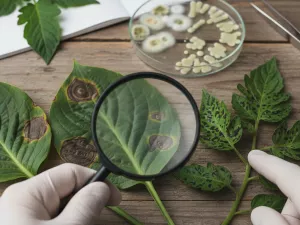
Inspection methods for confirmation
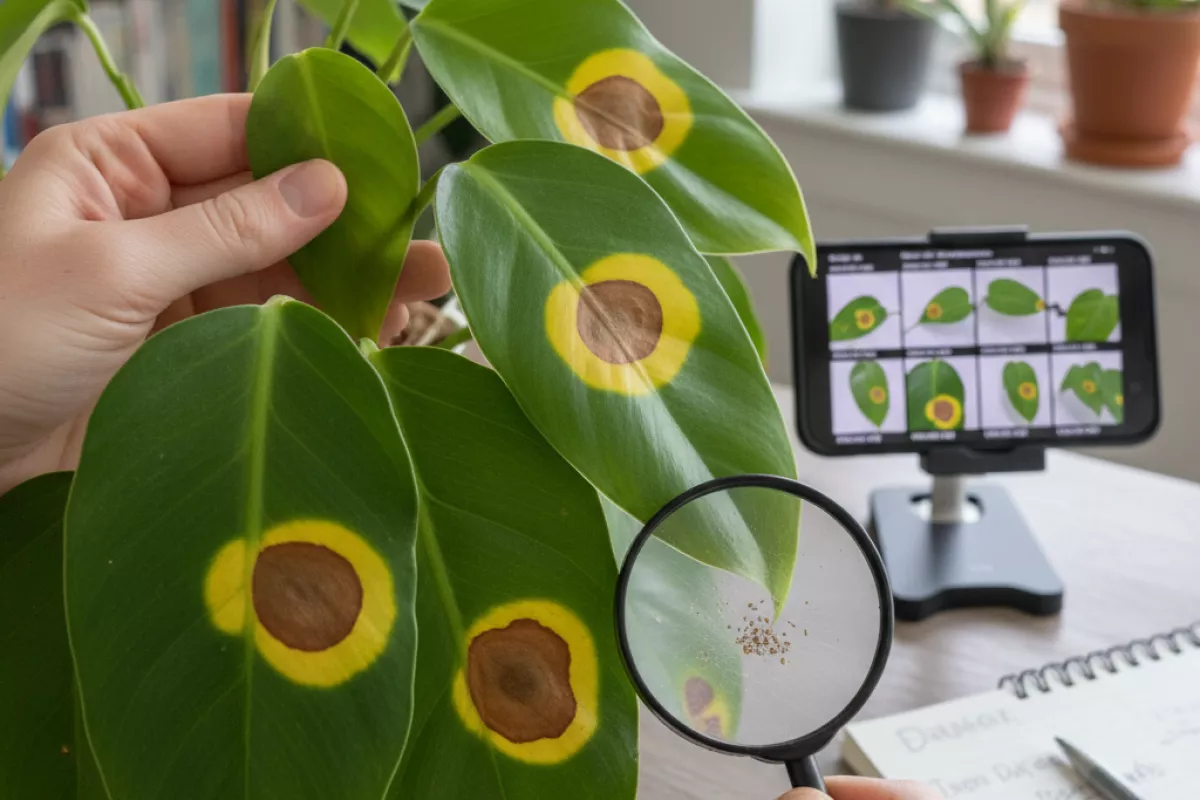
Start by slowing down and documenting what you see: where the brown spots appear, how fast they spread, and whether the yellow halo is uniform or blotchy. A quick photo taken in the same lighting each day makes subtle changes easier to catch and helps you avoid guessing.
- Check both sides of the leaf. Many problems show different clues on the underside (fine webbing, fuzzy growth, clustered insects, or raised pustules). Flip several leaves, not just the worst-looking one.
- Look for a pattern on the plant. Spots that begin on older, lower leaves often point to nutrient issues or normal aging, while damage that starts on new growth can suggest pests, herbicide drift, or a fast-moving infection.
- Examine the spot edge and halo. A crisp, dark border around a dry center can hint at leaf-spot diseases; a water-soaked, translucent edge that later turns brown can fit bacterial issues. Halos that fade gradually into green tissue can also occur after sunscald or chemical splash.
- Do the “wipe test.” Gently rub the surface with a damp cotton swab. If color transfers (rusty, sooty, or dusty), you may be dealing with spores, sooty mold, or residue rather than dead tissue inside the leaf.
- Use a hand lens. A 10× lens (or your phone’s macro mode) helps you spot mite stippling, thrips scarring, tiny eggs, or fungal structures. Look at the halo zone as well as the brown center.
- Assess texture: dry vs. greasy. Dry, papery centers often indicate tissue death from scorch or many fungal leaf spots; greasy or water-soaked lesions that smear when pressed can lean bacterial, especially if they expand after humid nights.
- Check for “shot holes.” If the brown center falls out leaving a clean hole, it can occur with certain bacterial/fungal leaf spots or after rapid tissue collapse from stress. Confirm by inspecting nearby leaves for earlier-stage lesions.
- Inspect the environment around the plant. Note recent overhead watering, crowding, poor airflow, or leaves staying wet overnight. Also check for splash-back from soil after rain or irrigation.
- Rule out chemical and fertilizer burn. Look for spots that match droplet shapes or appear where spray could have landed. If you recently applied fertilizer, compare affected leaves near the application zone to those farther away.
- Compare multiple plants. If only one plant shows symptoms, localized causes (root stress, physical damage, uneven watering) rise on the suspect list. If several plants show similar halos at once, think weather event, irrigation issue, or a spreading pathogen.
| What you observe | What it often suggests | Quick way to confirm |
|---|---|---|
| Powdery or dusty coating that wipes off | Surface growth (spores/sooty mold) or residue | Wipe test; inspect underside with 10× magnification |
| Water-soaked, translucent edge that later browns | Bacterial involvement or wet-leaf stress | Track expansion after humid nights; check for greasy texture |
| Dry, papery center with a defined dark border | Common fungal leaf-spot patterns or scorch | Look for similar lesions at different stages on nearby leaves |
| Fine stippling, silvery scarring, or tiny black specks | Thrips/mites feeding damage | Tap a leaf over white paper; confirm with macro/hand lens |
| Spots match droplet shapes or appear after spraying | Chemical splash, soap/oil burn, or fertilizer contact | Review recent applications; check if damage is on exposed surfaces only |
| Symptoms start on lower leaves and progress upward slowly | Soil splash pathogens, nutrient imbalance, or aging | Check spacing/airflow; inspect for splash marks and overall leaf color |
If you want extra certainty, isolate one affected leaf and watch it for 48–72 hours. Mark the lesion edge with a pen dot and measure the diameter: even a change of 2 mm (0.08 in) can be meaningful. Rapid enlargement, new halos, or spreading to adjacent leaves points more toward an active infection than a one-time injury.
Treatment steps for infected plants
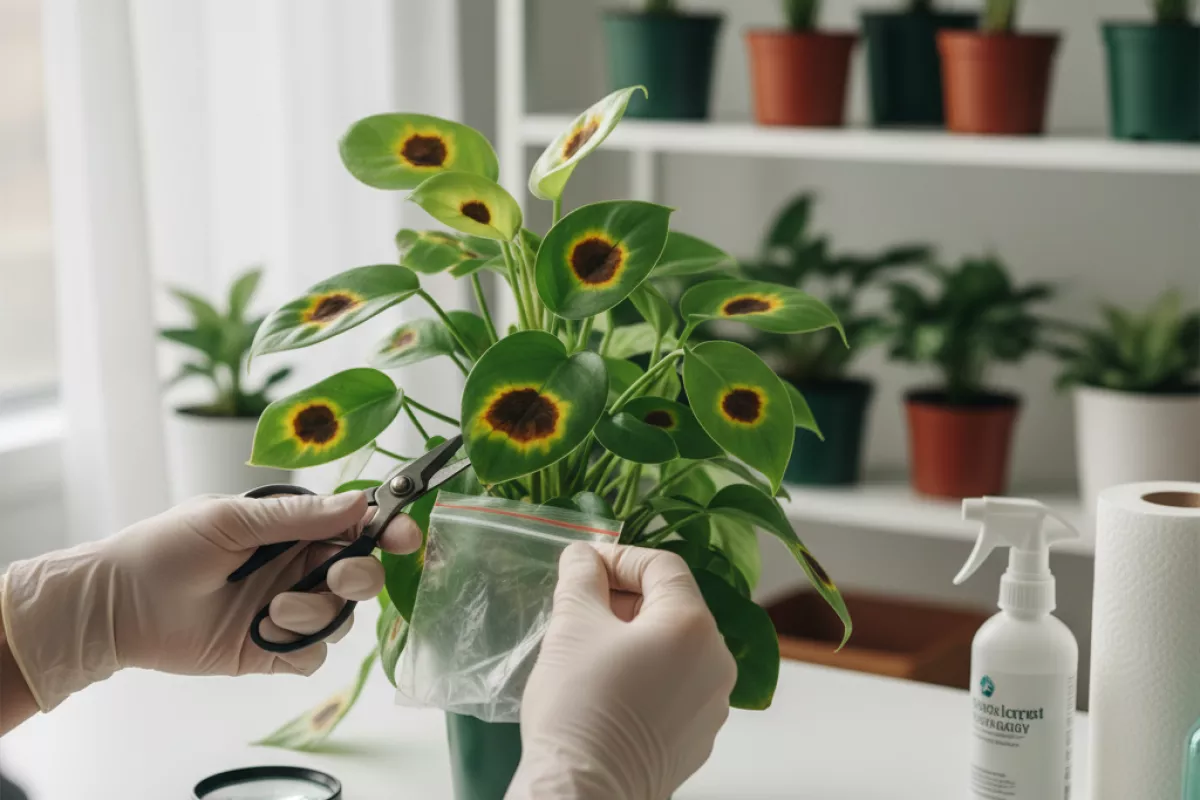
Act quickly once you see brown lesions with yellow halos: the goal is to slow spread, protect new growth, and remove the most infectious tissue without stressing the plant further. Start by isolating the affected plant if possible, then work from the cleanest plants to the sickest to avoid carrying pathogens on your hands, tools, or water splash.
-
Confirm it’s likely infectious (not just nutrition or sunscald).
Look for spots that expand over days, develop a darker center, or show a distinct yellow ring. If symptoms are limited to the oldest leaves and look more like uniform yellowing between veins, address nutrition first before cutting aggressively.
-
Quarantine and reduce splash spread.
Increase spacing, stop overhead watering, and water at the soil line. If you must mist, do it early so leaves dry fast. Aim for good airflow rather than blasting the plant with a fan that can move spores around.
-
Remove the worst leaves first.
Prune leaves that are heavily spotted, yellowing, or touching other foliage. Don’t strip more than about 20–30% of the canopy in one session; take a second pass 3–5 days later if needed. Place removed material directly into a bag—don’t compost it if you suspect a fungal or bacterial issue.
-
Disinfect tools between cuts.
Wipe pruners between plants (and ideally between heavily infected leaves). A practical option is 70% isopropyl alcohol; let it stay wet briefly before the next cut. If you use a bleach solution, mix fresh and rinse/dry tools afterward to prevent corrosion.
-
Adjust the environment to make infection harder.
Keep foliage dry longer? That favors disease. Improve ventilation, avoid crowding, and remove debris on the soil surface. If you’re growing indoors, keep leaves from pressing against cold windows where condensation forms.
-
Choose a treatment approach based on the likely cause.
Fungal leaf spots often respond to protectant sprays; bacterial spots are harder to “cure” and rely more on sanitation and preventing spread. If you’re unsure, start with hygiene and cultural changes first, then consider a broad, labeled product appropriate for your plant type.
| If you suspect… | Clues you’ll usually see | What to do next | What to avoid |
|---|---|---|---|
| Fungal leaf spot | Round/irregular brown spots that slowly enlarge; may show concentric rings; yellow halo common | Remove infected leaves; keep foliage dry; consider a labeled protectant fungicide on remaining leaves | Overhead watering; leaving wet leaves overnight; reusing contaminated stakes/pots without cleaning |
| Bacterial leaf spot | Water-soaked or greasy-looking lesions; spots may look angular (bounded by veins); rapid spread in warm, humid conditions | Strict sanitation; isolate plant; prune infected tissue; consider a labeled copper-based product if appropriate for the plant | Misting; handling wet plants; saving seed/cuttings from symptomatic plants |
| Salt/fertilizer burn | Leaf edge scorch; spotting without a clear “progression”; white crust on soil or pot rim | Flush soil with clean water and let drain; reduce feeding rate; check drainage | Adding more fertilizer “to fix” yellowing; letting pots sit in runoff |
| Sunscald or heat stress | Bleached/tan patches on sun-facing leaves; damage appears after a bright/hot day; not typically spreading | Move to gentler light; harden off gradually; provide shade during peak heat | Sudden jump from low light to full sun; spraying oils in strong sun |
After you intervene, monitor new leaves more than the old ones. Existing spots won’t “heal,” but you should see fewer fresh lesions within 7–14 days if the changes are working. If new growth continues to spot despite better watering and pruning, escalate to a labeled treatment for your specific plant and reassess whether the issue is actually bacterial, fungal, or an environmental stress that keeps reopening the door to infection.
Preventing future outbreaks
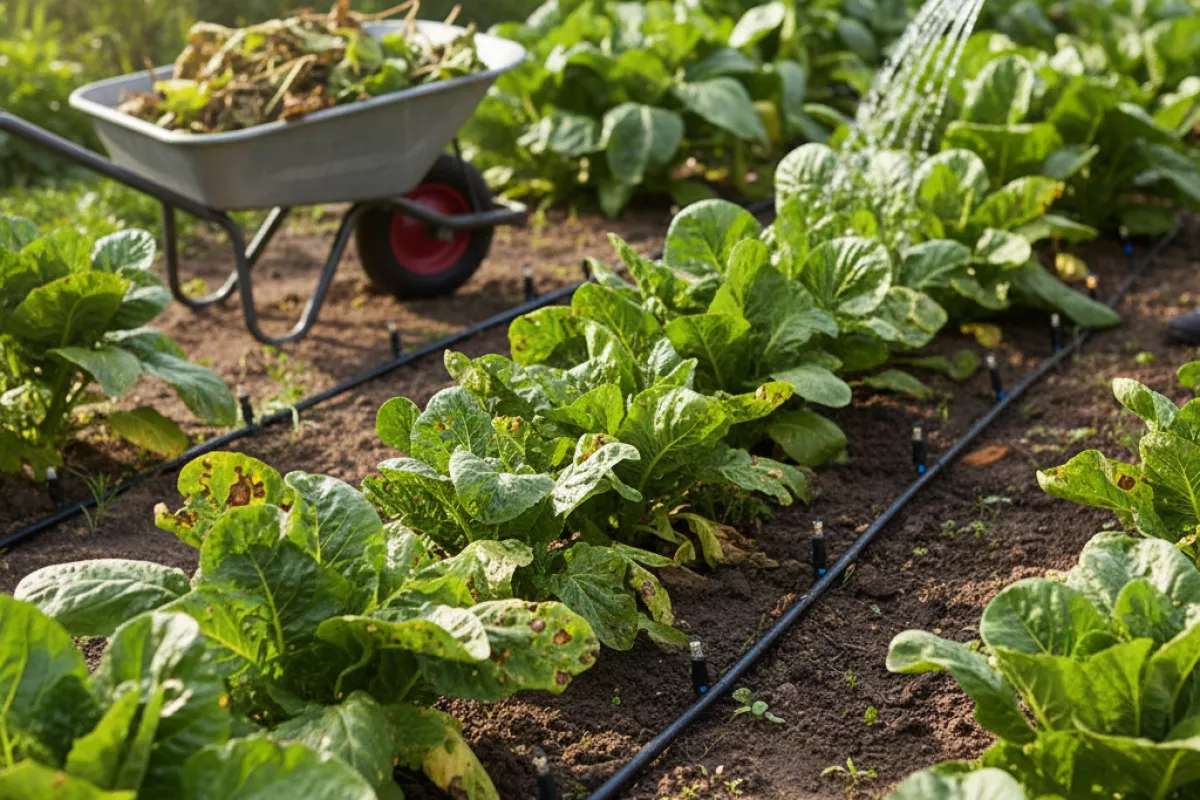
Stopping brown spots with yellow halos from coming back usually comes down to breaking the cycle: reduce leaf wetness, limit stress on the plant, and keep pathogens from moving from old debris to new growth. The goal isn’t perfection—it’s making conditions less favorable for leaf-spot fungi and bacteria.
- Water at the base, not over the leaves. Wet foliage is an open invitation for many diseases. Use drip irrigation or a watering wand aimed at the soil, and water early so any splashes dry quickly.
- Give plants breathing room. Thin crowded stems and space plants so air can move through the canopy. Better airflow shortens drying time after rain or irrigation and slows spread from leaf to leaf.
- Clean up infected material promptly. Remove spotted leaves and fallen debris, then dispose of it in the trash rather than compost if disease pressure is high. Sanitize pruners between plants with 70% isopropyl alcohol or a 10% bleach solution (1 part bleach to 9 parts water).
- Mulch to reduce soil splash. A 5–8 cm (2–3 in) layer of clean mulch helps keep spores and bacteria in the soil from splattering onto lower leaves during watering and storms.
- Rotate susceptible crops. For vegetables and annuals, avoid planting the same family in the same bed for 2–3 years. Rotation lowers the carryover of disease organisms that survive in plant residue.
- Feed and water for steady growth, not surges. Over-fertilizing (especially with nitrogen) can push tender new leaves that spot easily. Aim for even moisture and moderate fertility based on the plant’s needs.
- Choose resistant varieties when possible. If a particular plant repeatedly shows haloed spotting every season, switching to a resistant cultivar is often more effective than repeated treatments.
- Scout weekly and act early. Check lower leaves first, then work upward. Catching the first few lesions makes pruning and isolation practical before the problem spreads.
| Risk factor that encourages spotting | Practical prevention step |
|---|---|
| Leaves stay wet for long periods | Water in the morning; switch to drip/soaker lines; avoid overhead irrigation |
| Dense growth and poor airflow | Prune for airflow; space plants; stake or trellis to lift foliage off the ground |
| Pathogens overwinter in debris | Remove fallen leaves; clean beds at season’s end; rotate plant families |
| Soil splashes onto foliage | Add 5–8 cm (2–3 in) mulch; water gently at soil level |
| Tools and hands move disease between plants | Disinfect pruners; avoid handling wet plants; work from healthiest to most affected |
If you’ve already had a bad run of leaf spotting, consider a reset at the end of the season: remove crop residue, refresh mulch, and disinfect stakes, cages, and pots. Those small habits often do more to prevent yellow-halo lesions than any single spray.
Conditions that increase risk

Some health issues and everyday exposures make it more likely that a spot develops a pale or yellow ring, or that a small patch of irritation turns into something more persistent. The halo can reflect inflammation, pigment change, or a reaction pattern that shows up more readily when the skin barrier or immune response is already under strain.
- Chronic sun exposure and past sunburns: UV damage can trigger uneven pigment and slow healing, so minor irritation may leave a darker mark with a lighter or yellowish rim. Risk rises with frequent outdoor work or tanning.
- Inflammatory skin conditions: Eczema, psoriasis, and seborrheic dermatitis can create recurring redness and scaling; as spots resolve, they may leave a brown center with a lighter halo from post-inflammatory pigment changes.
- Acne-prone or easily irritated skin: Repeated breakouts, picking, friction from masks or helmets, and harsh exfoliation increase post-inflammatory hyperpigmentation and uneven borders around healing lesions.
- Allergic or irritant contact dermatitis: Fragrances, preservatives, hair dye, nickel, and some topical products can cause a ring-like reaction where the center is healing but the edge stays inflamed.
- Fungal or bacterial overgrowth: Warm, sweaty environments (tight clothing, athletic gear) can encourage superficial infections that sometimes show a darker area with a paler rim, especially if treated late or inconsistently.
- Diabetes and insulin resistance: Higher glucose can impair circulation and immune response, making skin infections and slow-healing marks more common, and increasing the chance that a small lesion changes appearance over time.
- Immune suppression: Conditions such as HIV or medications like systemic steroids, chemotherapy, or biologics can make atypical rashes and infections more likely, and can alter how lesions heal and pigment.
- Liver or gallbladder problems: Some people notice more generalized yellowing or itch; localized yellow tones around spots can be more noticeable when baseline skin color shifts or when scratching causes secondary irritation.
- Hormonal shifts: Pregnancy, thyroid disease, and hormonal contraception can influence pigmentation patterns, making brown patches and uneven borders more likely after minor inflammation.
- Nutritional deficiencies: Low iron, zinc, or certain B vitamins can affect skin repair and barrier function, increasing lingering discoloration after small injuries or rashes.
- Older age and cumulative skin damage: With time, collagen support and repair slow down, and benign pigment spots become more common; halos may appear when surrounding skin reacts differently than the center.
- Medications that affect pigment or sun sensitivity: Some antibiotics, diuretics, retinoids, and anti-inflammatories can increase photosensitivity or change pigment, so sun-exposed areas may develop darker centers with lighter surrounding skin.
If a brown mark with a yellowish ring is new, changing quickly, painful, warm to the touch, oozing, or paired with fever, it’s worth getting checked sooner rather than later. A clinician can tell whether you’re seeing a pigment issue, an infection, or an inflammatory pattern that needs targeted treatment.