Large Brown Patches on Foliage: What It Means

 Covers what large patches on plants can signal, including environmental stress and infections that cause expanding lesions, plus texture changes tied to tissue death. Explains how to diagnose the patch source, choose treatments by cause, and when leaf removal is necessary.
Broad brown blotches on leaves usually mean the plant is stressed and needs a closer look. Causes include sun scorch, inconsistent watering, nutrient imbalance, pests, or fungal disease. Note where the spots appear, whether edges are crisp or soft, and if new growth is affected. Check light exposure, soil moisture and drainage, and look under leaves for insects. Isolate the plant if disease is suspected and remove badly damaged leaves.
What large patches signal in plants
Big, spreading blotches on leaves usually mean the plant has been under stress long enough for damage to merge into larger areas. A tiny spot can come from a single splash, bite, or sun-scorch event; a broad patch more often points to a continuing issue such as moisture staying on foliage, roots struggling, or a pathogen moving through tissue.
Because many problems can look similar at first glance, it helps to read the pattern: where the discoloration starts, how the edges look, and whether the patch is dry, soft, or ringed. Those clues narrow it down faster than guessing based on color alone.
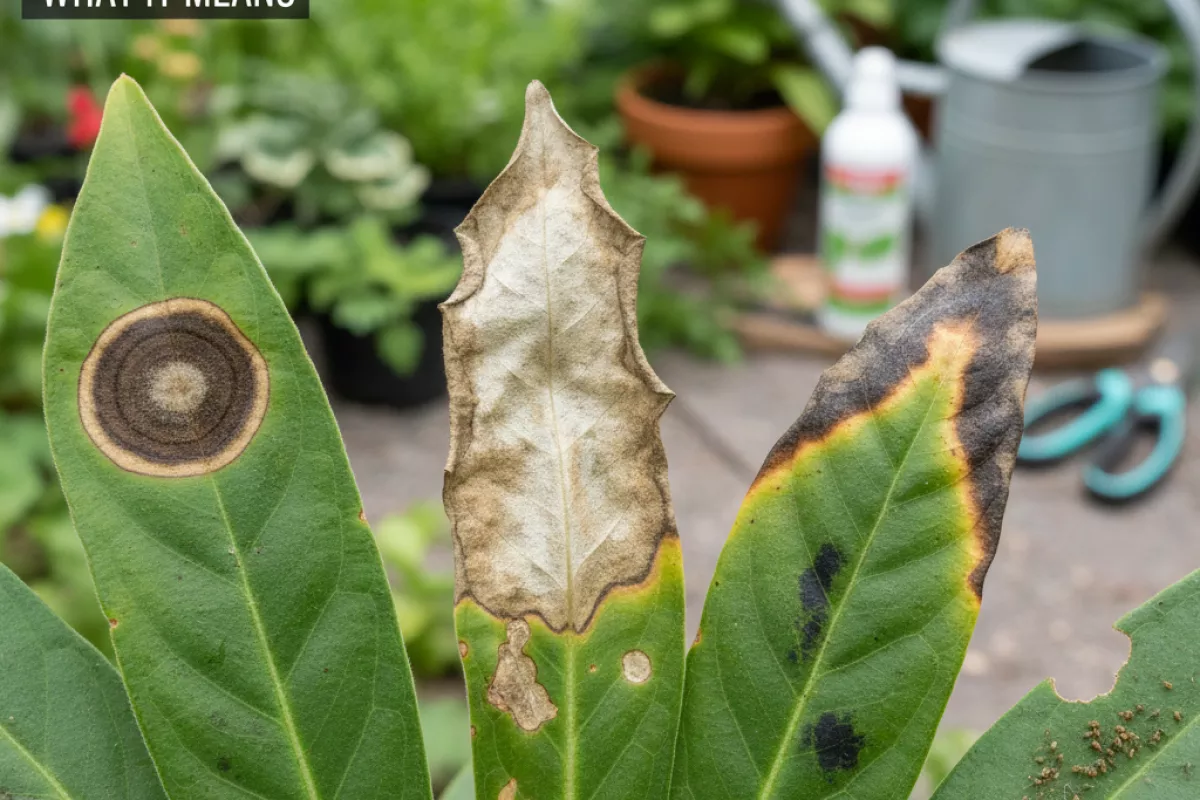
- Irregular brown patches with yellow halos often suggest leaf-spot diseases (fungal or bacterial). The halo is the plant’s “boundary line” as it reacts to infection, and the patch may expand after watering or rain that splashes spores or bacteria.
- Large crispy areas starting on the sun-facing side commonly point to sunscald or heat stress, especially after a plant is moved from shade to bright light too quickly. Damage tends to look bleached first, then turns tan to brown and papery.
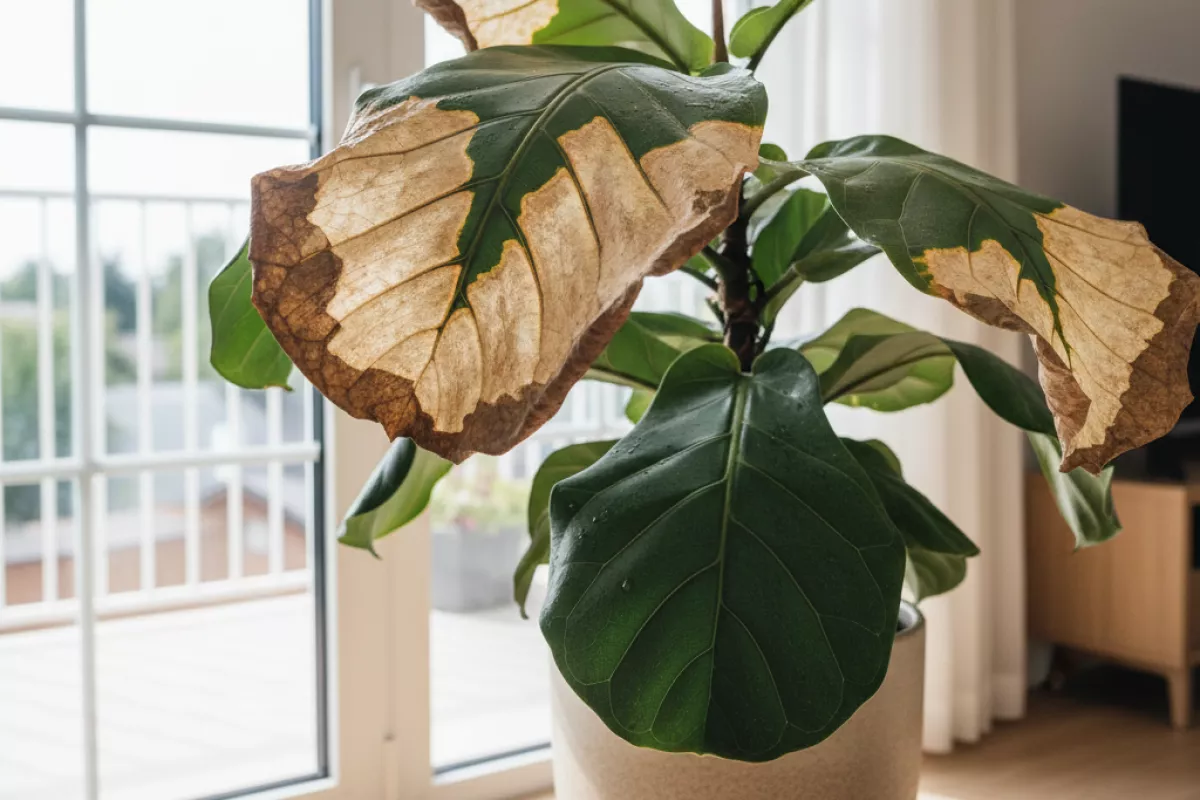
- Brown sections that begin at the leaf tip or edges can indicate water imbalance: underwatering, inconsistent watering, or salt buildup from fertilizer. Margins are where dehydration and salt injury often show first.
- Soft, dark patches that feel wet or collapse are more consistent with rot or bacterial blight. These can spread quickly in warm, humid conditions and may be accompanied by a sour smell.
- Patches between leaf veins while veins stay greener can be tied to nutrient issues (often potassium or magnesium) or root stress that prevents uptake. It’s a “distribution” problem: the plant can’t move or access what it needs evenly.
- Clusters of blotches on lower leaves first frequently indicate splash-up from soil, overcrowding, or poor airflow. Lower foliage stays damp longer and is closer to spores and debris.
- Large, uniform browning after a cold night may be chilling or frost injury. Tender plants can show damage after exposure near 0°C (32°F), with tissue turning dark and limp before drying out.
| What you see on the leaf | What it often signals | Quick check to confirm |
|---|---|---|
| Dry, papery patch on the brightest-exposed side | Sunburn or heat stress | Newer leaves in shade look normal; damage doesn’t “rub off” and stops spreading once light is managed |
| Brown patch with a yellow ring; multiple leaves affected | Fungal/bacterial leaf spot | Look for spotting that increases after overhead watering; check for speckling or tiny lesions nearby |
| Leaf edges brown and crisp, tips drying first | Underwatering, low humidity, or fertilizer salts | Feel soil 5 cm (2 in) down; check for white crust on soil or pot rim; review feeding frequency |
| Dark, water-soaked area that spreads and turns mushy | Rot or bacterial blight | Inspect stems and crown; note any odor; see if tissue collapses rather than dries |
| Blotchy browning between veins, overall pale look | Nutrient uptake problem or root stress | Check root health and drainage; consider recent repotting, compacted soil, or prolonged wetness |
One more practical signal: if the patch has a sharp boundary that matches a window edge, lamp footprint, or a splash pattern, it’s more likely environmental (light, temperature, chemicals). If it looks like it’s “moving” from leaf to leaf over days, especially in humid conditions, a disease process is more likely.
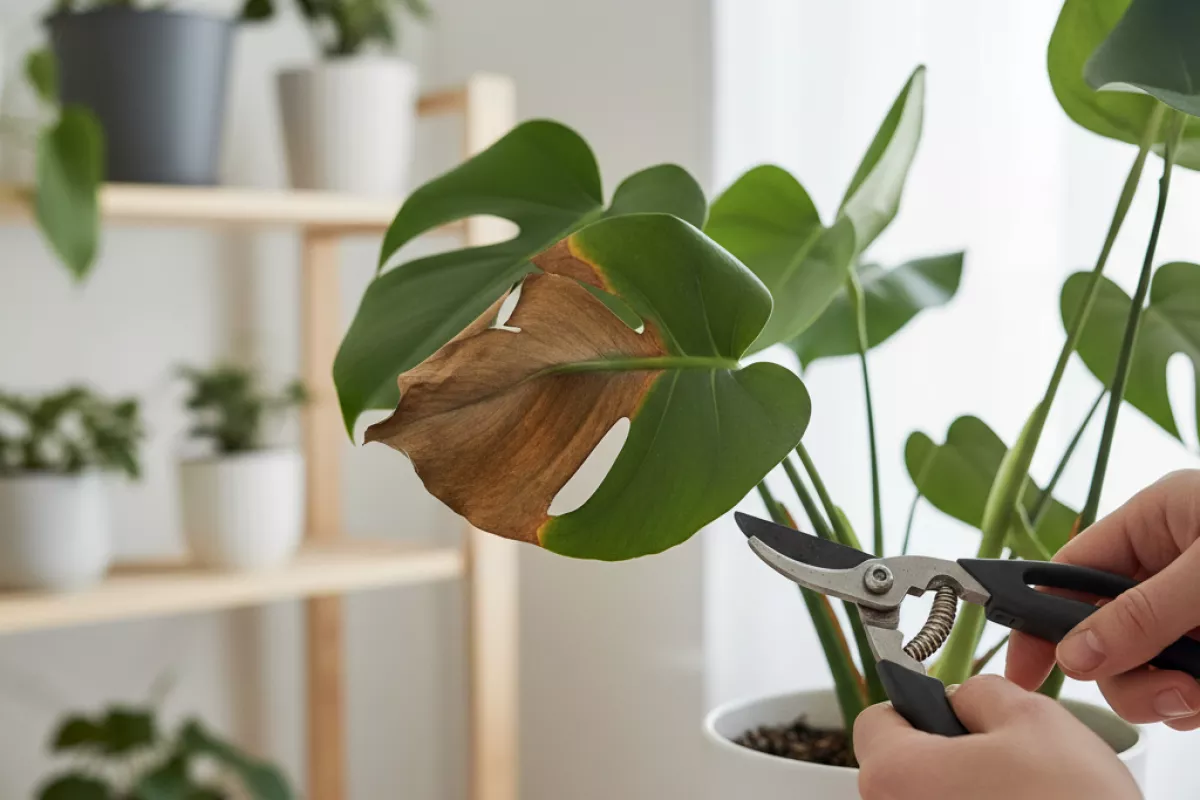
When you’re unsure, isolate the plant, avoid wetting the leaves, and remove the most damaged foliage with clean scissors. That simple step reduces spread while you figure out whether the underlying cause is care-related (watering, light, salts) or infectious.
Environmental stress that causes blotches
When leaves develop large brown areas without obvious pests or fuzzy growth, the trigger is often a mismatch between the plant and its conditions. These blotches tend to look irregular, show up quickly after a weather or care change, and may be worst on the most exposed foliage (top, outer edge, or window-facing side).
- Sunscald (too much direct light too fast): Pale tan patches that turn papery brown, usually on the side facing the sun. This often happens after moving a plant outdoors or closer to a bright window without a gradual transition.
- Heat stress: Brown, crispy sections that start at tips or margins and spread inward, especially during hot spells above 32°C (90°F). Containers heat up faster than garden soil, so potted plants can show damage first.
- Cold injury and frost: Water-soaked dark spots that later dry into brown blotches, commonly after exposure below 4°C (40°F) or a drafty window. Tender new growth is usually hit hardest.
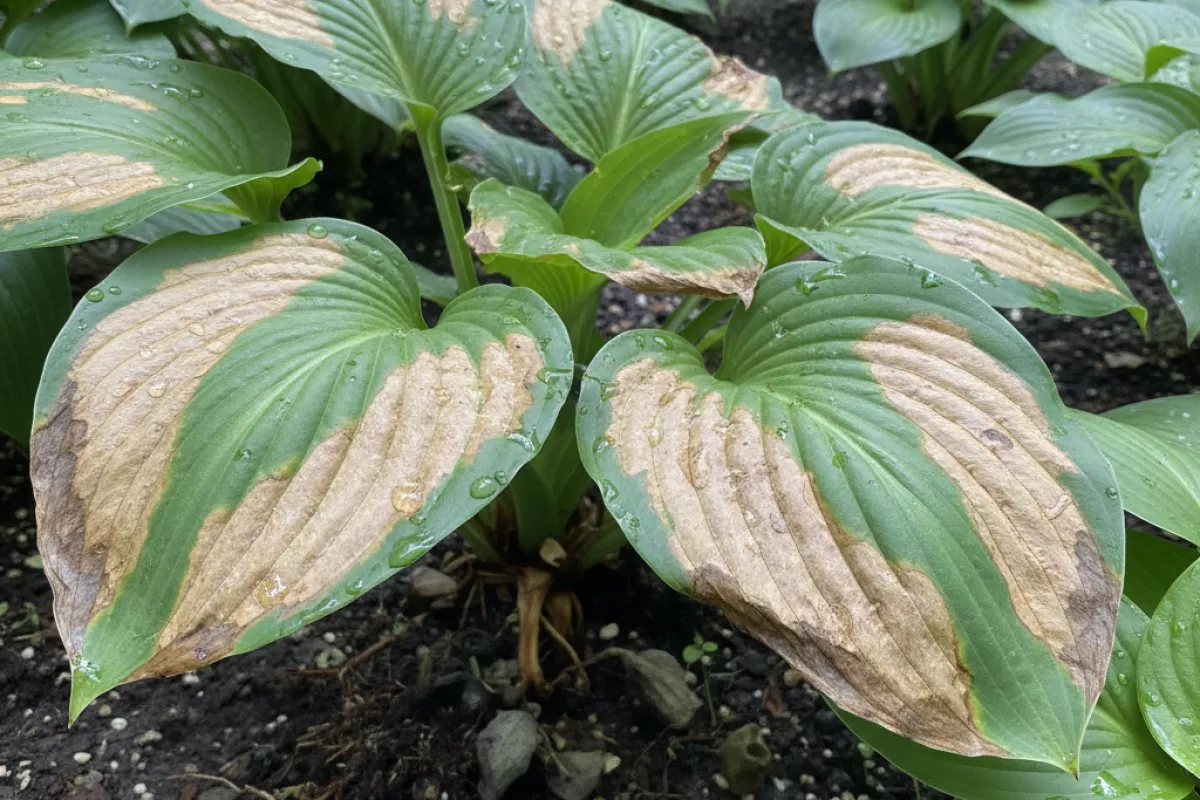
- Drought or inconsistent watering: Larger dry patches or edge burn when roots repeatedly swing from very dry to saturated. In some species, the leaf tissue between veins browns while veins stay greener for a while.
- Overwatering and low oxygen at the roots: Blotchy brown areas paired with limp leaves or yellowing. The leaf damage is secondary: stressed roots can’t supply water properly even though the soil is wet.
- Low humidity and drying air: Brown margins and scattered tan spots, common near vents, radiators, or forced-air heat. This is most noticeable in thin-leaved houseplants during winter.
- Salt and fertilizer burn: Brown patches and crisp edges after heavy feeding or using softened water. White crust on the soil surface or pot rim is a clue that salts are accumulating.
- Chemical splash or spray burn: Roundish blotches or streaks that match droplet patterns after applying oils, soaps, or cleaning products. Damage often appears within 24–72 hours.
- Wind and abrasion: Ragged brown areas where leaves rub against each other, a wall, or a stake. Outdoor plants may show this after storms or in consistently windy spots.
| Stress trigger | Typical pattern on leaves | Quick check | What to adjust first |
|---|---|---|---|
| Sudden stronger sun | Bleached area that turns tan/brown; papery texture | Damage is mostly on the brightest-facing side | Move to bright shade; re-acclimate over 7–14 days |
| Heat spike | Crispy edges and larger dry patches | Pot and soil feel hot in late afternoon | Provide afternoon shade; water earlier in the day |
| Cold draft or near-freezing night | Dark, water-soaked spots that later brown | Symptoms appear after a chilly night below 4°C (40°F) | Move away from drafts; protect outdoors during cold snaps |
| Watering swings | Irregular blotches; tip and margin burn | Soil alternates between bone-dry and soggy | Water thoroughly, then let the top 2–5 cm (1–2 in) dry (species-dependent) |
| Salt buildup / overfeeding | Edge burn plus scattered brown patches | White crust on soil or pot rim | Flush soil with clean water; reduce feeding strength and frequency |
| Spray or chemical contact | Droplet-shaped spots or streaking | Pattern matches where liquid dried on the leaf | Rinse foliage; avoid spraying in bright sun; test on one leaf first |
If you’re deciding whether this is stress or disease, use timing and placement. Stress-related blotches usually show up soon after a change (moving the plant, a heat wave, a missed watering), and the newest damage doesn’t keep expanding once conditions stabilize. Fungal and bacterial leaf spots more often continue to spread, develop halos or defined margins, and appear on multiple leaves regardless of exposure.
Damaged tissue won’t turn green again, but you can stop the problem from progressing. Remove the worst leaves if more than about one-third of the blade is brown, keep tools clean, and focus on one correction at a time so you can tell what helped.
Infections that produce expanding lesions
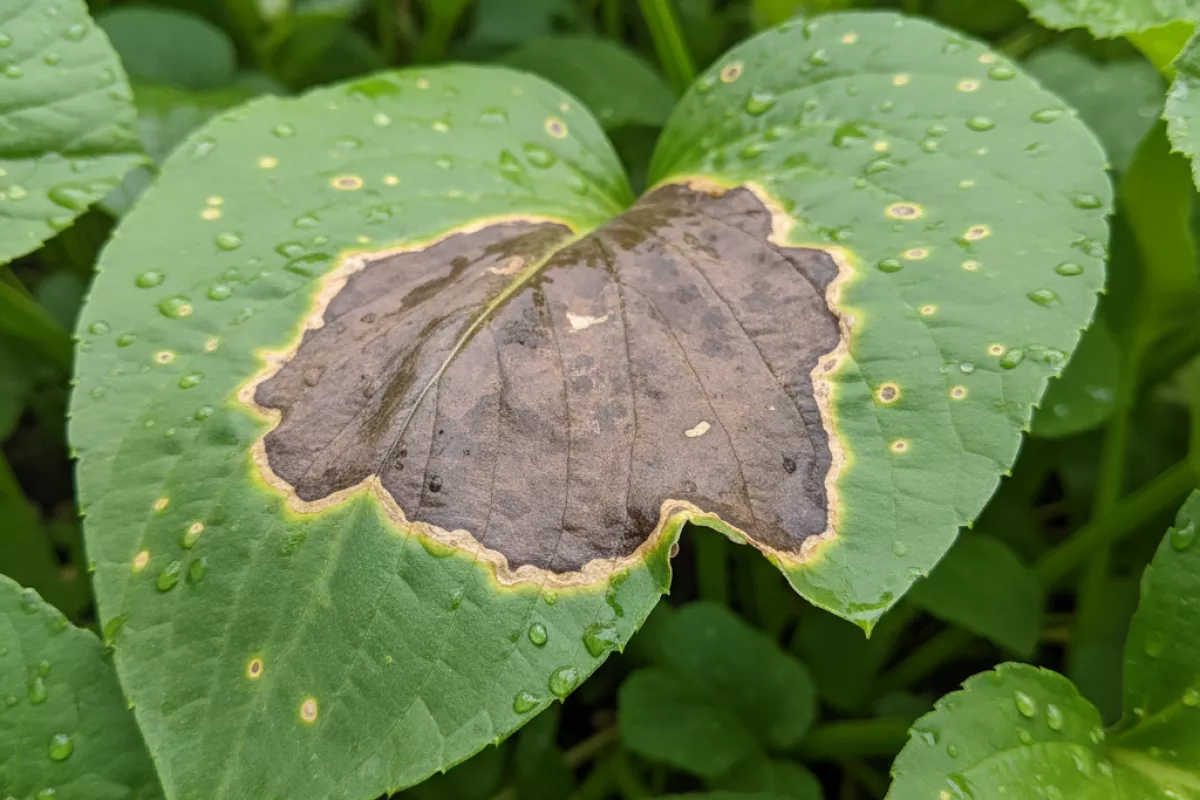
When a brown patch keeps creeping outward over days, it often points to a living pathogen rather than a one-time stress event like sunscald or fertilizer burn. These problems typically start as small, water-soaked or tan flecks, then enlarge into blotches with clearer edges, rings, or a yellow halo as the organism advances into healthy tissue.
Expansion is usually fastest when leaves stay wet for long stretches (overhead watering, frequent rain, crowded canopies, poor airflow). Many leaf-spot pathogens also “jump” upward from soil splash, so the lowest foliage is commonly hit first before the damage climbs the plant.
- Fungal leaf spots and blights: Spots enlarge into irregular brown patches; you may see concentric rings (“target spots”) or tiny dark specks (fruiting bodies) within older tissue.
- Bacterial leaf spots: Lesions can look greasy or water-soaked at first, then turn papery brown. On some plants they appear angular because veins limit the spread.
- Downy mildew–type infections: Upper leaf surfaces show yellow-to-brown blotches that expand, while the underside may develop a gray or purplish fuzz in humid conditions.
- Anthracnose and similar canker/spot complexes: Often begin as small tan spots that grow into larger dead zones; leaf edges may curl as tissue collapses.
| What you see on the leaf | What it often suggests | What to check next |
|---|---|---|
| Brown patch with a yellow halo that slowly enlarges | Active infection spreading into surrounding tissue | Look for prolonged leaf wetness; inspect nearby leaves for newer, smaller spots |
| Concentric rings or “target” pattern in older lesions | Common with several fungal leaf spots | Check for splash patterns from soil; remove heavily spotted lower leaves |
| Angular, vein-limited brown areas | Often bacterial leaf spot | Avoid overhead watering; sanitize pruners between plants |
| Underside fuzz or mildew-like growth during humid weather | Downy mildew–type pathogen | Increase airflow; water early so foliage dries; separate crowded plants |
To slow spread, start with simple containment: remove the worst leaves (don’t compost them), keep foliage dry by watering at the soil line, and thin dense growth so air can move through. If you’re pruning, wipe blades between cuts, especially when moving from a diseased plant to a healthy one.
If lesions are doubling in size within about 48 hours (2 days) or you see new spots appearing after each watering, treat it as an active outbreak. At that point, improving drying time and cleanliness matters as much as any product choice, because repeated moisture is what keeps many pathogens advancing.
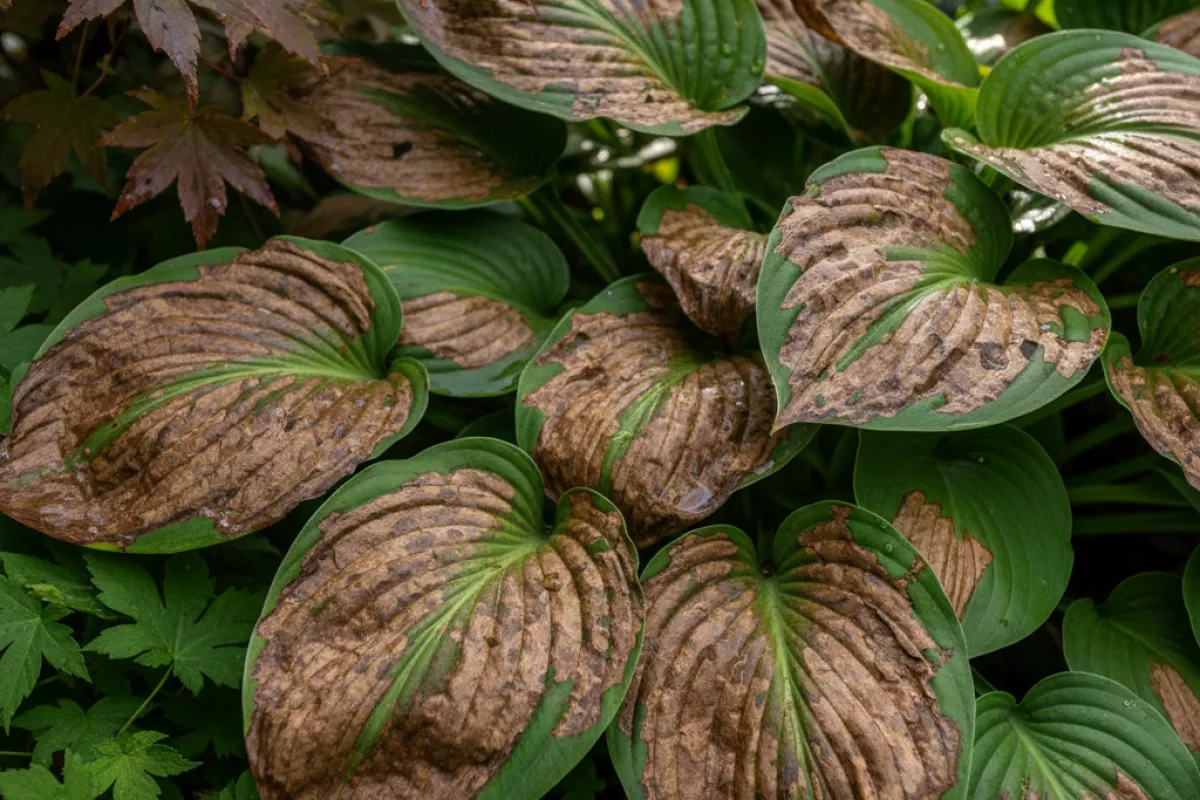
Texture changes linked to tissue death

When a leaf develops large brown patches, the feel of that area often tells you whether the problem is still active or the tissue has already died. Healthy leaf tissue is flexible and slightly springy; damaged areas shift toward papery, brittle, or water-soaked textures as cells lose structure and moisture balance.
- Crispy, papery patches: Usually indicate the cells have dried out and collapsed. This is common after sunscald, underwatering, hot dry wind, or salt/fertilizer burn. The brown area may crack when bent, and the edge between green and brown can look sharp.
- Leathery, stiff areas: Often show slower dehydration or chronic stress. You may see a firm, dull surface that doesn’t flex like the surrounding green tissue. This can happen with prolonged low humidity, root restriction, or repeated mild drought.
- Soft, mushy, or slimy spots: Suggest the tissue broke down while still wet, which can point to bacterial issues, advanced fungal rot, or prolonged leaf wetness. These patches may darken quickly and can spread beyond the original boundary.
- Water-soaked, translucent zones that later turn brown: A common progression after cold injury or chemical sprays. The area may look glassy at first, then dries into tan-to-brown paper as the cells die.
- Raised or corky texture: Sometimes the plant “walls off” injury, leaving a rough, scab-like surface. This can follow minor pest feeding, edema (water imbalance), or older mechanical damage.
Pay attention to the transition line where green meets brown. A crisp, stable border usually means the damage is finished, while a fuzzy, expanding edge can mean the stressor is ongoing (for example, infection moving through the leaf). If the brown patch feels dry but the surrounding tissue is limp, the issue may be happening at the roots (watering problems, root rot, or a pot that stays wet too long).
As a quick check, compare several leaves: if newer growth stays supple while older leaves turn brittle, it often points to environmental stress over time. If random leaves across the plant develop soft lesions, suspect a spreading pathogen or persistent moisture on the foliage. Remove only tissue that’s fully dead and dry; cutting into partly living areas can create fresh wounds that are easier for disease to enter.
How to diagnose patch origin
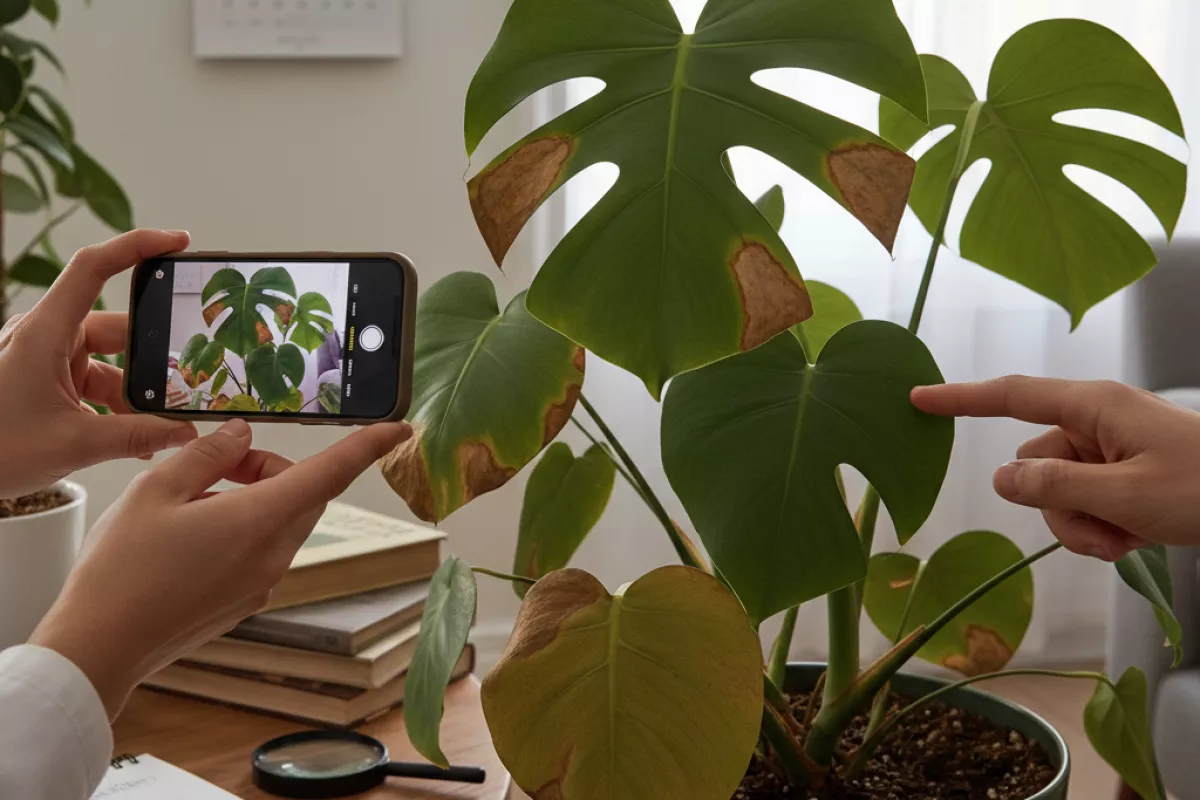
Start by treating the brown area like a clue trail: where it appears, how fast it spreads, and what the leaf tissue looks like at the edge usually points to the source. Before you change anything, take a clear photo and note when you first noticed it; a quick timeline often separates a one-time injury from an active disease.
- Map the pattern on the plant.
- Lower/inner leaves first often suggests watering issues, root stress, or older-leaf senescence.
- Upper/exposed leaves first leans toward sunscald, windburn, heat, or spray damage.
- One-sided damage can indicate a localized cause (heater vent, window glare, cold draft, herbicide drift).
- Many plants affected at once points to environment (watering schedule, humidity, temperature swings) rather than a single pest.
- Inspect the patch edge (the “border” tells a lot).
- Sharp, crisp margins are common with sunburn, chemical splash, fertilizer burn, or cold injury.
- Soft, expanding margins with a yellow halo can indicate a leaf-spot pathogen.
- Dark, water-soaked edge that later dries papery may suggest bacterial or fungal infection, especially if it spreads after watering.
- Look for texture and surface clues.
- Papery, bleached-to-brown tissue is typical of sunscald (often starts tan, then turns brown).
- Greasy or translucent spots that turn brown can be bacterial.
- Concentric rings (“target” spots) often align with fungal leaf spots.
- Stippling, bronzing, or fine webbing suggests mites; silvery scarring can indicate thrips.
- Check the underside and the stem junctions.
- Flip leaves and use a bright light; pests and eggs hide along veins and where the petiole meets the stem.
- If you see tiny moving dots, tap the leaf over white paper to confirm activity.
- Inspect for sticky residue (honeydew) or black soot-like film (sooty mold), which often follows sap-sucking insects.
- Review recent changes from the last 7–14 days.
- Repotting, moving closer to a window, or a sudden heat/cold event can trigger rapid browning.
- New products matter: foliar sprays, neem, soaps, and fertilizers can scorch if applied in bright light or at high concentration.
- Watering shifts: a missed cycle followed by heavy watering can crack tissues and invite opportunistic infections.
- Do a simple “spread test.”
- Mark the edge of the patch with a pen dot on the leaf (not on the spot itself) and re-check in 48–72 hours.
- If the brown area expands noticeably in 2–3 days, think active disease, ongoing pest feeding, or continuing stress.
- If it stays the same, it may be a one-time injury; the plant’s new growth becomes the key indicator.
| What you observe | Most likely origin | Quick confirmation step |
|---|---|---|
| Large, irregular brown patch on the sun-facing side; tissue looks bleached then crisp | Sunscald or heat stress | Check if damage aligns with the brightest window/outdoor exposure and appeared after a move or seasonal sun change |
| Brown edges/tips on multiple leaves; no distinct spots; leaf feels dry | Low humidity, underwatering, salt buildup, or fertilizer burn | Review watering consistency and fertilizer timing; check for white crust on soil or pot rim |
| Spots with yellow halos; multiple lesions that slowly enlarge | Fungal leaf spot | Look for similar lesions on nearby leaves; avoid wetting foliage and see if new spots stop forming |
| Water-soaked or greasy-looking lesions that turn brown; may have an odor when severe | Bacterial infection | Check if symptoms worsen after overhead watering; isolate the plant and remove the worst leaves |
| Fine stippling, bronzing, tiny moving specks; possible webbing | Spider mites or other sap-sucking pests | Tapping test over white paper; inspect leaf undersides along veins with a magnifier |
| One-time patch where spray droplets dried; sharp-edged blotches | Chemical or soap/oil phytotoxicity | Recall recent foliar applications; damage often matches droplet patterns and doesn’t “spread” like disease |
If you’re still unsure, isolate the plant for 10–14 days, improve airflow, and avoid wetting the leaves. New growth is the tie-breaker: if fresh leaves emerge clean while old patches stay static, the cause was likely a past stress event rather than an ongoing infection.
Treatment approaches based on cause
Fixing large brown patches on foliage starts with matching the response to what’s actually damaging the leaf tissue. The same-looking blotch can come from a fungus, sun scorch, inconsistent watering, chemical injury, or pests, and each calls for a different set of steps. Use the patch pattern (edges vs. centers, spots vs. sheets), how fast it spreads, and whether new growth is affected to choose your next move.
| Likely cause | What to do now | Prevention / long-term adjustment |
|---|---|---|
| Fungal leaf spot / blight |
|
|
| Bacterial leaf spot |
|
|
| Sunscald / heat stress |
|
|
| Underwatering / drought scorch |
|
|
| Overwatering / poor drainage (root stress leading to browning) |
|
|
| Nutrient issues (especially potassium or magnesium) or salt buildup |
|
|
| Chemical burn (fertilizer splash, pesticides, herbicide drift) |
|
|
| Pests (thrips, mites, scale) causing stippling that turns brown |
|
|
If you’re unsure, start with the low-risk basics: remove badly damaged foliage, correct watering and drainage, and improve airflow. Then watch the newest leaves for 7–10 days; fresh damage appearing quickly often points to an active pathogen or pests, while stable older patches usually reflect past stress (sun, drought, or a one-time chemical hit).
When removal of leaves is necessary
Cutting off damaged foliage isn’t always the first move, but it’s the right call when keeping the leaf does more harm than good. Large brown patches can become a reservoir for pathogens, attract pests, or simply drain the plant’s energy if the leaf can’t photosynthesize effectively anymore.
- The leaf is mostly nonfunctional. If more than about one-third to one-half of the leaf surface is brown, crisp, or collapsed, it’s often better to remove it so the plant can focus on healthier growth.
- Spots are spreading quickly. When patch edges expand day to day, especially with a yellow halo, water-soaked look, or a mix of tan and dark brown, treat it like an active problem and prune affected leaves to slow spread.
- You suspect a contagious issue. Fungal and bacterial leaf spots can move through splashing water and contact. Removing the worst leaves reduces the amount of infected tissue sitting in the canopy.
- There’s visible mold or rot. Any fuzzy growth, slimy areas, or a sour smell is a sign the tissue is breaking down; leaving it in place raises the risk of nearby leaves being affected.
- Pests are using it as a hideout. If thrips, mites, or scale are concentrated on a badly damaged leaf, removing that leaf can reduce the population quickly (still follow up with proper pest control).
- Brown tissue is touching the soil or pot rim. Leaves resting on damp soil stay wet longer and can encourage disease; trimming them improves airflow and keeps moisture where it belongs.
- The plant is stressed and dropping leaves anyway. During transplant shock or root issues, a plant may shed heavily damaged leaves; removing them early can prevent secondary problems like mold.
How to do it without making things worse: use clean, sharp scissors or pruners; cut at the base of the leaf stem (petiole) without tearing. If you’re dealing with suspected disease, disinfect the blades between cuts and bag the removed leaves instead of composting them. If only the tips are brown and the rest of the leaf is healthy, you can trim just the dead portion, following the natural leaf shape, and leave a thin margin of brown tissue to avoid cutting into living green areas.
Try not to take too much at once. As a rough guideline, avoid removing more than about one-quarter to one-third of the total foliage in one session unless the plant is clearly infected and you’re prioritizing containment. After pruning, adjust care to address the underlying cause (watering habits, humidity, light, or airflow), or new leaves may develop the same large brown patches.