Tiny Brown Specks Spreading Across Young Leaves

 Covers why young leaves show symptoms first, what tiny specks mean biologically, and how spotting spreads across foliage. Explains minor damage vs disease, how to detect issues early, steps to stop progression, and how to prevent spread to new growth.
Small brown flecks spreading on fresh new leaves usually mean the plant is under stress while growth is still tender. Common causes include sap-sucking pests, fungal leaf spot, sun scorch, fertilizer burn, or uneven watering, and the pattern and location of spots can help identify which. Check leaf undersides for insects, review soil moisture and drainage, and think about recent changes in light, feeding, or temperature to narrow it down quickly.
Why young leaves show symptoms first
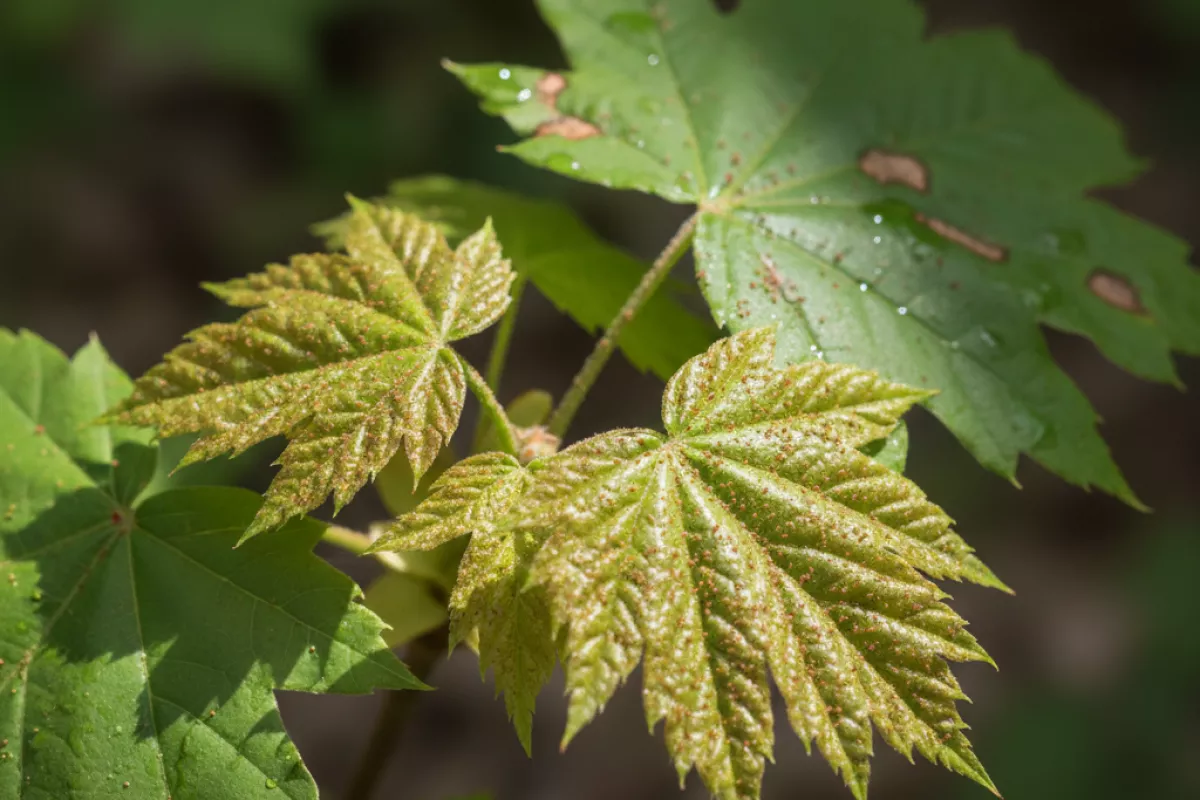
New growth tends to look worse sooner because it’s softer, thinner, and still building its defenses. When something starts causing tiny brown specks, the youngest leaves often “tell on it” first: they’re actively dividing cells, moving lots of water and nutrients, and they haven’t fully thickened their protective cuticle yet.
- Less physical protection: Young leaf tissue has a thinner cuticle and cell walls, so it bruises and dehydrates faster. Small injuries from wind, handling, or dry air can show up as pinpoint brown spots before older foliage reacts.
- Higher demand, smaller buffer: Fresh leaves are rapid-growth zones. If there’s even a short wobble in calcium, potassium, or water delivery, the newest tissue can develop speckling or tiny dead patches while mature leaves coast on stored resources.
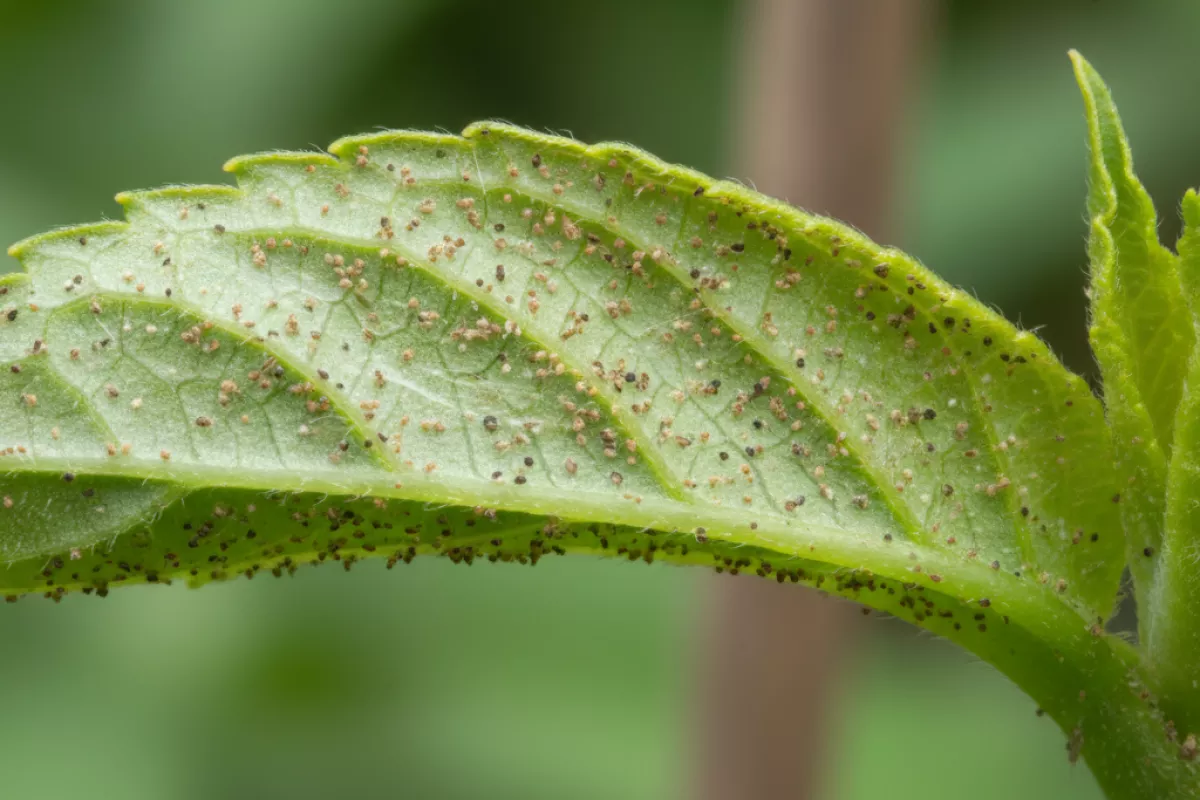
- More attractive to pests: Sap-feeders such as thrips, mites, and aphids prefer tender growth. Their feeding can create scattered brown flecks, silvery scarring, or peppery dots that appear first on the topmost leaves and buds.
- Faster symptom “printing”: Because young leaves expand quickly, a small early injury gets stretched out and becomes more visible over days. Older leaves expand slowly, so the same initial damage can stay subtle.
- Greater sensitivity to sprays and residues: Oils, soaps, and some fertilizers can spot tender leaves more easily, especially if applied in strong light or heat. The newest foliage may show fine brown stippling while older leaves remain mostly unmarked.
- Humidity and airflow effects hit tips first: The plant’s outermost, newest leaves sit in the most variable microclimate. Rapid shifts in humidity or a draft can cause localized stress that shows as tiny brown specks before the rest of the canopy changes.
If the speckling is concentrated on the newest leaves, check the growing tips closely: look for distorted edges, sticky residue, fine webbing, or a “sandblasted” look. Those clues help separate a nutrient or watering issue from pest feeding or mild chemical burn.
What tiny specks indicate biologically
Small brown dots showing up on fresh, expanding leaves usually mean something is disrupting the plant’s youngest tissues. Biologically, those specks are either dead cells (necrosis), pigment changes (localized browning), or surface deposits (frass, spores, or dried sap) that become more obvious as the leaf blade stretches.
- Cell death from feeding: Sap-sucking insects (thrips, mites, lace bugs) puncture cells; the damaged spots dry out into tiny tan-to-brown flecks. On very young leaves, this can look like “peppering” that spreads as the leaf unfurls.
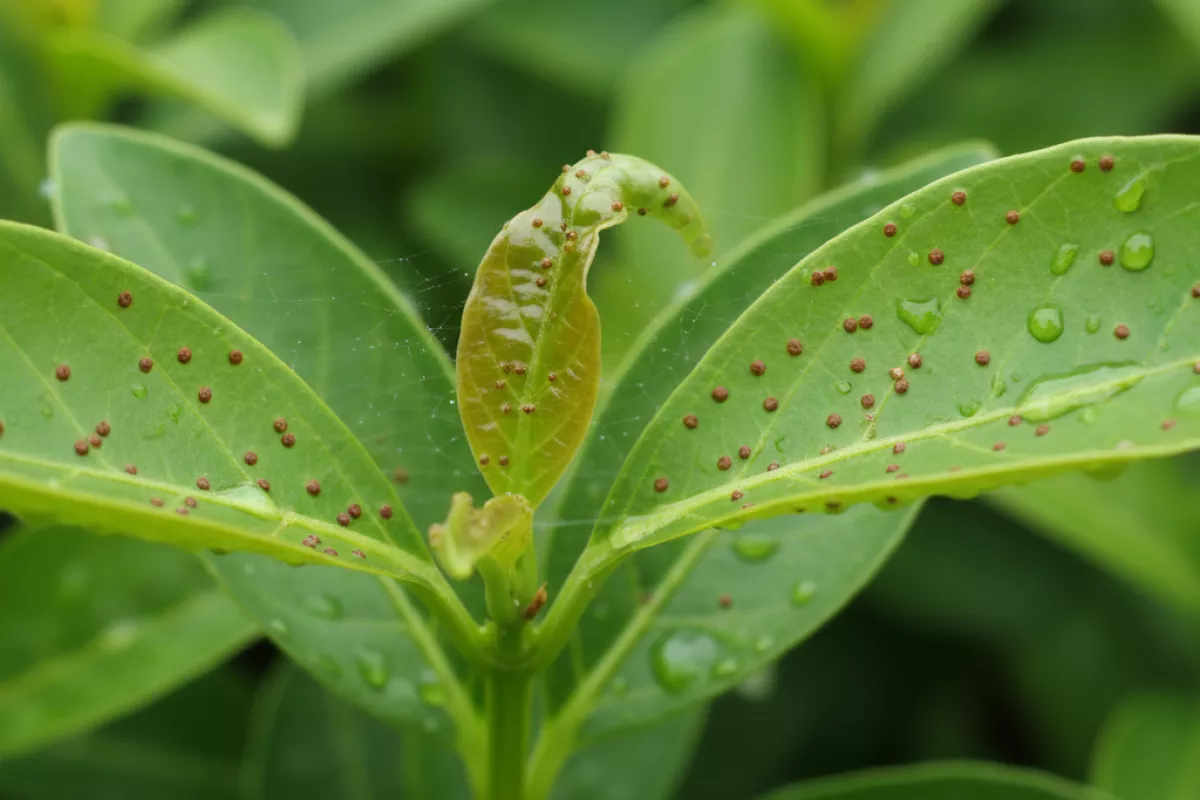
- Early fungal or bacterial spotting: Many leaf-spot pathogens start as pinprick lesions before they enlarge. The plant walls off the infection, creating a small necrotic center that later may gain a yellow halo or a darker margin.
- Physiological stress on tender growth: Rapid swings in moisture, heat, or light can cause localized tissue collapse on new leaves. The biology here is simple: cells that were still expanding lose water balance or get sun-injured, then brown and stay as fixed specks.
- Nutrient imbalance expressed in new tissue: Deficiencies that affect developing leaves (commonly calcium) can create scattered dead micro-patches because cell walls don’t form properly. The dots often accompany subtle distortion or tip dieback on the newest growth.
- Spray, fertilizer, or water droplet injury: Concentrated residues can burn tiny points where droplets sat. As the leaf enlarges, those burn points appear to “multiply,” even though they’re the same original injuries spread across a bigger surface.
- Eggs, frass, or spores sitting on the surface: Sometimes the specks aren’t plant tissue at all. Insect droppings, mite cast skins, or fungal spores can look like brown dust; a gentle wipe test can separate surface debris from true lesions.
A practical way to interpret the biology is to ask whether the dots are in the leaf or on it. If they don’t rub off and you see crisp-edged dead pinpoints, you’re looking at localized cell loss. If they smear or lift with a damp cloth, the specks are more likely deposits (frass, spores, or dried residue) and the underlying tissue may be intact.
| What you observe on young leaves | Most likely biological meaning |
|---|---|
| Specks look embedded; edges are sharp; no smear when wiped | True lesions: micro-necrosis from feeding, infection, or stress-related cell collapse |
| Fine stippling plus silvery patches or slight leaf distortion | Cell contents removed by piercing-sucking pests (often thrips or mites) |
| Dots slowly enlarge, may develop a yellow halo or darker ring | Plant defense “walling off” a pathogen; early-stage leaf spot development |
| Specks mostly on the newest leaves; tips or margins also brown | Growth-limiting physiology (commonly calcium-related) causing weak cell walls and localized dieback |
| Dots correspond to old droplets or spray pattern; appear after treatment or overhead watering | Chemical/salt burn or light-focused droplet injury creating tiny dead points |
| Specks sit on top; can be rubbed off; may reappear quickly | Surface deposits (frass, spores, dust) rather than damaged leaf tissue |
Because the leaves are young, even minor damage can look dramatic: a pinpoint injury made when the leaf was tightly folded becomes a more widely spaced pattern after it expands. That “spreading” effect is often growth revealing earlier damage, not necessarily a rapidly worsening problem.
How spotting spreads across foliage
Those tiny brown specks rarely “jump” all at once; they usually expand in a predictable way as the trigger keeps repeating. New growth is often hit first because tender tissue has thinner protective layers and stays wet longer after watering, rain, or heavy dew.
Most spread happens when moisture, movement, and plant stress line up. A few initial marks can turn into many if spores, bacteria, or sap-feeding pests are repeatedly carried to nearby leaves—especially where air is still and foliage overlaps.
- Splash and drip transfer: Water droplets can move pathogens from an older spotted leaf to clean leaves below. Overhead watering and rain are common drivers, particularly when leaves stay wet for 6–12 hours (0.25–0.5 day).
- Leaf-to-leaf contact: When plants are crowded, rubbing and constant contact can spread infections and also create tiny wounds that make it easier for spots to establish.
- Hands and tools: Pruners, gloves, and even brushing past plants can carry microscopic material from one plant to the next if tools aren’t wiped between cuts.
- Insect “taxi service”: Thrips, aphids, mites, and leafhoppers can create stippling that looks like specks, and they can also move disease organisms as they feed and travel.
- Wind and ventilation patterns: Breezes can move spores short distances, but poor airflow is often the bigger issue because it keeps humidity high and leaf surfaces damp.
- Stress makes symptoms multiply: Nutrient imbalance, root issues, or heat/cold swings can weaken defenses, so minor spotting becomes more noticeable and spreads faster across the canopy.
A helpful clue is where the marks appear first. Spots that start low and move upward often point to splash-back from soil or lower leaves, while specks that begin on the newest leaves can suggest insects feeding on tender growth or a problem tied to humidity around the shoot tips.
If you want to slow progression while you troubleshoot the cause, focus on keeping leaves dry (water at the soil line), increasing spacing for airflow, and removing the most heavily marked leaves so they aren’t a constant source of new speckling.
Difference between minor damage and disease
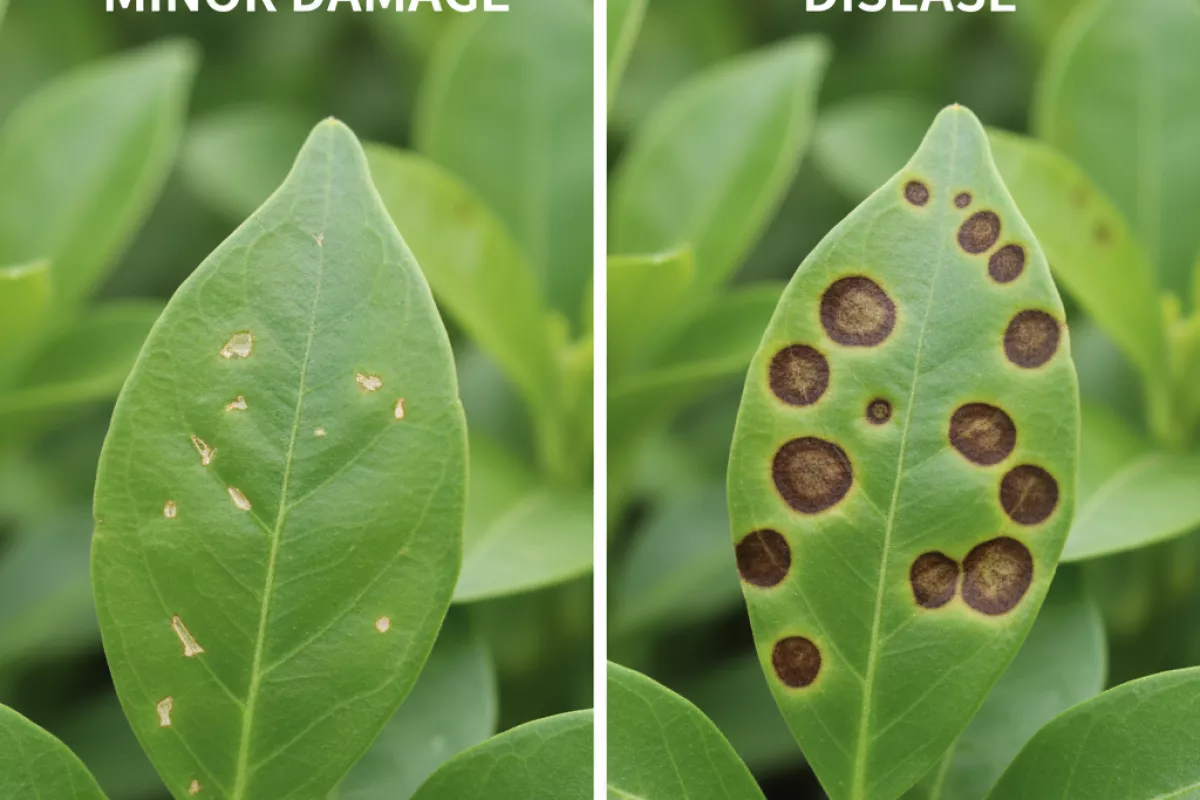
When tiny brown specks show up on young leaves, the quickest way to avoid overreacting (or missing a real problem) is to look for patterns: where the spots start, how fast they spread, and whether the leaf tissue around them is changing. Minor injury tends to look random and “surface-level,” while infections usually create repeatable shapes, expand over time, and affect multiple leaves in a similar way.
| What you notice | More consistent with minor damage (stress/pests/handling) | More consistent with disease (fungal/bacterial/viral) |
|---|---|---|
| Pattern on the plant | Scattered, uneven, often worse on the most exposed leaves (wind, sun, splashes) | Repeats leaf-to-leaf; similar spot style appears across new growth as it emerges |
| Spot shape and edges | Irregular freckles, tiny scuffs, or pinpricks; edges look “dry” rather than water-soaked | More defined circles/angles; may show halos, concentric rings, or a yellow margin |
| Speed of change | Stays about the same once the leaf hardens; new leaves may look clean | Spots enlarge, multiply, or merge over several days; newest leaves start showing symptoms too |
| Leaf texture | Specks feel flat or slightly rough; tissue isn’t collapsing | Lesions can become papery, sunken, or brittle; tissue may tear where spots join |
| Underside clues | No growth; you might find fine stippling from mites or tiny black dots of insect frass | Possible fuzzy growth, spore dust, or dark fruiting bodies; some diseases show more underneath |
| Location on the leaf | Along edges/tips (salt/fertilizer burn), near veins after rubbing, or where water droplets sat in sun | Often starts as small lesions that expand outward; may follow veins or appear between veins |
| Whole-plant symptoms | Otherwise vigorous; no wilting; damage is cosmetic | Yellowing, leaf drop, stunting, or distorted new leaves alongside the speckling |
| Response to better conditions | Improves after steadier watering, gentler light, and avoiding wet foliage; old specks remain but don’t spread | Continues spreading despite small care tweaks; needs sanitation and targeted control |
- Do a quick “wipe test.” If the brown dust smears onto your finger or a white tissue, you may be dealing with spores or pest residue rather than fixed leaf tissue damage.
- Check the newest leaves first. If the freshest growth keeps emerging speckled, that points more toward an active issue than a one-time splash, sunscald, or handling bruise.
- Look for a trigger event. A recent heat spike, a missed watering, a strong fertilizer dose, or spraying in bright light can leave freckles that stop progressing once conditions normalize.
- Use a simple timeline. Mark one affected leaf and re-check in 3–5 days. Expansion and new spots elsewhere suggest an infection; no change suggests minor injury.
If you’re unsure, treat it like a “watch and isolate” situation: remove the worst leaf, avoid overhead watering, improve airflow, and keep the plant separated for a week. Minor speckling won’t keep marching across new leaves, but a true pathogen often will.
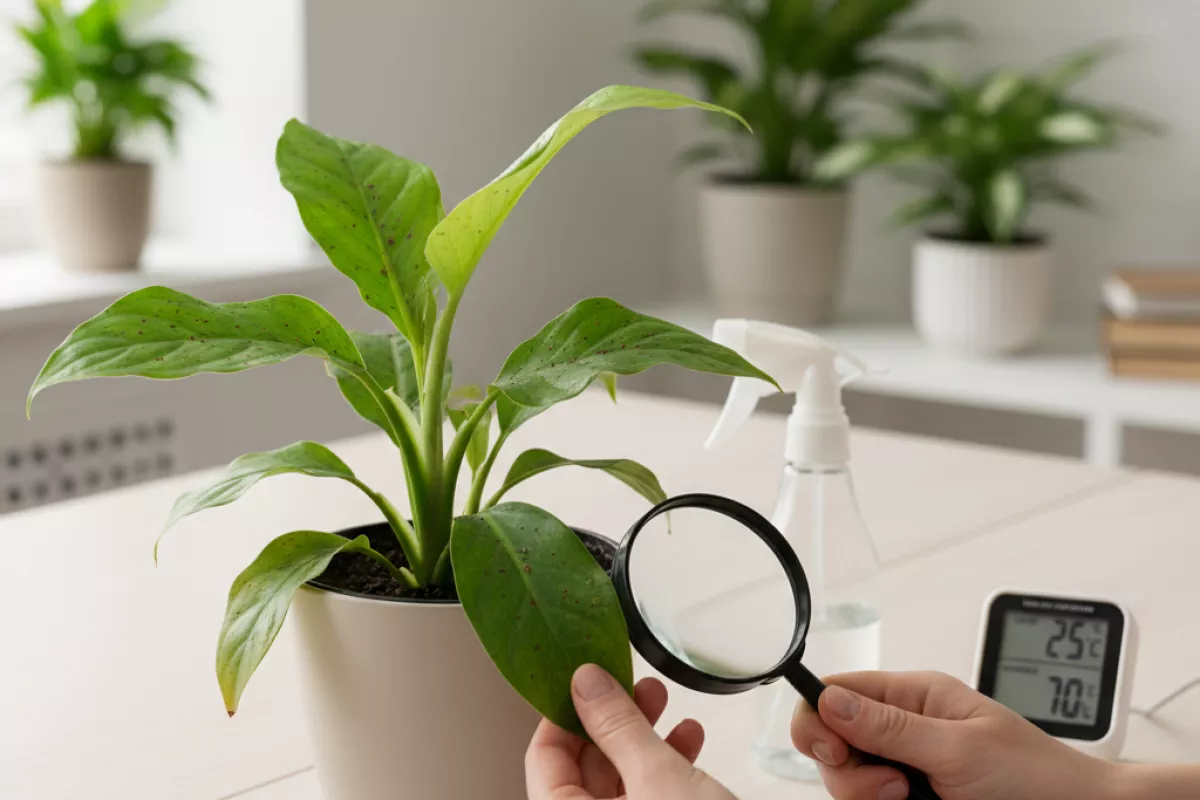
Early detection techniques
Catch the problem while it’s still confined to a few young leaves by building a quick, repeatable scouting routine. Tiny brown specks can come from insects, fungal leaf spots, bacterial issues, nutrient splash, or even physical abrasion, so the goal is to spot patterns early and narrow the likely cause before it spreads.
- Check the newest growth first. Examine the top 5–10 leaves on each plant (or each branch on shrubs). Fresh foliage shows changes sooner, and the distribution on new leaves versus old leaves is a big clue.
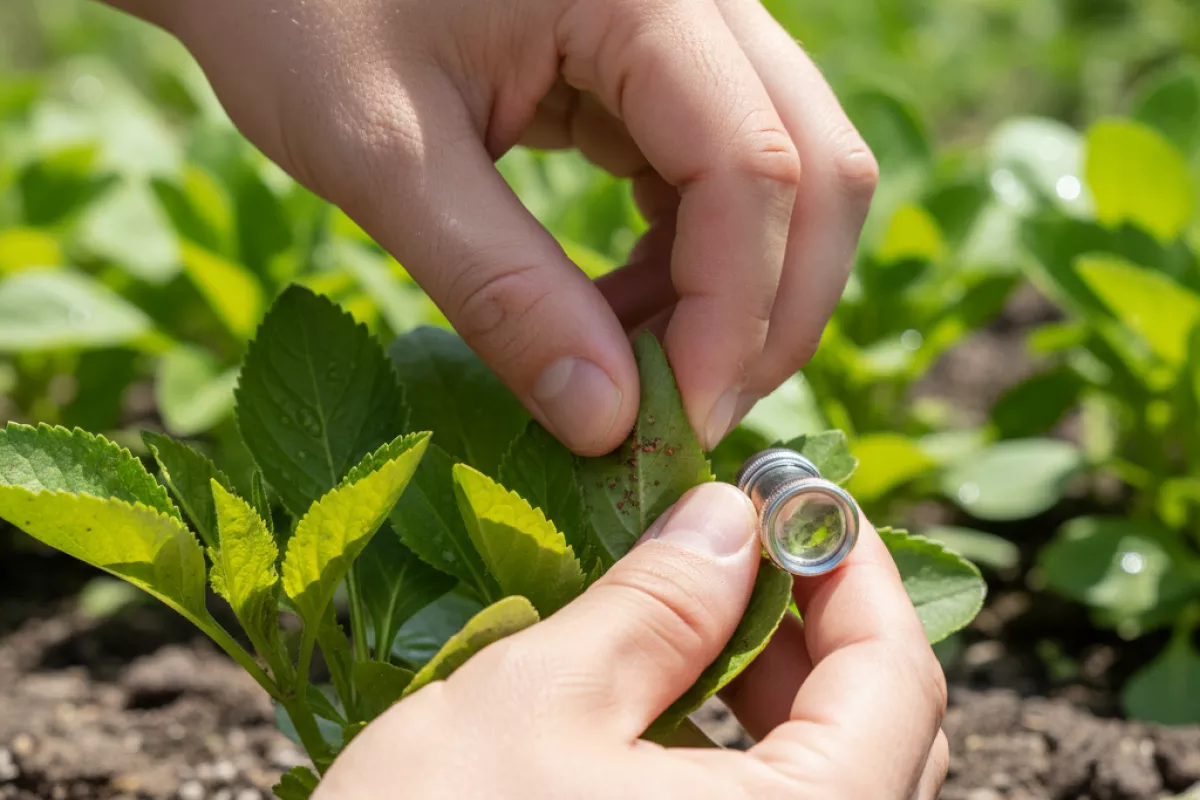
- Use consistent lighting and angles. Look with the sun behind you, then flip leaves and view the underside. Many pests feed below the leaf surface, and early lesions can be easier to see in backlighting.
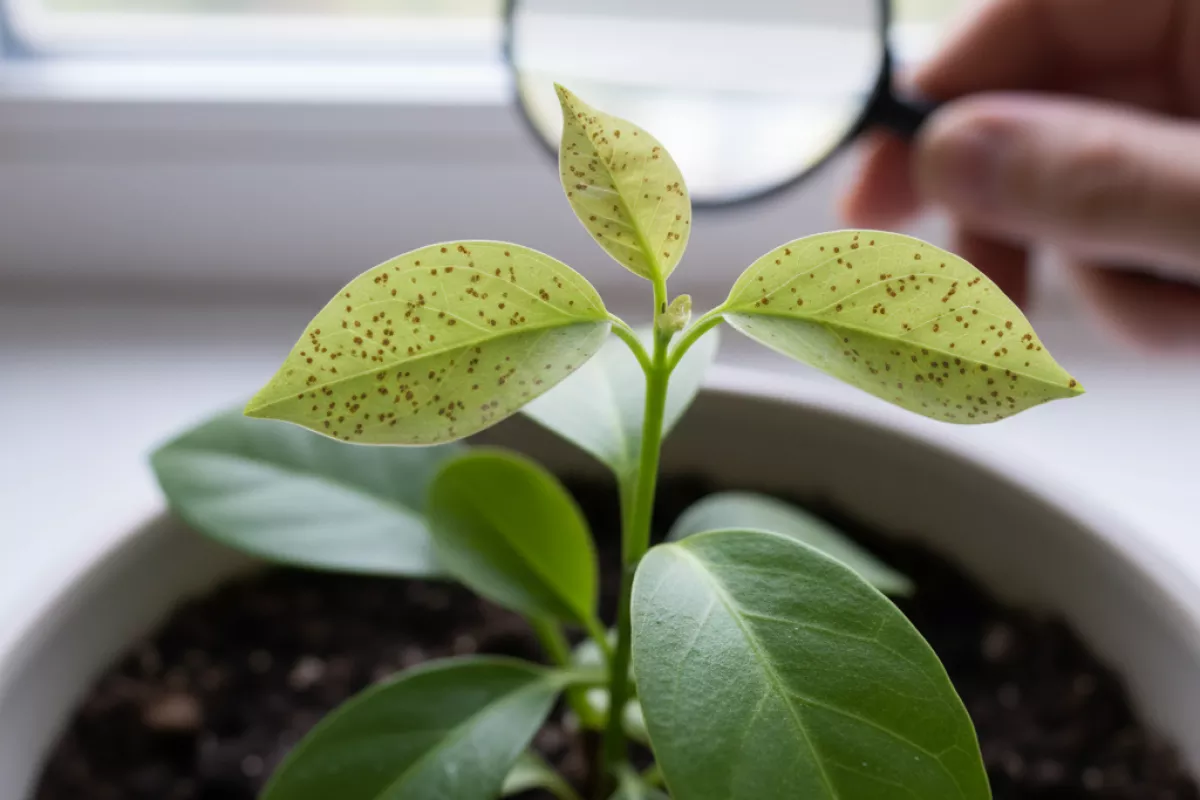
- Inspect both sides with a hand lens. A 10× loupe is usually enough to see mite stippling, thrips frass, or fungal structures. If you don’t have one, use your phone’s macro mode and zoom in on the same area each time.
- Do a “tap test” for mobile insects. Hold a white sheet of paper under a suspect leaf and tap the stem. Moving specks that crawl quickly can point to thrips or mites; static spots are more likely tissue damage or disease.
- Mark and monitor a few leaves. Choose 3–5 affected leaves, circle the area lightly with a washable marker on the petiole, and recheck in 48–72 hours. Rapid enlargement suggests infection; unchanged specks may be old injury or residue.
- Track where it starts. Note whether spotting begins at leaf tips, margins, between veins, or near the midrib. Also record whether it’s concentrated on one side of the plant (often wind, sun, or spray drift) or scattered evenly (often systemic stress or widespread spores).
- Look for “companion symptoms.” Curling, silvery streaks, yellow halos, pinholes, or sticky residue help separate causes. For example, halos can suggest bacterial activity, while silvery scarring often points to thrips feeding.
- Check moisture and airflow clues. Early leaf spot problems often follow long leaf-wet periods. If leaves stay wet more than about 6–8 hours (0.25–0.33 day) overnight, flag it as a risk factor and watch closely after humid evenings.
- Review recent changes. In the last 7–14 days (1–2 weeks), note any new fertilizer, foliar spray, pruning, repotting, or heat/cold swing. A sudden change can explain why specks appeared “all at once.”
| What you observe early | What it tends to suggest | Quick confirmation step |
|---|---|---|
| Specks mostly on undersides; fine stippling; no clear halos | Mites or other sap-feeders | Tap test on white paper; check for webbing along veins with a 10× lens |
| Silvery patches with pepper-like dark dots nearby | Thrips feeding and frass | Tap test; look for slender insects in leaf folds and buds |
| Round spots that slowly expand; may show concentric rings | Fungal leaf spot | Recheck marked leaves after 48–72 hours; look for fuzzy growth in humid conditions |
| Water-soaked look that turns brown; yellow halo common | Bacterial spotting | Compare leaves after watering; avoid overhead watering and see if new lesions slow |
| Specks clustered where spray droplets land; sharp edges; no spread | Spray burn, fertilizer splash, or sunscald | Review last applications; check if only exposed leaves are affected |
Keep notes simple: date, plant/location, which leaves (new vs. old), and whether the spots are increasing. A short log makes it much easier to tell if you’re dealing with an active spread versus leftover damage that just looks alarming on young leaves.
Steps to stop progression
Act early and focus on limiting spread: isolate the plant, reduce leaf wetness, and correct the most common stressors (light, watering, nutrition). Tiny brown spotting on new growth often accelerates when conditions stay warm and damp, or when pests and nutrient imbalances are left unchecked.
- Quarantine and inspect closely.
- Move the plant at least 1–2 m (3–6 ft) away from others to reduce cross-contamination.
- Check the undersides of young leaves with a hand lens for thrips, mites, or aphids; look for silvery scarring, fine webbing, or sticky residue.
- Mark a few affected leaves with a small tie so you can tell if new specks are still appearing.
- Remove the worst tissue and sanitize tools.
- Snip off heavily marked leaves if the plant can spare them; don’t strip more than about 20–30% at once.
- Disinfect pruners between cuts (for example, with 70% isopropyl alcohol) and let them dry.
- Bag and discard debris rather than composting if you suspect a leaf-spot pathogen.
- Adjust watering to keep foliage dry.
- Water at the soil level, not over the leaves; morning watering helps surfaces dry faster.
- Let the top 2–3 cm (1 in) of mix dry for many houseplants before watering again (adjust for species).
- Empty saucers so roots aren’t sitting in water; soggy roots can trigger stress spotting on new leaves.
- Improve airflow and spacing.
- Give the plant breathing room; crowded leaves stay wet longer and spotting spreads faster.
- If indoors, aim for gentle air movement (a fan on low, not blasting the plant).
- Outdoors, avoid placing the plant where sprinklers hit the foliage repeatedly.
- Stabilize light and temperature.
- Prevent sudden jumps from shade to harsh sun; acclimate over 7–14 days.
- Keep away from cold windows, heaters, and vents; rapid swings can make young leaves more vulnerable.
- If you’re using grow lights, keep a consistent distance and schedule rather than frequent changes.
- Correct nutrition without overdoing it.
- Pause heavy feeding if you suspect fertilizer burn; flush the pot with plain water equal to 2–3× the container volume (for example, 2 L per 1 L pot volume (68 fl oz per 34 fl oz)) and let it drain well.
- If growth is pale or weak, use a balanced fertilizer at 1/4–1/2 strength and reassess after 2–3 weeks.
- For plants prone to calcium issues (common in fast new growth), keep watering consistent and avoid letting the mix swing from bone-dry to soaked.
- Target pests if you find them.
- Rinse foliage with lukewarm water around 20–25°C (68–77°F), focusing on undersides.
- Use insecticidal soap or horticultural oil as directed, and repeat on a schedule (often every 5–7 days) to catch new hatchlings.
- For thrips, treat both leaves and the top layer of soil, since they can pupate there.
- If spotting looks fungal or bacterial, reduce spread first, then treat.
- Stop misting and avoid overhead watering; moisture on young leaves is a common driver.
- Remove affected leaves that show expanding lesions or yellow halos.
- Consider an appropriate fungicide if new leaves continue to develop brown speckles despite drier foliage and better airflow; follow label directions and test on a small area first.
- Track results for 10–14 days.
- New leaves should emerge cleaner; existing spots usually won’t disappear, but they shouldn’t multiply rapidly.
- If the newest growth keeps developing fresh brown dots after you’ve adjusted care and ruled out pests, reassess roots (smell, firmness) and consider repotting into fresh, well-draining mix.
If you’re unsure whether the specks are pest damage, a leaf-spot infection, or a nutrient issue, the fastest way to narrow it down is to watch the newest leaves: improving conditions should reduce new spotting, while active pests or a spreading pathogen will keep marking fresh growth.
Preventing spread to new growth
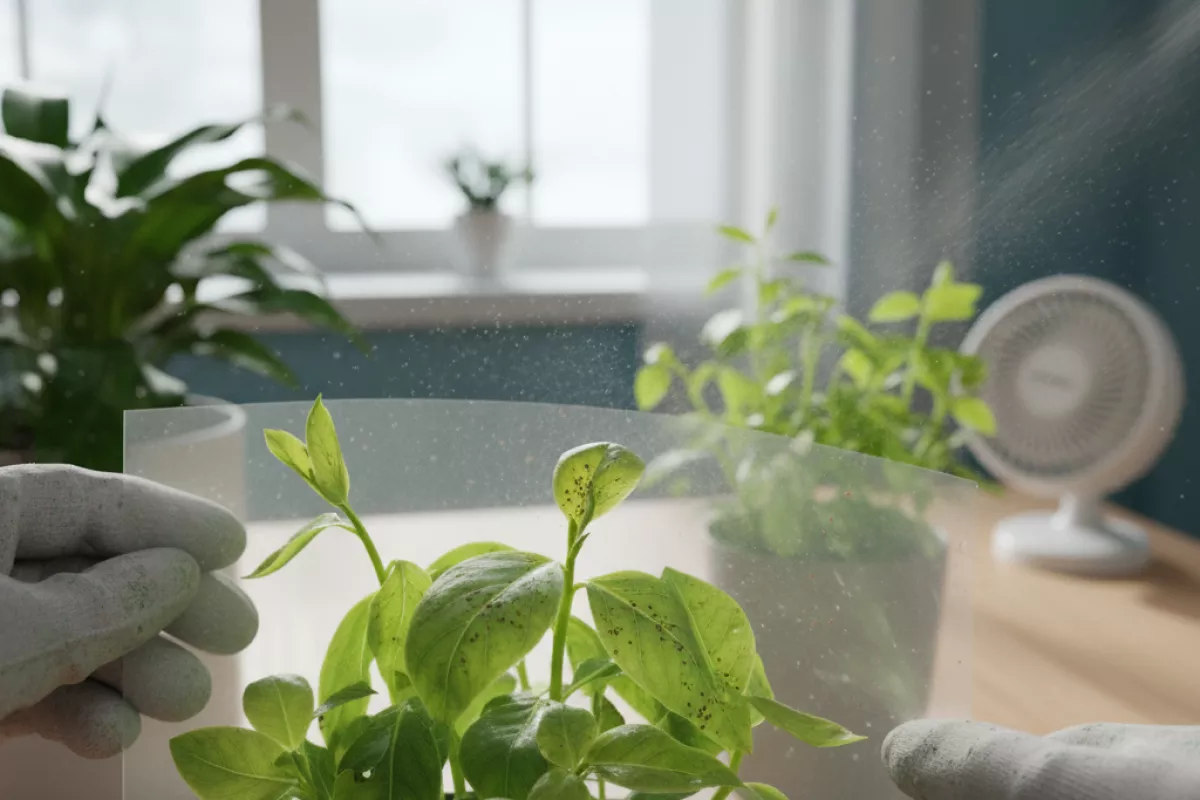
Stop the issue at the source and you’ll protect the fresh, tender leaves that show symptoms first. The goal is to reduce whatever is creating the tiny brown specks (often pests, splashing spores, or stress) and to keep new foliage from being exposed while it hardens off.
- Isolate and stabilize first. If this is a houseplant, move it away from other plants for 10–14 days. Outdoors, create space so leaves aren’t touching neighboring plants; better airflow slows many leaf-spot problems.
- Water in a way that doesn’t wet the leaves. Direct water to the soil line and avoid overhead watering that splashes pathogens onto new growth. If you must rinse the plant, do it early in the day so foliage dries quickly.
- Remove the most affected leaves (selectively). Snip badly spotted young leaves with clean scissors, but don’t strip the plant bare. Discard in the trash, not compost, if you suspect a fungal or bacterial leaf spot.
- Clean tools and hands between plants. Wipe blades with 70% isopropyl alcohol or wash with soap and hot water after each plant to avoid carrying the problem to new shoots.
- Check undersides for pests and treat promptly. Look for thrips, mites, or aphids—common causes of speckling on tender leaves. Rinse with a firm spray, then follow with insecticidal soap or horticultural oil, covering both sides of leaves. Apply in the cool part of the day and repeat every 5–7 days until new leaves emerge clean.
- Reduce splash and soil bounce. Add a thin mulch layer (about 2–5 cm (0.8–2 in)) to keep soil from splattering onto lower leaves during watering or rain.
- Dial in light and avoid sudden changes. New leaves scorch and spot more easily when a plant is moved abruptly from low light to strong sun. Transition over 7–10 days, increasing exposure gradually.
- Keep humidity and airflow balanced. Very still, humid air can favor spotting, while extremely dry air can stress new leaves and invite mites. Aim for steady conditions and gentle air movement rather than big swings.
- Hold back on heavy feeding until it’s improving. Overfertilizing can burn young tissue and make spotting look worse. If you fertilize, use a diluted dose (for example, 1/2 strength) and only after you see clean new growth.
| Likely trigger | What protects new leaves most | What to avoid |
|---|---|---|
| Thrips/mites feeding | Repeat treatments every 5–7 days; treat undersides; isolate plant | One-and-done spraying; missing the leaf undersides |
| Fungal leaf spot from splash | Bottom watering; mulch 2–5 cm (0.8–2 in); improve airflow | Overhead watering; crowded foliage |
| Bacterial spotting from wet leaves | Keep foliage dry; sanitize tools; remove worst leaves | Misting; handling wet plants then touching others |
| Sun/heat stress on tender growth | Gradual light increase over 7–10 days; shade during peak heat | Sudden move into direct sun; hot window glass contact |
Watch the newest leaves as your progress marker: old specks won’t disappear, but the next flush should come in cleaner. If every new leaf continues to develop brown pinpoints despite better watering and hygiene, re-check for pests with a magnifier and consider whether the plant is staying wet too long (potting mix, drainage, and airflow are usually the deciding factors).