Watering Container Plants for Even Moisture Control

 Explains what soil moisture means in pots, how water moves through container soil, and ways to prevent dry pockets. Covers choosing mixes for even moisture, how often to water, signs moisture is well distributed, and common causes of uneven hydration.
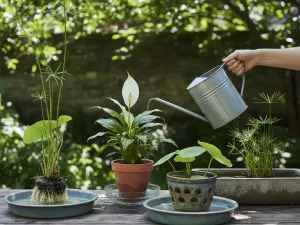
Keeping potted plants evenly hydrated takes more than a quick splash. This guide explains how to water container plants for steady moisture from top to bottom. Learn how pot size, soil mix, drainage, and timing affect how water moves and dries, helping roots stay consistently moist without becoming soggy or stressed.
What even soil moisture means in pots
In a container, “even” moisture doesn’t mean the mix is constantly wet. It means the root zone stays within a comfortable middle range: not bone-dry in one pocket and waterlogged in another, and not swinging from drought to saturation every time you water.
Pots make this tricky because water moves differently than it does in the ground. Gravity pulls moisture down fast, the sides heat up and dry out, and the potting mix can form dry channels that let water run straight through. So the goal is consistency across the whole volume of the pot, not just a damp top layer.
- Uniform dampness through the root zone: When you check 5 cm (2 in) below the surface, it should feel cool and slightly moist, not dusty or soggy. Deeper down, it should still have air spaces—roots need oxygen as much as water.
- Small, predictable dry-down between waterings: The mix should gradually lighten and dry from the top down, rather than flipping from “crispy” to “swampy.” That steady dry-down is what keeps roots growing instead of stalling.
- No perched wet layer at the bottom: Many containers hold a saturated zone near the base after watering. Even moisture control aims to minimize how long that layer stays waterlogged, because it can suffocate roots and invite rot.
- Water reaches the whole pot: If water immediately pours out the drainage holes while the center stays dry, you’re not getting even hydration—you’re getting bypass flow. A slower pour, a second pass after a short pause, or bottom-watering can help re-wet the mix evenly.
- The plant’s signals match the soil’s condition: Leaves should stay stable between waterings. If you see midday wilting followed by recovery at night, the mix may be drying too fast near the edges. If leaves yellow while the surface looks dry, the base may still be overly wet.
A practical way to think about it: you’re managing a gradient. The top 2–5 cm (1–2 in) can dry a bit between waterings, but the middle should stay gently moist, and the bottom shouldn’t remain saturated for long. When that balance holds, roots can breathe, drink, and expand into the pot instead of circling or dying back.
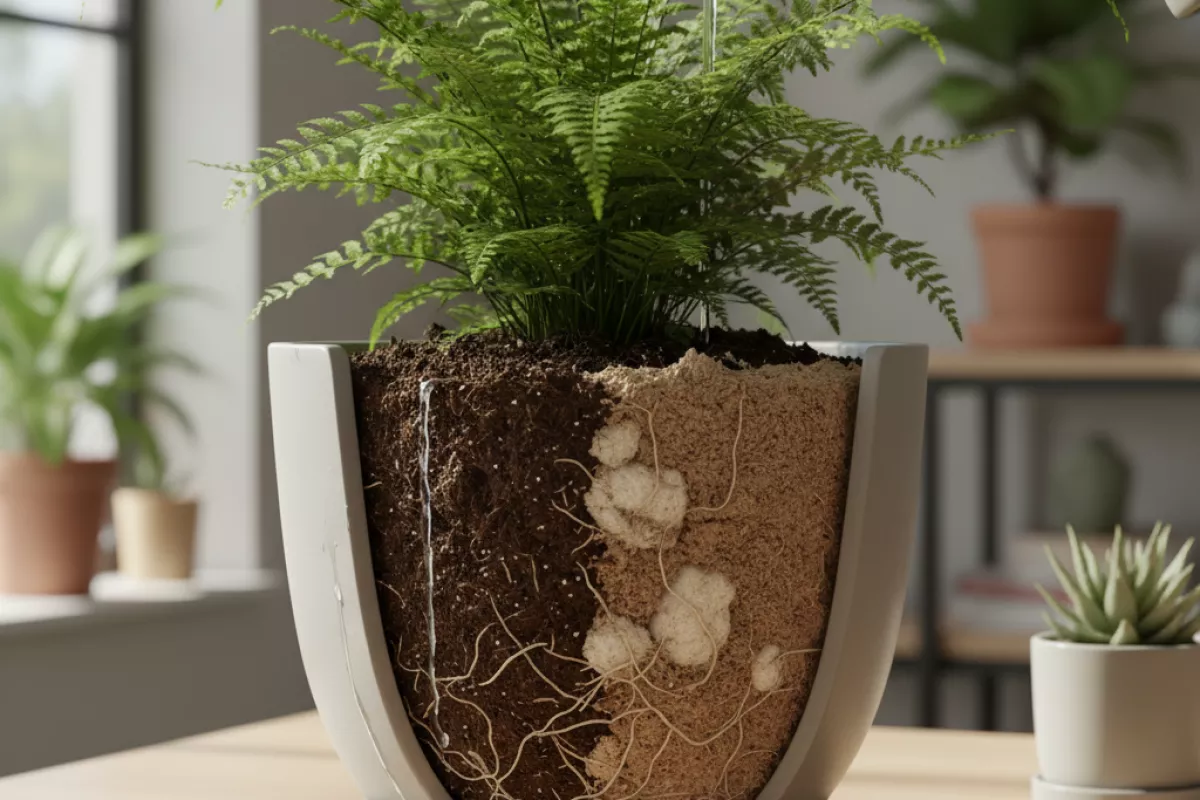
How water spreads through container soil
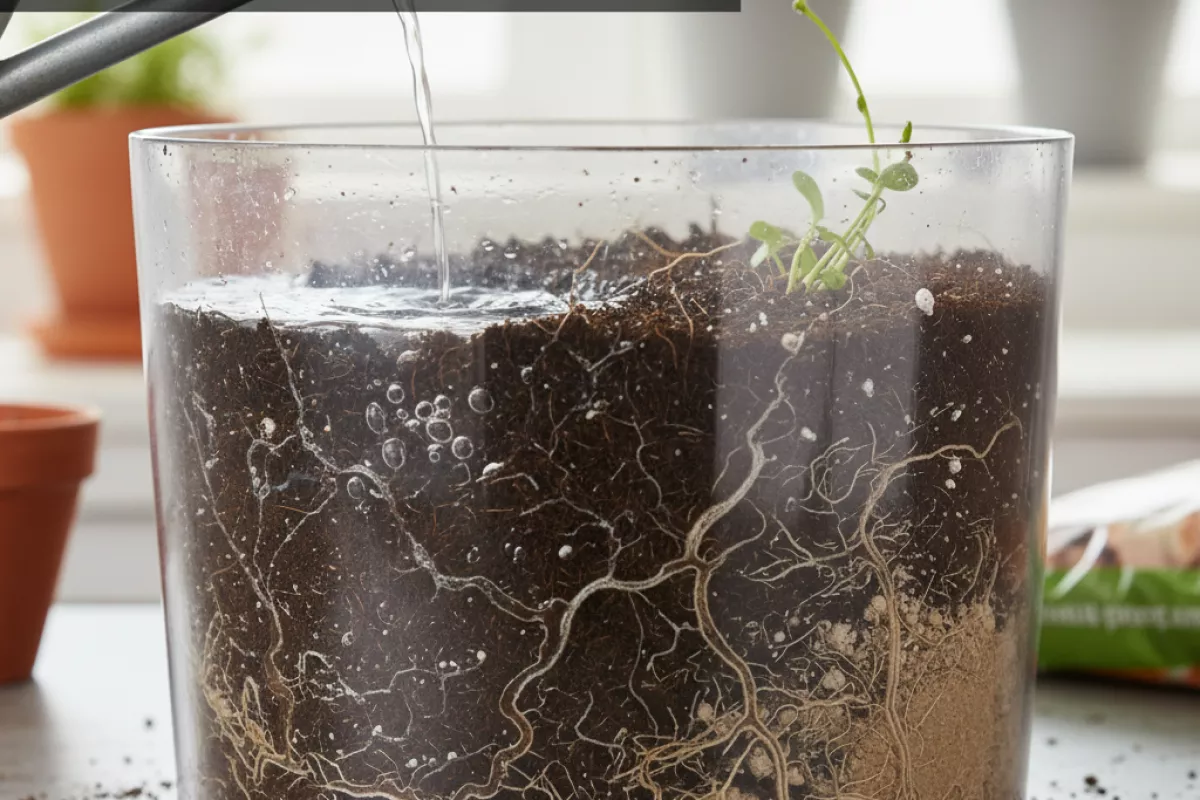
In a pot, moisture doesn’t move straight down like it often does in the ground. It follows the easiest pathways through the mix, then slows as tiny pores hold onto water. That’s why one side of a container can be wet while another stays dry, even after a thorough-looking pour.
Three forces shape the wetting pattern: gravity pulls water downward, capillary action pulls it sideways and upward through small pores, and air pressure/escape routes determine how easily water can replace air in the root zone. Container media are designed to drain fast, so the balance between drainage and capillary “wicking” is especially noticeable.
- Pore size decides speed and spread. Coarser particles (bark chunks, perlite) create larger pores that drain quickly and don’t pull water far sideways. Finer particles (coco coir, peat, compost fines) create smaller pores that wick moisture more evenly but can stay wet longer.
- Preferential flow creates “channels.” When water finds cracks, gaps along the pot wall, or old root tunnels, it can rush through those routes and bypass drier areas. The surface may look evenly watered while pockets inside remain dry.
- Dry media can become water-repellent. Peat- or coir-based mixes that dry out hard may initially shed water, causing it to run down the sides. A slower application or pre-wetting helps the mix accept water again.
- Air must escape for water to enter. If the mix is compacted or the pot has limited drainage, trapped air resists infiltration. You’ll see water pooling on top or racing down one edge instead of soaking in.
- Roots change the structure over time. As roots fill the container, they take up pore space and can create uneven density—some zones become tight and slow to wet, while others form channels that drain too fast.
A key container-specific effect is the perched water zone: after watering, a layer near the bottom stays wetter because capillary forces hold water against gravity. Its height depends more on mix texture than on pot height. Adding more depth doesn’t remove that wet layer; it just adds drier mix above it.
| What you notice after watering | What’s usually happening in the pot | What to adjust for more even moisture |
|---|---|---|
| Water runs down the pot edge and out fast | Hydrophobic dry mix or a gap between mix and container wall is channeling flow | Water slowly in 2–3 passes, waiting 30–60 s (0.5–1 min) between; lightly roughen the surface; pre-wet the mix if very dry |
| Top looks wet, but the middle stays dry | Fast-draining coarse zones or compacted layers are preventing lateral spread | Apply water over the full surface, not one spot; use a gentle shower; consider adding a bit more fine material at the next repot |
| Bottom stays soggy for days | Perched water zone is large due to fine texture or reduced air space | Increase aeration (more bark/perlite), avoid compressing the mix, and ensure drainage holes are clear |
| One side dries much faster than the other | Uneven density, sun/wind exposure, or roots concentrated on one side | Rotate the pot regularly; water around the entire rim; check for root binding and repot if needed |
| Water pools on top before soaking in | Surface crusting, compaction, or trapped air slowing infiltration | Break up the surface gently; water with a finer spray; consider top-dressing with a thin layer of fresh mix to improve intake |
If you want a quick mental model: container mixes act like a sponge made of different-sized holes. Big holes drain and ventilate; small holes store water and move it sideways. Even moisture control comes from keeping those holes balanced and making sure water enters the mix slowly enough to spread before it drains.
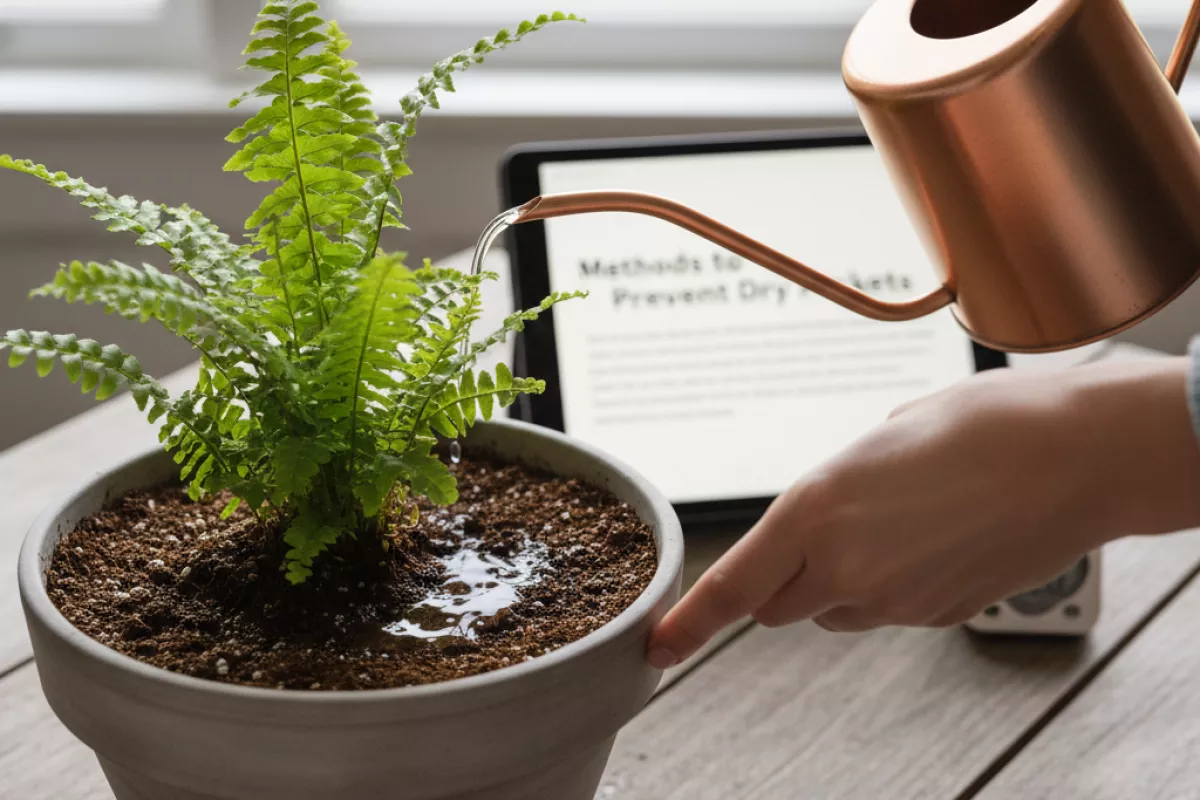
Methods to prevent dry pockets
Uneven wetting usually comes from water taking the easiest path down the pot wall, skipping compacted or water-repellent spots. The goal is to slow the flow, help the mix re-wet evenly, and make sure the entire root zone gets moisture rather than just a narrow channel.
- Water in two passes. Apply a first, lighter watering to “prime” the potting mix, wait 5–10 minutes, then water again until you get a little runoff. The pause lets dry peat/coir rehydrate so the second pass spreads sideways instead of tunneling straight down.
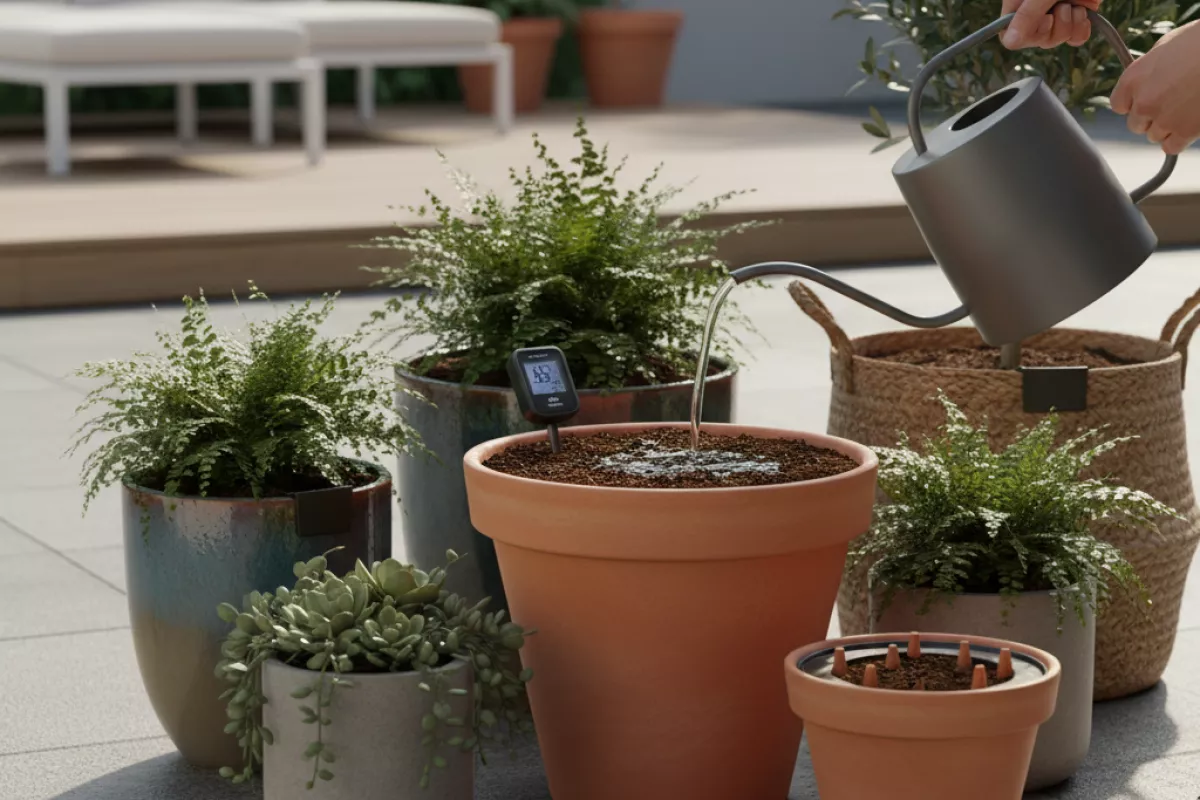
- Use a gentle, targeted stream. A watering can with a rose (sprinkler head) or a narrow spout aimed around the surface reduces channeling. Move in a slow circle and cover the whole top, not just one spot near the stem.
- Break surface crusting. If the top has hardened, lightly scratch 1–2 cm (0.4–0.8 in) of the surface with a fork or your fingers before watering. This improves infiltration without disturbing deeper roots.
- Bottom-water occasionally, then finish from the top. Set the pot in a tray with 2–3 cm (0.8–1.2 in) of water for 10–20 minutes, then remove and let it drain. Follow with a small top-water to rinse salts and ensure the upper layer isn’t left bone-dry.
- Soak hydrophobic mixes. If water beads and runs off, use lukewarm water around 20–25°C (68–77°F) and water slowly. For severe cases, submerge the pot up to the rim for 5–15 minutes, then drain thoroughly.
- Check for hidden compaction. If the mix has shrunk from the pot edge, gently press it back into contact with the container wall and fill gaps with fresh mix. Air gaps act like gutters that send water straight down.
- Improve the potting mix structure. For future repots, avoid packing the medium tightly. A balanced blend with some coarse material (like perlite or bark) helps water spread while still draining; overly fine mixes tend to form dense zones that stay dry inside.
- Match pot size to the plant. Oversized containers hold wet pockets at the bottom while the center can still dry unevenly. Stepping up one size at a time keeps the wetting pattern more consistent.
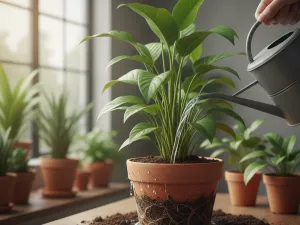
- Use a moisture check in more than one spot. Probe 2–3 locations with a finger, chopstick, or moisture meter, including near the pot edge. If one area reads much drier, water that zone directly rather than adding more to an already-wet section.
- Ensure drainage is clear. A blocked hole or a saucer left full can create saturated areas that discourage roots, while other zones dry out faster. After watering, empty standing water within 10–15 minutes.
If you’re troubleshooting a stubborn dry core, the two-pass method plus an occasional bottom-water is usually the fastest fix. Once the mix re-wets evenly, consistent technique (slow, thorough coverage and periodic checks around the pot) keeps those dry pockets from returning.
Choosing soil mixes for uniform moisture
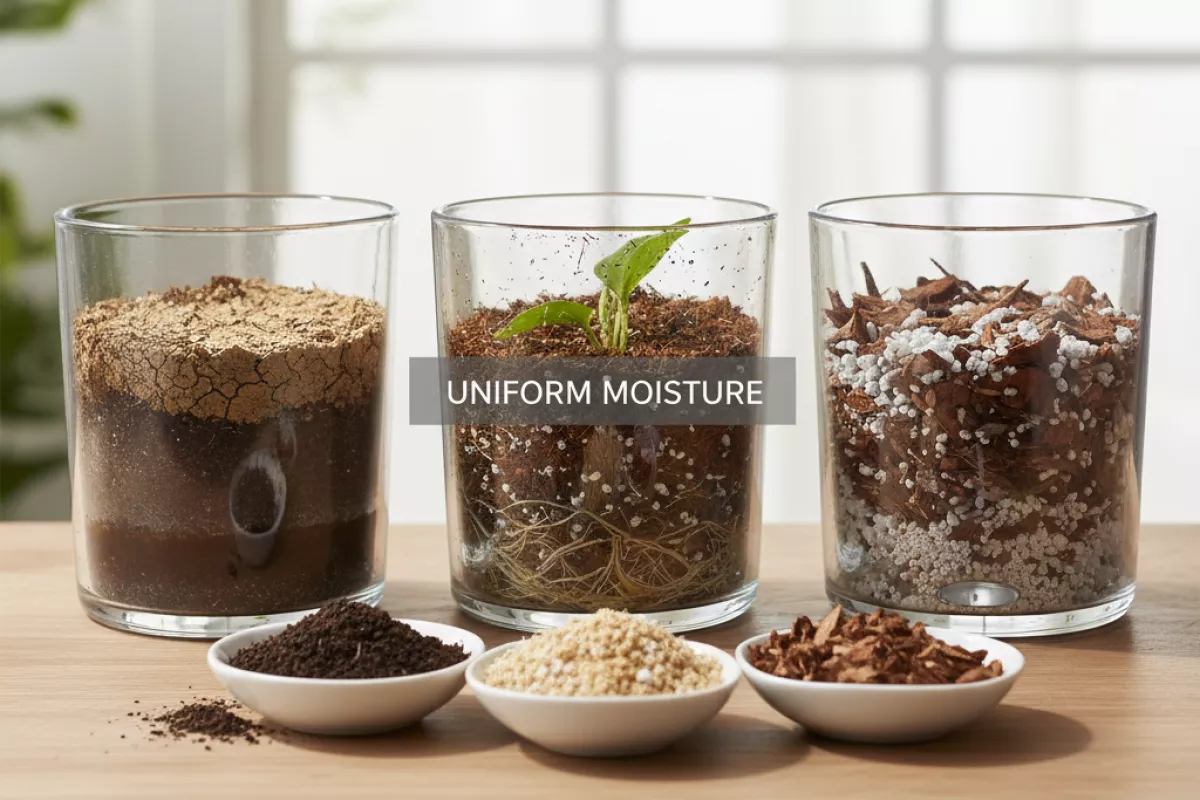
Even moisture in containers starts with the potting mix. Garden soil tends to compact in pots, creating a soggy bottom and a dry top. A good container blend holds water in tiny pores while still leaving enough air space for roots, so the whole root ball wets evenly and dries at a predictable pace.
Think in terms of three roles: a moisture-holding base, a structure builder for air and drainage, and a small amount of long-lasting organic matter for buffering. The right balance depends on your plant, pot size, and how fast your site dries (sun, wind, heat).
- Prioritize a true potting mix over “topsoil.” Look for mixes labeled for containers; they’re built to resist compaction and re-wet more easily after drying out.
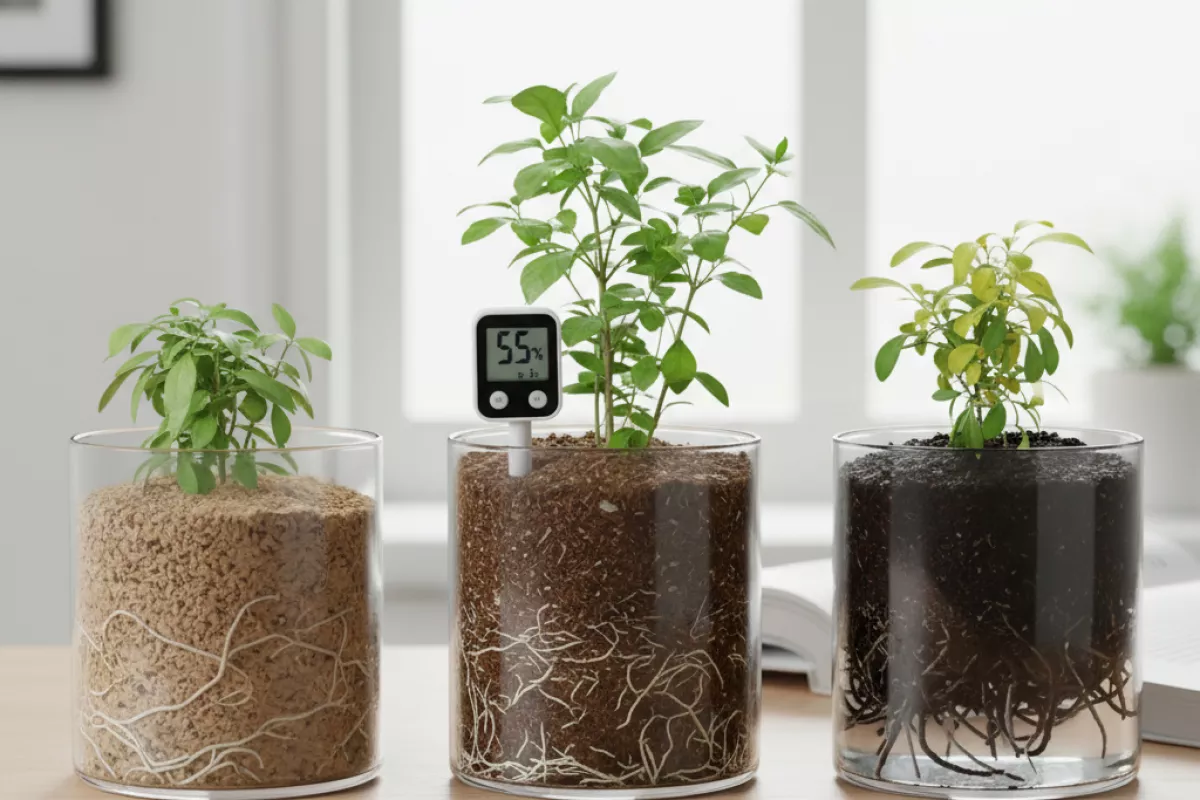
- Use particle size to control wetness. Fine, peat-heavy blends hold more water but can stay wet in cool conditions; chunkier mixes (bark, coarse coir, perlite) drain faster and are easier to rehydrate evenly.
- Add aeration for stability. Perlite or pumice increases air-filled pore space, helping prevent the cycle of waterlogging followed by rapid surface drying.
- Be cautious with “drainage layers.” Gravel at the bottom rarely improves moisture uniformity; it can create a perched water zone above the layer. A consistent mix from top to bottom is usually more reliable.
- Match the mix to the container. Small pots (10–15 cm / 4–6 in) dry quickly and often benefit from slightly higher water-holding ingredients; large pots (30 cm / 12 in and up) can stay wet longer and usually need extra aeration.
- Use wetting technique as part of the mix choice. If a blend becomes hydrophobic when dry, plan on bottom-watering or slow soaking until the root ball is evenly moist.
| Container situation | What to look for in the mix | Why it helps even moisture |
|---|---|---|
| Hot, windy balcony; daily drying | Higher water-holding base (peat or coir) plus moderate aeration | Slows rapid top-down drying so the root zone stays uniformly damp longer |
| Cool/low-light spot; slow drying | Chunkier structure (bark, perlite/pumice) with less fine material | Prevents persistent soggy pockets that cause uneven root function |
| Large pots (30–50 cm / 12–20 in) | Extra aeration and stable particles; avoid overly fine blends | Reduces waterlogging in the lower half where evaporation is minimal |
| Small pots (10–15 cm / 4–6 in) | Slightly finer texture or added compost in small amounts | Improves water retention so the entire pot doesn’t swing from wet to bone-dry |
| Thirsty plants (basil, fuchsia, many annuals) | Moisture-retentive base with good re-wetting ability | Keeps consistent moisture without frequent extreme dry-down |
| Drought-tolerant plants (succulents, many cacti) | Fast-draining, gritty mix with high mineral content | Lets you water thoroughly while avoiding wet zones that linger too long |
If you’re tweaking an existing pot, adjust gradually: replace part of the mix at repotting rather than making a sudden switch that changes how water moves through the root ball. And if you add compost, keep it modest; too much can increase fine particles and lead to uneven wetting and slower drying.
How often containers really need watering
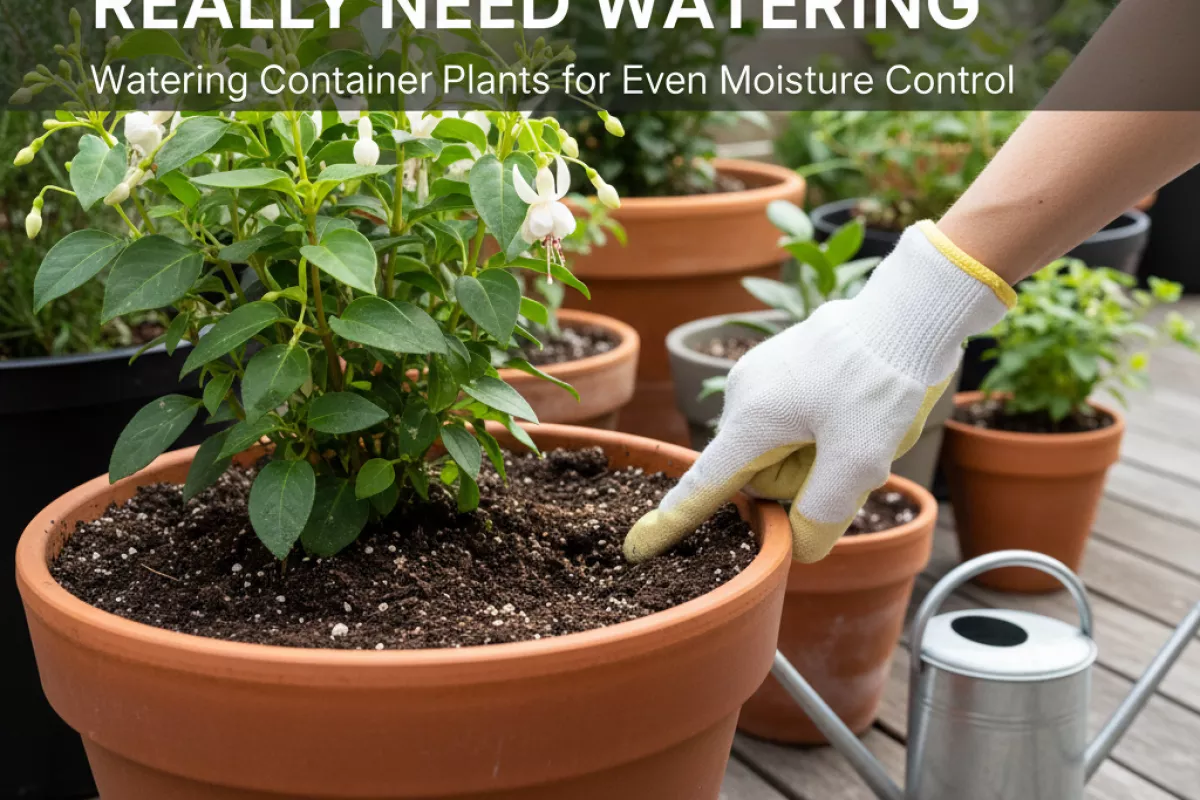
There isn’t a single schedule that works for every pot. Container soil dries from the top down, and the right timing depends on plant size, pot material, weather, and how much root mass is filling the container. Instead of watering “every day” or “twice a week,” aim to water when the root zone is starting to lose moisture but before the plant wilts.
The most reliable check is simple: feel the mix. Push a finger 2–5 cm (1–2 in) into the soil. If it feels dry at that depth, it’s usually time to water; if it’s still cool and slightly damp, wait. For large planters, checking in two spots (near the edge and closer to the stem) gives a truer read because edges often dry faster.
- Heat and sun: In hot, bright conditions, small pots can need water daily, sometimes twice in extreme heat. A 30°C (86°F) day with wind can dry a 15 cm (6 in) pot surprisingly fast.
- Wind: Breezes pull moisture from leaves and the soil surface, increasing demand even when temperatures are mild.
- Pot size: Bigger volumes buffer moisture. A 40 cm (16 in) container generally holds usable moisture longer than a 20 cm (8 in) pot with the same plant.
- Pot material: Terracotta “breathes” and dries quicker than plastic or glazed ceramic. Fabric grow bags also lose water faster through the sides.
- Plant type and growth stage: Leafy annuals and vegetables drink more than succulents; flowering and fruiting stages often increase uptake.
- Root crowding: When roots fill the pot, there’s less soil to hold water, so frequency goes up.
| Situation | Typical watering rhythm (starting point) | What to check before you water |
|---|---|---|
| Small pots (10–20 cm / 4–8 in) in full sun | Daily; may be 2× on very hot, windy days | Top 2–3 cm (1 in) dry; pot feels light when lifted |
| Medium containers (25–35 cm / 10–14 in) with mixed plantings | Every 1–3 days in warm weather | Dryness at 3–5 cm (1–2 in); leaves not yet drooping |
| Large planters (40 cm / 16 in and up) outdoors | Every 2–5 days, depending on heat and root density | Check two spots; moisture should be fading, not gone |
| Shade or cool periods (below 18°C / 64°F) | Every 3–7 days | Soil stays cool; avoid watering if it’s damp below the surface |
| Succulents/cacti in fast-draining mix | When fully dry; often every 7–21 days | Mix dry throughout; pot noticeably lighter |
| Indoor containers (stable temps, lower airflow) | Every 5–14 days | Dryness at 2–5 cm (1–2 in); watch for slower evaporation |
If you’re aiming for even moisture, water deeply enough that the whole root ball is wetted, then let excess drain. A quick splash that only wets the top layer often leads to a cycle of frequent watering and uneven moisture, with dry pockets deeper down.
Finally, adjust with feedback. If the pot stays wet for more than 48 hours (2 days), reduce frequency or improve drainage; if it’s drying out within 24 hours (1 day) and the plant looks stressed, increase frequency, add a light mulch layer, or move the container to afternoon shade.
Signs moisture is evenly distributed
You’ll know the root zone is getting watered consistently when the plant’s behavior, the pot’s weight, and the soil’s feel all line up. Look for patterns that stay steady from one watering to the next, rather than one-off improvements right after you water.
- Even pot weight after watering: Once excess water has drained, the container feels uniformly heavy—no “light side” and “heavy side” when you lift from different angles.
- Consistent moisture depth: If you check with a finger or a wooden skewer, the dampness changes gradually with depth instead of flipping from wet on top to powder-dry just below the surface.
- Water exits the drainage holes at a steady pace: After you water slowly, you see a brief, even trickle from multiple holes rather than a sudden gush from one spot (often a sign of channeling).
- No persistent dry pockets: When you probe 5–8 cm (2–3 in) down in a few spots, you don’t find isolated dusty areas while nearby soil is saturated.
- Leaves stay stable between waterings: Foliage doesn’t swing between drooping (too dry) and puffy/soft (too wet). New growth looks normal, not stressed or stunted.
- Minimal surface cracking or pulling away: The potting mix doesn’t shrink into a hard ring that separates from the pot wall, which can cause water to run down the sides instead of soaking in.
- Even drying rate across the surface: The top layer lightens in color fairly uniformly. One area staying dark and soggy while another turns pale quickly can point to uneven distribution.
- Roots develop throughout the pot: When you eventually slip the plant out to check (or when repotting), roots are present around the sides and lower half, not just clustered in one wet zone.
If you’re unsure, do a quick confirmation check: water slowly until you get drainage, wait 10–15 minutes, then test moisture in 3–4 spots around the pot at about 5 cm (2 in) deep. Similar readings across those points usually means the water is spreading through the mix instead of taking one fast path downward.
Common causes of uneven soil hydration
When a pot ends up with wet pockets and dry pockets, it’s usually a mix of how water moves through the medium, how roots occupy the space, and how the container drains. The good news is that most problems have a clear “cause → what you’ll notice → what to adjust” pattern.
| Cause | What it looks like in the pot | Why it happens | What to change |
|---|---|---|---|
| Hydrophobic (water-repellent) potting mix | Water runs down the sides or straight out the drainage holes; the top looks wet but the root zone stays dry | Peat/coir-based mixes can dry past a point where they resist re-wetting, so water channels instead of soaking in | Pre-moisten the mix before potting; bottom-water for 10–20 min (600–1,200 s); water in 2–3 passes a few minutes apart |
| Channeling from fast pour or compacted spots | One side stays dry; you see “rivers” or cracks where water prefers to flow | Water takes the path of least resistance, especially in pots with settled media or a hard crust on top | Pour slowly around the surface; break up crusting; use a watering can rose; top-dress with 1–2 cm (0.4–0.8 in) of fine mulch to reduce crusting |
| Uneven particle size or poor mix structure | Top dries quickly while the bottom stays soggy, or the reverse depending on ingredients | Fine particles hold water tightly; coarse particles drain quickly—layering or segregation creates inconsistent moisture zones | Use a well-blended mix; avoid layering gravel at the bottom; refresh old mix that has broken down into fines |
| Root-bound plants and dense root mats | Water seems to vanish quickly, yet the center of the root ball stays dry; runoff happens sooner than expected | Roots form a tight mass that sheds water, and there’s less medium left to store moisture | Repot to a container 2–5 cm (0.8–2 in) wider; tease or slice the outer root ring; soak the root ball thoroughly before replanting |
| Pot size/shape and material | Small pots swing from wet to dry fast; tall pots may stay wet at the bottom; terracotta dries faster than plastic | Less volume means less buffer; height affects the perched water zone; porous walls increase evaporation | Match pot volume to plant demand; consider plastic or glazed pots for thirstier plants; for tall pots, use a chunkier mix to improve air space |
| Drainage issues (blocked holes, saucer water, or too few holes) | Bottom stays saturated; fungus gnats or sour smell; leaves yellow despite “watering carefully” | Excess water can’t exit, so the lower zone stays oxygen-poor and roots can’t take up water evenly | Clear holes; add additional holes if safe; empty saucers after 10–15 min (600–900 s); elevate pots slightly for airflow |
| Salt buildup and hard-water deposits | White crust on soil or pot rim; water beads on the surface; tips brown even when moisture seems adequate | Minerals change how water infiltrates and can damage fine roots, reducing uniform uptake | Flush with clean water until you get steady runoff; repeat monthly or every 4–6 weeks (28–42 days) if using fertilizer regularly |
| Heat, wind, and sun exposure differences | One side dries out faster (often the sunny or windy side); frequent wilting late afternoon | Microclimates around balconies, walls, and railings increase evaporation and leaf demand unevenly | Rotate pots every 7–14 days; group plants to reduce wind; add shade during heat spikes above 30°C (86°F) |
If you’re unsure which one you’re dealing with, check moisture in more than one spot. A finger test or a chopstick inserted 5–8 cm (2–3 in) can show whether the center is lagging behind the edges, which is a common clue that water is bypassing the root zone rather than soaking in evenly.